
On this page
Start here
Quick answer
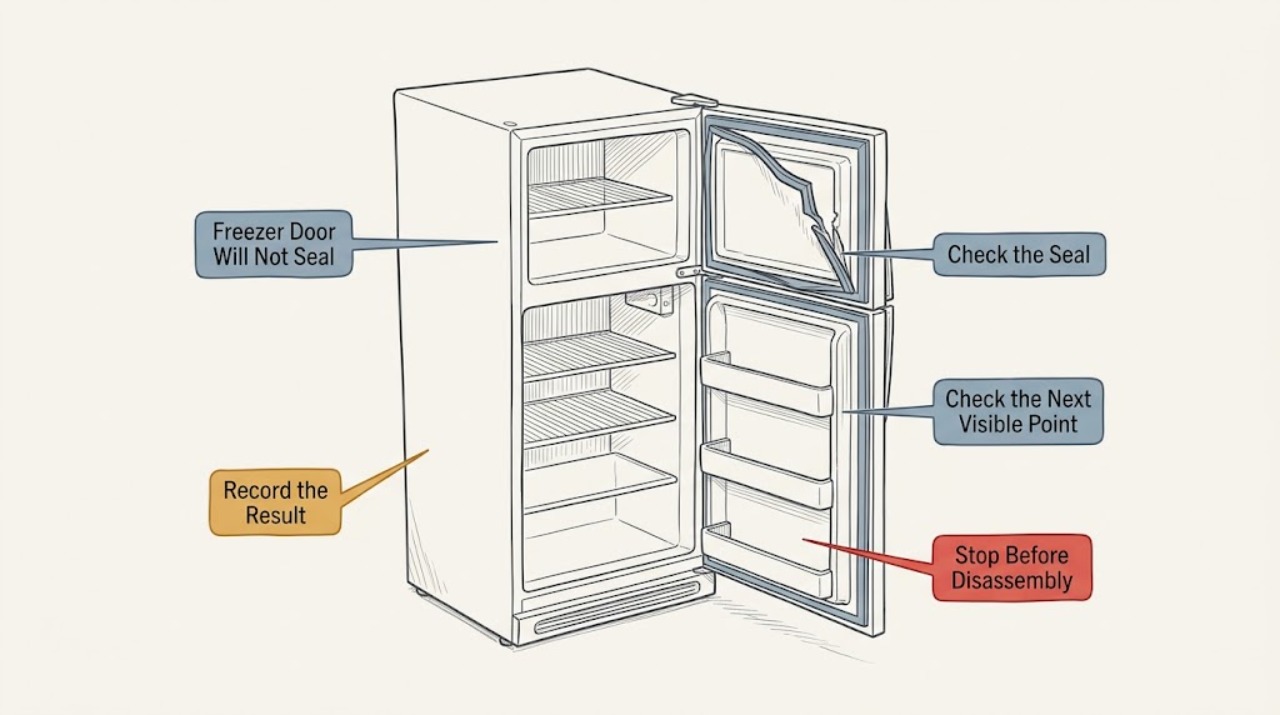
A freezer door that will not seal can lose cold air, build frost, and make the appliance run longer. First remove anything that holds the door open and inspect the full gasket for a loose section, gap, twist, dirt, frost, or a tear. Clean the gasket and the mating cabinet surface with warm water and mild detergent, rinse and dry them, then press a loose gasket back into its retainer only if the model design allows it. A torn, cracked, or permanently deformed gasket normally needs a model-specific replacement, while a door that remains misaligned may need hinge or leveling service. Keep the freezer closed as much as possible while the seal is being corrected, and arrange appliance service if the gasket will not stay seated, the door or liner is damaged, frost blocks closure, or the appliance cannot maintain temperature. Do not force the door, cut the seal, or heat it aggressively.
Work through in order
Diagnostic checks
Use only checks that match the exact appliance or system and its official guide.
-
Check 1
Open the freezer briefly and inspect the entire gasket perimeter, the cabinet surface it contacts, and the door liner. Look for a section pulled from its retainer, a split or puncture, a twisted or folded corner, a visible gap, frost, or a package pressing against the door. Close the door without slamming and note where it fails to contact.
Expected result: The gasket is intact but loose, the rubber is torn or cracked, frost or debris is in the contact path, the gap is at one corner or hinge side, or the gasket appears uniformly seated.
Next step: Continue with cleaning and a careful reseating check for an intact loose gasket. Treat a torn gasket as a replacement or service decision, and arrange service for a persistent one-sided gap, damaged liner, or hinge concern.
Stop if: Do not pull hard on the gasket, cut away a damaged section, or force the door against a package or frost buildup.
Why this matters
Why: An intact loose section may be reseated. A tear or crack compromises the magnetic seal and usually requires replacement. Frost, debris, or an obstruction can hold the door open, while a one-sided gap makes door alignment, hinge, liner, or leveling more likely than a seal-only problem.
-
Check 2
Remove loose food particles or frost from the gasket and the cabinet contact surface without scraping the liner. Wash the gasket with warm water and mild detergent using a soft sponge or cloth, rinse it, and wipe it completely dry. Keep the door open only as long as needed to clean it.
Expected result: Dirt, dried residue, frost, or a sticky section was preventing contact, the gasket becomes flexible and contacts the frame, or a gap remains after cleaning.
Next step: Close the door gently and recheck the previously identified gap. If the gasket still cannot contact the frame, move to the reseating and obstruction checks; do not keep adding cleaner or lubricant unless the exact manual calls for it.
Stop if: Do not use abrasive tools, solvents, sharp objects, boiling water, or a heat gun on the gasket or freezer liner.
Why this matters
Why: A contaminated contact surface can resist closure and mimic a failed gasket. If a clean gasket still leaves a gap, the cause is more likely a loose retainer, torn or deformed seal, door alignment, hinge, liner, or cabinet-level issue.
-
Check 3
If the gasket is intact and a section has pulled loose, press that section evenly back into the door retainer or channel, following the freezer's owner instructions. Smooth twists or folds by hand and close the door gently to check whether the gasket now contacts the cabinet continuously; do not stretch, glue, or trim it.
Expected result: The loose section stays in the retainer and seals, it pops out again, the gasket is permanently wrinkled or hardened, or a tear opens when the seal is moved.
Next step: Keep the door closed and monitor for renewed frost only when the seal is continuous. Arrange a model-specific gasket or door service when the gasket will not remain seated or is torn, cracked, hardened, or deformed.
Stop if: Do not glue the gasket, stretch it into a shorter path, use a sharp tool in the retainer, or continue if the door must be forced shut.
Why this matters
Why: A stable reseated gasket can restore the seal. A section that will not stay seated, a hard deformation, or a tear means the seal or its retainer may be damaged and cannot be corrected by cleaning alone.
-
Check 4
Check that bins, shelves, packages, and drawers are fully seated and do not protrude into the door path. Look at the hinge side and cabinet without removing hardware, and confirm the freezer is not visibly rocking or leaning in a way that prevents the door from closing. Do not adjust hinges or levelers unless the owner manual gives model-specific instructions.
Expected result: A package or drawer blocks closure, the door is visibly shifted or drops on the hinge side, the cabinet is unlevel, or the door and gasket align normally but the seal still leaks.
Next step: Remove only the harmless storage obstruction and recheck the seal. Use qualified appliance service for hinge, door-liner, cabinet-leveling, or retainer problems, and keep the door closed as much as practical while waiting.
Stop if: Do not bend hinges, remove a heavy freezer door, prop the door with tools, or force a misaligned door against the frame.
Why this matters
Why: An obstruction or alignment problem can create a gasket gap even when the rubber is intact. A normal-looking alignment with a torn or loose gasket keeps the seal itself as the likely cause; a shifted door or damaged liner requires mechanical service.
Use your observations
Decision map
Find the observation that best matches what you see, then follow the next safe action.
-
PATH 01Next step
What you see
The gasket is intact, dirt or frost was removed, the loose section can be pressed back into its retainer, and the door now contacts the cabinet around the full perimeter.
Do this next
Keep the freezer closed and watch for renewed frost, condensation, or temperature recovery problems. If the gap returns, stop forcing the seal and arrange model-specific service.
Why this path and its safety boundary
Why it matters: A removable contamination or seating problem was more likely than a failed seal or door structure.
-
PATH 02Next step
What you see
The gasket has a real tear, split, crack, hardened deformation, or a section that will not remain in its retainer after cleaning and gentle reseating.
Do this next
Arrange replacement or qualified appliance service using the freezer model and door configuration. Keep the door closed as much as possible and do not patch or trim the gasket as a permanent fix.
Why this path and its safety boundary
Why it matters: The gasket cannot reliably maintain a continuous cold-air seal and needs a model-specific replacement or service assessment.
-
PATH 03Next step
What you see
The gasket is intact and clean, but a bin or package blocks closure, the door is shifted, the hinge side has a gap, or the freezer is visibly unlevel.
Do this next
Remove only the storage obstruction and recheck the door. Leave hinge, liner, cabinet, and leveling repairs to qualified service or the exact owner instructions; do not force the door closed.
Why this path and its safety boundary
Why it matters: Storage arrangement, door alignment, hinge, liner, or cabinet leveling is more likely than a gasket-only fault.
-
PATH 04Next step
What you see
The door appears closed but frost, moisture, temperature fluctuation, or longer running continues after the gasket and contact path are clean and unobstructed.
Do this next
Arrange appliance service and provide the model, gap location, gasket condition, frost pattern, and what changed after cleaning or reseating. Protect food according to safe food-storage guidance if the freezer cannot hold temperature.
Why this path and its safety boundary
Why it matters: A hidden gap, retainer or door problem, cabinet alignment issue, or a separate cooling fault may remain; the visible seal check is not enough to identify the cause.
Helpful context
Understand the symptom
Find the gap before replacing anything
A loose or torn gasket is an obvious sealing problem, but a shelf, bin, package, frost ridge, misaligned door, or unlevel cabinet can create the same gap. Close the door gently and inspect all four sides. Frost or moisture near one section identifies where warm room air may be entering, but it does not by itself tell you whether the gasket or the door alignment is at fault.
A loose seal and a torn seal have different next steps
If the flexible gasket has pulled out of its retainer but is intact, pressing it back into place may restore the seal. If it has a genuine split, puncture, or hardened deformation, cleaning will not repair it; the replacement must match the freezer model and door configuration. Do not use a generic strip or cut the gasket to make it fit.
Only after diagnosis
Potential parts
- freezer door gasket
Only consider this category when the gasket is torn, cracked, hardened, permanently deformed, or will not stay seated after cleaning and model-approved reseating.
Door-gasket shape and attachment vary by appliance model and door configuration; confirm the exact model before selecting a replacement. - freezer gasket retainer or door liner
Only consider this category when an intact gasket repeatedly pulls out or the retainer or liner is damaged and qualified service confirms it is causing the gap.
Retainer and liner parts are model-specific and may require door disassembly; do not glue or modify the channel. - freezer door hinge or leveling component
Only consider this category when the gasket is clean and intact but the door is shifted, drops, fails to align, or the appliance is visibly unlevel and service confirms the mechanical cause.
Hinge and leveling configurations vary; verify the exact appliance and follow its installation instructions or use qualified service.
When checks do not resolve it
Need a professional?
Arrange qualified appliance service when the freezer gasket is torn, cracked, hardened, permanently deformed, or will not stay in its retainer; the door or liner is shifted or damaged; the freezer remains frosty or cannot maintain temperature after the seal is cleaned and unobstructed; or hinge, leveling, retainer, or cooling diagnosis is needed. Keep the door closed as much as possible and protect food if temperature is rising. Do not cut, glue, aggressively heat, force, or patch the gasket, and do not remove a heavy door or adjust hinges without model-specific instructions.
Common questions
FAQ
Can I fix a freezer gasket that is loose but not torn?
Often, an intact section that has pulled out can be pressed back into its retainer if the model design allows it. Clean and dry the gasket and contact surface first, smooth twists by hand, and check for a continuous seal. If it pops out again or the retainer is damaged, arrange service.
What should I do when the freezer door gasket is torn?
A genuine tear, split, crack, or permanently deformed section normally requires a model-specific gasket replacement. Keep the door closed as much as possible, do not patch or trim the seal, and arrange qualified appliance service if replacement or door disassembly is needed.
Why is there frost even after I clean the freezer gasket?
A clean gasket may still leave a gap if the door is blocked, shifted, unlevel, or the retainer or liner is damaged. Check storage items and the full gasket perimeter without forcing the door. Persistent frost, moisture, or temperature fluctuation after those checks needs appliance service.
Read the exact guide
Official sources
- Top Freezer Refrigerator - Adjusting or Replacing the Door GasketsGE Appliances · Manufacturer guidance for loose, torn, deformed, and replacement refrigerator or freezer door gaskets
- [LG Refrigerator] Cold Air Escapes Through DoorLG USA Support · Manufacturer explanation of door gaskets, cold-air leakage, frost and moisture, cleaning, loose-gasket reseating, and leveling
- Door Hard to Open - FreezerWhirlpool Product Help · Manufacturer freezer door gasket cleaning, door alignment, leveling, frost, and service guidance
Community feedback
Share a repair observation
Share a plain-text repair observation. Accepted observations are published automatically; this page may take a moment to update.