
On this page
Start here
Quick answer
A freezer door that will not seal is most often being held open by a package, shelf, basket, drawer rail, frost, or a dirty or displaced gasket; a warped gasket, misalignment, or leveling problem can also let cold air escape. Open the freezer briefly and look for the exact gap, then remove only an obvious obstruction and make sure baskets or drawers are fully seated. Clean the gasket with the method allowed by the manufacturer, check that it sits evenly in its channel, and use a paper or light test around the perimeter. A torn, split, hardened, or persistently warped gasket, a door that sits unevenly, a hinge or rail that needs adjustment, or frost that returns after the door closes needs model-specific service. Do not force the door, reshape hardware, glue the gasket, or keep operating while food is warming.
Before you begin
Safety first
- This article supports brief observation, ordinary obstruction removal, gentle gasket cleaning, and only manufacturer-approved defrost or alignment steps. Do not improvise seal materials, use heat to clear frost, disassemble hinges or concealed cooling components, or bypass controls.
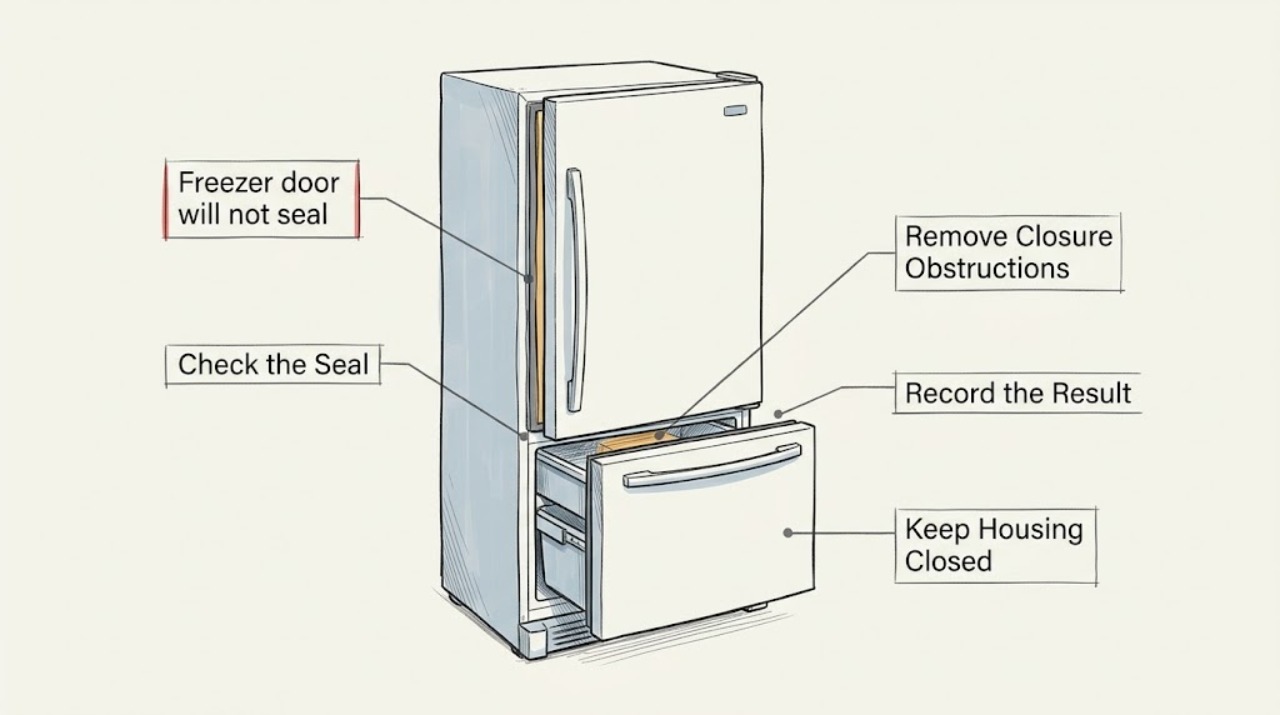
Work through in order
Diagnostic checks
Use only checks that match the exact appliance or system and its official guide.
-
Check 1
Close the freezer door or drawer gently and inspect the perimeter from all sides. Use a thin sheet of paper at several points, or place a light inside the empty compartment and look for light escaping around the closed door, without leaving the door open longer than needed.
Expected result: Record whether the paper has slight resistance around the full perimeter, slips out at one corner or side, or the door cannot close enough to make contact; note any frost or condensation concentrated near the gap.
Next step: Photograph the failed area and continue to the obstruction and gasket checks. If food is warming, the gap is large, or water is reaching electrical parts, protect the food and arrange service rather than repeatedly opening the freezer.
Stop if: Do not force the door against resistance, insert tools into the gasket, or leave a light source inside a powered appliance where it can heat or damage the compartment.
Why this matters
Why: An isolated loose section supports a local gasket, seating, or alignment check. A uniform failure suggests the door is blocked, misaligned, unlevel, or the gasket is broadly deformed. Frost at the same edge supports warm-air entry, but it does not by itself prove the gasket is the only cause.
-
Check 2
With the door open briefly, check the full closure path for packages, shelves, bins, ice, shipping material, a drawer that is not fully seated, or a lower basket and slide that are out of position. Reposition only the item that is visibly preventing closure, then close the door without slamming.
Expected result: Observe whether the door now closes on its own and contacts the cabinet evenly, whether one corner remains high or low, or whether the door still stops before the gasket touches.
Next step: Keep packages and shelves clear of the seal and verify that drawers or baskets are fully seated. Use the exact owner manual for any alignment procedure; do not remove hinges or rails as a first check.
Stop if: Do not force a basket, bend a rail, pry ice from the frame, or defeat an auto-close or drawer mechanism.
Why this matters
Why: A successful closure after removing one obstruction makes the item or basket position the likely cause. A remaining uneven gap makes gasket seating, door alignment, leveling, hinge, or rail geometry more likely. If frost itself blocks the door, the warm-air cause still needs to be addressed after safe frost removal.
-
Check 3
After removing ordinary obstructions, inspect the rubber gasket around the freezer opening for dirt, cuts, splits, hardening, twists, pulled-out sections, or a folded corner. Clean it with a soft damp cloth and mild soapy water if the manual allows, dry it, and press a loose section back into its channel only when the manufacturer describes that procedure.
Expected result: Classify the gasket as clean and evenly seated, dirty but intact, loose from the retainer, wrinkled or deformed, or torn, split, hardened, or otherwise damaged. Repeat the paper test at the previously failing spot.
Next step: Monitor a clean, evenly sealing gasket. If the gasket is damaged or the test still fails, record the exact model and arrange a compatible replacement or qualified service; do not order by appearance alone.
Stop if: Do not glue, cut, stretch, sand, lubricate with an unapproved product, or heat the gasket. Stop if the gasket channel or cabinet is cracked or the door requires force to close.
Why this matters
Why: Improved paper resistance after cleaning or reseating supports a gasket-contact problem. A torn or hardened gasket cannot be made reliable by cleaning. A clean, intact gasket with an uneven gap points more toward door alignment, leveling, hinges, rails, or frost than the rubber itself.
-
Check 4
Inspect the frame, gasket edge, rear wall, and vents for frost that could hold the door open. If frost is light, remove it only with the model-approved method; if a full defrost is required, follow the manual, protect food, and keep power and water handling within its instructions.
Expected result: Note whether frost is only at the door edge, forms broadly on the rear wall and vents, blocks a drawer or gasket, or returns after the door is confirmed closed.
Next step: Restore a dry, unobstructed gasket and retest closure. Request service for heavy frost, repeated recurrence, a freezer that is warming, or frost that cannot be cleared without accessing concealed components.
Stop if: Do not use a hair dryer, heat gun, open flame, knife, screwdriver, or sharp scraper to remove frost; do not remove evaporator covers or defrost components.
Why this matters
Why: Edge frost that disappears after correcting a gap supports warm-air leakage through the door. Broad rear-wall or vent frost suggests airflow, moisture, or automatic-defrost trouble and may continue even with a new gasket. Frost that physically prevents closure is an obstruction that must be cleared before retesting the seal.
-
Check 5
With the freezer empty enough to see the geometry, compare the door or drawer to the cabinet: check whether the top and bottom gaps are even, the gasket touches the frame all around, the drawer basket is square on its slides, and the appliance is level as the owner's instructions specify.
Expected result: Record whether the door is visibly sagging, a drawer sits skewed, one rail or hinge has play, the cabinet is out of level, or the gasket gap remains despite an unobstructed, intact seal.
Next step: Use only the exact model manual for a permitted leveling or drawer-alignment adjustment; otherwise give the photos and model information to a qualified appliance technician. Retest the paper seal after any approved adjustment.
Stop if: Do not loosen hinges, remove rails, lift a heavy door, shim the appliance, or adjust hardware without the model procedure and proper support.
Why this matters
Why: An uneven gap with an intact gasket supports alignment, leveling, hinge, or rail diagnosis. Whirlpool notes that an unlevel freezer can seal incorrectly, while GE says the gasket should touch the frame evenly and that some drawer designs require door adjustment. A visibly loose or damaged hinge or rail is not a gasket-cleaning issue.
-
Check 6
After the freezer closes evenly, keep the door shut and monitor the compartment, food condition, frost pattern, and any visible condensation during normal operation. Avoid repeated door openings while checking whether cold air continues to escape.
Expected result: Classify the result as a stable seal with no new frost, a seal that passes but the freezer remains warm, a gap or condensation that returns at the same edge, broad frost returning, or food beginning to thaw.
Next step: Stop repeated self-adjustment when the symptom returns and arrange model-specific service. Provide the model, photos, paper-test locations, gasket condition, frost pattern, and food-temperature observations.
Stop if: Stop operation for food thawing, water near electrical parts, burning odor, damaged wiring, refrigerant-tube damage, or any need to bypass a control.
Why this matters
Why: A stable seal with normal cooling supports an obstruction, cleaning, or seating correction. A passing seal with poor cooling shifts concern toward airflow, temperature control, fan, defrost, or sealed cooling. Recurring edge frost makes a persistent seal or alignment issue more likely; broad frost and thawing require service regardless of the paper result.
Use your observations
Decision map
Find the observation that best matches what you see, then follow the next safe action.
-
PATH 01Safety boundary
What you see
The paper or light test fails at one area, and a package, shelf, basket, drawer, ice, or shipping material is visibly holding the door open; the seal and cabinet are otherwise intact.
Do this next
Remove or reposition the identified obstruction, seat the basket or drawer according to the manual, close the door gently, and repeat the perimeter seal test.
Why this path and its safety boundary
Why it matters: The obstruction is more likely than a failed gasket. The opening is allowing warm air in and can create frost that later becomes a second obstruction.
Safety stop: Do not force the door, bend the basket or rails, or chip ice from the frame with a sharp object.
-
PATH 02Safety boundary
What you see
The closure path is clear, but the gasket is torn, split, hardened, badly deformed, pulled from its channel, or still fails the paper test at the same edge after cleaning and permitted reseating.
Do this next
Request a model-matched gasket assessment or replacement through the manufacturer or qualified service. Keep the freezer closed as much as possible and monitor food while waiting.
Why this path and its safety boundary
Why it matters: A gasket-contact failure is likely. Cleaning cannot restore a cut or hardened seal, while a loose but intact section may be correctable only by the exact model procedure.
Safety stop: Do not glue, cut, stretch, heat, or substitute an unverified gasket, and do not keep using the appliance if water or frost is damaging the cabinet or food.
-
PATH 03Safety boundary
What you see
The gasket is clean and intact, but the door or drawer sits high or low, the top and bottom gaps differ, a rail or hinge has play, or the freezer is not level.
Do this next
Follow only the exact model manual for leveling or alignment, or arrange service with the model information. Retest the seal after an approved adjustment rather than forcing the gasket into contact.
Why this path and its safety boundary
Why it matters: Alignment, leveling, hinge, or drawer-slide geometry is more likely than rubber failure. The correct adjustment depends on whether the freezer uses a hinged door or a pull-out drawer.
Safety stop: Do not remove hinges or rails, lift a door without support, or shim or adjust hardware by guesswork.
-
PATH 04Safety boundary
What you see
The door is unobstructed and may pass the paper test, but frost covers the rear wall or vents, frost returns broadly, the freezer is warm, or food is beginning to thaw.
Do this next
Check only ordinary vent clearance and closure, then request appliance service for the defrost, fan, temperature, or cooling system. Protect food according to food-safety guidance.
Why this path and its safety boundary
Why it matters: The door gasket is not established as the primary fault. Blocked airflow, excess moisture, a fan issue, or an automatic-defrost or cooling problem is more likely; repeated gasket cleaning will not resolve it.
Safety stop: Do not bypass temperature or defrost controls, remove concealed panels, or continue operation while food safety or electrical safety is uncertain.
-
PATH 05Safety boundary
What you see
The door closes evenly and the gasket has consistent resistance, but cold air still seems absent, the compartment does not hold temperature, or condensation and leaks persist elsewhere.
Do this next
Stop treating the gasket as the fix, document the temperature and symptom timing, and arrange qualified appliance diagnosis; do not change settings or parts from the seal symptom alone.
Why this path and its safety boundary
Why it matters: A door-seal leak is less likely. The remaining problem may involve airflow, fan, temperature controls, automatic defrost, drain or pan, or another water or cooling source.
Safety stop: Stop operation for food thawing, burning odor, water near electrical components, or any need to access sealed-system or live electrical parts.
Helpful context
Understand the symptom
Find the actual leak path before replacing a gasket
Cold air can escape through a small section of gasket that is dirty, pulled out of its channel, folded, torn, or not touching the cabinet evenly. The door may also be stopped short by food, a shelf, a basket, a drawer slide, a shipping piece, or frost. Samsung suggests checking the seal with a paper test and says frost or condensation at the interior edge near the seal is a likely sign of a poor seal. The location of the gap matters: one corner suggests a local seal or alignment issue, while a door that cannot close at all suggests an obstruction, frost, drawer, rail, or hinge problem.
Hinged doors and freezer drawers have different checks
For a hinged top-freezer door, inspect the gasket all the way around and check whether it is seated in its retainer. For a bottom-freezer or French-door drawer, make sure the lower basket and slides are fully seated and that the gasket touches the frame evenly at the top and bottom. Samsung's door guide separates hinged and pull-out doors and directs owners to model-specific manual procedures when alignment or roller parts need attention. Do not use a side-by-side or hinged-door adjustment procedure on a drawer that uses different rails.
Frost is both a symptom and a new obstruction
Warm, moist room air entering through a poor seal freezes inside the freezer. That frost can then hold the door open, making the leak larger. Remove an ordinary package obstruction and wipe a dirty gasket, but treat heavy frost, a damaged seal, or frost that returns after the door is restored as a service clue. Samsung warns not to use a hair dryer to speed defrosting; use the model's defrost procedure and protect food instead. A door that closes but a freezer that remains warm also needs cooling diagnosis rather than repeated seal tests.
Safety boundary
Stop conditions
- Do not force the freezer door, slam it, bend rails or hinges, or pry frost from the gasket or cabinet with a sharp tool.
- Do not glue, cut, stretch, sand, or heat a gasket, and do not install a replacement without confirming the exact model and fit.
- Do not use a hair dryer, heat gun, open flame, or improvised heater to clear frost; follow the model's defrost instructions instead.
- Do not remove hinges, drawer rails, evaporator covers, fans, wiring, or defrost components without the exact service procedure and proper support.
- Stop for food thawing, water near electrical parts, burning odor, damaged wiring, refrigerant-tube damage, or recurring frost and cooling loss; arrange appliance service.
Only after diagnosis
Potential parts
- freezer door gasket
Consider this category only if inspection confirms a torn, split, hardened, or irreparably deformed gasket, or service confirms that a correctly seated door still fails the perimeter seal test because the gasket is damaged.
Confirm the exact appliance model, door style, gasket profile, channel, and manufacturer's fit information; do not stretch, cut, glue, or substitute a visually similar seal. - freezer drawer roller or slide component
Consider this category only if a bottom-freezer or French-door drawer remains skewed or cannot seat after the manual-approved obstruction and seating checks, and service identifies a damaged rail or roller.
Confirm the exact model and left/right or front/rear position with the manufacturer; do not order from appearance alone or force a drawer onto a mismatched slide. - freezer door hinge or alignment hardware
Consider this category only if service confirms that a worn, bent, loose, or damaged hinge or alignment component is causing an otherwise intact gasket to sit unevenly.
Confirm the exact model, hinge side, door weight, and manufacturer's procedure; hinge work may require support and alignment that should not be improvised.
When checks do not resolve it
Need a professional?
Arrange manufacturer or qualified appliance service when the gasket is torn, split, hardened, or persistently deformed; the paper or light test still fails after ordinary cleaning and permitted reseating; the door is uneven, a hinge or rail is loose, or alignment requires disassembly; frost returns broadly; the freezer is warming or food is thawing; or the source of cold-air loss is uncertain. Provide the model, door style, photos of the gap and gasket, obstruction findings, frost pattern, paper-test results, and cooling observations.
Safety scope: This article supports brief observation, ordinary obstruction removal, gentle gasket cleaning, and only manufacturer-approved defrost or alignment steps. Do not improvise seal materials, use heat to clear frost, disassemble hinges or concealed cooling components, or bypass controls.
Common questions
FAQ
How can I tell where a freezer door is leaking cold air?
Check the perimeter with a thin sheet of paper or a brief light test and note the exact corner or edge that fails. Frost or condensation at the same interior edge supports warm-air entry. If the door cannot close at all, look first for food, a basket, drawer, rail, or frost obstruction.
What should I check before replacing a freezer gasket?
Remove packages or shelves that block closure, seat drawers and baskets, clean the gasket, and check that it is in its channel and touching the cabinet evenly. A torn, split, hardened, or persistently deformed gasket is a replacement or service issue; a clean intact gasket with an uneven gap points toward alignment or leveling.
Can frost make a freezer door stop sealing?
Yes. Frost can hold the gasket or door open, while a poor seal also admits moist air that creates more frost. Use the model's defrost procedure and do not use a hair dryer, open flame, or sharp tool. Broad rear-wall frost or frost that returns needs service for airflow or defrost causes.
Why does my freezer drawer close on one side but not the other?
A package, basket, slide, roller, frost buildup, or drawer alignment can leave one side high or low. Confirm the basket and slides are seated and follow only the exact model's alignment procedure. Do not bend rails or remove hardware without proper support and instructions.
What if the seal passes but the freezer is still warm?
A consistent paper-test seal makes a door leak less likely. Check only ordinary vent clearance and loading, then arrange appliance service for a fan, automatic-defrost, temperature-control, airflow, or cooling-system problem. Protect food if it is thawing and do not bypass controls.
Read the exact guide
Official sources
- Frost forms in the Samsung freezer, refrigerator, or ice bucketSamsung · Official Samsung US frost troubleshooting; model-specific defrost procedures and door adjustments control.
- Samsung refrigerator or freezer doors will not closeSamsung · Official Samsung US troubleshooting for several door styles; exact alignment and roller procedures vary by model.
- What should I do if I suspect my Samsung fridge/freezer is leaking water?Samsung · Official Samsung UK support used for general seal and leak patterns; exact repair instructions vary by model and region.
- Cooling issues with Samsung refrigerator or freezerSamsung · Official Samsung US cooling troubleshooting; temperature and clearance details vary by model.
- Bottom Freezer Refrigerator - Freezer Drawer Not Sealing ProperlyGE Appliances · Official GE support for French-door and bottom-freezer drawers; exact adjustment steps vary by model.
- Checking for Items Preventing Door or Lid Closure - Product HelpWhirlpool · Official Whirlpool freezer support; the page covers chest-freezer lid examples and general closure causes, so door style and manual instructions control.
- Refrigerator & Freezer - Ice on Freezer WallGE Appliances · Official GE support for frost on freezer walls; model-specific defrost and service procedures still control.
- Top Freezer Refrigerator - Adjusting or Replacing the Door GasketsGE Appliances · Official GE guidance for top-freezer gaskets; it is not a universal replacement or heating procedure for every freezer design.
Community feedback
Share a repair observation
Share a plain-text repair observation. Accepted observations are published automatically; this page may take a moment to update.