
On this page
Start here
Quick answer
Some burned food with undercooked or pale food elsewhere does not automatically mean a failed oven. First record the mode, rack, pan, food position, and whether the browning is top, bottom, edge, or one-sided. Fully preheat, use the rack position and bakeware specified for the recipe and oven, leave room for air circulation, and keep the door closed during the heat-up. Dark pans absorb more heat, while shiny pans reflect it; a pan touching the wall or another pan can create a hot spot. If the same area burns across different foods after those controls are consistent, use the oven's model-specific temperature-calibration procedure and arrange service if calibration does not help or an element, sensor, door, fan, or control appears damaged. Do not line the oven floor or whole rack with foil, move hot racks with bare hands, or open electrical panels.
Before you begin
Safety first
- This article supports safe observation, manual-approved rack and bakeware adjustments, complete preheat, and model-specific calibration only. A qualified technician handles live electrical diagnosis, elements, sensors, controls, fan assemblies, door switches, wiring, and damaged insulation.
Work through in order
Diagnostic checks
Use only checks that match the exact appliance or system and its official guide.
-
Check 1
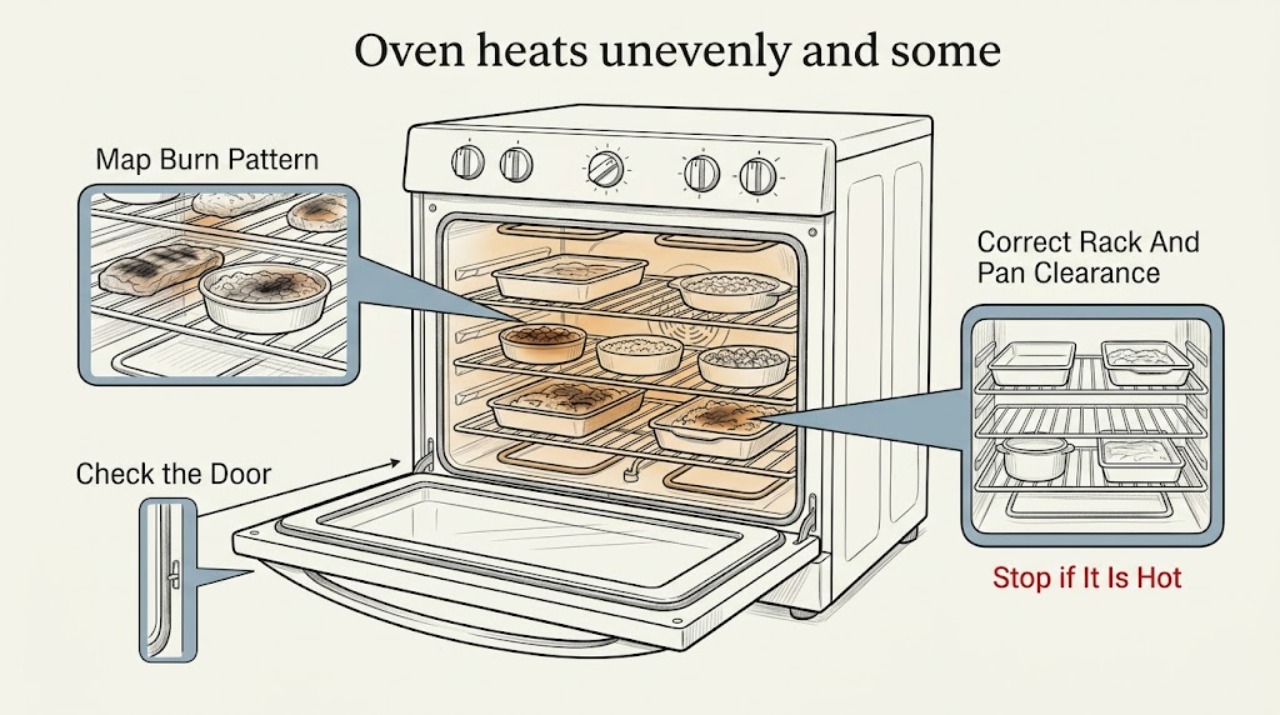
For the next safe cooking test, use the same recipe and mode only if the oven is otherwise safe, and map where food burns or stays pale without touching hot surfaces; record the rack, pan, food position, and mode.
Expected result: Classify the result as top-only browning, bottom-only burning, a rear or front hot side, one corner, edge browning, uneven pieces within one pan, or a whole-cavity temperature problem; note whether the other areas are undercooked.
Next step: Keep a photo and written pattern, then apply the controlled preheat, rack, pan, and clearance checks rather than replacing a component from one bake.
Stop if: Stop using the oven for smoke, arcing, a burning electrical smell, a glowing or damaged element, a door that cannot close, a power trip, or a risk of contact with hot food or racks.
Why this matters
Why: A result tied to one rack, pan edge, or food position supports setup and airflow checks. The same location across different foods and positions is more concerning for heat distribution, element, sensor, door, fan, or control behavior.
-
Check 2
Select the recipe's intended bake, roast, broil, or convection mode and allow the oven to complete its model-specific preheat signal before placing food inside; confirm the door closes fully and avoid opening it repeatedly.
Expected result: Record whether uneven burning occurs only when food is added before preheat, only in one mode, or even after a complete preheat with a fully closed door; note any door gap, warning, or unusual fan behavior.
Next step: Repeat the test only under the same controlled mode and preheat conditions, then compare the result; arrange service for a damaged door, abnormal fan, error, or persistent uneven result.
Stop if: Do not bypass a door switch, hold the door partly open, use broil as a heat test for baking, or reach into a hot cavity to inspect an element.
Why this matters
Why: Whirlpool says incomplete preheat can leave excessive top heat and over-brown the top while the bottom remains undercooked. A repeatable problem after correct preheat or a door that does not seal points toward service or a model-specific setting rather than simply adding time.
-
Check 3
Place one pan on the rack position recommended by the exact recipe and owner manual, centered with clearance from the oven walls; if using multiple pans, distribute them as the manual directs and leave air space between them.
Expected result: Record whether a pan touches a wall, another pan, or a rack edge; whether the burn follows the pan rather than the cavity; and whether one centered pan cooks more evenly than crowded or off-center pans.
Next step: Keep the corrected rack and clearance arrangement for the recipe and record any remaining fixed hot area; do not cover the rack or oven bottom with foil.
Stop if: Do not place a pan directly on the oven floor, block the vent, stack pans unless the manual permits it, or move a hot rack without heat protection.
Why this matters
Why: Whirlpool says hot air must circulate and that pans touching the walls or each other can create hot spots and faster cooking at the contact areas. If centering and spacing remove the burn, the setup was contributing; if the same cavity area remains hot, continue to calibration and service checks.
-
Check 4
Repeat a controlled recipe with the recommended pan size and a known, undamaged bakeware type, keeping the food thickness and spacing consistent; do not change several variables at once.
Expected result: Compare a dark or dull pan with a light or shiny pan only when the recipe and manual permit the comparison, and note whether the burn is on the pan-facing bottom, on edges, or in the same oven location regardless of pan.
Next step: Use the bakeware and size specified for the recipe or manual, adjust only by its instructions, and continue to calibration or service when the fixed hot spot remains.
Stop if: Do not use warped, cracked, undersized, or incompatible cookware, place food on foil as a substitute for a pan, or leave a burning dish unattended.
Why this matters
Why: Whirlpool identifies dark, dull pans as absorbing more heat and producing darker browning, while shiny pans reflect heat and produce lighter browning. A result that follows the pan supports bakeware influence; a fixed cavity location across pans supports an oven distribution issue.
-
Check 5
Confirm that the selected recipe, rack arrangement, and convection setting match the exact owner manual; keep vents clear and avoid overcrowding, and use the convection fan only when the model and recipe call for it.
Expected result: Record whether the issue occurs only with convection, only with conventional bake, with multiple racks, or when pans are close together; note a fan that fails to run when expected or makes grinding or scraping sounds.
Next step: Use the manual's rack and mode combination and retest one controlled pan; arrange service for an abnormal fan, blocked vent that cannot be safely cleared, or persistent uneven cooking.
Stop if: Do not block vents, remove fan guards, touch a moving fan, or use a mode that the cookware or recipe does not permit.
Why this matters
Why: Samsung lists airflow, rack placement, convection, and spacing as causes or controls for uneven cooking. A mode-specific fixed hot area or abnormal fan can indicate a circulation or service issue; overcrowding can produce uneven results without a failed component.
-
Check 6
After the setup controls are consistent across more than one safe test, check the owner manual for the model's temperature-calibration or offset procedure and record whether the oven runs consistently hot, cold, or uneven in one location; do not open the control panel.
Expected result: Record the model, selected temperature and mode, preheat result, food pattern, calibration setting before and after any manual-approved adjustment, and whether the same area still burns; note error codes, element damage, sensor damage, or power events.
Next step: Apply only the exact manual's adjustment limits, then arrange appliance service if the result remains uneven or any component, wiring, door, or control is suspect.
Stop if: Do not probe live wiring, remove panels, bend or reposition a temperature sensor, replace an element without safe model-specific procedure, or use an improvised thermometer result as permission to change wiring or controls.
Why this matters
Why: A repeatable whole-oven hot or cold result may support a model-specific calibration adjustment. Persistent spatial unevenness, visible element or sensor damage, abnormal fan, error, or power symptom requires service inspection; a calibration setting cannot repair a failed component.
Use your observations
Decision map
Find the observation that best matches what you see, then follow the next safe action.
-
PATH 01Safety boundary
What you see
Food is dark on top and undercooked below, and the result improves when the oven fully preheats before food is inserted.
Do this next
Use the complete model-specific preheat cycle, insert food promptly after the signal, keep the door closed, and follow the recipe's rack and pan instructions.
Why this path and its safety boundary
Why it matters: The incomplete-preheat pattern is more likely than a failed part; early top heat can brown food before the cavity reaches the intended operating condition.
Safety stop: Do not compensate by placing food directly on the oven floor, covering vents or racks with foil, or raising the temperature without recipe guidance.
-
PATH 02Safety boundary
What you see
The burn follows a dark or dull pan, the pan is close to a wall or another pan, or centered single-pan cooking improves the result.
Do this next
Use the recommended pan size and material, center it on the prescribed rack, leave clearance, and distribute multiple pans only as the manual directs.
Why this path and its safety boundary
Why it matters: Bakeware heat absorption and restricted airflow are contributing more likely than a fixed oven hot spot.
Safety stop: Do not line the rack or oven bottom with foil, stack unsupported pans, or use warped or damaged cookware.
-
PATH 03Safety boundary
What you see
The same left, right, front, rear, top, or bottom area burns across different foods, pans, positions, and controlled preheat cycles.
Do this next
Stop relying on repeated cooking tests, document the fixed location and mode, and arrange qualified appliance service to inspect the heating and sensing system.
Why this path and its safety boundary
Why it matters: A fixed heat-distribution issue, element behavior, sensor, fan, door, or control problem is more likely than recipe or pan color alone.
Safety stop: Do not remove an element, reposition a sensor, bypass a door switch, or open energized panels.
-
PATH 04Safety boundary
What you see
Uneven cooking appears only in convection, only in conventional bake, or only when two racks or crowded pans are used, and the fan behavior is abnormal or the setup differs.
Do this next
Return to the model manual's supported rack and mode arrangement with one pan, then request service if the fan is noisy, absent when expected, or the mode remains uneven.
Why this path and its safety boundary
Why it matters: Airflow, fan operation, rack spacing, or an unsupported mode combination is more likely than a general temperature offset.
Safety stop: Do not remove fan guards, block vents, or continue a mode that produces smoke or an electrical smell.
-
PATH 05Safety boundary
What you see
Several different foods cook consistently too fast or too slow across the cavity after rack, pan, airflow, door, and preheat controls are consistent.
Do this next
Use only the owner manual's calibration procedure and record the change; arrange service if the offset is outside the allowed adjustment, the result remains uneven, or the problem returns.
Why this path and its safety boundary
Why it matters: A model-specific temperature offset or calibration issue is plausible, but calibration does not prove or repair an element, sensor, or control failure.
Safety stop: Do not invent calibration values, alter wiring, or use a single unstable temperature reading as a component diagnosis.
-
PATH 06Safety boundary
What you see
Uneven burning is accompanied by smoke unrelated to the food, arcing, a damaged or continuously glowing element, a damaged door or seal, breaker trips, error codes, or abnormal fan noise.
Do this next
Turn the oven off, let it cool without touching hot components, isolate power only at the clearly identified appliance disconnect if safe, and arrange qualified service.
Why this path and its safety boundary
Why it matters: The symptom has crossed from cooking performance into a possible electrical, thermal, door, or control hazard.
Safety stop: Do not use the oven again to reproduce the fault, clean an energized cavity, or open panels or controls.
Helpful context
Understand the symptom
Start with the shape of the burn, not a replacement part
Write down whether the burn is on the top, bottom, rear, front, left, or right side; whether the rest of the food is underdone; and whether the result changes with a different rack or pan. A single dark corner can reflect pan placement or local airflow, while the same side burning in several recipes points more strongly toward heat distribution, an element, sensor, door seal, or control issue. Keep the oven identity and the exact mode in the record because bake, roast, broil, and convection do not distribute heat the same way.
Control preheat, rack position, pan material, and clearance
Whirlpool recommends fully preheating, selecting the rack position appropriate to the food, using the recommended bakeware, and leaving clearance so hot air can circulate. Its guidance says dark, dull pans absorb heat and brown more, while shiny pans reflect heat and brown less. Keep pans from touching the oven walls or one another, and never cover the entire rack or oven bottom with foil because that can block airflow. These changes can distinguish a repeatable oven fault from a recipe-and-setup problem without opening the appliance.
Calibrate only after the pattern is repeatable
Ovens cycle heating elements on and off, and different models handle calibration differently. If multiple foods consistently cook too fast or too slow after controlled rack, pan, preheat, and airflow checks, follow the exact owner manual's calibration or temperature-offset procedure. Samsung notes that persistent uneven cooking may warrant service inspection of heating elements or sensors. Calibration is not a substitute for service when a door will not close, a fan is abnormal, an element is visibly damaged, or the oven trips power or produces smoke.
Safety boundary
Stop conditions
- Stop using the oven for smoke unrelated to food, arcing, a damaged or continuously glowing element, burning electrical odor, breaker trips, error codes, a damaged door, or abnormal fan noise.
- Do not cover the entire oven rack or oven bottom with aluminum foil, block vents, or place cookware directly on the cavity floor as a heat adjustment.
- Do not open electrical panels, probe live wiring, bypass a door switch, reposition a sensor, or remove an element as a troubleshooting test.
- Do not move hot racks or pans without suitable heat protection, and do not leave food or a test unattended while it is burning.
- Do not change several cooking variables at once or treat one burned recipe as proof of a failed part; document a repeatable pattern first.
Only after diagnosis
Potential parts
- oven temperature sensor
Consider this category only if controlled tests show a repeatable temperature or spatial problem and qualified service confirms the sensor is inaccurate, damaged, or out of specification.
Confirm the exact oven model, sensor type, connector, mounting, and manufacturer service information; do not replace a sensor based only on a burned recipe. - oven bake or broil heating element
Consider this category only if service confirms a damaged, open, shorted, or unevenly operating element after the safe setup checks rule out rack, pan, preheat, and airflow causes.
Confirm the exact model, element shape, rating, terminals, and safe installation procedure; disconnecting or testing oven wiring is qualified service work. - convection fan assembly
Consider this category only when the model uses convection, fan operation is absent or abnormal, and service confirms a fan or motor fault that explains the mode-specific uneven cooking.
Confirm the exact model and fan assembly, guard, blade, and electrical specification; do not remove the guard or touch the fan while powered or hot.
When checks do not resolve it
Need a professional?
Arrange qualified appliance service when the same cavity area burns across different foods and controlled setups, a fan or element behaves abnormally, the door does not close or seal, error codes or power trips occur, calibration does not correct a repeatable whole-oven offset, or uneven heating persists after the model-specific rack, pan, preheat, spacing, and airflow checks. Provide the model, modes, rack and bakeware arrangement, food pattern, photos, and any calibration or error observations.
Safety scope: This article supports safe observation, manual-approved rack and bakeware adjustments, complete preheat, and model-specific calibration only. A qualified technician handles live electrical diagnosis, elements, sensors, controls, fan assemblies, door switches, wiring, and damaged insulation.
Common questions
FAQ
Why does my oven burn food on one side?
First determine whether the burn follows the pan or stays in the same cavity location. Pan clearance, rack position, bakeware, preheat, and airflow can create uneven results; a fixed hot side across controlled tests is more concerning for an element, sensor, fan, door, or control issue.
Can incomplete preheating make food burn on top?
Yes. Whirlpool says that putting baked goods in before the oven fully preheats can expose them to excessive top heat, causing top browning while the bottom remains undercooked. Follow the model-specific preheat signal and avoid repeated door openings.
Does pan color affect uneven browning?
Yes. Dark, dull pans absorb more heat and can brown more, while shiny pans reflect heat and can brown less. Use the recipe and owner manual's recommended pan size and material, and do not change pan type and oven settings together during diagnosis.
Can I use foil to stop a burned edge?
Only use a small foil shield if the exact recipe and oven manual permit it; never cover an entire rack or the oven bottom. Whirlpool warns that full foil coverage can block airflow. Keep foil away from heating elements, vents, and cavity surfaces as directed by the manual.
Should I calibrate the oven when one corner burns?
Calibration is intended for a repeatable whole-oven hot or cold offset, not proof of a fixed corner fault. First control preheat, mode, rack, pan, spacing, and airflow. If the same area still burns, arrange service to inspect elements, sensors, fan, door, and controls rather than repeatedly changing the offset.
When does uneven heating need appliance service?
Arrange service for a fixed hot area after controlled tests, persistent uneven cooking after model-approved setup changes, an abnormal fan, damaged or continuously glowing element, door or seal damage, error code, breaker trip, smoke, or burning electrical odor. Do not open panels or reproduce an unsafe fault.
Read the exact guide
Official sources
- Samsung Wall Oven FAQsSamsung US · Samsung wall-oven FAQ used for general diagnostic branches; the installed oven's model manual controls its modes and calibration procedure.
- Oven Temperature Incorrect (Too Hot or Too Cold)Whirlpool Product Help · Whirlpool temperature guidance; calibration ranges and controls are model-specific and must not be generalized to another oven.
- How to Correct Uneven Baking or BrowningWhirlpool Product Help · Whirlpool manufacturer guidance used for general oven-baking mechanisms; the installed oven's own manual controls rack positions and settings.
- Uneven browning - RangeWhirlpool Product Help · Whirlpool range guidance used for broadly applicable baking setup controls; exact rack recommendations vary by oven model.
Community feedback
Share a repair observation
Share a plain-text repair observation. Accepted observations are published automatically; this page may take a moment to update.