
On this page
Start here
Quick answer
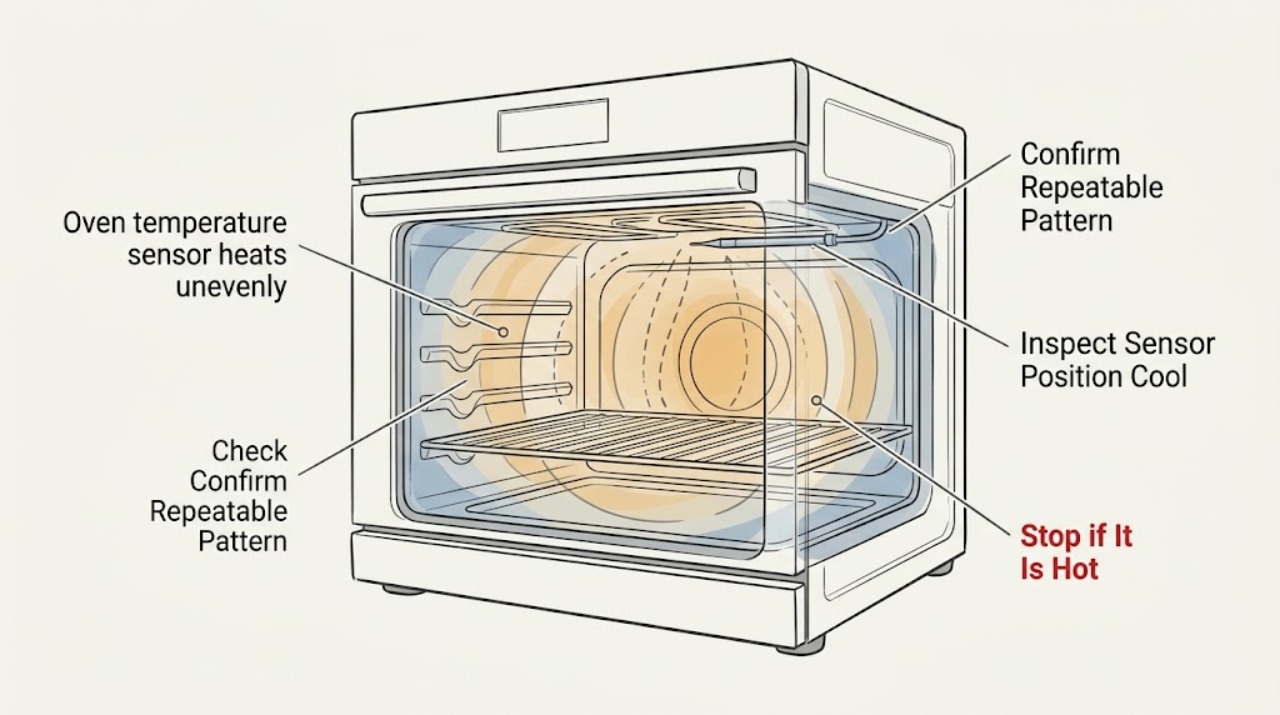
An oven that heats unevenly may have a temperature-sensor position or calibration problem, but the same symptom can come from the bake element, control, door seal, airflow, rack and pan placement, or normal temperature cycling. After the oven is completely cool, confirm the mode and rack setup, check that the door closes and the visible sensor has not been displaced if the manual permits that observation, and look for an exposed element or fan problem without touching anything. A portable thermometer at one location cannot by itself prove a sensor fault. Do not bend, disconnect, test, or replace the sensor; do not open panels, test live voltage, or work around gas. If the sensor is damaged or displaced, the oven repeatedly runs hot or cold, or there is smoke, gas odor, arcing, an abnormal flame, or a repeated breaker trip, stop using the appliance and arrange qualified service.
Before you begin
Safety first
- Owner checks are limited to cool visual observations, ordinary controls, user-accessible rack and pan placement, and visible seal or airflow checks. A qualified technician must handle sensor testing or removal, element and fan work, cabinet access, electrical measurements, controls, burners, igniters, and gas service.
Work through in order
Diagnostic checks
Use only checks that match the exact appliance or system and its official guide.
-
Check 1
With the oven cool, record the selected cooking mode and temperature, rack and pan position, which area cooks faster or slower, and whether the same pattern occurs on more than one ordinary bake. Follow the model manual for mode and rack use.
Expected result: Record a repeatable hot or cold area, a result that changes with rack or pan position, an overcrowded cavity, a wrong mode, or a problem that occurs in every position.
Next step: Correct only an obvious setup issue and repeat one supervised bake observation. If the same bias remains, continue with cool visual checks and arrange appliance service.
Stop if: Stop for smoke, sparks, arcing, burning odor, gas odor, abnormal flame, exposed wiring, or an unexpected hot control or door area.
Why this matters
Why: A pattern tied to rack, pan, crowding, or mode makes cooking setup and airflow more likely than a sensor fault. A repeatable bias across correct positions keeps sensor, calibration, element, control, door, and fan causes open.
-
Check 2
After complete cooling, look at the visible temperature sensor from its normal position without bending, touching, disconnecting, or removing it. Use the owner manual to decide whether a position observation is appropriate for this model.
Expected result: Record a sensor that appears positioned as specified, visibly displaced, bent, damaged, loose, contaminated, hidden, or inaccessible without tools.
Next step: Do not reposition, test, or replace the sensor unless the exact manual explicitly authorizes a safe tool-free adjustment. Request qualified service for any displacement, damage, looseness, or uncertainty.
Stop if: Do not bend the sensor, pull wires, remove a cover, or work inside the oven's control or rear area.
Why this matters
Why: A displaced or damaged sensor can affect the oven's temperature control, but a normal appearance does not prove the sensor or its circuit is accurate. A hidden or tool-access sensor is a service task, not a reason to open the cavity or control area.
-
Check 3
Record whether the oven consistently runs hot or cold relative to the recipe result and whether the display shows an error. Consult the model manual for any user-accessible temperature-offset setting; do not infer a sensor failure from one thermometer reading at one rack location.
Expected result: Record a repeatable temperature bias, a stable result after a permitted calibration adjustment, no calibration option, a persistent error, or results that vary by food and rack position.
Next step: Use only the calibration procedure in the model manual. If the bias remains, the control shows an error, or calibration requires opening the appliance, stop and arrange qualified service.
Stop if: Do not open the control area, disconnect the sensor, perform electrical measurements, or change settings beyond the model manual's user instructions.
Why this matters
Why: A repeatable bias can involve calibration, the sensor, the control, or heating output. Variation by food or rack can be normal heat distribution or setup. An error or a bias that remains after documented user settings increases the need for service diagnosis.
-
Check 4
From a safe position during one ordinary bake, note whether an exposed electric bake element activates according to the manual and whether a convection fan operates when that mode requires it. After cooling, check only visible vents and keep foil and coverings off the oven floor and racks.
Expected result: Record normal element cycling, a lasting dark element, visible break or blister, a fan that is absent or noisy when expected, blocked airflow, or a normal element and fan with persistent uneven results.
Next step: Remove only an obvious user-added covering after cooling. Stop using the oven and request service for a damaged or inactive element, abnormal fan, exposed wiring, or persistent uneven results.
Stop if: Do not touch the element or fan, insert tools through vents, remove a cover, or test the appliance live.
Why this matters
Why: A damaged or inactive element can cause uneven heating, while blocked airflow or a faulty fan can create uneven distribution. Normal cycling does not rule out a sensor, control, door, or output problem, and one observation cannot identify a specific part.
-
Check 5
After the oven is cool, inspect the door's ordinary closure and visible gasket for a tear, gap, displacement, or obstruction. During cooking, keep the door closed and use the light if available rather than repeatedly opening it.
Expected result: Record a firm closure and intact seal, a door that does not close, a visibly damaged gasket, an obstruction, or heat escaping at the door area.
Next step: Remove only an obvious obstruction after cooling. Request service for a damaged seal, loose door, hinge issue, or persistent heat loss; do not disassemble the door.
Stop if: Do not operate with a door that cannot close safely, a loose glass panel, exposed insulation, smoke, or an abnormal hot spot at the controls or door.
Why this matters
Why: A door that leaks heat can make the oven appear unable to maintain a uniform temperature and can change cooking results without a sensor fault. A sound seal shifts attention back toward sensor, calibration, element, fan, control, or setup causes.
-
Check 6
Prepare the appliance service request with the model if visible from ordinary access, electric or gas configuration, mode and temperature, repeatable hot or cold area, sensor position, calibration context, element and fan observations, door-seal condition, error display, and symptom history.
Expected result: Confirm that the record contains external observations only and that no sensor, element, panel, wiring, burner, igniter, or fan was disturbed.
Next step: Request qualified appliance diagnosis and let the technician check the sensor circuit, calibration, control, element output, airflow, door seal, and any gas or electrical components with model-specific procedures.
Stop if: Stop all user troubleshooting when the next step requires panel access, electrical testing, sensor removal, element removal, gas work, burner or igniter access, or fan work.
Why this matters
Why: The pattern helps a technician separate sensor or calibration from element, control, airflow, fan, door, power, and gas-related causes. It prevents a part from being selected from a symptom alone.
Use your observations
Decision map
Find the observation that best matches what you see, then follow the next safe action.
-
PATH 01Next step
What you see
Uneven cooking changes with rack or pan position, crowding, foil, door opening, or cooking mode, and the sensor appears correctly positioned.
Do this next
Correct the documented setup after cooling and repeat one normal bake. If the same area remains hot or cold with correct setup, request service for calibration, sensor, element, fan, and control checks.
-
PATH 02Next step
What you see
A repeatable temperature bias remains across correct rack positions, and the sensor is visibly displaced, damaged, or the permitted calibration context points to a persistent control error.
Do this next
Stop short of bending, testing, or replacing the sensor and arrange qualified service for sensor circuit, control, calibration, and heating-output diagnosis.
-
PATH 03Next step
What you see
An exposed bake element stays inactive or visibly damaged, or the convection fan is abnormal when expected, with uneven heating continuing after setup checks.
Do this next
Stop using the oven and request appliance service. Do not touch the element or fan, remove covers, or assume the sensor is the failed part.
-
PATH 04Next step
What you see
The door does not close or the visible gasket is torn, displaced, or obstructed, and heat retention is poor.
Do this next
Stop if the door or glass is unsafe and request service for the door and seal. Do not disassemble the door or continue relying on a sensor adjustment to compensate for heat loss.
-
PATH 05Next step
What you see
The appliance has gas odor or an abnormal flame, or there is smoke, burning odor, arcing, sparks, exposed wiring, or a repeated breaker trip.
Do this next
Stop using the oven, keep clear, and use appropriate emergency, gas, electrical, or appliance help from a safe location. Do not manually ignite, reset repeatedly, open panels, or attempt a repair.
Helpful context
Understand the symptom
A temperature sensor can influence control without being the only cause
The sensor reports cavity temperature to the control, so a displaced, damaged, or inaccurate sensor can contribute to a consistent hot or cold bias. Uneven food, however, can also result from rack position, crowded pans, blocked airflow, a door that does not seal, calibration, the bake element, or the convection fan. Electric elements also cycle on and off while maintaining temperature, so a dark element at one instant is not proof of failure. The useful distinction is whether the temperature bias repeats after the cooking setup is correct and the sensor appears positioned as the manual specifies.
Begin with cool, user-accessible checks
Let the oven cool completely before looking at the sensor, element, seal, or fan. Confirm the selected mode, temperature, rack, and pan arrangement from the model manual; leave room for airflow and keep the door closed during baking. A visible sensor should be observed only from its normal position and only if the manual permits it. Do not treat a single portable-thermometer reading as a control diagnosis, because readings vary with location and appliance tolerances. Persistent uneven heating after these checks deserves a service inspection.
Sensor diagnosis and replacement require a professional boundary
The appearance of a sensor does not confirm its resistance, wiring, connector, control input, or calibration. Removing it or opening the control area exposes hot, high-voltage, or gas-related hazards depending on the appliance. For gas ovens, do not manually ignite or disturb the burner or igniter. Whirlpool advises professional help when sensor repositioning does not resolve uneven heating; Samsung directs owners to repair when uneven cooking persists or a fan, sensor, or heating component needs inspection.
Safety boundary
Stop conditions
- Do not bend, disconnect, test, or replace the temperature sensor; do not remove elements, panels, controls, insulation, or wiring.
- For a gas oven, do not manually ignite or disturb the burner or igniter, and do not continue operation when gas odor or an abnormal flame is present.
- Stop using the oven for smoke, sparks, arcing, burning odor, exposed wiring, a repeated breaker trip, a loose fan, unsafe door, or persistent abnormal heating.
Only after diagnosis
Potential parts
- oven temperature sensor
Consider a sensor only if testing confirms a sensor, position, wiring, or calibration fault; uneven food or one thermometer reading does not prove the sensor is defective.
Confirm the exact oven model, sensor specification, connector, mounting, and control compatibility before sourcing a replacement; a technician should perform the replacement. - oven control or calibration component
Consider this category only if service testing shows the control cannot interpret the sensor or maintain the selected temperature after the sensor and element are ruled out.
Confirm model-specific control revision, connector, voltage, firmware or settings, and manufacturer-approved fit through qualified service before replacement. - oven bake element or convection fan component
Consider an element or fan only when a technician confirms inactive or damaged heating or circulation hardware; a sensor symptom can be caused by setup, door, or calibration instead.
Confirm the oven model, component design, electrical specification, mounting, and manufacturer-approved fit; do not remove or wire the component as a homeowner step.
When checks do not resolve it
Need a professional?
Call a qualified appliance technician when the oven repeatedly runs hot or cold, the sensor is displaced or damaged, calibration does not resolve the bias, or uneven heating continues after correct setup, airflow, element, fan, and door observations. Stop immediately and keep clear for smoke, sparks, arcing, burning odor, gas odor, abnormal flame, exposed wiring, an unsafe door, or a repeated breaker trip; use appropriate emergency, gas, electrical, or appliance help.
Safety scope: Owner checks are limited to cool visual observations, ordinary controls, user-accessible rack and pan placement, and visible seal or airflow checks. A qualified technician must handle sensor testing or removal, element and fan work, cabinet access, electrical measurements, controls, burners, igniters, and gas service.
Have this ready
- Give the technician the model if safely visible, electric or gas configuration, mode and temperature, rack and pan position, repeatable hot or cold area, sensor and calibration observations, element and fan response, door-seal condition, errors, and symptom history.
Common questions
FAQ
Can a bad oven temperature sensor cause uneven heating?
It can contribute to a repeatable hot or cold bias, especially if displaced or inaccurate, but airflow, rack placement, the element, fan, door seal, calibration, and control can produce similar results. The sensor needs testing before replacement.
Can I bend the sensor back into place?
Do not bend or disconnect it as a general step. Observe its position only after complete cooling and only as the model manual permits. A displaced or damaged sensor should be assessed by a qualified technician.
Is a portable oven thermometer enough to diagnose the sensor?
No. A reading at one location can differ from the oven's sensor and normal heat distribution. Use repeatable cooking results and the model's approved calibration guidance as context, then request service for a persistent bias.
Why is one side of the oven hotter?
Check rack and pan placement, spacing, airflow, door closure, and the selected mode first. If the same area remains hot or cold with correct setup, service should check the sensor, calibration, element, fan, door seal, and controls.
Does a dark bake element prove it is bad?
No. Electric bake elements cycle on and off during normal bake operation. A lasting dark section, visible crack or blister, or failure to activate during the manual's normal bake behavior needs qualified diagnosis.
When should I stop using the oven immediately?
Stop for smoke, sparks, arcing, burning odor, gas odor, an abnormal flame, exposed wiring, an unsafe door, a loose fan, or a repeated breaker trip. Keep clear and use appropriate emergency, gas, electrical, or appliance help.
Read the exact guide
Official sources
- Samsung Wall Oven FAQs | Samsung USSamsung · Samsung wall-oven FAQ used for general cooking setup and sensor or service context; controls and procedures vary by model.
- Troubleshooting guide for Samsung built-in ovenSamsung · Samsung built-in oven guidance used for general heat-retention and fan observations; the user's model guide takes precedence.
- Electric Range Operation of the Elements During BakeGE Appliances · GE Appliances support guidance used only to explain normal electric element cycling; it is not a diagnosis or universal model procedure.
- What to Do If Your Gas Oven Is Not HeatingWhirlpool · Whirlpool gas-oven guidance used to separate electric sensor and element observations from gas appliance service; model instructions govern.
- 6 Reasons Why Your Oven Is Not Baking ProperlyWhirlpool · Whirlpool consumer guidance used for general uneven-baking checks; the exact model manual and service procedures govern any repair.
Community feedback
Share a repair observation
Share a plain-text repair observation. Accepted observations are published automatically; this page may take a moment to update.