
On this page
Start here
Quick answer
Start with a safe visual record rather than filling or removing the tile. Map whether the crack is inside one tile, follows grout, continues across several tiles, or is accompanied by edge height, moisture, or movement changes. Walk normally over the area without striking or prying and note any rocking or changed sound; photograph dampness and progression without drilling or cutting. A single stable-looking tile crack may be a localized finish problem, but repeated aligned cracks, a widening or offset edge, moisture, a loose-feeling area, or a trip hazard needs a flooring professional to assess the tile assembly and underlying floor. Do not demolish the floor, cut tile, grind grout, or make dust-producing repairs yourself.
Before you begin
Safety first
- The reader should limit work to visual and ordinary-use observations. Do not demolish the floor, cut tile, grind grout, drill, pry, remove hidden layers, or create dust to test a theory.
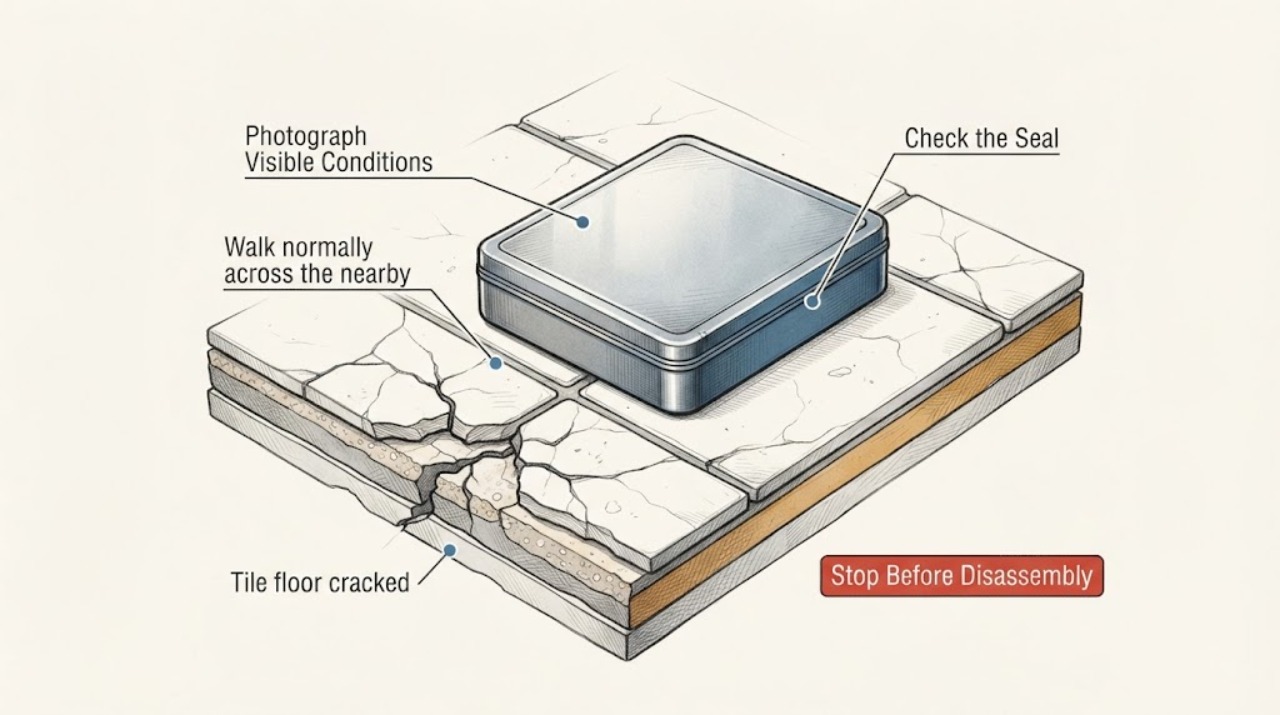
Work through in order
Diagnostic checks
Use only checks that match the exact appliance or system and its official guide.
-
Check 1
Photograph the crack from above and from each end, then trace its visible path with your eyes without touching it; note whether it stays inside one tile, follows a grout joint, reaches a tile edge, or continues through several tiles.
Expected result: The line is isolated to one tile, follows grout, crosses tile boundaries, branches, or forms a similar line in a repeated row or room transition.
Next step: Record the room, tile count affected, nearby transitions, and a reference photo, then send the pattern to a flooring professional for an assessment plan.
Stop if: Stop if the crack creates a sharp edge, loose fragment, or immediate trip hazard; block the area from foot traffic without pressing on the tile.
Why this matters
Why: An isolated line narrows the service location. A repeated, aligned, branching, or boundary-crossing pattern raises the possibility that the flooring professional needs to inspect the tile assembly or a movement/joint condition rather than treat one surface line alone.
-
Check 2
Walk normally across the nearby floor only if it is safe, without jumping, deliberately stomping, tapping, striking, or prying, and listen for an unusual change in sound or feel compared with an adjacent intact area.
Expected result: The area feels stable and sounds consistent, or it feels loose, rocks, flexes, or has a distinct changed sound during ordinary walking.
Next step: Note the exact tile and whether the change is localized or repeated; keep traffic light and ask the professional to assess the area without destructive testing at the first visit.
Stop if: Stop walking the area if the tile moves, an edge catches footwear, the floor is wet, or the surface could break under normal use.
Why this matters
Why: A changed feel or sound can indicate that the tile or setting assembly needs closer professional inspection, but a normal walk cannot prove that the assembly is sound.
-
Check 3
Inspect the crack and nearby baseboard, threshold, plumbing fixture, or exterior-facing edge in ordinary light for dampness, staining, swelling, or a recent water event; do not probe the crack or remove sealant.
Expected result: The area is dry with no nearby change, has a visible stain or damp edge, or becomes damp after a known spill, leak, cleaning event, or weather event.
Next step: Photograph the location and timing, stop the nearby water source if it is a safe user-level valve or spill response, and tell the flooring or appropriate leak professional what changed.
Stop if: Stop if water is near electrical equipment, the floor is saturated, a ceiling or wall is actively leaking, or the source cannot be safely identified.
Why this matters
Why: Moisture changes the priority and may affect the setting layers or adjacent materials. A dry surface does not rule out hidden moisture, while a repeated damp pattern needs the source assessed before cosmetic repair.
-
Check 4
View the tile edge in low-angle light from a standing position and compare it with the adjacent tile without touching, pressing, or trying to level it.
Expected result: The edges appear flush, one edge is visibly raised or chipped, the tile is displaced, or the grout around it is separating.
Next step: Keep people away from a raised or sharp area, photograph the edge, and request a professional assessment of the tile and surrounding assembly.
Stop if: Do not sand, grind, cut, lift, or press the tile to make the edge flush.
Why this matters
Why: A visible height change or separation increases trip risk and suggests that a simple surface fill may not be appropriate. A flush edge is useful information but does not identify the hidden cause.
-
Check 5
Compare a new photograph taken from the same safe position with an earlier photograph after normal use or a later moisture event; do not scratch, mark, or widen the crack to test it.
Expected result: The line appears unchanged, has extended or branched, has a new adjacent crack, or cannot be compared reliably.
Next step: Share the dated images and any event that preceded the change, and ask whether the professional recommends a localized tile evaluation or a broader floor inspection.
Stop if: Stop normal use if progression creates movement, a sharp edge, loose pieces, or a trip hazard.
Why this matters
Why: An extending or branching pattern deserves prompt professional assessment. An unchanged image supports routine scheduling only if there is no moisture, movement, sharp edge, or access concern; it does not prove the crack is harmless.
Use your observations
Decision map
Find the observation that best matches what you see, then follow the next safe action.
-
PATH 01Safety boundary
What you see
One tile has a stable-looking line, no moisture, no movement during normal walking, and no sharp or raised edge.
Do this next
Schedule a flooring professional for a localized assessment and ask what repair method is appropriate after the tile and substrate are identified.
Why this path and its safety boundary
Safety stop: Do not fill, grout, or replace the tile based on appearance alone if the line changes or moisture appears.
-
PATH 02Safety boundary
What you see
The crack follows a joint, crosses multiple tiles, branches, or repeats in an aligned pattern.
Do this next
Request an assessment of the tile assembly, joints, and substrate conditions rather than a single-tile cosmetic patch.
Why this path and its safety boundary
Safety stop: Do not make a structural diagnosis or cut through the floor to investigate.
-
PATH 03Safety boundary
What you see
The tile rocks, the edge is raised or sharp, or a fragment is loose.
Do this next
Restrict foot traffic and arrange flooring service with close-up and room-context photographs.
Why this path and its safety boundary
Safety stop: Do not press, tape down, grind, or remove the loose piece as a temporary repair.
-
PATH 04Safety boundary
What you see
Dampness, staining, swelling, or a recurring water event is near the crack.
Do this next
Address the suspected water source with the appropriate professional before finalizing a tile repair plan, and document when the moisture appears.
Why this path and its safety boundary
Safety stop: Stop if water reaches electrical equipment or the source requires opening walls, floors, or plumbing.
-
PATH 05Safety boundary
What you see
Repair would require tile demolition, cutting, grinding, dust-producing work, or inspection of hidden layers.
Do this next
Use a qualified flooring professional who can select the assessment and dust-control method for the installation.
Why this path and its safety boundary
Safety stop: The reader should not demolish the floor, cut tile, grind grout, or disturb the substrate.
Helpful context
Understand the symptom
A cracked tile is only the visible part of a layered floor. The tile, grout, setting material, underlayment, and substrate can respond differently to moisture, temperature, loading, and movement. The same-looking line can therefore represent a localized tile defect, a grout or joint issue, moisture at the edge, or movement that needs a broader assessment. Observation can narrow the service request, but it cannot identify the hidden layer from the surface alone.
Keep the inspection non-destructive. Use normal lighting and a camera, walk carefully without deliberately loading the crack, and avoid tapping, prying, lifting edges, drilling, grinding, cutting, or removing grout. Keep the area dry and marked as a trip hazard if an edge is raised.
Repair material should follow a cause assessment. A rigid filler may hide a line temporarily while the underlying movement or moisture remains. If a professional finds that the crack is moving, crosses a joint, or is associated with a loose or damp assembly, the repair plan may need to address more than the visible tile.
Use the checks below to describe the pattern and urgency to a flooring professional. The goal is a safe handoff, not a do-it-yourself tile replacement.
Only after diagnosis
Potential parts
- tile repair kit
Consider a repair kit only after a flooring professional confirms that the crack is a suitable localized surface repair and that the surrounding assembly is stable and dry.
Confirm tile material, color, finish, joint condition, moisture exposure, and the manufacturer's application limits before selecting a kit. - grout repair
Consider grout material only when the visible defect is confirmed to be confined to a grout joint rather than the tile or underlying floor.
Match the existing grout type and joint conditions with professional guidance; do not use grout to bridge a moving or moisture-affected crack. - tile leveling tool
Consider a leveling tool only if a professional selects it for an approved installation or replacement plan; it is not a diagnostic or a way to force a cracked tile flat.
Confirm the tile format, setting method, substrate condition, and professional installation instructions before use.
When checks do not resolve it
Need a professional?
Safety scope: The reader should limit work to visual and ordinary-use observations. Do not demolish the floor, cut tile, grind grout, drill, pry, remove hidden layers, or create dust to test a theory.
Have this ready
- Give the room and tile location, crack pattern and length description without unsupported measurements, dated photos, sound or movement observations from normal walking, edge condition, moisture timing, recent spills or work, and any access restrictions.
Common questions
FAQ
Does one cracked floor tile mean the foundation is failing?
No. A surface crack alone cannot identify the layer or cause. Record whether it crosses tiles or joints, changes over time, feels loose, or appears with moisture, then have a flooring professional assess the assembly before making a broader conclusion.
Should I fill a cracked tile or grout line right away?
Not before checking for movement, moisture, raised edges, and a repeated pattern. A filler may conceal the visible line while leaving an underlying cause unchanged, and a moving or damp area needs a different assessment.
Can I cut out and replace one cracked floor tile myself?
This workflow does not recommend demolition or tile cutting. Cutting and grinding can create hazardous dust and can damage adjacent tiles or hidden services. Ask a qualified flooring professional to determine the safe repair scope.
Read the exact guide
Official sources
- ACI 302.1R-04 Guide for Concrete Floor and Slab ConstructionAmerican Concrete Institute · Used cautiously for a concrete substrate context only: the guide says some slab cracking can occur from normal volume change and that a visible crack alone does not establish a design or construction failure. It is not a tile-repair procedure.
- Silica, Crystalline: ConstructionOccupational Safety and Health Administration · Supports keeping dust-producing tile cutting or grinding out of the user-level steps and referring such work to a properly equipped professional; the page is not a tile diagnosis guide.
- ACI RAP-2: Crack Repair by Gravity Feed with ResinAmerican Concrete Institute · Used only to support cause assessment before repair and the distinction between stable and moving cracks in concrete; it does not authorize a homeowner to repair a tiled floor or use resin.
Community feedback
Share a repair observation
Share a plain-text repair observation. Accepted observations are published automatically; this page may take a moment to update.