
On this page
Start here
Quick answer
Treat a tile that moves, clicks, sounds different, or has opening grout as an inspection issue rather than a quick grout patch. From a safe standing position, compare the sound and feel with nearby tiles during ordinary walking, inspect grout and edges, and document whether the pattern is isolated, clustered, or near a wet area. Do not lift, pry, strike, cut, grind, demolish, or promise a substrate diagnosis. Keep water away from the area and have a flooring professional assess the tile bond, underlayment, moisture, and repair scope.
Before you begin
Safety first
- Do not lift, pry, strike, cut, grind, demolish, drill, or remove tiles; do not disturb mold, contaminated water, asbestos-suspect material, structural elements, or concealed services.
Work through in order
Diagnostic checks
Use only checks that match the exact appliance or system and its official guide.
-
Check 1
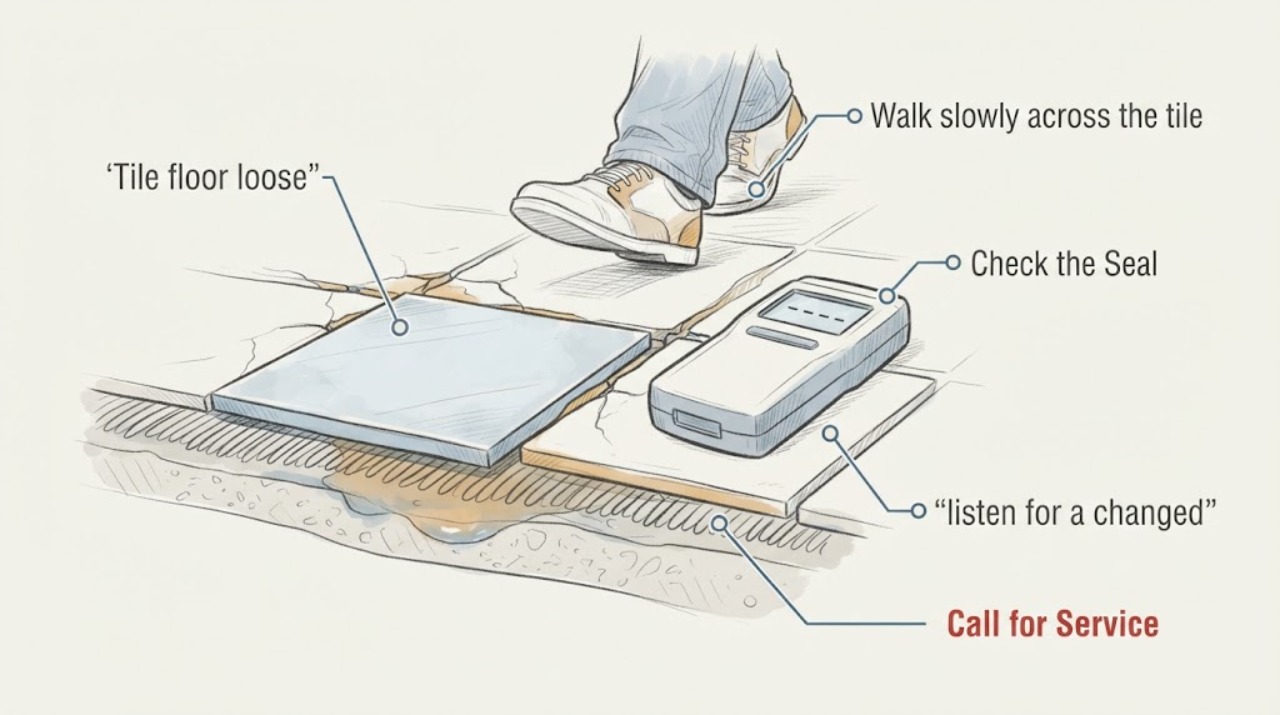
Walk slowly across the tile in ordinary use, comparing the suspected tile with adjacent tiles; do not stomp, jump, place concentrated weight on it, or use a tool to test it.
Expected result: Record whether the tile feels stable, flexes or clicks under normal walking, feels raised or lower than its neighbors, or cannot be safely approached because of a broken edge.
Next step: Mark the location on a simple sketch and provide photos and the walking observation to a flooring professional; keep traffic light until assessed.
Stop if: Stop walking the area if the tile shifts, cracks, feels sharp, or the floor is wet or unsafe.
Why this matters
Why: Movement or a repeatable change in feel supports a professional inspection, but it does not identify whether the tile bond, underlayment, or subfloor is responsible. A stable feel does not rule out a hollow bond or grout issue.
-
Check 2
From standing height, listen for a changed or hollow sound during a light normal footstep and compare it with nearby tiles without striking, drilling, or removing any tile.
Expected result: Record whether the sound is isolated, follows a line or cluster, or appears across a room, and whether the sound is accompanied by movement, a crack, or a visible height difference.
Next step: Photograph and map the sound pattern and request an inspection that considers the tile, grout, substrate, and moisture history together.
Stop if: Stop if testing would require tapping hard, moving furniture, kneeling on a damaged tile, or disturbing a crack or loose edge.
Why this matters
Why: A sound pattern can help a professional prioritize locations, but sound alone cannot establish a failed bond or structural defect. A broad pattern changes the scope from one-tile repair to assembly and moisture assessment.
-
Check 3
Inspect visible grout joints, tile edges, transitions, baseboards, and nearby fixtures without scraping grout, prying an edge, lifting trim, or applying a patch.
Expected result: Record hairline or open grout cracks, missing grout, tenting or lifted edges, chipped tile, lippage, a gap at a transition, or no visible surface defect.
Next step: Keep the area dry, photograph the defect with a wider room view, and ask the flooring professional whether the adjacent field and movement joints need assessment.
Stop if: Stop if an edge is sharp, the tile is tenting, grout is falling into a void, or the floor may collapse or expose a substrate.
Why this matters
Why: Cracks and gaps can accompany movement or moisture, while an intact surface can still conceal debonding. The location relative to walls, transitions, and wet fixtures helps the professional decide whether movement or water deserves priority.
-
Check 4
Inspect accessible areas around the loose tile for water marks, dampness, efflorescence-like residue, musty odor, swollen baseboards, or a recent leak, spill, flood, or persistent wet cleaning without probing below the surface.
Expected result: Record whether the floor is dry, recently wet, continuously damp, stained, or affected only after a particular plumbing or weather event.
Next step: Address the water source through the appropriate plumbing or building professional and ask the flooring professional to include moisture assessment before any replacement or resealing.
Stop if: Stop if there is standing water, sewage or contaminated water, visible mold, a soft floor, or water near electricity; keep clear and arrange professional service.
Why this matters
Why: Moisture may affect the underflooring or tile bond and can make a cosmetic grout repair temporary. A dry surface does not prove the substrate is dry, and a white residue does not prove a specific source.
-
Check 5
Map how many tiles show the sound, feel, grout, or moisture clue and note their position relative to doorways, walls, transitions, wet rooms, and heating or plumbing zones without moving cabinets or appliances.
Expected result: Record whether the issue is one tile, a connected cluster, a perimeter strip, a straight line, or a broad field, and whether nearby rooms or the room below show related moisture signs.
Next step: Give the map, photographs, age of the installation if known, and any leak or remodeling history to a flooring contractor for a scoped inspection.
Stop if: Stop if mapping requires demolition, lifting flooring, entering a crawlspace, climbing, or disturbing a potentially hazardous material.
Why this matters
Why: An isolated symptom may support a localized inspection, while a cluster or room-wide pattern can indicate assembly movement, substrate conditions, or moisture that a single tile repair would not solve. The map is evidence, not a structural conclusion.
Use your observations
Decision map
Find the observation that best matches what you see, then follow the next safe action.
-
PATH 01Safety boundary
What you see
One tile feels loose or sounds different, the grout is localized, and the area is dry with no edge or safety hazard.
Do this next
Request a localized flooring inspection and ask whether the tile bond and substrate support a professional repair.
Why this path and its safety boundary
Safety stop: Do not inject, grout, or seal the area before the bond and moisture condition are confirmed.
-
PATH 02Safety boundary
What you see
Several tiles form a cluster or line, or the floor moves or sounds different across a broad area.
Do this next
Request an assembly-level flooring assessment that considers substrate movement, underlayment, transitions, and moisture history.
Why this path and its safety boundary
Safety stop: Do not assume replacing one tile will correct a broad pattern.
-
PATH 03Safety boundary
What you see
Grout is opening, tile edges are lifting, or tenting or height changes are visible.
Do this next
Keep traffic and furniture off the area and arrange professional inspection before any grout or surface repair.
Why this path and its safety boundary
Safety stop: Do not pry, lift, strike, or cut the tile to investigate.
-
PATH 04Safety boundary
What you see
Moisture, staining, efflorescence-like residue, odor, or a recent leak is present.
Do this next
Correct the water source and have the floor and underflooring assessed and dried before selecting a repair.
Why this path and its safety boundary
Safety stop: Do not cover damp materials or use sealant to hide an active moisture problem.
-
PATH 05Safety boundary
What you see
The suspected floor is wet, contaminated, visibly moldy, sharp, or near a structural or electrical hazard.
Do this next
Keep people clear and request appropriate flooring, water-damage, plumbing, or building assessment based on the observed hazard.
Why this path and its safety boundary
Safety stop: Do not clean contaminated water, disturb mold, enter a crawlspace, or perform demolition as a homeowner check.
Helpful context
Understand the symptom
A loose tile can result from a local bond problem, movement in the tile assembly, moisture affecting the substrate, or a broader installation condition. A hollow or changed sound is a clue, not proof of failure, and grout cracking can reflect movement without identifying the exact layer that moved. The useful first step is to map the pattern without disturbing the floor.
Walk slowly over the area in normal footwear and compare it with adjacent stable-looking tiles; do not stomp or load one tile deliberately. Photograph the whole room and close details of grout, edges, stains, and transitions. Keep furniture and water away from a tile that visibly shifts or has a sharp broken edge.
Moisture changes the repair decision. EPA guidance for hard-surface flooring emphasizes drying the floor and checking whether the underflooring is dry, while EPA remodeling guidance says water and moisture problems should be addressed before work proceeds. Do not cover a damp or stained floor with new grout, sealant, or replacement material.
A repair kit is conditional. A professional may recommend a localized repair when the tile and substrate are sound enough, but a kit cannot correct movement, a wet underlayment, widespread debonding, or an unresolved plumbing or structural issue.
Only after diagnosis
Potential parts
- tile-repair-kit
Consider this only if a flooring professional confirms a localized cosmetic or bond repair is appropriate and the substrate is dry and stable.
Match the tile type, grout, finish, and repair method; a kit cannot correct movement, wet underflooring, widespread debonding, or structural conditions. - moisture-meter
Consider this only as part of a professional moisture assessment when the surface looks dry but a leak or damp underflooring is suspected.
Readings depend on material, calibration, and method; do not use one consumer reading as proof that a floor is structurally sound or ready to cover.
When checks do not resolve it
Need a professional?
Call a flooring professional when a tile moves, clicks, sounds different, has opening grout, shows moisture clues, or is part of a wider pattern.
Safety scope: Do not lift, pry, strike, cut, grind, demolish, drill, or remove tiles; do not disturb mold, contaminated water, asbestos-suspect material, structural elements, or concealed services.
Have this ready
- Provide the floor map, photos, sound and walking observations, grout and edge condition, moisture or leak history, installation age if known, and any related room or transition clues.
Common questions
FAQ
Does a hollow sound prove that a floor tile is loose?
No. A sound difference is a clue to map and compare, not proof of a failed bond or substrate. Combine it with movement, grout, edge, pattern, and moisture observations and have a flooring professional assess the assembly.
Can I add grout around a moving tile?
Do not use new grout to hide movement or moisture. The tile bond, adjacent joints, and underflooring should be assessed first; a surface patch may fail or conceal the condition that needs repair.
Why does moisture matter if ceramic tile itself looks dry?
Water can remain in grout, adhesive, underlayment, or subfloor layers even when the tile face looks dry. Address the water source and have the floor assessed before covering or repairing it.
Read the exact guide
Official sources
- Moisture Control Guidance for Building Design, Construction and MaintenanceU.S. Environmental Protection Agency · Used only for the caution that apparently dry surfaces may not prove a substrate is dry and that wet materials should be dried before covering.
- Mold Course Chapter 4: General Remediation IssuesU.S. Environmental Protection Agency · Used for moisture branches and drying boundaries, not as a tile-bond diagnosis or demolition instruction.
- Remodeling Your Home and Indoor Air QualityU.S. Environmental Protection Agency · Used to support correcting water and moisture problems before covering or repairing a floor; it does not establish the cause of this loose tile.
Community feedback
Share a repair observation
Share a plain-text repair observation. Accepted observations are published automatically; this page may take a moment to update.