
On this page
Start here
Quick answer
If an air conditioner still does not cool after an evaporator coil was replaced, treat the timing as a post-installation commissioning or handoff issue first. Record whether cooling never returned or worked briefly, then check only the thermostat, filter, registers, visible ice, visible condensate, and outdoor-unit response from a safe position. Do not open panels, handle refrigerant, measure pressure or voltage, or keep running a system that is iced, leaking, arcing, smoking, or tripping a breaker. Have the original installer or another qualified HVAC professional verify airflow, coil fit and air sealing, condensate drainage, refrigerant charge and leak status, line connections, controls, and system operation; refrigerant service in the United States is restricted to appropriately certified technicians.
Before you begin
Safety first
- Keep the system off for ice with water, pooled condensate near electrical equipment, smoke, arcing, burning odor, hot electrical parts, damaged wiring, refrigerant release, or repeated breaker trips. Do not open panels, handle refrigerant, touch fans, reset a tripping breaker repeatedly, or perform energized checks.
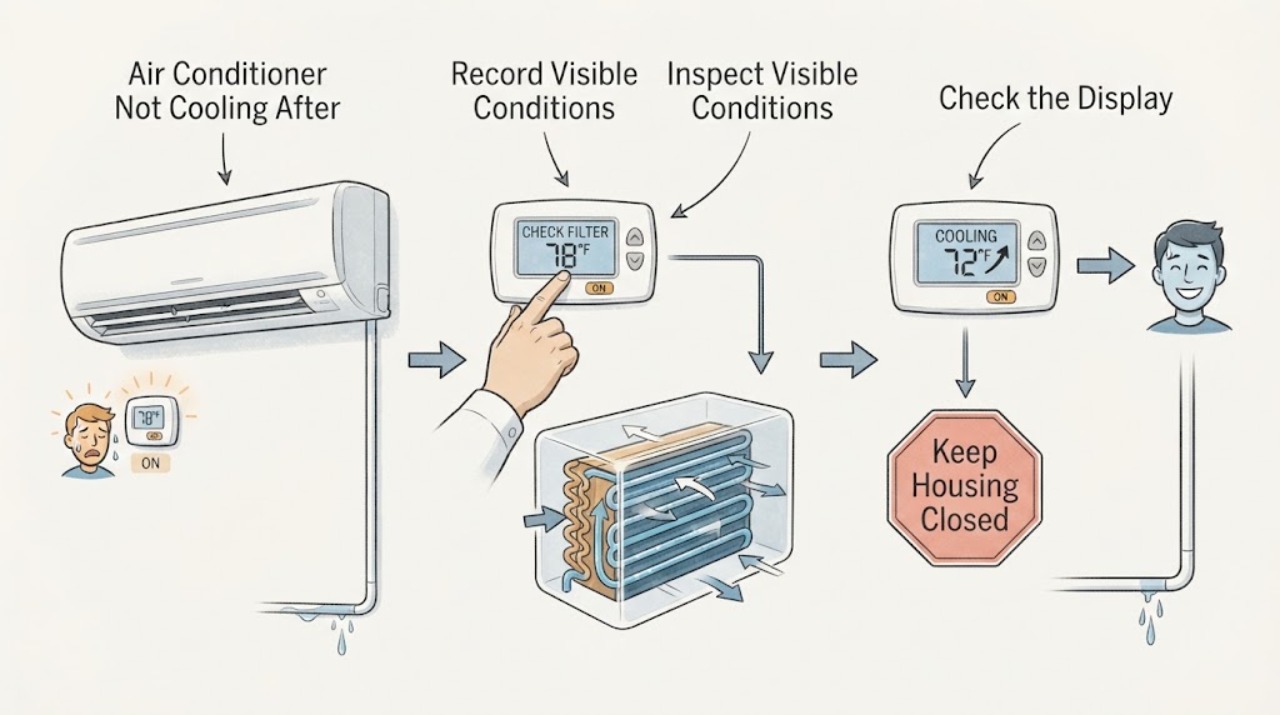
Work through in order
Diagnostic checks
Use only checks that match the exact appliance or system and its official guide.
-
Check 1
Record the exact replacement date and the first time cooling failed. Note whether the system never cooled after the work, cooled briefly and then warmed, or became warm only after a later event. Record the thermostat setting, indoor temperature, airflow strength, visible ice, water, noises, and any message without removing a cover.
Expected result: Cooling never returned, cooling returned briefly, or the system degraded after a separate event such as a filter change, storm, drain overflow, or breaker trip.
Next step: Send the timeline and photos of only safe visible areas to the original installer and request a post-replacement diagnostic visit. Keep the system off if a safety stop condition is present.
Why this matters
Why: No cooling immediately after the work raises an installation or commissioning concern; a delayed change leaves room for a leak, airflow, condensate, control, or unrelated equipment fault.
-
Check 2
At the thermostat, confirm Cooling mode, a setpoint below the room temperature, a normal fan setting, and any displayed alert. From the room, verify that several supply registers are open and that the return grille is not visibly blocked; do not change installer setup values or open the thermostat wiring.
Expected result: The control is not calling for cooling, an alert is shown, the setpoint is not below room temperature, or the call is present but airflow remains warm or weak.
Next step: Correct only an obvious user setting and observe one normal call. If the call is present and cooling does not return, leave service settings unchanged and arrange HVAC service.
Why this matters
Why: A control setting can prevent a call, while a valid call with warm or weak airflow moves the investigation toward air delivery, ice, condensate, outdoor operation, or service-level equipment checks.
-
Check 3
With the system off, inspect the user-accessible air filter and replace or clean it only according to the equipment instructions. Look at the filter frame, return grille, and registers for obvious blockage; keep all equipment covers closed.
Expected result: The filter is visibly loaded, the return path is blocked, airflow is weak, or the filter is clean but the rooms still receive little air.
Next step: Correct the accessible filter issue and make one supervised cooling call only if there is no ice, water, odor, or electrical warning. If airflow stays weak or ice appears, turn cooling off and call the installer or HVAC professional.
Why this matters
Why: Restricted airflow can reduce cooling and contribute to a frozen evaporator coil. A clean filter does not rule out a blower, duct, coil-fit, or air-sealing problem after replacement.
-
Check 4
From a safe exterior position, look for frost or ice on visible tubing or the indoor-unit area and for condensate collecting where it should not. If ice is present, switch cooling off and leave the fan in the mode allowed by the equipment instructions so the coil can thaw naturally; do not apply heat or chip the ice.
Expected result: Ice is present, airflow is falling, water appears during thaw, or no ice or water is visible.
Next step: Allow natural thaw with cooling off and arrange service to identify the cause before resuming normal cooling. Have the technician check airflow, coil installation, charge or leak status, and condensate drainage.
Why this matters
Why: A frozen coil reduces cooling and can follow restricted airflow or low refrigerant pressure. Water during thaw can expose a drain or pan problem; no visible ice only means that this particular clue was not observed.
-
Check 5
During one ordinary thermostat call, observe the outdoor unit from a safe distance without touching the grille or removing a panel. Note whether the outdoor fan starts, whether the unit remains silent, and whether the indoor blower supplies air; stop the call if the breaker trips, a harsh sound, smoke, or an odor appears.
Expected result: The outdoor unit does not start, the indoor blower runs but the outdoor unit is silent, the outdoor fan runs but the air stays warm, or both sides run with normal airflow but no cooling.
Next step: Do not reset a repeatedly tripping breaker or reach into the unit. Leave it off and give the installer the observation so a qualified technician can check controls, connections, charge, leak status, and system performance.
Why this matters
Why: A no-start or repeat trip can indicate an electrical or control fault. Outdoor operation with warm air can still involve refrigerant, coil connection, airflow, compressor, or other service-level causes.
-
Check 6
From the closed exterior, look for a wet floor, a full visible drain pan, a kinked or disconnected condensate tube, or water staining near the indoor equipment. Do not move the unit or disconnect a drain line; keep hands and electrical items away from pooled water.
Expected result: Water is pooling, the drain pan is full, a tube is visibly out of place, or the area is dry.
Next step: Turn cooling off for active overflow or water near electrics and request HVAC service. If the area is dry but cooling is still absent, include the dry observation with the post-replacement timeline rather than treating drainage as confirmed.
Why this matters
Why: A condensate restriction, float protection, or thawing ice can stop cooling or create water damage. A dry exterior does not rule out a concealed drain or coil issue.
-
Check 7
Prepare the service handoff: model and serial labels that are safely visible, replacement invoice or work description, refrigerant label if visible, thermostat symptoms, filter date, ice or water photos, and whether cooling changed immediately or later. Ask the original installer to review the complete post-replacement commissioning record.
Expected result: The installer can confirm the replacement scope and commissioning data, or the work record is incomplete and the cause remains unknown.
Next step: Request qualified HVAC service, preferably from the original installer while any workmanship or parts coverage applies. In the United States, ensure refrigerant work is performed by an appropriately EPA-certified technician.
Why this matters
Why: Airflow, charge, duct performance, and refrigerant-circuit work require measurements and model-specific judgment that cannot be established from a safe visual check.
Use your observations
Decision map
Find the observation that best matches what you see, then follow the next safe action.
-
PATH 01Next step
What you see
The air conditioner never cooled after the evaporator replacement.
Do this next
Return to the original installer with the work date and symptom timeline. Keep panels closed and do not authorize another part swap until airflow, charge, leak status, drainage, controls, and cooling performance are documented.
Why this path and its safety boundary
Why it matters: The timing makes incomplete commissioning, incorrect coil fit or air sealing, airflow setup, condensate protection, control wiring, or refrigerant-circuit work an important first service path.
-
PATH 02Next step
What you see
The system cooled briefly after replacement and then stopped cooling.
Do this next
Turn cooling off for ice, water, odor, or electrical symptoms and request a qualified diagnostic visit. Provide the period of normal cooling and any later event.
Why this path and its safety boundary
Why it matters: A leak, charge loss, new airflow restriction, condensate event, control fault, or another system failure is possible; the replacement date alone does not identify the cause.
-
PATH 03Next step
What you see
Airflow is weak or ice is visible after the coil work.
Do this next
Turn cooling off and allow natural thaw. Correct only an obvious filter issue, then have HVAC service identify the root cause before normal operation resumes.
Why this path and its safety boundary
Why it matters: Restricted filter or duct airflow, blower performance, coil fit, or low refrigerant pressure can reduce cooling and freeze the evaporator coil.
-
PATH 04Next step
What you see
Water is pooling near the indoor unit or appearing during thaw.
Do this next
Switch cooling off, keep clear of pooled water near electrical equipment, and request HVAC service. Do not move the unit or disconnect a drain line as a test.
Why this path and its safety boundary
Why it matters: A condensate drain or pan problem, float protection, or thawing ice may be involved, and pooled water can create equipment and electrical risk.
-
PATH 05Next step
What you see
The outdoor unit is silent, will not start, or trips the breaker during a call.
Do this next
Leave the system off and arrange qualified HVAC or electrical service. Do not keep resetting the breaker, touch the fan, or open the cabinet.
Why this path and its safety boundary
Why it matters: Power, controls, fan, compressor, or another electrical fault is possible; a repeat trip is a protection event.
-
PATH 06Next step
What you see
Both sides run and airflow is normal, but the house remains warm with no visible ice or water.
Do this next
Stop changing settings and ask the installer to verify the replacement and full-system performance, including charge, leak check, airflow, duct condition, and controls.
Why this path and its safety boundary
Why it matters: Thermostat demand, refrigerant charge or leak status, coil connection, metering, compressor performance, duct leakage, or commissioning may need professional measurement.
-
PATH 07Next step
What you see
Smoke, arcing, burning odor, an unusually hot plug or disconnect, damaged wiring, refrigerant release, or repeated breaker trips is observed.
Do this next
Stop immediately, keep people away, leave the equipment off, and obtain emergency help or qualified HVAC/electrical service as appropriate. Do not approach a fire, operate electrical switches in a hazardous area, or attempt a repair.
Why this path and its safety boundary
Why it matters: This is a fire, shock, pressure, or exposure hazard rather than a cooling diagnosis.
Helpful context
Understand the symptom
Why the replacement date changes the diagnosis
A system that was warm immediately after the evaporator coil was replaced has a different starting point from one that cooled normally for days and then became warm. The first pattern warrants a return visit for installation and commissioning checks; the second can also indicate a new leak, airflow restriction, drain problem, control fault, or another unrelated failure. Write down the replacement date, first cooling attempt, indoor temperature, thermostat setting, airflow, ice or water, and any work paperwork before contacting the installer. Do not assume that replacing the coil proves the coil itself is the only cause.
Separate air, water, refrigerant, and electrical clues
Warm air with weak airflow points toward the filter, return path, blower, ductwork, ice, or an air-sealing issue. Normal airflow with warm air points more toward thermostat demand, the outdoor unit, refrigerant circuit, coil fit, or controls. Water at the indoor unit points toward condensate drainage or a thawing freeze condition. A silent outdoor unit, repeated breaker trip, burning odor, or visible electrical damage is an electrical or equipment safety event, not a reason to continue testing.
Only perform closed-exterior checks
The safe homeowner checks below do not require removing an equipment cover. A replacement coil can involve sealed refrigerant connections, airflow transitions, a condensate pan or drain, and controls that need model-specific service procedures. Refrigerant recovery, charging, leak testing, brazed or flare connection work, wiring work, pressure readings, and cabinet access belong with a qualified HVAC professional. In the United States, EPA Section 608 rules require certification for technicians who service equipment that could release regulated refrigerants or most substitute refrigerants.
Use the installer handoff as the next diagnostic step
Ask the installer to document what was replaced, the model and size of the coil, the refrigerant type, the measured airflow, the charge and leak check, the condensate drain test, and the final cooling operation. ENERGY STAR recommends verifying system airflow, proper refrigerant charge, and duct performance during quality installation. A clear record lets the service visit focus on evidence instead of another blind part swap.
Safety boundary
Stop conditions
- Stop cooling for visible ice, falling airflow, water near the indoor unit, or an overflowing condensate area; allow only natural thaw and arrange diagnosis before restarting normal cooling.
- Stop immediately for smoke, arcing, burning odor, an unusually hot plug or disconnect, damaged electrical parts, a refrigerant release, or repeated breaker trips. Keep clear and obtain qualified or emergency help.
- Do not open equipment panels, reach into a fan, perform electrical or pressure measurements, handle refrigerant, leak-test or charge the circuit, loosen sealed connections, or remove the replacement coil as a homeowner check.
- Do not keep changing thermostat settings or repeatedly restart a system that never cooled after the work. Return the issue to the installer or another qualified HVAC professional with the full timeline and visible observations.
Only after diagnosis
Potential parts
- air filter
Consider a filter change only when the installed equipment instructions identify the filter as user-accessible and the filter is visibly loaded; a filter cannot substitute for post-replacement commissioning.
Confirm the exact equipment model and dimensions. Do not select a filter by appearance alone. - condensate drain or float protection component
A drain or float component is relevant only when a qualified diagnosis confirms an overflow, restriction, or protection fault after the replacement work.
Drain layouts and safety controls vary by system. Have the installer identify the component before any part is selected. - evaporator coil or refrigerant service component
Do not order another coil or sealed-circuit component from symptoms alone; consider it only after qualified diagnosis confirms a defect or incorrect installation.
Coil size, system design, refrigerant, and connections must be verified by the installer or qualified HVAC professional.
When checks do not resolve it
Need a professional?
Call the original installer first for no cooling immediately after evaporator replacement or for a symptom covered by the installation handoff. Call qualified HVAC service for ice, water, weak airflow, warm air with normal airflow, a silent outdoor unit, or a returning fault. Treat smoke, arcing, burning odor, hot electrical parts, refrigerant release, and repeated breaker trips as urgent safety issues.
Safety scope: Keep the system off for ice with water, pooled condensate near electrical equipment, smoke, arcing, burning odor, hot electrical parts, damaged wiring, refrigerant release, or repeated breaker trips. Do not open panels, handle refrigerant, touch fans, reset a tripping breaker repeatedly, or perform energized checks.
Common questions
FAQ
Why is my air conditioner still not cooling after an evaporator coil replacement?
If cooling never returned, ask the original installer to review coil fit, air sealing, airflow, condensate drainage, controls, refrigerant charge, leak status, and final performance. If it cooled briefly and then became warm, the same checks plus a new leak or airflow event may be relevant. Do not assume another coil is needed from the symptom alone.
Can I add refrigerant after the evaporator was replaced?
No homeowner charge or pressure work should be attempted. Refrigerant charge and leak status require qualified equipment and model-specific diagnosis; in the United States, covered refrigerant service requires an appropriately certified technician. Return the issue to the installer first.
What should I do if the coil freezes after replacement?
Turn cooling off and allow the coil to thaw naturally. Check only the user-accessible filter and visible airflow, and never chip ice or apply a heater. A frozen coil can reflect restricted airflow or low refrigerant pressure, so have HVAC service identify the cause before normal cooling resumes.
Is water after an evaporator replacement a normal sign?
Condensate may be normal only when it is captured and drained as designed. Pooling water, a full pan, water near electrical equipment, or water during thaw is a stop condition. Turn cooling off and request service for the drain, pan, float protection, or freeze cause.
Should I call the original installer or another HVAC technician?
Call the original installer first when cooling failed immediately after the work or the handoff is incomplete. Ask for a documented commissioning review. Use another qualified HVAC professional if the installer is unavailable, the symptom returned later, or the system has an urgent safety issue; do not keep running an unsafe system while arranging service.
Read the exact guide
Official sources
- Will a Frozen AC Fix Itself?Carrier · General Carrier residential guidance; follow the exact system manual.
- Troubleshoot an Air Conditioner Not WorkingCarrier · Carrier homeowner guidance used for general symptom categories; model procedures may differ.
- Section 608 Technician CertificationUS EPA · US regulatory guidance; local rules may add requirements outside the United States.
- HVAC Quality InstallationENERGY STAR · General residential HVAC quality-installation guidance; exact procedures remain equipment-specific.
- Evaporator Coil ReplacementCarrier · Carrier educational page used for general coil mechanics; exact coil and refrigerant procedures are model-specific.
- Heating and Cooling Maintenance ChecklistENERGY STAR · General residential checklist; use the equipment manual for access and intervals.
Community feedback
Share a repair observation
Share a plain-text repair observation. Accepted observations are published automatically; this page may take a moment to update.