
On this page
Start here
Quick answer
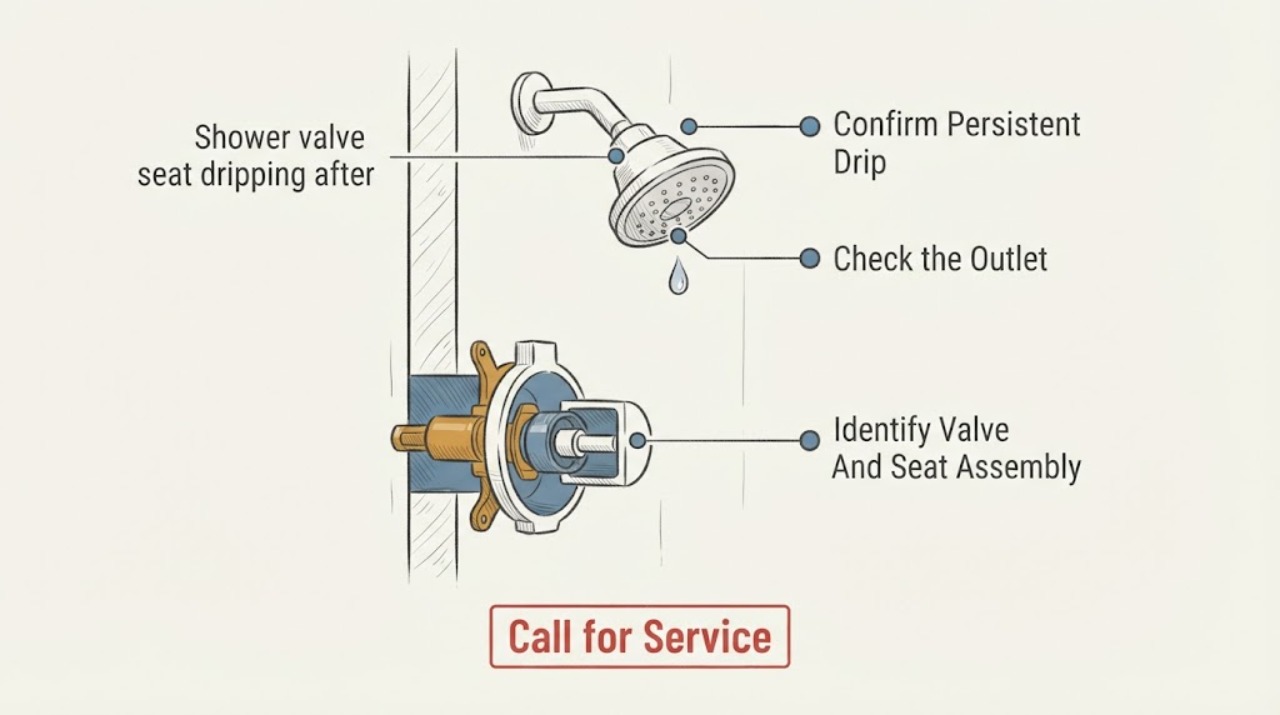
A few drops from an American Standard showerhead immediately after shutoff can be water draining from the shower arm or head; a drip that keeps returning after the line has drained points toward a valve that is not sealing, such as a worn cartridge, valve-seat surface, debris, or a diverter path. First verify that the drip is continuous rather than residual, and note whether it comes from the showerhead, tub spout, or a wall-side trim opening. Identify the exact American Standard trim and valve model before choosing a shower cartridge, washer, or repair kit. Before any valve service, shut off the water upstream of the valve, relieve pressure, and verify that no flow remains. Do not remove an in-wall valve seat, pressure-balance cartridge, or trim under pressure. Keep the shower unused and call a qualified plumber if the shutoff cannot isolate the valve, water is entering the wall, the valve body or seat is inaccessible, the handle is stuck, temperature is unstable, or the drip continues after an exact model-compatible repair.
Before you begin
Safety first
- This article supports observing the outlet, identifying the model, operating normal user controls, and shutting off and verifying upstream water before model-directed service. A qualified plumber should handle in-wall valve work, pressure-balance or diverter diagnosis, valve-seat extraction or resurfacing, failed shutoffs, seized hardware, concealed leaks, and any temperature-safety symptom.
Work through in order
Diagnostic checks
Use only checks that match the exact appliance or system and its official guide.
-
Check 1
With the shower control fully off, dry the showerhead, arm, tub spout if present, diverter outlet, and trim area. Observe from a safe position whether the outlet gives only the remaining water time to drain or continues producing fresh drops after the flow has stopped.
Expected result: Record whether dripping stops on its own, continues at a steady rate, starts again when the handle is touched, or occurs from more than one outlet; note whether the water is warm, cold, or temperature-unstable.
Next step: Photograph the outlet and trim and continue with model identification only if the drip is persistent or repeatedly returns after shutoff.
Stop if: Stop using the shower for a stream, hot-water surge, scalding risk, water at the wall or trim opening, or any sign that the valve cannot control flow safely; arrange qualified plumbing service.
Why this matters
Why: A short, diminishing drain can be residual water in the showerhead or riser. A persistent fresh drip after shutoff supports a valve or diverter that is not sealing, but it does not distinguish a cartridge, seat surface, debris, or another valve component.
-
Check 2
If the installation has a tub spout, hand shower, or diverter, operate only the normal user controls and compare which outlet drips after the water is shut off; do not remove the showerhead or trim to test the in-wall valve.
Expected result: Record whether only the showerhead drips, only the tub spout drips, both outlets drip, the drip follows a diverter position, or water appears around the escutcheon or wall penetration.
Next step: Use the outlet pattern with the exact American Standard valve and trim documentation; treat a persistent wall-side leak or uncertain diverter path as a plumbing service case.
Stop if: Do not repeatedly cycle a stuck diverter, force the handle, pry the trim, or continue showering when water is entering the wall or temperature control is unstable.
Why this matters
Why: One outlet can implicate a diverter or outlet-specific path, while dripping from the selected outlet with all diverter positions points more toward the primary shutoff or pressure-balance valve. Water at the wall or trim is not a showerhead drainage issue.
-
Check 3
From the trim, valve cover, installation paperwork, exposed service label, or model records, identify the American Standard shower family and valve arrangement without opening the wall or removing pressurized trim.
Expected result: Record the trim and valve model if available, whether the control is pressure-balance, thermostatic, or on/off volume control, whether a diverter is integrated, the handle count, and whether the documentation names a cartridge, valve seat, service stop, or repair kit.
Next step: Match the exact model to its official installation guide or repair-parts diagram before selecting a shower cartridge, washer, or valve repair kit. Keep photos and markings for a plumber.
Stop if: Do not assume a faucet valve seat, generic shower cartridge, or similarly shaped repair kit fits, and do not remove the escutcheon if the valve cannot be isolated.
Why this matters
Why: American Standard's Flash valve uses a pressure-balance cartridge and can include a shared diverter cartridge, while its R701 page describes an in-wall on/off volume-control valve and its Bedminster kit pairs a pressure-balance valve with trim. These arrangements require different service paths; the visible handle style alone is not enough.
-
Check 4
Before any valve, cartridge, seat, or retaining-ring service, close the model-provided service stops if present or shut off the upstream water supply, open the shower briefly, and verify that no pressurized flow remains.
Expected result: Check whether the local service stops work, water continues from the outlet, the building shutoff is required, or the shutoff is inaccessible, seized, or does not fully stop flow.
Next step: Proceed only when the exact model procedure permits the work and isolation is confirmed. If the stop fails or the installation has no accessible isolation, have a plumber shut down and verify the supply.
Stop if: Do not remove trim, cartridge, seat, or retaining hardware under pressure, and do not rely on the shower handle as the water shutoff.
Why this matters
Why: A verified isolation is the minimum boundary for model-directed valve service. Continued flow means the valve remains pressurized; forcing a service stop or opening the assembly can release water behind the wall and cause damage.
-
Check 5
Only if the exact model instructions allow ordinary-access inspection after water isolation, compare the visible cartridge, seat or seat-kit reference, seals, and retaining hardware with the model diagram; do not excavate an in-wall seat or apply force to a stuck part.
Expected result: Record whether the model identifies a replaceable seat or cartridge, visible debris or damaged sealing surfaces are present, the cartridge is oriented and seated as documented, the valve body appears damaged, or the repair path remains uncertain.
Next step: Use only the exact model's cleaning, seat, cartridge, or repair-kit procedure. If the seat is in-wall, stuck, damaged, or not clearly identified, resecure accessible parts, keep water isolated, and arrange qualified service.
Stop if: Do not grind, lap, drill, pry, scrape, substitute, or force a valve seat; do not use a generic cartridge or pressurize an incomplete assembly.
Why this matters
Why: A documented replaceable seat or a model-matched cartridge with visible sealing damage can support a conditional repair. An intact part, damaged valve body, unknown assembly, or inaccessible seat does not establish which component is at fault.
-
Check 6
After an exact model-approved repair is fully reassembled, restore water slowly, run the shower briefly through each documented outlet and temperature setting, then shut it off while checking the outlet, trim, and wall-side area for fresh water.
Expected result: Record whether the drip stops, diminishes as residual water only, returns from the same outlet, follows a diverter position, or is accompanied by a temperature surge, wall leak, or handle problem.
Next step: Shut the water off again for any returning drip or safety symptom, preserve the model and old-part information, and arrange qualified plumbing diagnosis rather than repeating seat work or tightening trim.
Stop if: Do not continue testing a stream, hot surge, water behind trim, cracked valve body, stuck handle, or leak that worsens with pressure; isolate the supply and call a plumber.
Why this matters
Why: A dry wall-side area and no continuing fresh drip support a successful repair, although a few final drainage drops may remain. A returning drip indicates an unresolved seat, cartridge, diverter, seal, or valve-body problem; a new wall or temperature symptom raises the urgency.
Use your observations
Decision map
Find the observation that best matches what you see, then follow the next safe action.
-
PATH 01Safety boundary
What you see
The showerhead releases a diminishing amount of retained water after shutoff, then stays dry; the tub or alternate outlet and wall-side trim also remain dry.
Do this next
Record the normal post-use behavior and monitor for a fresh drip that returns after drainage; arrange service if the drip becomes persistent or the outlet no longer shuts off normally.
Why this path and its safety boundary
Why it matters: Residual water in the shower arm or head is more likely than a continuously leaking valve seat. This observation does not justify valve disassembly.
Safety stop: Do not remove the valve or seat for a brief, diminishing drain, and stop use for any wall leak, hot surge, or uncontrolled flow.
-
PATH 02Safety boundary
What you see
A fresh drip continues from the selected shower outlet after the retained water should have drained, while the trim and alternate outlet remain dry and no diverter change affects it.
Do this next
Identify the exact valve model, isolate the water, and follow the model-approved cartridge or seat diagnosis; use qualified service for in-wall or forceful work.
Why this path and its safety boundary
Why it matters: The primary shower valve's shutoff path is more likely involved. Depending on the exact American Standard assembly, that path may include a pressure-balance cartridge, valve-seat surface, debris, or related seal; the symptom alone does not identify the part.
Safety stop: Do not lap or replace a valve seat by guesswork, open the valve under pressure, or continue using it if temperature or flow is abnormal.
-
PATH 03Safety boundary
What you see
The drip changes with a diverter position, appears at the tub spout or hand-shower outlet instead of the primary showerhead, or multiple outlets behave differently after shutoff.
Do this next
Record which outlet and diverter position produce the drip, identify the model, and arrange model-specific diverter or valve diagnosis before ordering a primary cartridge or seat kit.
Why this path and its safety boundary
Why it matters: A diverter or outlet-specific sealing path is more likely than a single universal valve-seat fault. Integrated and shared diverter arrangements vary by American Standard valve family.
Safety stop: Do not block an outlet, force the diverter, or remove in-wall components without verified isolation and model instructions.
-
PATH 04Safety boundary
What you see
Water appears around the escutcheon or wall penetration, the handle cannot control flow, or a temperature surge accompanies the drip.
Do this next
Shut off the upstream water, keep the shower unused, protect the wall and surrounding area, and arrange qualified plumbing service for isolation and valve assessment.
Why this path and its safety boundary
Why it matters: The symptom exceeds a simple outlet drip and may involve the in-wall valve body, pressure-balance function, supply connection, or concealed water damage. A seat or cartridge replacement cannot be selected safely from the drip alone.
Safety stop: Do not remove trim to search inside the wall, defeat a pressure-balance feature, test with water on, or continue showering through a temperature or wall-leak symptom.
-
PATH 05Safety boundary
What you see
The model is unknown, the seat or cartridge does not match the official diagram, the part is stuck or damaged, or the drip returns after an exact model-compatible repair.
Do this next
Keep water isolated, preserve the trim and part information, and obtain qualified plumbing diagnosis or manufacturer model confirmation before another repair attempt.
Why this path and its safety boundary
Why it matters: Fit, seating, valve-body condition, or the original diagnosis is unresolved. American Standard's model-specific parts and valve arrangements do not support a generic substitution or repeated tightening.
Safety stop: Do not force the seat, grind the valve, add unverified washers, reuse damaged seals, or pressurize an uncertain assembly.
Helpful context
Understand the symptom
A post-shutoff drip is not automatically a bad valve seat
A showerhead and riser can retain water after the control is closed, so a brief final drain is different from a fresh drop that keeps forming. Watch the outlet without opening the wall, and note whether water comes from the showerhead, tub spout, diverter outlet, or around the trim plate. American Standard uses different pressure-balance, on/off, and diverter arrangements; the outlet that drips helps separate residual water from a valve or diverter that is still passing water.
Valve-seat work is model-specific and often behind the wall
American Standard lists ceramic pressure-balance cartridges and model-specific valve-seat or repair parts, but those pages do not make one cartridge, seat, or repair kit universal. A seat surface may be part of a replaceable repair path on one valve and part of an in-wall valve assembly on another. Record the trim name, valve or cartridge marking, handle style, diverter arrangement, and any model information before ordering a part. If the seat is inside the valve body or requires force, leave it to a qualified plumber.
Shut off water before valve service
Before removing a handle, escutcheon, cartridge, seat, or retaining hardware, close the water supply upstream of the shower valve, open the shower briefly to relieve pressure, and verify that flow has stopped. Some American Standard valve assemblies provide model-specific service-stop or servicing features, while other installations require a building-level shutoff. Do not assume the trim handle is a shutoff, and do not open an in-wall valve with pressurized water behind it.
Safety boundary
Stop conditions
- Confirm a persistent fresh drip rather than brief showerhead drainage before treating the symptom as a valve-seat or cartridge fault.
- Record which outlet drips and whether a diverter position changes it; a tub spout, hand shower, and primary showerhead can have different sealing paths.
- Shut off and verify upstream water isolation before removing trim, cartridge, seat, or retaining hardware; do not use the shower handle as a shutoff.
- Do not grind, lap, drill, pry, force, or substitute a valve seat, pressure-balance cartridge, diverter, or repair kit without exact model documentation.
- Keep the shower unused for water at the wall, hot surges, uncontrolled flow, a stuck handle, a cracked valve body, or a shutoff that cannot isolate the valve.
- If a model-compatible repair does not stop the fresh drip, close the supply and arrange qualified plumbing service instead of repeating disassembly.
Only after diagnosis
Potential parts
- shower cartridge
Consider this category only when the exact valve model and persistent post-shutoff drip support a pressure-balance or shutoff cartridge diagnosis after residual drainage and diverter paths are excluded.
Confirm the exact American Standard valve and trim model, cartridge type, orientation, retaining method, and pressure-balance requirements before ordering or installing. - shower head washer
Consider this category only when the exact model identifies a washer at the showerhead connection and inspection finds a damaged or displaced washer rather than a persistent in-wall valve drip.
Confirm the exact showerhead connection and washer specification; a head-connection washer cannot repair a valve that continues passing water after shutoff. - shower valve repair kit
Consider this category only when the exact American Standard valve documentation identifies a compatible seat or repair-kit path and a qualified diagnosis supports seat or sealing-surface service.
Confirm the exact valve body, seat arrangement, included seals, required tools, and safe installation procedure; do not substitute a faucet seat or force an in-wall repair kit.
When checks do not resolve it
Need a professional?
Arrange qualified plumbing service when the upstream shutoff cannot isolate the shower valve, the drip is persistent or becomes a stream, water appears at the wall or trim, temperature control is unstable, the handle or diverter is stuck, the valve seat or cartridge is in-wall or seized, the model or part fit is uncertain, or an exact model-compatible repair does not hold.
Safety scope: This article supports observing the outlet, identifying the model, operating normal user controls, and shutting off and verifying upstream water before model-directed service. A qualified plumber should handle in-wall valve work, pressure-balance or diverter diagnosis, valve-seat extraction or resurfacing, failed shutoffs, seized hardware, concealed leaks, and any temperature-safety symptom.
Common questions
FAQ
Why does my American Standard shower drip after I shut it off?
A few diminishing drops may be water draining from the showerhead or riser. A fresh drip that keeps returning points toward a valve or diverter that is not sealing, but the cause could be a cartridge, seat surface, debris, seal, or valve body rather than one guaranteed part.
How can I tell residual showerhead water from a leaking valve seat?
Dry the outlet, shut the control fully, and watch whether the drops diminish and stop or keep forming after the retained water should have drained. A persistent fresh drip supports a valve path; the observation alone cannot identify the seat or cartridge.
Does the dripping outlet matter?
Yes. A showerhead, tub spout, and hand-shower outlet can use different diverter or valve paths. Record which outlet drips and whether changing the diverter changes the symptom before choosing a primary cartridge or valve-seat repair.
Do I need to shut off water before inspecting an American Standard shower valve?
Yes. Close the model service stops if present or shut off the upstream supply, open the shower briefly to relieve pressure, and verify that flow has stopped before removing trim, a cartridge, a seat, or retaining hardware. If isolation fails, call a plumber.
Can I install any American Standard shower cartridge or valve-seat kit?
No. American Standard lists different pressure-balance, on/off, diverter, and seat arrangements. Confirm the exact valve and trim model, cartridge or seat design, orientation, retaining method, and required procedure before ordering or installing a part.
What if water is coming from around the shower trim or wall?
That is not ordinary showerhead drainage and may indicate a valve body, supply, or concealed leak. Shut off the upstream water, keep the shower unused, and arrange qualified plumbing service rather than removing trim to search behind the wall.
When should I call a plumber for an American Standard shower drip?
Call when the shutoff cannot isolate the valve, the drip is persistent or becomes a stream, the handle or diverter is stuck, temperature is unstable, water appears at the wall, the seat or cartridge is inaccessible or seized, the model is uncertain, or a compatible repair does not stop the drip.
Read the exact guide
Official sources
- 1/2-Inch (13 mm) On/Off Control Rough-In ValveAmerican Standard · A specific American Standard in-wall on/off control valve; trim and valve compatibility and service access depend on the installed model.
- Transfer Valve Seat KitAmerican Standard · American Standard's specific transfer-valve seat-kit listing; it demonstrates that seat parts are model-specific and is not a universal shower-valve fit guide.
- Bedminister® Tub and Shower Trim Kit With ValveAmerican Standard · A specific American Standard Bedminster tub-and-shower kit; its valve and trim details do not establish fit for another shower valve.
- Flash® 2-Way Integrated Shower Diverter Rough-In Valve with Pressure Balance Valve CartridgeAmerican Standard · A specific American Standard Flash rough-in valve; it demonstrates pressure-balance and diverter variations and is not a universal valve-service procedure.
Community feedback
Share a repair observation
Share a plain-text repair observation. Accepted observations are published automatically; this page may take a moment to update.