
On this page
Start here
Quick answer
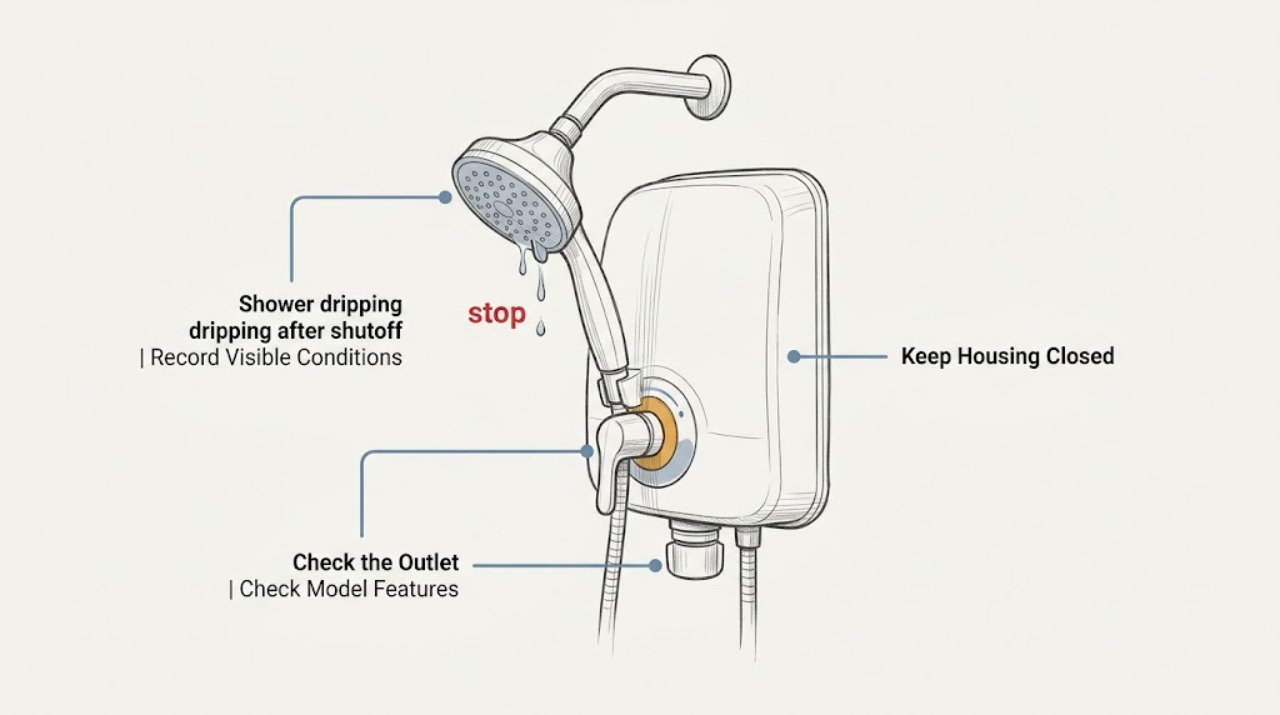
A Grohe shower that releases a short tail of water after shutoff may simply be draining water retained in the showerhead or hose, and some Grohe showerheads have a model-specific DripStop feature intended to reduce that behavior. Dripping that continues, returns after the head has emptied, comes from the control, diverter, escutcheon, or wall, or is accompanied by a temperature or pressure change points instead to a valve cartridge, diverter or non-return part, connection, or concealed plumbing issue. First record where the water appears and how long it lasts, identify the exact Grohe fitting and outlet, and inspect only exposed, dry connections. Do not remove a concealed control or alter a cartridge as a test; stop for persistent flow, wall or ceiling moisture, hot-water instability, or any leak that can damage the structure.
Before you begin
Safety first
- This article supports ordinary-access observation, model identification, drying, and inspection of exposed surfaces only. It does not authorize cartridge removal, valve-body or diverter disassembly, concealed plumbing access, temperature adjustment, or force on isolation valves.
Work through in order
Diagnostic checks
Use only checks that match the exact appliance or system and its official guide.
-
Check 1
After a normal shower, turn the control fully off and watch from a stable, dry position without touching the trim or spray face.
Expected result: Record whether drops taper and stop, continue as a thin stream, restart after stopping, and whether they emerge from the showerhead, hand shower, spout, handle, escutcheon, hose joint, wall, or ceiling below.
Next step: Use the residual-water branch only when the drip stops and no exposed joint or surrounding surface is wet; use the valve, connection, or concealed-leak branch for any continuing or misplaced water.
Stop if: Stop immediately for a steady flow, water entering a wall or ceiling, a slippery floor, visible damage, or hot water that could burn someone.
Why this matters
Why: A brief taper from an outlet is consistent with retained water draining out. Continuous or recurring water with the control closed, or water from a joint or wall, is not established as harmless residual water.
-
Check 2
Identify which Grohe outlet is involved—fixed head, hand shower, tub spout, or another outlet—and note whether a diverter or separate flow control was used; do not remove the control plate.
Expected result: The drip occurs from one outlet only, follows a change in diverter position, or appears at more than one outlet while all controls are closed.
Next step: Photograph the control and outlet layout, then follow the exact Grohe model instructions or provide the information to a plumber; do not infer that every Grohe shower uses the same cartridge.
Stop if: Do not force the diverter, remove hidden trim, or continue operating a control that is loose, hot, seized, or leaking around the wall.
Why this matters
Why: One outlet points toward retained water in that outlet or a local outlet component. A pattern that follows the diverter or affects several outlets makes a diverter, valve, non-return part, or shared control more likely.
-
Check 3
Read the visible Grohe name, model marking, and showerhead documentation from a dry position; check whether the installed head is one of the Grohe models that documents DripStop or another drainage feature.
Expected result: The exact model is identified with a documented drip-reduction feature, the model is identified without that feature, or the product identity is missing or unclear.
Next step: Use the model's care and installation instructions for the expected behavior and service parts; ask a plumber or Grohe support to identify an unknown fitting before replacing internal parts.
Stop if: Do not use a generic Grohe cartridge, spray head, or seal based only on appearance or brand name.
Why this matters
Why: A documented feature can explain why the product may reduce but not necessarily eliminate a short outlet drip. An unlisted or unknown model cannot be judged from another Grohe product's behavior.
-
Check 4
With the shower unused and surfaces dry, inspect the exposed hose connection, shower arm, outlet, handle perimeter, escutcheon edge, and floor or ceiling below without loosening anything.
Expected result: The drip is limited to the spray face, a connection becomes wet, water appears behind the escutcheon or at the wall, or the surrounding area stays dry.
Next step: Dry and photograph the location. Stop using the shower and arrange qualified service for a connection, escutcheon, wall, or ceiling leak; do not tighten hidden or seized parts as a test.
Stop if: Do not remove the escutcheon, open the wall, add sealant over a leak, or continue using the shower when moisture is reaching structure.
Why this matters
Why: A wet connection suggests a seal or fitting leak; water at the escutcheon or wall raises a concealed connection or valve concern. A dry exterior with a brief spray-face tail keeps retained outlet water in consideration.
-
Check 5
After the fitting has been dry, observe one normal close-and-cool cycle and note any change in temperature, pressure, or handle position; do not remove the cartridge or test internal water pressure.
Expected result: The drip stops normally with stable temperature and pressure, continues with the control closed, or coincides with a temperature swing, noisy valve, or control that no longer reaches its stop.
Next step: Record the exact timing and control position for service. Leave the fitting unused when flow continues or temperature control is abnormal, and have the model-specific valve assessed.
Stop if: Stop for scalding risk, sudden pressure change, a control that cannot shut off, or any need to access the valve body.
Why this matters
Why: A stable, self-ending drip is more compatible with retained outlet water. Continued flow or changed temperature and pressure make cartridge, pressure-balance, thermostat, diverter, or non-return service more likely.
-
Check 6
If the drip persists after the outlet has fully drained, close the accessible local isolation valve only if it is clearly identified and operates normally; otherwise leave the control alone and arrange service.
Expected result: The leak stops with the local supply isolated, continues from a stored outlet only briefly, or the isolation valve is absent, seized, or affects other fixtures.
Next step: Keep the fitting out of service as needed and give the technician the model, outlet, timing, source location, isolation result, and photographs. The technician determines whether a cartridge, non-return part, seal, or concealed connection is compatible.
Stop if: Do not force an isolation valve, shut off a building supply you cannot identify, dismantle the valve, or open a wall or ceiling.
Why this matters
Why: Stopping with isolation supports a pressurized fitting or valve leak; an absent or seized isolation point means further diagnosis is not a safe user test. A drip that ends after the outlet drains remains a residual-water pattern.
Use your observations
Decision map
Find the observation that best matches what you see, then follow the next safe action.
-
PATH 01Next step
What you see
Drops come only from the showerhead or hand shower immediately after use, taper off, stop, and leave the control, connections, wall, and ceiling dry.
Do this next
Confirm the exact Grohe model and its care instructions; continue monitoring rather than replacing a cartridge based on a short, self-ending tail.
Why this path and its safety boundary
Why it matters: Retained water draining from the outlet is more likely than a control valve that is continuously passing pressurized water.
-
PATH 02Safety boundary
What you see
The showerhead or hand shower continues dripping after the outlet should have emptied, or the flow restarts while the control remains closed.
Do this next
Stop repeated cycling and arrange model-specific Grohe plumbing service; provide the fitting identity and timed drip record.
Why this path and its safety boundary
Why it matters: A valve cartridge, diverter, pressure-balance component, non-return part, or debris affecting the shutoff is more likely than ordinary retained water.
Safety stop: Do not remove the cartridge, pry internal parts, or substitute a part based only on a similar-looking fitting.
-
PATH 03Next step
What you see
Dripping changes with diverter position, appears from more than one outlet, or the outlet does not fully close while another outlet is selected.
Do this next
Leave the control in a safe position, document which outlet drips in each setting, and request qualified service using the exact model instructions.
Why this path and its safety boundary
Why it matters: The diverter, flow-control arrangement, non-return valve, or a shared valve body needs assessment; the showerhead alone is not proven to be the cause.
-
PATH 04Safety boundary
What you see
Water appears at a hose joint, shower arm, handle perimeter, escutcheon, wall, ceiling, or adjacent room rather than only at the spray face.
Do this next
Dry the area, stop using the shower when appropriate, isolate a clearly identified local supply if safe, and arrange prompt plumbing inspection.
Why this path and its safety boundary
Why it matters: A seal, exposed connection, valve-body connection, or concealed plumbing leak is possible and can damage the structure.
Safety stop: Do not tighten hidden parts, remove the escutcheon, add surface sealant, or open the wall or ceiling as a user test.
-
PATH 05Next step
What you see
The drip is accompanied by a handle that will not shut off, temperature fluctuation, unexpected pressure change, or a persistent flow after the control is closed.
Do this next
Stop use for scalding or uncontrolled-flow risk and arrange qualified valve service; do not attempt internal adjustment without the exact model procedure.
Why this path and its safety boundary
Why it matters: The symptom may involve the Grohe cartridge, pressure-balance or thermostatic function, diverter, or supply rather than harmless residual water.
Helpful context
Understand the symptom
Measure the drip pattern before deciding it is a failed valve
A few drops from a recently used showerhead can be water draining from the head or hose. The useful distinction is not simply whether a drop appears, but whether the stream tapers off and stops, whether it restarts while the control remains closed, and where it comes from. A drop from the spray face is a different problem from water at the handle, diverter, escutcheon, hose connection, or wall. Record the pattern from a dry, stable position before taking anything apart.
GROHE features and valve layouts are model-specific
GROHE lists DripStop on some Rainshower products, but the assigned shower may have another head, hand shower, diverter, pressure-balance valve, or thermostat. GROHE product information also shows that some shower valves include flow control, diverter functions, dirt strainers, and non-return valves. Identify the installed product and use its own instructions; a generic cartridge procedure can damage trim or change temperature protection.
Keep a drip from becoming concealed water damage
Do not leave a persistent shower leak running while you troubleshoot. Dry the exposed area, keep the shower unused if water can reach the wall or floor structure, and arrange qualified plumbing service for a valve, diverter, connection, or concealed leak. GROHE installation guidance distinguishes ordinary installation from maintenance access, so hidden parts and cartridge work belong to the model-specific service boundary rather than an improvised test.
Safety boundary
Stop conditions
- Do not remove a Grohe cartridge, control unit, escutcheon, or concealed valve as a troubleshooting test.
- Do not force an isolation valve, diverter, handle, threaded connection, or seized trim, and do not add sealant over an active leak.
- Stop using the shower for a steady stream, wall or ceiling moisture, visible water damage, a control that will not shut off, or a slippery unsafe floor.
- Stop immediately for scalding risk, unstable temperature, sudden pressure change, or water near electrical equipment.
- Do not assume a short drip is normal for every Grohe product; verify the exact model and its documented features before interpreting it.
Only after diagnosis
Potential parts
- Grohe shower valve cartridge
Consider this category only when qualified diagnosis finds that the valve continues passing water with the control closed and the exact Grohe model identifies a compatible cartridge.
Confirm the exact fitting, valve type, cartridge design, temperature-control arrangement, and current manufacturer fit information before ordering. - Grohe diverter or non-return valve component
Consider this category only when drip behavior follows outlet selection or a qualified inspection identifies a failed diverter or non-return component.
Confirm the exact shower system and outlet configuration; do not substitute a visually similar part or use it to bypass backflow protection. - Grohe shower connection seal or O-ring
Consider this category only when an exposed connection is confirmed to leak and the exact Grohe instructions identify a replaceable seal.
Confirm seal size, material, connection, and model fit; do not overtighten or cover a concealed leak with surface sealant.
When checks do not resolve it
Need a professional?
Arrange qualified plumbing service when dripping continues after the outlet has drained, returns with the control closed, follows diverter settings, appears at a connection or wall, is accompanied by pressure or temperature changes, or the Grohe model and safe maintenance procedure are unknown. Stop use promptly for a steady flow, scalding risk, or any sign of concealed water damage.
Safety scope: This article supports ordinary-access observation, model identification, drying, and inspection of exposed surfaces only. It does not authorize cartridge removal, valve-body or diverter disassembly, concealed plumbing access, temperature adjustment, or force on isolation valves.
Common questions
FAQ
Is a few drops after turning off a Grohe shower normal?
A short, self-ending tail from a recently used showerhead can be retained water draining from the outlet, but the behavior is model-dependent. GROHE lists DripStop on some showerheads to minimize dripping. Continued or recurring flow, or water from a handle, joint, wall, or ceiling, needs service.
Why does my Grohe shower keep dripping after it has been off?
If the drip continues after the outlet has emptied or restarts with the control closed, the valve cartridge, diverter, non-return component, or a connection may not be sealing. Record the source and timing, avoid dismantling the control, and arrange model-specific plumbing diagnosis.
Should I replace the Grohe cartridge myself for a post-shutoff drip?
Do not choose or remove a cartridge based only on the brand name or appearance. Grohe shower systems differ between single-lever and thermostatic layouts and may include diverters, strainers, and non-return valves. A qualified technician should confirm the model and failed component before replacement.
What if water is dripping from the Grohe handle or wall instead of the showerhead?
Treat water at the handle, escutcheon, wall, ceiling, or adjacent room as a possible connection or concealed leak rather than ordinary outlet drainage. Dry the area, stop using the shower when needed, isolate a clearly identified local supply if safe, and arrange prompt plumbing service.
Read the exact guide
Official sources
- Rainshower™ Smartactive CollectionGROHE · Use only to explain that some Grohe showerheads document a drip-reduction feature; it does not establish expected behavior for every Grohe fitting.
- Thermostat Bath/Shower ValveGROHE · Use to distinguish a thermostat or diverter layout from a simple showerhead and to require model-specific service; the assigned fitting model is not supplied.
- Installation GuidesGROHE · Use to route cartridge or control work to the exact installation guide and professional boundary rather than applying a generic disassembly procedure.
Community feedback
Share a repair observation
Share a plain-text repair observation. Accepted observations are published automatically; this page may take a moment to update.