
On this page
Start here
Quick answer
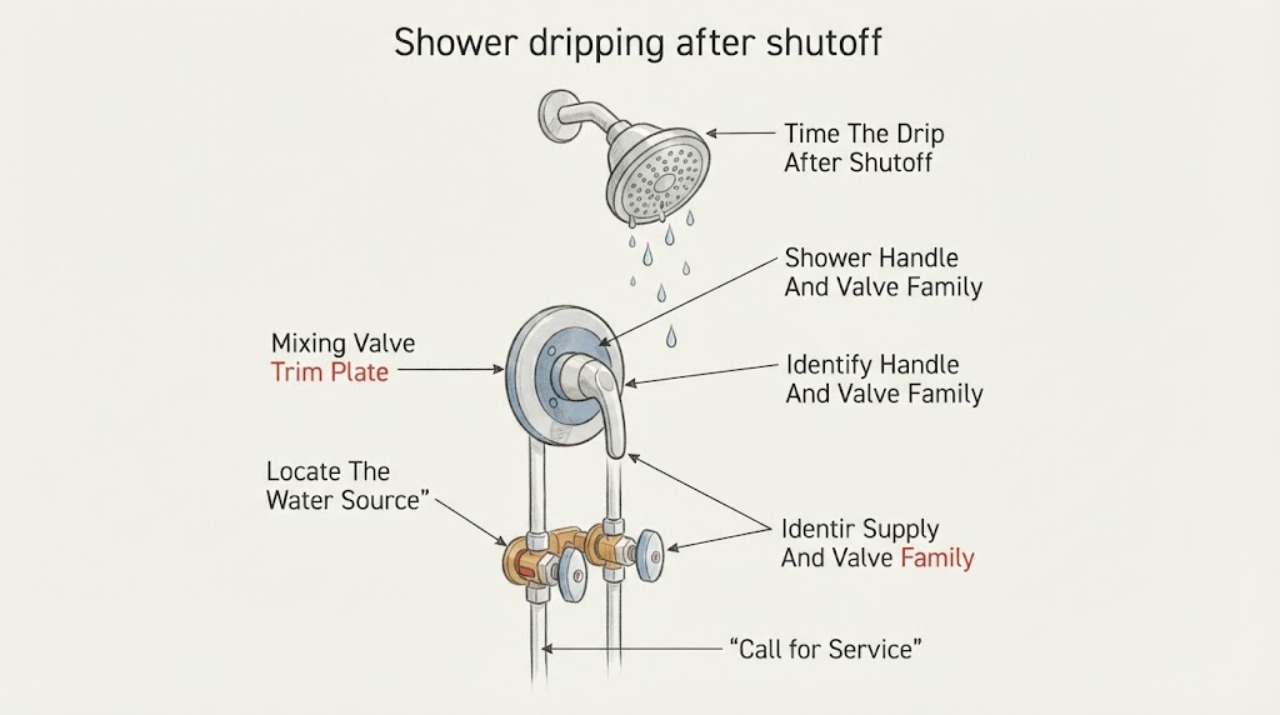
A Moen showerhead can release a small amount of residual water after shutoff, especially while the shower arm and head drain. The key distinction is whether the drip stops after the trapped water drains or continues for hours, returns continuously, or appears from the handle, escutcheon, wall, tub spout, or a second shower device. Moen's guidance treats a continuous drip with the handle off as a mixing-valve or flow-cartridge problem; on specific M-Core systems, a new installation may also need handle calibration, while an existing installation that suddenly begins dripping points to the cartridge. Check the handle position, identify where water emerges, and use only accessible supply shutoffs. Do not remove trim, loosen a cartridge nut, or change a cartridge without identifying the valve and shutting off the water. Stop for water behind the wall, ceiling damage, an inaccessible shutoff, or a leak that continues after the supply is closed, and arrange qualified plumbing service.
Before you begin
Safety first
- This article supports drying and observing the drip, identifying the control arrangement without removing trim, and closing a known accessible supply valve without force. A qualified plumber must handle trim and cartridge removal, retaining nuts, concealed connections, valve replacement, pressure-related work, and final leak testing.
Work through in order
Diagnostic checks
Use only checks that match the exact appliance or system and its official guide.
-
Check 1
Turn the Moen shower handle fully off, dry the showerhead and tub or shower floor, then observe from a safe position without touching the trim or opening the wall.
Expected result: Record whether the drip stops after residual water drains, continues for hours, runs continuously, or returns only after another shower device is used.
Next step: Use the duration and trigger to select a branch below. Keep the handle off and arrange plumbing service for a continuous or recurring drip rather than repeatedly moving the handle.
Stop if: Stop for water from the wall, ceiling, floor below, or around electrical equipment, or if the shower cannot be shut off at the fixture or supply.
Why this matters
Why: A brief decline to dry supports trapped water in the showerhead or arm. A continuing drip or stream makes a mixing-valve or flow-cartridge issue more likely; a drip after transfer can involve the transfer valve instead.
-
Check 2
With the handle off, inspect the showerhead, arm connection, tub spout if present, handle, escutcheon, and any second shower device for the first place where fresh water appears; do not remove trim.
Expected result: Classify the water as coming from the showerhead, from around the mixing handle or escutcheon, behind the wall, from the tub spout, or from a second device after transfer.
Next step: Dry each area, record the first wet point, and keep the supply accessible. Arrange service for handle, escutcheon, wall, tub-spout, or transfer-device leakage; do not seal over a concealed leak.
Stop if: Stop immediately for water behind the wall, staining or swelling, an active stream, or a leak near electrical wiring or a ceiling below.
Why this matters
Why: Showerhead-only water can be residual or a mixing-valve shutoff leak. Water around the handle or behind the escutcheon can be a concealed valve or retaining-seal leak. A device leaking after transfer points toward the transfer valve, while water behind the wall is not a trim-only check.
-
Check 3
Without removing the handle or trim, note the handle movement and whether the shower is a single mixing valve, tub-and-shower, or multi-device system; compare the visible arrangement with the Moen valve-identification guidance.
Expected result: Record a rotate-only handle, a push-pull or push-in/out handle, separate temperature and volume controls, a separate transfer handle, or an unknown arrangement; note whether the leak began after installation or after normal operation.
Next step: Use the valve family and installation history to give a technician accurate information. Do not order or install a cartridge from handle appearance alone, and do not remove trim unless the water supply is isolated and the model instructions are known.
Stop if: Stop if the valve family cannot be identified, the handle is loose or damaged, or any identification step would require opening a concealed valve or wall.
Why this matters
Why: Moen associates different handle and valve families with different cartridges. A rotate-only handle is consistent with PosiTemp guidance, while M-Core systems use different cartridge families; new-installation leakage and a sudden leak in an existing shower have different likely causes.
-
Check 4
If the drip is continuous or the area needs protection, close the accessible local stop-check valves or the fixture supply as described for the Moen system; turn the supply only as far as it moves normally and do not force a stuck valve.
Expected result: Record whether the drip stops fully, slows but continues, or does not change, and whether the shutoff is local to the shower or controls other fixtures.
Next step: Leave the supply closed when safe and arrange service for any continuous leak or uncertain isolation. If the local valve is inaccessible, shared, stuck, or absent, use the home's main shutoff only if you know its operation and can protect other occupants from the loss of water.
Stop if: Do not force, disassemble, or repair a stuck supply valve, and stop for water damage, a hidden leak, or a supply that cannot be isolated safely.
Why this matters
Why: A complete stop confirms that the shower supply was isolated and prevents further flow while service is arranged. A continuing drip after the supply is closed can be residual water, a different branch still feeding the system, or a shutoff that is not closing; it is not proof that the cartridge is the only issue.
-
Check 5
With the water supply restored only when the area is dry and safe, observe whether the drip changes when the mixing handle is fully off, when a separate volume control is off, or after water is transferred between the showerhead and handheld; do not force the controls.
Expected result: Record a showerhead drip only in the off position, a leak around one handle, a second device that drips after transfer, or a drip that changes when the volume control is moved.
Next step: Turn the water off again if the leak is continuous and arrange service with the control pattern, installation history, and valve identification. Do not use a second device to mask a leak from the first.
Stop if: Stop for water behind trim, a control that binds, a sudden increase in flow, or any need to remove a cartridge nut or valve component without model instructions.
Why this matters
Why: An off-position leak from the mixing device makes its flow cartridge or shutoff path more likely. A leak after transfer points toward the transfer valve; a handle or escutcheon leak may be a concealed seal or retaining issue. The pattern does not identify a cartridge number without model and valve-family confirmation.
-
Check 6
After a brief residual drip has stopped or a qualified repair is complete, dry the shower area and make one normal water-on and water-off observation while watching the showerhead, handle, transfer device, wall, and area below; do not repeat cycles to force a result.
Expected result: Record a dry showerhead after drainage, a renewed continuous drip, water around trim, water behind the wall, or a device that leaks after transfer.
Next step: Close the local supply when safe and arrange qualified service for recurrence. Give the plumber the exact wet point, duration, valve family, installation history, isolation result, and whether transfer changed the symptom.
Stop if: Stop for active flow, wall or ceiling damage, a failed supply shutoff, or any need to open the wall or work on the valve under pressure.
Why this matters
Why: A dry result supports residual water rather than a continuing valve leak. Any renewed continuous drip or concealed water means the shutoff path or another valve still needs diagnosis, even if the first cartridge or handle adjustment appeared to help.
Use your observations
Decision map
Find the observation that best matches what you see, then follow the next safe action.
-
PATH 01Safety boundary
What you see
The showerhead drips briefly after shutoff, then becomes dry; there is no water around the handle, wall, tub spout, or second device.
Do this next
Wipe the head dry after use and monitor whether the duration changes. Arrange service if the drip becomes continuous, returns many hours later, or appears from another location.
Why this path and its safety boundary
Why it matters: Residual water in the showerhead, arm, or nearby shower piping is more likely than a continuous mixing-valve leak.
Safety stop: Stop for staining, wall moisture, a stream that does not taper, or water below the shower.
-
PATH 02Safety boundary
What you see
Water continues from the showerhead with the mixing handle fully off, including an existing shower that previously shut off normally.
Do this next
Close the accessible supply if safe and arrange qualified service. Provide the handle operation, valve family, model information, and whether the leak began after installation or after normal use.
Why this path and its safety boundary
Why it matters: A mixing-valve flow cartridge or related shutoff problem is more likely. Moen's guidance treats continuous off-position dripping as a mixing-valve symptom, but the correct cartridge depends on valve family.
Safety stop: Do not remove the handle or cartridge, force a retaining nut, or keep the supply open while water is reaching the wall or floor below.
-
PATH 03Safety boundary
What you see
The drip began immediately after a new Moen shower installation or repair, and the handle or cartridge may not have been positioned in the full off position.
Do this next
Keep the supply isolated until the installer or a qualified plumber checks the exact valve instructions, handle position, cartridge seating, and retaining parts. Do not apply the M-Core procedure to an unidentified valve.
Why this path and its safety boundary
Why it matters: For the M-Core 4 Series, Moen identifies handle calibration as one possible new-installation cause and gives a cartridge-specific path if the leak continues. The same symptom on another Moen family may have a different cause.
Safety stop: Stop if the supply cannot be isolated, water is behind the wall, or calibration would require unlisted trim or valve access.
-
PATH 04Safety boundary
What you see
The showerhead leaks only after water was transferred to a handheld or second outlet, or water appears around a mixing or transfer handle or escutcheon.
Do this next
Close the supply if the leak is continuous and arrange service with the leaking device and control pattern identified. Do not seal the escutcheon to hide water behind it.
Why this path and its safety boundary
Why it matters: A transfer-valve cartridge or a concealed mixing-valve seal is more likely than residual water from the showerhead. Moen distinguishes a device leak after transfer from a continuous 24-hour mixing-valve drip.
Safety stop: Stop for water behind the wall, a growing stain, a control that binds, or a leak that reaches the room below.
-
PATH 05Safety boundary
What you see
The drip continues after the local shower supply is closed, or the local stop-check valve is stuck, shared, inaccessible, or not clearly identified.
Do this next
Protect the area, avoid forcing the valve, and arrange prompt plumbing service. If water is actively flowing or building damage is occurring, use only a known safe main shutoff and keep clear of electrical hazards.
Why this path and its safety boundary
Why it matters: Some residual water may remain, but ongoing flow raises the possibility that another supply path is feeding the valve or the isolation point is not actually closed. This cannot be resolved by guessing at a cartridge.
Safety stop: Stop for an active stream, a failed main shutoff, water near electrical equipment, or any hidden-wall leak.
Helpful context
Understand the symptom
First separate residual water from a continuous leak
Water held in a showerhead, arm, or nearby pipe can drip for a short time after the handle is turned off. That is different from water that continues for hours or is still dripping the next day. Wipe the showerhead dry, leave the handle off, and observe whether new water appears. A continuing stream or recurring drip means the shutoff path is not sealing fully or another valve is feeding the device.
Where the water appears identifies the valve path
Water from the showerhead with the mixing handle off points toward residual water or the mixing valve. Water around a handle or escutcheon raises a concealed trim or cartridge-seal concern. Water that appears only after transferring between a showerhead and hand shower points toward the transfer valve, while water behind the wall needs prompt plumbing assessment. Moen notes that shower devices do not control the main water flow; the mixing valve supplies the system.
Valve family and installation history matter
Moen uses several shower valve families and cartridges. Its guidance identifies PosiTemp by a rotate-only handle and M-Core families by their handle operation, but appearance alone is not enough to order a cartridge. A leak present immediately after a new installation can have a handle or installation cause; a leak that starts after weeks of normal use points to a different service path. Shut off the water before any trim or cartridge work.
Safety boundary
Stop conditions
- Close the accessible shower supply and arrange service for a continuous off-position drip, active stream, water behind the wall, ceiling or floor damage, or water near electrical equipment.
- Do not remove trim or a cartridge, loosen a retaining nut, force a supply valve, or work on the valve while water pressure remains or the valve family is unknown.
- Do not select a cartridge from brand or handle appearance alone; Moen uses multiple shower valve families and cartridge types.
- Do not keep the supply open to test a leak that is reaching the wall, room below, or concealed plumbing.
Only after diagnosis
Potential parts
- Moen shower mixing-valve cartridge
Consider this category only when continuous dripping with the mixing handle off is confirmed and the valve family and cartridge identity are verified by model information or qualified inspection.
Moen shower families use different cartridges, including family-specific flow or thermostatic designs; confirm the exact valve, handle arrangement, revision, and installation instructions before selection. - Moen transfer or diverter cartridge
Consider this category only when one device leaks after water is transferred to another or a qualified inspection identifies the transfer valve as the source.
Confirm the exact transfer-valve model, number of functions, cartridge arrangement, and device layout; a mixing-valve cartridge will not be inferred from a transfer symptom. - Moen handle, cartridge retaining, or trim seal component
Consider this category only when water is confirmed around the handle or escutcheon and qualified inspection identifies a handle-position, retaining, O-ring, or trim-seal fault.
Confirm the exact valve family, handle and trim design, seal location, and manufacturer procedure; do not tighten or replace a part to conceal a leak behind the wall. - Moen local stop-check or water-supply valve
Consider this category only if inspection confirms that the local isolation valve is failed, inaccessible for safe service, or not closing and that it is the correct supply component.
Confirm the valve location, plumbing arrangement, connection type, and access requirements; do not force or disassemble a pressurized supply valve.
When checks do not resolve it
Need a professional?
Arrange qualified plumbing service when a Moen shower continues dripping with the handle off, leaks around the handle or escutcheon, leaks after transferring to another device, began dripping after an installation or repair, or continues after the local supply is closed. A brief drip that fully stops may be residual water, but recurring or worsening water needs assessment of the mixing valve, transfer valve, cartridge, trim seals, supply isolation, and concealed connections.
Safety scope: This article supports drying and observing the drip, identifying the control arrangement without removing trim, and closing a known accessible supply valve without force. A qualified plumber must handle trim and cartridge removal, retaining nuts, concealed connections, valve replacement, pressure-related work, and final leak testing.
Common questions
FAQ
How long should a Moen shower drip after shutoff?
A brief drip that tapers off and stops can be residual water in the showerhead, arm, or nearby pipe. A drip or stream that continues for hours, returns continuously, or is still present much later is a shutoff-leak symptom and needs valve-family-specific diagnosis.
Why does my Moen shower keep dripping when the handle is off?
Moen links continuous off-position dripping to the mixing valve and its flow cartridge, but the correct cartridge depends on the valve family. PosiTemp, M-Core, and other Moen systems use different identification paths. Close a known local supply if safe and arrange service rather than ordering by brand alone.
What if the drip started right after my Moen shower was installed?
On the M-Core 4 Series, Moen says a new-installation shutoff leak can involve handle calibration, with a cartridge path if the leak continues. Other Moen valve families differ. Keep the supply isolated and have the installer or a qualified plumber verify the valve family, handle position, cartridge seating, and connections.
Why does water drip from the showerhead after using the handheld?
If one shower device leaks only after water is transferred to another, Moen treats that pattern as a transfer-valve issue rather than a simple residual drip. Record which device leaks and keep the supply closed if water continues; the transfer cartridge and system layout need confirmation.
Can I replace a Moen shower cartridge myself?
Do not start until the water supply is isolated and the valve family and cartridge are identified. Moen's guides cover multiple cartridge types and warn through their preparation steps that supplies must be off. A concealed leak, stuck shutoff, unknown valve, or water damage is a reason to use qualified plumbing service.
Read the exact guide
Official sources
- Shower Faucet: Leaking-M-Core 4 Series ValveMoen Solutions · Official Moen M-Core 4 Series article; do not apply its steps to an unidentified valve family.
- Faucet Cartridges: ShowerMoen Solutions · Official Moen cartridge guide; multiple shower families and cartridge variants require exact identification before service.
- Shower Faucet: Leaking Issues- Independent Transfer ValvesMoen Solutions · Official Moen Solutions guidance for multi-device shower systems; exact valve and cartridge arrangements vary by model.
- Shower Faucet: Leaking- PosiTemp ValveMoen Solutions · Official Moen PosiTemp guidance; it applies to the PosiTemp valve family and not every Moen shower.
- Shower Faucet: Leaking-M-Core ValveMoen Solutions · Official Moen M-Core guidance; 2 Series and 3 Series use different cartridge families and exact model confirmation is required.
- How to Operate PosiTemp Stop Check ValvesMoen Solutions · Official Moen PosiTemp service document; stop-check layout and access vary by installation.
Community feedback
Share a repair observation
Share a plain-text repair observation. Accepted observations are published automatically; this page may take a moment to update.