
On this page
Start here
Quick answer
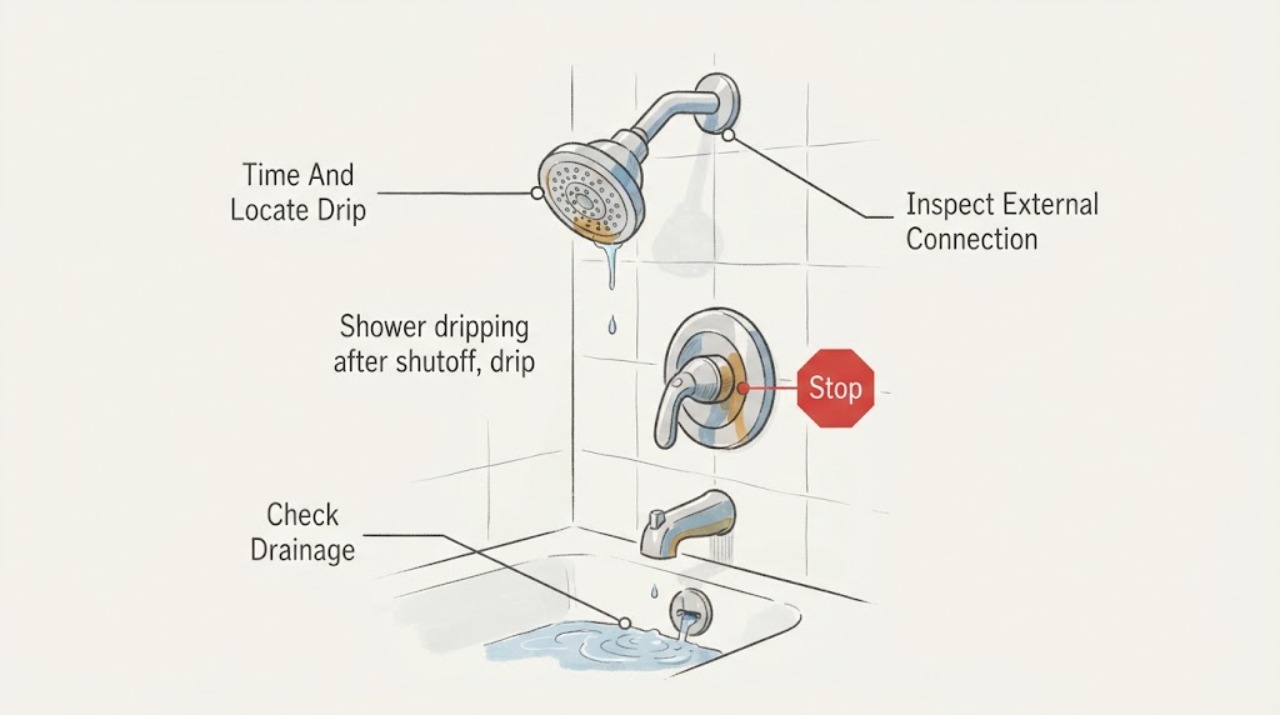
A few drips from the showerhead after the handle is turned off can be water draining from the head, especially when the dripping stops on its own after a short period. Delta describes this as the showerhead emptying its reservoir, and Kohler says residual water from some valves may drip for up to about 90 seconds. If water continues indefinitely, returns after the head has drained, comes from the valve trim or wall, or appears at a connection while the shower is running, treat it as a leak rather than normal drainage. Check the drip location and duration, inspect only ordinary external parts, and arrange qualified plumbing service for a persistent valve leak or any hidden-wall moisture.
Before you begin
Safety first
- This article covers observation and ordinary external inspection only. Do not open walls or valve trim, force connections, alter piping, remove internal valve parts, or improvise a seal or cartridge repair.
Work through in order
Diagnostic checks
Use only checks that match the exact appliance or system and its official guide.
-
Check 1
After the shower is turned off normally, wipe the visible exterior dry and watch the fixture without touching the handle or trim; record when the last drop appears and exactly where each new drop starts.
Expected result: Classify the event as a few drops from the spray openings that stop, a drip that continues or returns after stopping, water at the threaded connection, water at the handle or escutcheon, or moisture appearing from the wall or ceiling below.
Next step: Photograph the first wet location and continue only with the matching external checks; arrange plumbing service for a continuing drip, hidden-wall moisture, or a location that cannot be safely identified.
Stop if: Stop using the shower if water is entering the wall, ceiling, floor, or electrical area, or if the trim is loose or damaged.
Why this matters
Why: A self-limited spray-opening drip supports retained water draining from the showerhead. Persistent water or water outside the spray openings makes a seal, connection, valve, diverter, or concealed plumbing leak more likely.
-
Check 2
If the showerhead is on a tub-and-shower setup and the manufacturer's instructions allow removal without force, remove only the head from its accessible arm and observe the arm outlet after shutoff; otherwise leave it installed and record that the comparison could not be made.
Expected result: The drip stops when the head is removed, or water continues from the exposed shower arm or valve outlet after the head is separated.
Next step: Restore the head only according to its instructions and without force; request qualified service for continued upstream dripping, uncertain threads, or any sign of a damaged seal.
Stop if: Do not remove the valve trim, open the wall, force a seized head, or leave a connection open while the water supply is on.
Why this matters
Why: Stopping at the removed head supports residual water in the showerhead. Continuing from the arm or outlet makes an internal valve seal or another upstream issue more likely and is not explained by the head's reservoir alone.
-
Check 3
With the water off, inspect the outside of the showerhead, arm connection, visible washer or O-ring area, and spray face for scale, cracks, cross-threading, or a stray spray path; clean only as the installed manufacturer's care instructions permit.
Expected result: The head is dry except for spray openings, the connection wets only while the shower runs, a seal is visibly damaged or missing, or the source remains at the handle or wall.
Next step: If the instructions permit, restore a compatible washer or clean the accessible head; stop and request a plumber when the connection still leaks, the seal is uncertain, or water comes from the valve or wall.
Stop if: Do not overtighten, force threads, pry trim, use unapproved sealant, or disassemble the valve to chase a drip.
Why this matters
Why: A connection-only leak can arise from the head, washer, or threaded joint, while a handle or wall source points toward the valve or concealed plumbing. Scale or damage can also retain water, but external cleaning will not repair an internal seal.
-
Check 4
For a tub-and-shower combination, run water normally and select the shower while watching the tub spout from a safe position; then shut off and note whether water comes from the tub spout, showerhead, or both.
Expected result: Water flows only from the selected outlet, water also continues from the tub spout while showering, or water emerges from both outlets with unusual delay or back pressure.
Next step: Record the valve and outlet arrangement and request product-specific plumbing diagnosis if the nonselected outlet flows continuously, the behavior is new, or the shower does not divert correctly.
Stop if: Do not block an outlet, modify piping, remove a diverter, or open the wall to change back pressure.
Why this matters
Why: A small post-use drain from the selected head can be normal, but simultaneous or delayed flow can reflect the diverter, valve, outlet restriction, piping material, pressure, or installation arrangement. The observation does not identify a replaceable part by itself.
-
Check 5
Inspect the accessible wall area around the trim and the room or ceiling below for staining, soft materials, peeling finish, persistent dampness, or a musty smell; compare the area after the shower has been unused for a while.
Expected result: There is no surrounding moisture, moisture appears only after use, moisture persists while the shower is off, or damage is spreading beyond the fixture.
Next step: Keep the area dry and document the timing and location; stop using the shower and arrange qualified plumbing service for persistent or spreading moisture.
Stop if: Do not cut the wall, remove trim to inspect inside, or use the shower to reproduce a suspected concealed leak when water damage is visible.
Why this matters
Why: No surrounding moisture supports a head-only drainage explanation but does not prove the valve is sound. Moisture that persists or spreads can indicate a valve-body, supply, drain, or concealed connection leak and needs prompt assessment.
-
Check 6
Gather the fixture brand and model if visible, single-control or separate-handle arrangement, tub spout and diverter details, drip duration and origin, photos, recent repair or installation history, and whether any connection or trim was disturbed.
Expected result: The behavior is unchanged since installation, began after a repair, varies with outlet selection or household pressure, or continues even when the showerhead is removed as instructed.
Next step: Give the record to a qualified plumber or the fixture manufacturer and ask for a diagnosis before ordering a cartridge, seal kit, or diverter.
Stop if: Do not select a replacement valve part by appearance alone, expose the valve, or change supply piping as a trial.
Why this matters
Why: A post-installation or post-repair pattern makes installation, cartridge, seal, or diverter configuration more relevant; a head-only, self-stopping pattern remains consistent with retained water. Pressure- or piping-related behavior requires an installation-specific assessment.
Use your observations
Decision map
Find the observation that best matches what you see, then follow the next safe action.
-
PATH 01Next step
What you see
Only the spray openings drip, the drops diminish and stop after the shower is off, and there is no wet trim, wall moisture, or connection leak.
Do this next
Monitor the event and follow the installed manufacturer's normal care instructions; arrange service if the duration grows, the drip returns after stopping, or its location changes.
Why this path and its safety boundary
Why it matters: Retained water draining from the showerhead is more likely than an active valve leak; this matches the residual-water behavior described by Delta and Kohler for their fixtures.
-
PATH 02Next step
What you see
Water continues from the shower arm or outlet after the head is safely separated, or the drip continues indefinitely after the head should have drained.
Do this next
Stop disassembly and arrange qualified plumbing service with the fixture identity and comparison result; use the manufacturer's model-specific repair path.
Why this path and its safety boundary
Why it matters: An internal seal, cartridge, pressure-balancing component, or upstream valve fault is more likely than residual water in the head.
-
PATH 03Next step
What you see
The showerhead or arm connection wets during use, a washer or O-ring is damaged or missing, or water appears outside the spray openings while the fixture is running.
Do this next
Use only the manufacturer's permitted external cleaning or seal replacement procedure; request plumbing service if the connection remains wet or threads do not engage easily.
Why this path and its safety boundary
Why it matters: A head seal, washer, threaded connection, or damaged showerhead is more likely than a post-shutoff reservoir drip.
-
PATH 04Next step
What you see
The tub spout and showerhead flow together, water appears at the nonselected outlet, or the outlet flow is delayed and changes with the piping or pressure arrangement.
Do this next
Document the outlet arrangement and have a plumber or the valve manufacturer assess the installation without modifying piping or opening the wall as a first step.
Why this path and its safety boundary
Why it matters: Diverter, outlet restriction, back pressure, valve configuration, or installation materials may be affecting the flow; retained water alone does not explain the whole pattern.
-
PATH 05Safety boundary
What you see
Moisture persists around the trim, wall, ceiling below, or floor after the shower is unused, or damage spreads beyond the showerhead.
Do this next
Stop using the shower, keep the area safe and dry, and arrange prompt qualified plumbing assessment; address active water damage through the appropriate professional.
Why this path and its safety boundary
Why it matters: A concealed valve, supply, drain, or connection leak is more likely and can cause structural damage even when the spray-head drip appears minor.
Safety stop: Do not cut the wall or remove valve trim to investigate without the correct isolation and model-specific procedure.
-
PATH 06Next step
What you see
The dripping began immediately after a new installation or repair, or it changed after the showerhead, cartridge, trim, or piping was disturbed.
Do this next
Provide the repair history and photos to the installer, manufacturer, or qualified plumber and request model-specific verification; do not add parts or alter the installation by trial and error.
Why this path and its safety boundary
Why it matters: A mis-seated seal, incorrect assembly, valve orientation, outlet restriction, or installation-specific issue deserves priority over generic cleaning advice.
Helpful context
Understand the symptom
A short post-shutoff drip is not the same as a valve leak
Start by watching one complete event with the water off. A few drops that slow and stop from the showerhead spray openings can be retained water draining from the head. Delta describes that behavior as the showerhead emptying its reservoir; Kohler's valve guidance likewise distinguishes residual drainage from a drip that continues after the head is separated. The exact time depends on the fixture and installation, so location and whether the flow truly stops matter more than a universal timer.
Find the origin before tightening or replacing anything
Dry the outside of the showerhead, connection, trim, and tub spout, then observe whether new water first appears at the spray openings, threaded connection, handle or escutcheon, or from the wall. EPA WaterSense recommends checking visible connections and contacting a plumbing professional for more complicated shower valve leaks. Do not assume a drip from the spray plate proves that the valve cartridge is bad, and do not tighten a hidden or seized connection by force.
Shower-and-tub combinations need a separate diversion check
If the fixture has both a tub spout and showerhead, note whether water appears at the tub spout while the shower is selected, and whether the post-shutoff drip is only the last water draining from the head. Kohler explains that back pressure, restricted or incorrectly installed connections, and the valve or diverter arrangement can affect where water emerges. This is an installation- and valve-specific diagnosis; it is not a reason to open the wall or alter piping without the manufacturer's instructions.
Safety boundary
Stop conditions
- Do not open the wall, remove valve trim, or disassemble the cartridge, pressure-balancing unit, or diverter as a first-line check.
- Do not force a seized showerhead, overtighten a threaded connection, use unapproved sealant, or alter piping to change back pressure.
- Stop using the shower for water entering the wall, ceiling, floor, or electrical area, persistent dampness, staining, or spreading water damage.
- Do not assume a persistent drip is normal residual water; arrange qualified plumbing service when it continues after the head should have drained or comes from the valve or wall.
- Do not choose a cartridge, seal kit, or diverter solely by appearance; confirm the exact fixture and compatibility with the manufacturer or plumber.
Only after diagnosis
Potential parts
- showerhead washer or O-ring
Consider this category only when inspection confirms a damaged, missing, or displaced seal at the accessible showerhead connection and the manufacturer's procedure calls for replacement.
Confirm the exact fixture, seal dimensions, material, and manufacturer's fit information; do not compensate for a mismatch by overtightening or adding unapproved sealant. - shower valve cartridge or seal kit
Consider this category only when the drip continues upstream after the showerhead is separated as instructed and a qualified diagnosis identifies an internal seal or cartridge fault.
Confirm the exact valve model, handle configuration, pressure-balancing design, and manufacturer procedure before ordering; installation may require water isolation and trained service. - shower diverter component
Consider this category only when water continues from the nonselected outlet or the diverter fails a product-specific check, rather than for a brief head-only residual drip.
Confirm the exact valve and outlet arrangement, installation requirements, and compatible component with the manufacturer or plumber; do not alter piping as a substitute.
When checks do not resolve it
Need a professional?
Arrange qualified plumbing service when dripping continues indefinitely, comes from the handle, trim, wall, or ceiling, appears at a connection after approved external checks, occurs with incorrect tub-and-shower diversion, or began after installation or repair. Stop using the shower for active water damage, persistent dampness, or water near electrical equipment. A short, self-stopping drip from the spray openings can be retained water, but a plumber or manufacturer should assess any uncertain or recurring change.
Safety scope: This article covers observation and ordinary external inspection only. Do not open walls or valve trim, force connections, alter piping, remove internal valve parts, or improvise a seal or cartridge repair.
Common questions
FAQ
Is it normal for a showerhead to drip for a few minutes after shutoff?
A short, self-stopping drip from the spray openings can be retained water draining from the showerhead. Delta describes the head as emptying its reservoir, and Kohler documents residual dripping for some valves. If the drip continues indefinitely, returns after stopping, or comes from the trim, connection, or wall, treat it as a leak.
How can I tell residual shower water from a valve leak?
Watch where the first new drop appears and whether the event stops. If the head is designed to be removed and the manufacturer's instructions allow it without force, a drip that stops with the head separated supports retained water in the head. Water that continues from the arm or valve outlet points toward an upstream seal or valve issue.
Why does my tub spout drip or run when the shower is selected?
A nonselected outlet can reflect a diverter, back-pressure, outlet restriction, valve configuration, or installation issue. A small amount of post-use drainage is different from continuous simultaneous flow. Record which outlets flow and have the installed valve or piping assessed rather than changing the piping yourself.
Can I tighten the showerhead to stop the drip?
Only an accessible connection leak should be addressed using the manufacturer's installation procedure and a compatible washer or seal. Do not overtighten, force threads, or use unapproved sealant. Dripping from the handle, wall, or valve outlet requires qualified plumbing diagnosis.
Should I replace the shower cartridge for a drip that stops after minutes?
Not based on that symptom alone. A brief spray-opening drip that stops can be residual water, while a drip that continues upstream after the head has drained can involve an internal seal or cartridge. Confirm the drip source and have the exact valve model and compatible repair path identified before ordering a part.
When should I stop using a dripping shower?
Stop using it for persistent dampness, staining, water entering the wall or ceiling below, spreading damage, or water near electrical equipment. Do not open the wall or valve trim to investigate; arrange qualified plumbing service and address active water damage promptly.
Read the exact guide
Official sources
- Fix a Leak WeekU.S. Environmental Protection Agency, WaterSense · EPA WaterSense household leak-detection guidance for visible showerhead and plumbing leaks; product instructions and qualified service govern concealed or complicated valve work.
- After turning off my shower, water continues to drip from the shower head for a minute or so. Is something wrong?Delta Faucet · Delta Faucet customer-support guidance for a showerhead that drips briefly after shutoff; other fixtures may differ.
- Delayed Flow, Dripping or Back Pressure from Shower Head and/or Tub SpoutKohler Assist · Kohler valve installation guidance for listed valve families; piping and valve requirements must be verified for the installed model.
- Rite-Temp Valve Dripping from Showerhead or SpoutKohler Assist · Kohler Rite-Temp single-control valve guidance; it is model-specific and does not establish the diagnosis for another valve.
Community feedback
Share a repair observation
Share a plain-text repair observation. Accepted observations are published automatically; this page may take a moment to update.