
On this page
Start here
Quick answer
First locate the water and separate a few residual drops from a continuing leak. Dry the showerhead face, the showerhead-to-arm or hose connection, the shower arm at the wall, the tub spout if present, and the floor. Run the shower briefly, shut it off, and watch where fresh water appears. Drops only from the spray face may be residual water draining from the head; water at the threaded connection while running points toward a washer, gasket, debris screen, or connection issue; a drip that continues from the outlet after the residual water should drain can point to the shower valve cartridge or seal. Do not overtighten, remove a showerhead, open the valve trim, or service a cartridge while water is pressurized. Isolate the water before any plumbing repair and call a plumber for a continuous drip, wall leak, seized shutoff, or uncertain source.
Before you begin
Safety first
- Isolate hot and cold water before any valve or fitting service. Do not overtighten or loosen a pressurized showerhead, remove valve trim or cartridge, cap an outlet, open the wall, handle hot pressurized water, or keep testing a persistent drip without a functioning shutoff. Keep the shower unused or isolated and have concealed and valve work handled by a qualified plumber.
Work through in order
Diagnostic checks
Use only checks that match the exact appliance or system and its official guide.
-
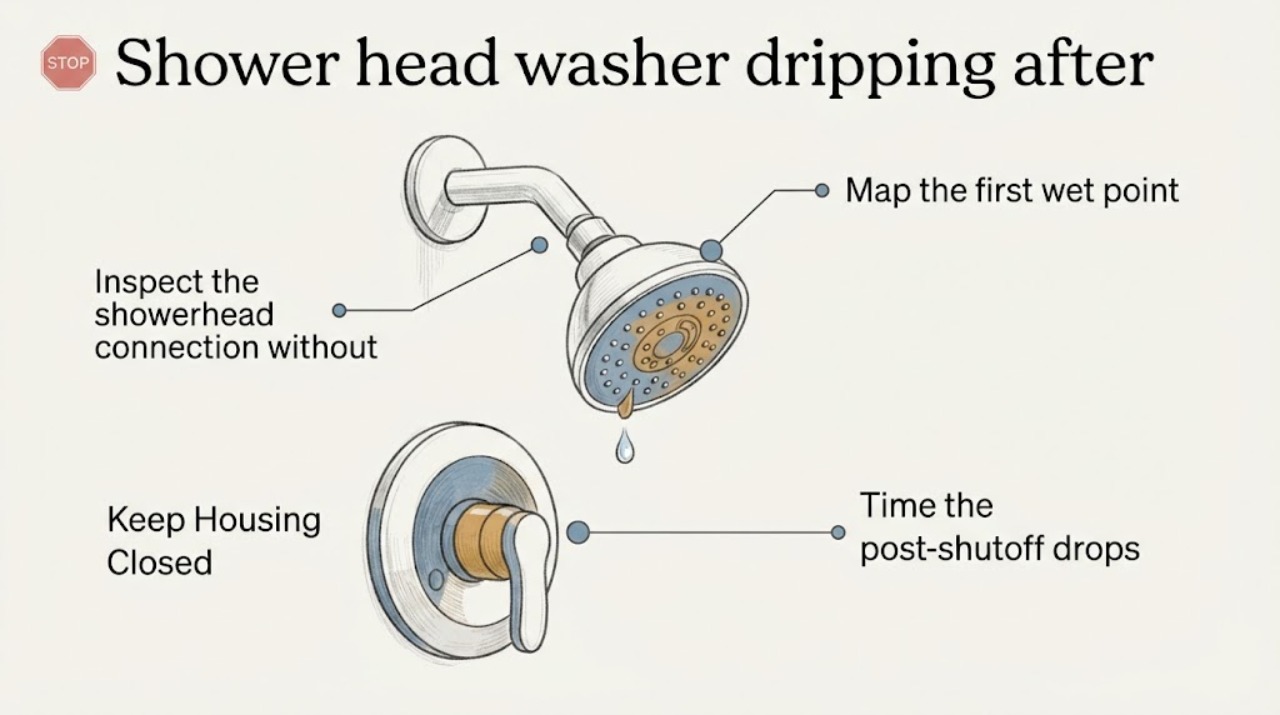
Map the first wet point
Dry the showerhead face and spray holes, the nut where the head meets the arm or hose, the shower arm at the wall, the handle and escutcheon, the tub spout if present, and the floor. Run water briefly, then shut it off and observe from a safe standing position without touching the fittings.
Expected result: Record water from the spray face, threaded head-to-arm or hose joint, shower arm at the wall, handle or escutcheon, tub spout, or no fresh water during the brief test.
Next step: Photograph the first wet point and continue only with timing and identity checks. Isolate water before removing or servicing any fitting, and arrange plumbing service for a wall, handle, or continuous leak.
Stop if: Stop for water behind the wall, a loose shower arm, a spray that cannot be controlled, hot-water injury risk, a flooded floor, or water near electrical equipment.
Why this matters
Why: A joint-only leak points toward the washer, gasket, debris screen, thread, or fitting; an outlet drip after shutoff can be residual drainage or a valve seal; water at the handle or wall suggests another valve or concealed leak. The visible floor drip may not be the source.
-
Time the post-shutoff drops
After one brief normal shower use, watch the dry showerhead outlet and tub spout without removing either fitting. Note whether drops taper off and stop, continue as a steady flow, or return after the outlet appears dry; do not repeat a persistent drip test.
Expected result: Record a few separated drops that stop, a continuous drip or stream, outlet water that lasts unusually long, or a drip that begins again without the shower running.
Next step: Limit shower use for ongoing flow and give the duration and outlet to the plumber. Do not try to cure an outlet drip by adding tape at the visible nut or overtightening the head.
Stop if: Stop for a continuous stream, water entering the wall or ceiling, an inaccessible shutoff, or any need to dismantle the valve or outlet.
Why this matters
Why: Short-lived outlet drops may be residual water draining from the showerhead or pipe. Ongoing or recurring flow after shutoff makes an internal valve, cartridge, or seal issue more likely than a showerhead washer at the threaded joint.
-
Inspect the showerhead connection without loosening it
With the fitting dry and the shower off, inspect the nut or collar at the showerhead-to-arm or hose connection from normal reach. Look for a visible gap, shifted head, mineral buildup, a split or missing washer edge, or water that starts at the joint when the shower runs; do not turn the nut or insert a tool.
Expected result: Record a dry and aligned joint, water beading around the nut during use, a loose-feeling or visibly shifted head, mineral debris, a missing or crushed washer visible at an open edge, or a leak from the wall-side shower arm instead.
Next step: If a washer or connection is suspected, isolate water before any fitting is removed and follow the exact showerhead instructions or have a plumber service it. Do not overtighten because it can crush a washer or damage the connection.
Stop if: Stop for a shower arm that moves in the wall, corroded or seized threads, a cracked fitting, spraying water, or any need to use a wrench without water isolation.
Why this matters
Why: Moisture at the threaded joint is consistent with a washer, gasket, debris screen, thread, or connection problem. A dry joint with an outlet drip shifts attention upstream to the valve or cartridge; a wall-side leak needs prompt plumbing assessment.
-
Check tub-spout and diverter behavior if present
For a tub-and-shower combination, observe from the side whether water comes from the tub spout, showerhead, or both during normal selection and after shutoff. Do not cap an outlet, force the diverter, restrict the showerhead, or remove a spout for this check.
Expected result: Record a showerhead-only drip, tub-spout-only drip, water from both outlets when one is selected, or flow that continues from an outlet after the valve is off.
Next step: Give the outlet pattern to a plumber and avoid repeated use if flow continues after shutoff. Do not restrict an outlet or alter the diverter to conceal the symptom.
Stop if: Stop for unusual pressure, a stuck diverter, water behind trim, a damaged spout, or any need to cap or dismantle a pressurized outlet.
Why this matters
Why: Outlet patterns can reflect residual drainage, diverter behavior, pressure or installation conditions, or an internal valve seal—not just a showerhead washer. A washer at the showerhead connection will not explain flow emerging from the tub spout.
-
Check for wall or fixture moisture
From the bathroom side and any already accessible adjacent area, inspect the wall around the shower arm and escutcheon, the tub edge, floor, ceiling below, and visible trim for moisture or staining. Do not open the wall, pry the escutcheon, or remove tile to trace a leak.
Expected result: Record a dry surrounding area, moisture at the wall-side connection, a loose escutcheon, bubbling or staining, damp flooring, or a ceiling mark below the shower.
Next step: Stop shower use as needed, isolate water if the leak is active, and call a plumber for any concealed moisture or structural damage. Preserve photos before applying caulk or opening finishes.
Stop if: Stop for a soft wall, active wall leak, damaged ceiling, mold-like growth, water near electricity, or any need to cut into a finish.
Why this matters
Why: Wall-side or concealed moisture can accompany a failed shower arm connection, valve seal, or supply line and should not be treated as a replaceable washer problem. A dry wall does not rule out an intermittent concealed leak.
-
Identify the model and prepare the repair handoff
Collect the showerhead, hose, valve, and trim brand/model if visible, connection type, first wet point, drip duration, outlet pattern, photos, and any recent installation or cartridge work. Do not choose a washer or cartridge from appearance alone and do not remove the valve trim to identify it while pressurized.
Expected result: Record whether the likely path is a showerhead washer or connection, residual outlet drainage, cartridge or valve seal, diverter, wall-side connection, or unresolved without isolation.
Next step: Isolate water before any repair and send the photos, model information, timing, and outlet pattern to a plumber or manufacturer support channel. Keep the shower out of normal use if flow continues after shutoff.
Stop if: Stop information gathering when it requires removing a showerhead or valve trim, loosening a fitting, opening the wall, handling hot pressurized water, or working without a functioning shutoff.
Why this matters
Why: A washer is selected by the connection and fitting, while a cartridge or repair kit is selected by the valve family. Model identity and leak location prevent a connection washer from being substituted for an upstream valve repair.
Use your observations
Decision map
Find the observation that best matches what you see, then follow the next safe action.
-
PATH 01Next step
What you see
Only a few tapering drops come from the showerhead face after shutoff and the threaded connection stays dry.
Do this next
Treat the symptom as possible residual drainage, monitor without repeated tests, and consult valve guidance if the drip becomes continuous or changes location.
-
PATH 02Next step
What you see
Water appears at the showerhead-to-arm or hose joint while the shower runs and the outlet/valve otherwise shuts off.
Do this next
Isolate water before any fitting service and have the washer, gasket, debris screen, and threads checked against the exact fitting instructions. Do not overtighten or use tape as a substitute for a missing washer.
-
PATH 03Next step
What you see
A continuous drip or stream comes from the showerhead or tub spout after shutoff while the visible head connection is dry.
Do this next
Limit use, isolate water if safe, and call a plumber for valve-cartridge or seal diagnosis. A showerhead washer will not stop an upstream valve from passing water.
-
PATH 04Next step
What you see
Water appears around the handle, escutcheon, shower arm at the wall, floor, ceiling below, or inside the wall.
Do this next
Stop use and request plumbing service for a concealed or wall-side leak. Do not caulk over the trim, open the wall, or keep testing.
-
PATH 05Next step
What you see
Water comes from both tub spout and showerhead unexpectedly, or the diverter behaves abnormally.
Do this next
Provide the outlet pattern to a plumber; diverter, pressure, restriction, installation, and valve conditions may be involved. Do not cap an outlet or force the diverter.
-
PATH 06Next step
What you see
The fitting and valve are identified, water is isolated, and a professional confirms the washer or valve repair and verifies the shower is dry after shutoff.
Do this next
Resume normal use only after the check. Monitor the joint, outlet, trim, and wall; isolate water and reopen service if dripping or moisture returns.
Helpful context
Understand the symptom
The washer and cartridge cause different symptoms
A showerhead washer seals the threaded connection between the head and arm or hose. It can leak at that joint when water is on, especially if it is missing, crushed, dirty, or not seated. A valve cartridge controls water upstream; when it does not close, water can continue to emerge from the showerhead or tub spout after shutoff. Water left inside the showerhead can also drip briefly without a failed washer or cartridge. The exact wet location and timing matter before selecting a part.
Keep the check low-risk
Use only a normal standing position and a brief ordinary shower test. Do not use a ladder, lean over a tub, block an outlet, or loosen a threaded fitting to prove the cause. Any work inside the valve, behind the escutcheon, or on a concealed shower arm begins only after the hot and cold supply is isolated and should follow the exact valve instructions or be handled by a plumber.
Only after diagnosis
Potential parts
- shower cartridge
Consider only when continuous post-shutoff flow is confirmed from the showerhead or tub spout, the visible head connection is dry, and the exact valve family is identified.
Match valve series, cartridge design, seals, and manufacturer instructions; a cartridge cannot correct a washer leak at the showerhead connection. - shower head washer
Consider only when fresh water is confirmed at the showerhead-to-arm or hose joint and the fitting's washer or gasket is missing, crushed, dirty, or otherwise identified as the cause after water isolation.
Match connection type, washer dimensions and material, showerhead or hose design, and the manufacturer's guidance; do not infer fit from a generic round washer. - shower valve repair kit
Consider only when the exact valve model and failed internal seal, pressure-balancing component, or related service part are confirmed after the water is isolated.
Verify valve series, kit contents, seal arrangement, water-isolation requirements, and service instructions; do not mix components across valve families.
When checks do not resolve it
Need a professional?
Call a plumber for a continuous drip after shutoff, water from the handle or wall, a shower arm that moves, a seized or inaccessible shutoff, recurring moisture, an unknown valve, or any repair requiring removal of a showerhead, trim, cartridge, or concealed fitting. Escalate promptly for a stream, hot-water hazard, wall or ceiling damage, or water near electricity.
Safety scope: Isolate hot and cold water before any valve or fitting service. Do not overtighten or loosen a pressurized showerhead, remove valve trim or cartridge, cap an outlet, open the wall, handle hot pressurized water, or keep testing a persistent drip without a functioning shutoff. Keep the shower unused or isolated and have concealed and valve work handled by a qualified plumber.
Have this ready
- Provide the first wet point, drip duration, whether the head-to-arm or hose joint is wet, outlet pattern with a tub spout if present, showerhead/valve brand and model if known, connection type, photos, recent installation or cartridge history, and whether the fixture or main shutoff stops the flow.
Common questions
FAQ
Does a dripping showerhead after shutoff mean the washer is bad?
Not necessarily. A washer usually leaks at the threaded showerhead-to-arm or hose connection while water is running. A few outlet drops may be residual drainage, while continuous post-shutoff flow can indicate a valve cartridge or seal. Locate the first wet point before choosing a part.
How can I tell a showerhead washer leak from a cartridge leak?
Dry the joint and outlet, run the shower briefly, and observe. Water at the threaded joint points toward the washer, gasket, debris screen, or fitting. A dry joint with continuous water from the showerhead or tub spout after shutoff points upstream toward the valve or cartridge. Do not loosen fittings while pressurized.
Can I tighten the showerhead to stop the drip?
Do not overtighten. Excess force can crush a washer or damage the threaded connection. Isolate water before any fitting service and follow the exact showerhead instructions or have a plumber check the washer, gasket, screen, and threads.
Why does my showerhead drip briefly after I turn it off?
Water retained in the showerhead, hose, or pipe can drain briefly after the valve closes. If drops continue, recur constantly, emerge from the handle or wall, or appear as a stream, treat it as a leak and request plumbing assessment.
What showerhead washer should I buy?
Identify the showerhead or hose connection, brand/model, washer location, and material guidance first. A generic round washer may have the wrong size or material. Order a washer only when the wet point confirms the threaded connection—not an upstream valve or concealed leak—as the cause.
Read the exact guide
Official sources
- How to Fix a Leaky Shower HeadDelta Faucet · Delta's manufacturer article is used to distinguish a washer or gasket leak at the showerhead-to-arm connection from a valve cartridge leak after shutoff; exact products and fitting instructions vary.
- Rite-Temp Valve Dripping from Showerhead or SpoutKohler · Kohler's single-control valve guidance supports distinguishing residual showerhead drainage from a continuing valve leak and highlights valve identification; the named valve and repair parts are not assumed for an unknown shower.
- WaterSense Labeled Homes Technical Sheet: Free of Water LeaksU.S. Environmental Protection Agency WaterSense · EPA WaterSense guidance is used for the low-risk observation sequence and locations to inspect; its home-verification protocol is not presented as a repair procedure for this unknown shower.
Community feedback
Share a repair observation
Share a plain-text repair observation. Accepted observations are published automatically; this page may take a moment to update.