
On this page
Start here
Quick answer
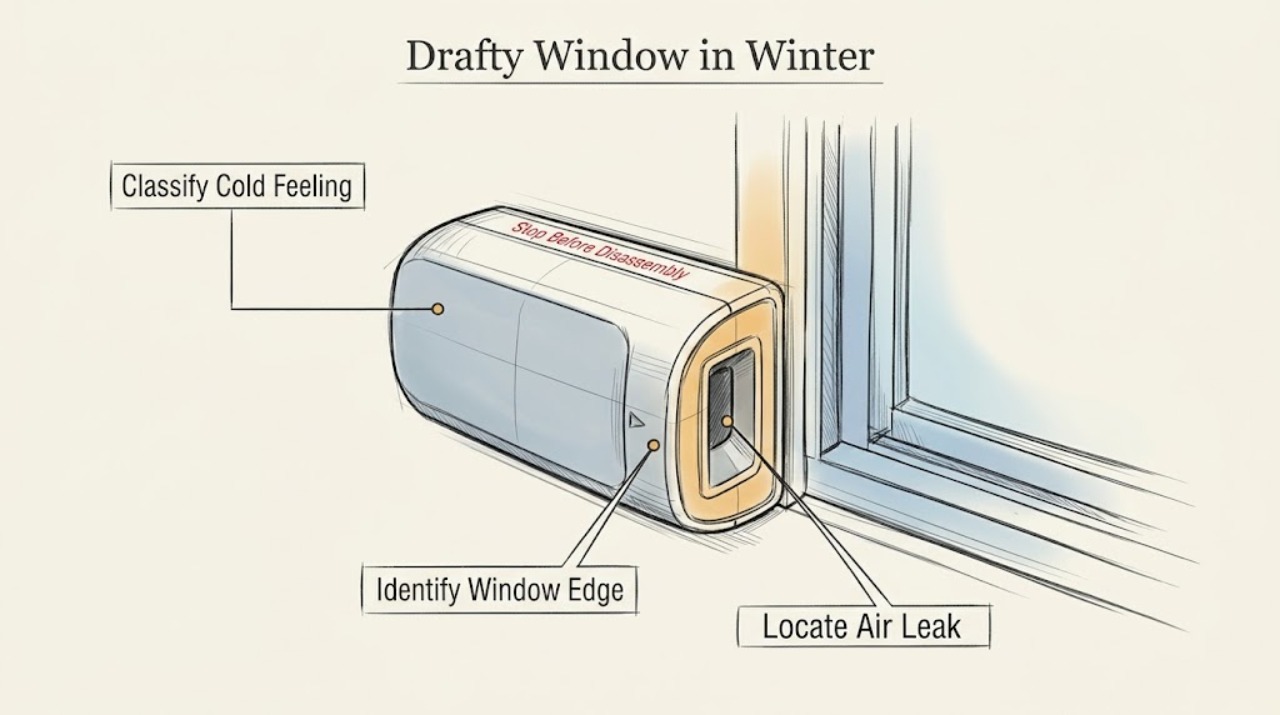
A winter window can feel drafty because air is passing through the sash, frame, or rough opening, or because cold glass is causing nearby air to move. Close and latch the window, then locate the exact edge with a strip of tissue or a smoke pencil; never use a candle or other flame. Check the sash meeting rail, corners, lock, frame-to-trim joint, and visible glass for movement, gaps, condensation, or water. Use weatherstripping only on a moving sash and caulk only on a dry, sound stationary joint without blocking drainage openings or an emergency exit. If glass is cracked or loose, water is entering the wall, mold is extensive, the frame is moving, or a combustion appliance may be back-drafting, stop and arrange qualified service.
Before you begin
Safety first
- This article supports ordinary-access observation and a narrow, reversible seal check on dry sound material only. Do not remove glass or trim, work at height, block drainage or egress, alter combustion ventilation, or work on energized or wet electrical equipment.
Work through in order
Diagnostic checks
Use only checks that match the exact appliance or system and its official guide.
-
Check 1
With the window closed and latched, compare the sensation at the glass center, sash edge, frame, trim, and nearby wall; do not remove trim or open the wall.
Expected result: Record whether air movement is felt at one edge, the glass is broadly cold with no movement, the room-side surface is wet or frosted, or water appears only after rain.
Next step: Use the matching branch below and keep a dated photo of moisture, staining, or the suspected edge before applying any seal.
Stop if: Stop if the wall is wet, the frame moves, glass is damaged, or the check would require opening a wall or disturbing exterior materials.
Why this matters
Why: A localized moving stream supports an air path at the sash or frame. A broad cold surface without movement suggests conduction or convection. Condensation suggests indoor moisture meeting a cold surface, while rain-linked water suggests a water-management or exterior-joint problem.
-
Check 2
Identify how the window operates and inspect ordinary-access contact points: the meeting rail or latch side of a sliding sash, the compression gasket of a casement, sash corners, frame, trim, and visible glass edge.
Expected result: Note whether the sash closes squarely, the lock draws it tight, a gasket or weatherstrip is visibly flattened or missing, the frame-to-trim joint has a dry gap, or the glass is cracked or loose.
Next step: Photograph the identified component and use only the moving-seal or stationary-joint path that matches it; arrange glazing or window service for damaged glass or an uneven frame.
Stop if: Do not force a swollen sash, pry glass beads, remove glazing, climb to reach exterior seals, or disassemble a frame.
Why this matters
Why: The operating type determines which surface is meant to move and which joint is stationary. A worn contact seal or incomplete latch can explain a sash-edge leak; a gap at stationary trim points to air sealing; loose or cracked glass is a glazing safety issue rather than a caulk target.
-
Check 3
Hold a narrow strip of tissue at the closed sash perimeter and frame-to-trim joint, or use a smoke pencil only as directed by its manufacturer and only away from flame, hot surfaces, and combustion appliances.
Expected result: Record whether the tissue moves or smoke drifts at the moving sash, latch corner, frame-to-trim joint, glass edge, or nowhere; repeat only at a different edge rather than leaving a smoke source unattended.
Next step: Mark the exact leak edge with removable tape and choose the corresponding branch; do not use the test to justify flame, heat, or an open-flame smoke source.
Stop if: Stop immediately for fuel odor, a carbon-monoxide alarm, smoke, flame disturbance, arcing, a hot outlet, or any need to test near a combustion appliance.
Why this matters
Why: Movement at a moving contact supports weatherstripping, closure, or alignment. Movement at a stationary frame joint supports air sealing or an installation gap. No movement means the sensation may be cold-glass convection, while movement at a vent or appliance path may not be a window defect.
-
Check 4
Operate the sash normally once and inspect the visible weatherstrip, gasket, latch, keeper, and meeting rail for compression, dirt, tears, or a closure gap without forcing the hardware.
Expected result: Record whether the latch engages cleanly and the seal contacts evenly, the sash springs back or leaves a corner gap, the gasket is damaged, or the hardware is loose or misaligned.
Next step: Clean only as allowed by the window instructions and obtain the exact seal or hardware identity; do not force the sash or substitute a thick seal that prevents safe closure.
Stop if: Stop for cracked glass, binding, unstable frame movement, a sash that may fall, or hardware that requires disassembly beyond ordinary access.
Why this matters
Why: Even contact makes a simple seal replacement less likely to be the main answer. A corner gap or latch that cannot draw the sash closed suggests alignment or hardware service; a torn or missing contact seal supports a compatible weatherstrip category.
-
Check 5
From inside and from ground-level exterior view only, inspect the dry frame-to-trim joint, sill, and visible drainage openings for a gap, failed seal, staining, or blocked path; do not remove trim or exterior cladding.
Expected result: Record whether the gap is narrow and dry, the joint is wet or separating, staining tracks from above, the frame is soft or displaced, or a sill drain or weep opening is obstructed.
Next step: Keep the opening and drainage path clear, photograph the pattern, and arrange window or building-envelope service when water, movement, or concealed damage is suspected.
Stop if: Do not seal over wet or moldy material, block weep or drain openings, remove exterior materials, or work at height without qualified equipment and training.
Why this matters
Why: A small dry stationary gap may be suitable for a compatible sealant assessment. Wet joints, staining from above, soft material, displacement, or blocked drainage may involve flashing, installation, or structural water management and cannot be diagnosed by adding surface caulk.
-
Check 6
Dry the room-side glass and sill, then document when moisture returns relative to outdoor cold, indoor cooking or showering, and rainfall; do not cover a damp or moldy surface with sealant.
Expected result: Record whether moisture forms on the room-side surface during cold weather, between insulated glass panes, at the sill after rain, or inside the wall or trim; note any mold-like growth or softened material.
Next step: Improve ordinary ventilation and dry accessible moisture when safe, but arrange glazing or building-envelope service for moisture between panes, recurring rain entry, concealed wetness, or mold concerns.
Stop if: Stop for extensive mold, contaminated water, wet insulation, electrical contact, or any attempt to open an insulated glass unit or wall.
Why this matters
Why: Room-side condensation is consistent with a cold surface and indoor moisture, while moisture between panes can indicate a failed insulated unit. Rain-linked or concealed wetness points toward water entry. Mold, soft material, or persistent dampness raises a moisture-remediation and building-envelope issue.
-
Check 7
If the exact leak is dry, accessible, and clearly identified, match a reversible repair to the component: a compatible weatherstrip for a moving sash or a compatible caulk assessment for a sound stationary frame-to-trim joint.
Expected result: After the window is closed normally, observe whether the seal contacts evenly, the sash still opens and latches safely, the draft is reduced at the marked edge, and no moisture is trapped or redirected indoors.
Next step: Leave drainage and egress clear, monitor through the next cold or wet period, and request qualified service if the result is incomplete or the repair is not reversible.
Stop if: Do not seal an emergency-exit window shut, cover drainage openings, caulk moldy or wet material, or use expanding products without product-specific professional guidance.
Why this matters
Why: A reduced draft with normal operation supports the selected contact seal or stationary-joint repair. A sash that will not latch, a new gap, trapped moisture, or draft that moves to the wall indicates a mismatch, alignment issue, or concealed path rather than a reason to add more material.
-
Check 8
Before any broader air-sealing work, identify nearby fuel-burning appliances, exhaust fans, and electrical equipment, and check whether the suspected air path could be related to combustion ventilation or a wet electrical area; do not alter vents or appliance settings.
Expected result: Record any carbon-monoxide alarm, fuel odor, soot, unusual flame behavior, smoke, arcing, hot outlet, water near electrical equipment, or repeated protective shutdown.
Next step: For a safety warning, leave or isolate the area only when safe and contact emergency or qualified service; otherwise ask an energy auditor or window professional to assess leakage and ventilation together.
Stop if: Do not relight, reset, or repeatedly operate a suspect appliance, work on energized wiring, test with flame, or seal combustion-air or exhaust paths.
Why this matters
Why: These findings change the job from a window draft repair to an urgent safety or qualified HVAC/electrical assessment. No such finding permits only the narrow window repair already identified; it does not authorize sealing the whole room or appliance area.
Use your observations
Decision map
Find the observation that best matches what you see, then follow the next safe action.
-
PATH 01Safety boundary
What you see
The glass feels cold but tissue does not move at the frame, sash, or trim.
Do this next
Check room humidity and airflow over the glass, then ask an energy professional about insulation or the glazing unit if comfort remains poor.
Why this path and its safety boundary
Why it matters: Heat transfer or air circulation beside a cold surface is more likely than a localized draft path.
Safety stop: Do not replace or remove glass based only on a cold sensation; stop for a cracked or loose pane.
-
PATH 02Safety boundary
What you see
Air movement is localized at the meeting rail, latch side, sash corner, or other moving contact.
Do this next
Use the exact window instructions to identify a compatible contact seal or arrange window service for alignment and hardware.
Why this path and its safety boundary
Why it matters: Weatherstrip condition, latch compression, or sash alignment is the focused path.
Safety stop: Do not force a binding sash, install an oversized seal that prevents latching, or leave an emergency exit unable to open.
-
PATH 03Safety boundary
What you see
Air movement is localized at a dry frame-to-trim or other stationary joint.
Do this next
Use a compatible stationary-joint seal only within ordinary safe access, or ask a window or building-envelope professional to assess the rough opening.
Why this path and its safety boundary
Why it matters: A surface air-sealing issue or installation gap is possible, but the joint must be dry and structurally sound first.
Safety stop: Do not seal wet, moldy, soft, separating, or structurally moving material, and do not remove trim to expose a concealed opening.
-
PATH 04Safety boundary
What you see
Moisture appears after rain or tracks from the sill, frame, trim, or wall.
Do this next
Dry what is safely accessible, keep drainage openings clear, document the path, and arrange window or building-envelope service.
Why this path and its safety boundary
Why it matters: Water management, flashing, drainage, or an exterior joint may be involved; a draft seal alone may hide damage.
Safety stop: Stop for wet insulation, softened wood, concealed wall moisture, ceiling or wall staining, or any exterior work at height.
-
PATH 05Safety boundary
What you see
Water or frost forms on the room-side surface during cold weather without a rain pattern.
Do this next
Dry the surface, use ordinary kitchen and bath ventilation, and ask about humidity or glazing improvements if it recurs.
Why this path and its safety boundary
Why it matters: Indoor moisture meeting a cold window surface is plausible; this is not proof of outdoor air leakage.
Safety stop: Stop for recurring concealed dampness, mold, or moisture between panes; do not caulk over wet or moldy material.
-
PATH 06Safety boundary
What you see
The glass is cracked, loose, fogged between panes, or the frame is displaced or unstable.
Do this next
Keep people away from the opening, avoid operating the sash, and arrange a qualified glazier or window professional.
Why this path and its safety boundary
Why it matters: Glazing or structural service is needed; weatherstripping or surface caulk will not make the opening safe.
Safety stop: Do not remove glass, glazing beads, or frame components, and do not apply pressure to a loose pane.
-
PATH 07Safety boundary
What you see
The suspected draft is near a fuel-burning appliance or exhaust path, or there is a carbon-monoxide alarm, fuel odor, soot, or flame disturbance.
Do this next
Leave or isolate the area as safety permits and contact emergency or qualified HVAC service; disclose the window and fan observations.
Why this path and its safety boundary
Why it matters: Ventilation and combustion safety take priority over window comfort; broad air sealing could worsen a dangerous pressure or venting condition.
Safety stop: Do not operate, relight, adjust, or seal the appliance, vent, or combustion-air path for testing.
-
PATH 08Safety boundary
What you see
Smoke, burning odor, arcing, a hot outlet, repeated protective shutdown, or water is near electrical equipment.
Do this next
Keep clear, shut power off only from a dry safe position when possible, and contact emergency or qualified electrical service.
Why this path and its safety boundary
Why it matters: This is an electrical or water-safety issue, not an ordinary window-seal repair.
Safety stop: Do not touch wet electrical equipment, reset protection repeatedly, or continue draft testing.
Helpful context
Understand the symptom
A cold window is not always an air leak
Stand near the closed window without touching it and ask what the sensation actually is. Moving air at one edge points toward leakage. A broad cold feeling with no measurable air movement can be heat loss through the glass or air circulation next to a cold surface. Interior water or frost is a moisture clue rather than proof that outdoor air is entering. ENERGY STAR notes that air can leak around windows and that cold-weather condensation occurs when an interior surface falls below the indoor dew point. This distinction prevents a person from sealing the wrong surface or replacing sound glass for a frame leak.
Find the path before choosing a repair
A closed and latched sash is the safest starting condition. Check the moving sash meeting rail, corners, lock side, frame-to-trim joint, and any visible gap around the glass. A tissue strip can show a small air movement; a smoke pencil can trace a path when used according to its instructions and away from flame, heated surfaces, and combustion appliances. The Department of Energy describes air sealing as a way to reduce drafts, but also warns that ventilation needs and fuel-burning appliances must be considered before sealing.
Match the repair to the window component
Weatherstripping belongs on a moving sash or other moving contact, where it can compress when the window closes. Caulk is for a dry, stationary joint such as a sound frame-to-trim gap. Neither is a reason to fill a sill drain or weep opening, cover a damaged frame, or trap wet material. If the leak appears between the frame and wall, or the sash no longer closes evenly, the cause may be installation, alignment, or structural movement and needs a window professional rather than repeated surface caulk.
Treat condensation and water as separate evidence
Wipe and document moisture before changing a seal. Condensation on the room side during a cold spell often reflects indoor humidity and a cold surface; water that appears after rain, collects at one corner, or enters the wall points toward exterior water management or a failed joint. EPA guidance recommends drying damp areas promptly, fixing leaks, and not covering moldy surfaces with caulk or paint. If wet insulation, softened wood, recurring staining, or a large mold area is present, preserve the evidence and call a qualified professional.
Keep combustion and electrical risks outside a DIY seal check
A draft near a window can be confused with air movement from a fuel-burning appliance, exhaust fan, or pressure imbalance. Do not seal vents or combustion-air openings based on a tissue test. The Department of Energy and EPA both stress maintaining ventilation for fuel-burning appliances because combustion pollutants can include carbon monoxide. If a carbon-monoxide alarm sounds, there is fuel odor, soot, flame disturbance, smoke, arcing, a hot electrical device, or a wet wall near electrical equipment, leave the area or shut power off only when it is safe to do so and use the appropriate emergency or qualified service path.
Safety boundary
Stop conditions
- Stop immediately for cracked, loose, or unstable glass; keep people away and arrange qualified glazing service.
- Stop for water entering the wall, softened frame material, wet insulation, persistent staining, extensive mold, or contaminated water; dry what is safe and arrange moisture or building-envelope service.
- Do not seal over wet or moldy material, block sill weep or drain openings, close an emergency exit, or cover a ventilation opening.
- Do not use a candle, lighter, torch, heat gun, or other flame to find a window leak, and do not remove trim, exterior cladding, glass, or glazing components.
- A carbon-monoxide alarm, fuel odor, soot, abnormal flame, suspected combustion backflow, smoke, arcing, hot electrical equipment, or water near energized equipment requires the appropriate emergency or qualified service path.
- Stop if the sash binds, the frame moves, the work needs a ladder or exterior access, or the correct seal and joint cannot be identified without disassembly.
Only after diagnosis
Potential parts
- window sash weatherstrip or compression gasket
Consider this category only when the leak is localized to a moving sash contact and the exact window operating type and seal profile are known.
Match the exact window manufacturer, operating type, seal profile, groove or channel, and closure clearance; an oversized seal can prevent safe latching or egress. - window latch or keeper
Consider this category only when the sash does not draw evenly into its seal and the hardware is visibly damaged or misaligned without frame movement.
Confirm the window operating type and hardware pattern; do not force the sash or drill new mounting points into glass or a structural frame. - compatible stationary-joint caulk or backer rod
Consider this category only for a dry, sound, stationary frame-to-trim joint after drainage, moisture, and structural movement have been ruled out.
Use the exact product instructions and keep weep openings, egress, and ventilation clear; do not use surface sealant to hide a wet or separating rough opening. - replacement insulated glass unit
Consider this category only when moisture is between panes or the sealed glazing is damaged and a glazier confirms the unit dimensions and frame system.
A qualified glazier must confirm the glass dimensions, safety glazing requirements, spacer or seal arrangement, and frame compatibility; do not remove or cut glass as a home diagnostic.
When checks do not resolve it
Need a professional?
Arrange a window professional or energy auditor when the leak persists after a clearly matched, dry, reversible seal check; the air path is at the rough opening; the sash is misaligned; or the opening needs exterior, structural, or glazing work. Arrange moisture or building-envelope service for rain-linked entry, wall wetness, softened material, or recurring staining. Use qualified HVAC or emergency service for combustion-air or carbon-monoxide concerns, and qualified electrical service for arcing, hot electrical equipment, smoke, or water near energized equipment.
Safety scope: This article supports ordinary-access observation and a narrow, reversible seal check on dry sound material only. Do not remove glass or trim, work at height, block drainage or egress, alter combustion ventilation, or work on energized or wet electrical equipment.
Common questions
FAQ
How can I tell whether a window is truly drafty in winter?
Close and latch the window, then use tissue at the sash and frame edges to find localized movement. A broad cold feeling with no movement may be cold glass or nearby convection. Do not use a candle or other flame.
Should I replace the glass when a window feels cold?
Not based on cold sensation alone. First separate air movement at the frame or sash from a cold glass surface, room-side condensation, moisture between panes, or rain entry. Cracked, loose, or failed glazing needs a qualified glazing assessment.
Where does weatherstripping belong on a drafty window?
Weatherstripping is for a moving sash or moving contact that should compress when the window closes. Match the exact window type and seal profile. A stationary frame-to-trim gap is a different path and must be dry and sound before any compatible caulk is considered.
Can I caulk around a drafty window?
Only a dry, sound stationary joint is a possible caulk location. Do not caulk wet or moldy material, block sill drainage openings, seal an emergency exit shut, or use surface caulk to hide a separating or water-damaged frame.
Why does a window collect water when it is not leaking?
Room-side condensation can form when indoor moisture meets a cold window surface, especially in winter. Dry it, use ordinary kitchen and bath ventilation, and seek advice if it recurs, appears between panes, or is accompanied by mold or concealed wall moisture.
When is a draft near a window an emergency?
Treat a carbon-monoxide alarm, fuel odor, soot, abnormal flame, smoke, arcing, hot electrical equipment, or water near energized equipment as a safety issue. Leave or isolate the area as safely possible and use emergency or qualified service; do not seal appliance vents or keep testing.
Read the exact guide
Official sources
- Mold and Your HomeU.S. Environmental Protection Agency · EPA household mold and moisture guidance; it does not diagnose a particular window assembly or replace professional remediation.
- Residential Windows, Doors, & SkylightsENERGY STAR · ENERGY STAR residential window guidance; product installation instructions and local building requirements still govern a particular opening.
- Guide to Air SealingU.S. Department of Energy · U.S. Department of Energy residential air-sealing guide; it is general guidance, not a model-specific window installation manual.
- A Brief Guide to Mold, Moisture and Your HomeU.S. Environmental Protection Agency · EPA general residential moisture guidance; building damage, contaminated water, and health concerns may require qualified assessment.
- Care for Your Air: A Guide to Indoor Air QualityU.S. Environmental Protection Agency · EPA indoor-air-quality guidance; appliance installation and emergency response must follow local requirements and qualified service advice.
Community feedback
Share a repair observation
Share a plain-text repair observation. Accepted observations are published automatically; this page may take a moment to update.