
On this page
Start here
Quick answer
First locate the air movement with the window fully closed and locked, then separate a moving-sash seal problem from a fixed frame, trim, or installation gap. Weatherstripping seals moving joints such as the sash-to-frame contact; caulk or an air-sealing repair is used at stationary frame-to-wall gaps. Inspect for compressed, loose, torn, brittle, or missing weatherstrip, and check that the sash closes squarely and the lock pulls it firmly into the seal. Replace only with a profile and length confirmed for the exact window; do not cover drainage paths or force a sash. If the draft remains after a correct seal repair, water enters, the frame is out of square, glass is damaged, or the work needs sash removal or exterior access, stop and use a qualified window professional.
Work through in order
Diagnostic checks
Use only checks that match the exact appliance or system and its official guide.
-
Check 1
Close and lock the window, then slowly check the interior perimeter with the back of a hand or a narrow strip of tissue without placing anything into the moving hardware; note whether air movement is at the sash edge, meeting rail, lock side, frame-to-trim joint, sill, or glass surface.
Expected result: Air movement is concentrated where the moving sash meets the frame, at the center meeting rail, around a stationary frame and trim, near the sill, or is not localized to an opening.
Next step: Record the window type and exact leak location before removing any material; use that location to choose the seal, lock, alignment, or frame branch.
Stop if: Stop if the glass is cracked, the sash is loose or falling, the frame is visibly distorted, or the check would require reaching from an unsafe height.
Why this matters
Why: A sash-edge or meeting-rail draft points toward weatherstripping, alignment, or lock compression. A frame-to-trim draft points toward stationary air sealing or installation. A non-localized cold sensation can be a cold-glass convection effect rather than a failed strip.
-
Check 2
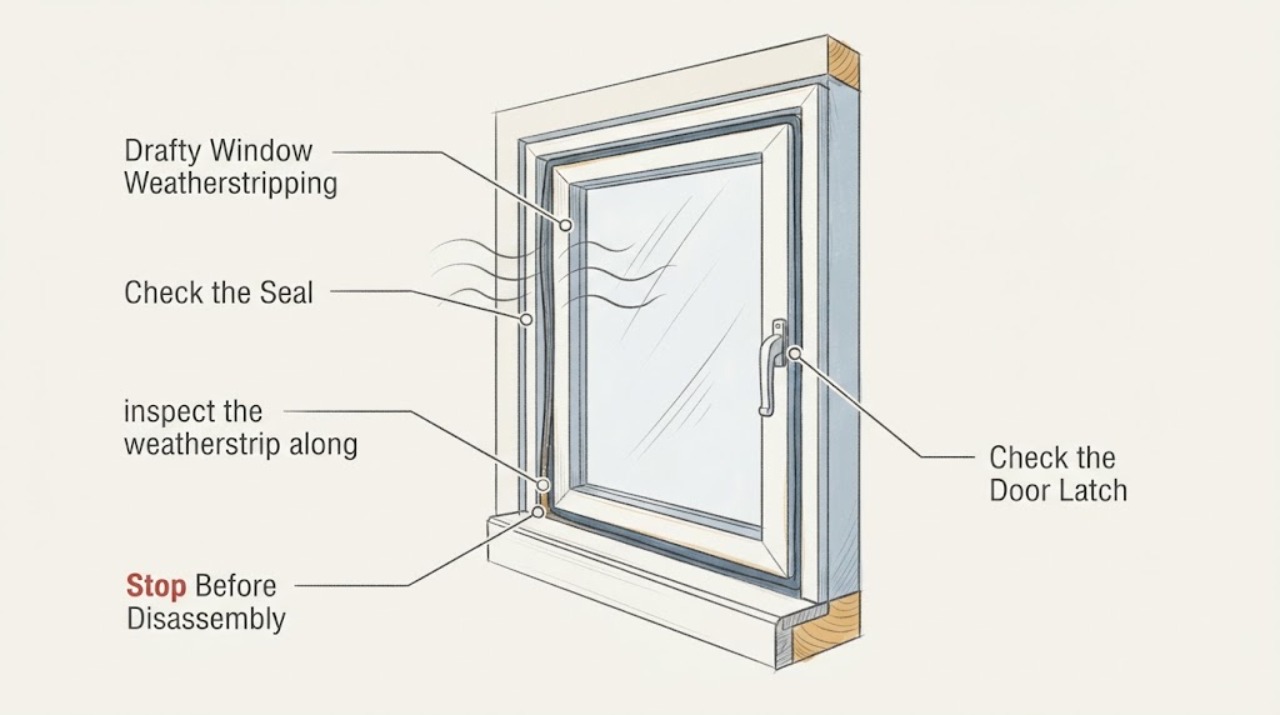
With the window open only as far as it safely allows, inspect the weatherstrip along the sash and frame for gaps, flattening, tears, brittle sections, loose ends, missing corners, adhesive failure, or a strip that has pulled out of its channel; compare the top, sides, and bottom rather than assuming every edge uses the same profile.
Expected result: The seal is continuous and resilient, or it is compressed, frayed, detached, missing, incorrectly seated, or visibly damaged at the same location as the draft.
Next step: Photograph the profile and measure only as the manufacturer instructions permit; identify the window series before selecting replacement weatherstrip.
Stop if: Stop if the seal is bonded to a sash that must be removed, if the glass or frame flexes, or if removal would require force, exterior access, or an unidentified sharp tool.
Why this matters
Why: A damaged or loose seal can leave an air path at a moving joint. A sound continuous strip shifts attention to lock compression, sash alignment, frame gaps, or a different leak path; adding a second layer can create binding instead of a seal.
-
Check 3
Operate the window through one open-close-lock cycle and observe whether the sash sits square in the frame, the lock fully latches, the weatherstrip contacts evenly, and the handle or lock requires abnormal force; clean accessible debris from the track without altering adjustment screws.
Expected result: The lock does not latch, the sash is skewed, one corner has a visible gap, the seal touches on only part of the perimeter, or the window closes and locks evenly.
Next step: Use only the cleaning or adjustment procedure in the exact manual; retest the perimeter after a correct latch, and do not force the lock against an over-thick replacement seal.
Stop if: Stop if the sash binds, drops, the lock or balance is loose, the glass moves in the frame, or a ladder or sash-removal step is required.
Why this matters
Why: A window that cannot close or lock correctly may admit air and moisture even when the weatherstrip is undamaged. Uneven contact can reflect alignment, hardware, frame movement, or an incorrect seal profile rather than a simple missing strip.
-
Check 4
If the draft is at the stationary frame, interior casing, sill, or trim rather than the sash contact, inspect the visible caulk line and trim joint for cracks, gaps, loose trim, or signs of water entry; do not seal over weep holes or drainage channels.
Expected result: The gap is between stationary components, the interior trim is loose or cracked, the sill has water staining, or the moving-joint weatherstrip is the only visible defect.
Next step: Use an appropriate stationary-joint air-sealing method only when the joint is accessible and the manufacturer or building guidance permits it; otherwise document the location for a qualified installer.
Stop if: Stop for wet framing, rot, mold, concealed damage, lead-paint renovation risk, a gap requiring exterior work, or any condition where sealing could trap water.
Why this matters
Why: Stationary frame-to-wall openings are an air-sealing or installation issue, not a reason to pack weatherstrip into the sash channel. Water staining or failed flashing can require an envelope repair before cosmetic caulk.
-
Check 5
When the exact window series and weatherstrip profile are identified, remove and replace only the damaged section using the manufacturer's documented direction; match the orientation, length, and contact surface, then open and close the window to confirm the new strip does not catch.
Expected result: The replacement seats fully, the sash operates and locks without abnormal force, contact is even, and the draft is reduced; or the strip will not seat, catches, leaves a gap, or changes the sash operation.
Next step: Retest the same perimeter and inspect after temperature changes; if contact is uneven or operation is impaired, remove the attempted repair only as the manual permits and call a professional.
Stop if: Stop if the sash must be removed, the work requires a ladder or exterior access, the window cannot be safely supported, or the glass or frame may be damaged.
Why this matters
Why: A correctly fitted seal should preserve operation while closing the air path. A strip that catches or prevents locking is the wrong profile, orientation, length, or installation method and can make the window less safe or less weather-tight.
-
Check 6
Arrange a qualified window repair or installation assessment when the draft persists after a correctly fitted seal and functioning lock, when the frame is out of square, or when the suspected leak is behind trim, at flashing, or around the rough opening; provide photos of the leak location and seal profile.
Expected result: The draft returns with wind or rain, water enters, the sash remains misaligned, the frame moves, insulated glass is damaged, or the repair needs sash removal, exterior access, concealed air sealing, or replacement assessment.
Next step: Keep the window closed and latched when practical, document indoor moisture or water marks, and have a qualified professional identify the leak path and repair scope.
Stop if: Stop DIY work for water intrusion, structural movement, cracked or loose glass, unsafe access, hidden damage, or any need to remove a heavy sash without adequate help.
Why this matters
Why: The problem may be installation, frame movement, glazing, drainage, or a concealed envelope defect rather than the weatherstrip itself. More surface sealant can hide water or prevent the sash and drainage system from working.
Use your observations
Decision map
Find the observation that best matches what you see, then follow the next safe action.
-
PATH 01Next step
What you see
Air movement is localized at a moving sash edge or meeting rail and the weatherstrip is torn, loose, missing, or flattened.
Do this next
Arrange qualified service and follow the exact model guidance.
Why this path and its safety boundary
Why it matters: Identify the exact window series and replace the matching weatherstrip using the manufacturer's instructions, then verify even contact and normal locking.
-
PATH 02Next step
What you see
The sash is skewed, the lock will not latch, or compression is uneven even though the weatherstrip appears intact.
Do this next
Arrange qualified service and follow the exact model guidance.
Why this path and its safety boundary
Why it matters: Use only documented cleaning or adjustment steps and obtain window service if the sash, hardware, balance, or frame remains out of alignment.
-
PATH 03Next step
What you see
Air or water enters at the stationary frame, trim, sill, or rough-opening area rather than the sash seal.
Do this next
Arrange qualified service and follow the exact model guidance.
Why this path and its safety boundary
Why it matters: Treat it as an air-sealing, flashing, or installation issue; do not pack weatherstrip into a stationary joint or block drainage paths.
-
PATH 04Next step
What you see
No perimeter air movement is found, but the glass surface feels cold or creates a downward room air current.
Do this next
Arrange qualified service and follow the exact model guidance.
Why this path and its safety boundary
Why it matters: Check indoor humidity, room air circulation, and window performance; weatherstrip replacement may not address the perceived draft.
-
PATH 05Next step
What you see
The draft persists after the correct seal and lock checks, or work requires sash removal, exterior access, concealed repair, or structural assessment.
Do this next
Arrange qualified service and follow the exact model guidance.
Why this path and its safety boundary
Why it matters: Stop DIY work and arrange a qualified window professional assessment with the model, photos, and exact leak conditions.
Helpful context
Understand the symptom
A draft is a location problem before it is a parts problem
Cold near a window does not always mean outdoor air is leaking through the weatherstrip. Air can enter at the meeting rail or sash edge, around a stationary frame and trim, or through an installation gap. A cold glass surface can also create a downward air current that feels like a draft. Start with the exact spot and the window's operating type, then test the seal while the sash is closed and locked.
Protect the sash, drainage, and glass
Do not add a thick strip that prevents the lock from latching, blocks weep or drainage openings, or makes the sash bind. Avoid cutting or removing a sash until the window series instructions are identified. Utility knives, ladders, heavy sashes, and exterior work can cause injury or glass damage; use suitable eye protection and safe lifting practices, and stop when the repair is not an accessible interior task.
Safety boundary
Stop conditions
- The glass is cracked, loose, or damaged, or the sash can fall or move unexpectedly.
- The frame is out of square, loose, rotted, or showing concealed water damage.
- The lock cannot latch, the sash binds, or the attempted seal prevents safe operation.
- The repair requires sash removal, exterior access, a ladder, or lifting a heavy window without suitable help.
- Water intrusion, blocked drainage or weep openings, mold, or lead-paint renovation risk is present.
- The leak is behind trim, at flashing, or in the rough opening and cannot be safely reached from the interior.
Only after diagnosis
Potential parts
- window sash weatherstrip or gasket
Consider only after the leak is localized to a moving sash joint and the existing profile is identified as damaged, loose, or missing.
Match the exact window series, operating type, profile, orientation, and length; do not use a generic strip that prevents locking or drainage. - check-rail or meeting-rail weatherstrip
Consider only for a center meeting-rail leak on a sliding or double-sash window after confirming the rail identity and seal contact.
Follow the exact series instructions; some designs require sash handling or replacement of a larger assembly when the rigid carrier is damaged. - window lock or latch hardware
Consider only when the sash is sound but the lock cannot pull it into even weatherstrip compression after documented cleaning or adjustment.
Verify the exact window type and handing; hardware substitution can affect closure, security, and seal compression.
When checks do not resolve it
Need a professional?
A correctly identified and fitted weatherstrip does not stop the draft., The sash is out of square, the lock will not latch, or compression is uneven., Air or water enters around stationary trim, the frame, sill, flashing, or rough opening., The glass is cracked, the frame moves, or the window has rot, mold, or concealed damage., The work requires sash removal, exterior access, or a repair that could affect drainage, security, or the window warranty.
Common questions
FAQ
Can I use any foam weatherstripping on a drafty window?
No. Weatherstrip profiles, contact surfaces, and installation methods vary by window type and series. Identify the exact window first and make sure the replacement does not stop the sash from closing, locking, or draining.
How do I tell whether a draft is from weatherstripping or the frame?
With the window closed and locked, locate the air movement. A sash edge or meeting rail points toward the moving seal or compression; a stationary trim or sill gap points toward caulk, installation, or the rough opening. A cold glass surface without perimeter air movement may be a convection or comfort issue instead.
Why is my window still drafty after replacing the seal?
The profile may be wrong or incorrectly oriented, the sash may be out of square, the lock may not compress it, or the leak may be around the stationary frame or installation. Remove the temptation to add more material and have the leak path checked if operation or water management is affected.
When should a professional repair a drafty window?
Use a professional when the frame moves, water enters, glass is damaged, the sash or balance is unsafe, the draft is behind trim or flashing, or the repair requires sash removal, exterior access, or concealed air sealing.
Read the exact guide
Official sources
- Replace Check Rail Bulb Weatherstrip on 200 Series Gliding WindowsAndersen Windows and Doors · A model-specific manufacturer example used to show why series identity, profile, orientation, and operation testing matter; its steps must not be applied to an unrelated window.
- Hardware for Vinyl WindowsPella · Official manufacturer product guidance used for the principle that a cam-action lock pulls the sash against the weatherstripping; hardware details vary by window.
- Winterize Windows to Keep the Cold at BayPella · Official manufacturer guidance used for practical inspection and replacement principles. It is not a substitute for the assigned window's series instructions.
- Energy-Efficient Home Improvement Credit Insulation and Air-Sealing EssentialsU.S. Department of Energy · Government guidance used to distinguish weatherstripping at operable window joints from caulk or other sealing at stationary frame gaps; it does not identify a brand-specific window profile.
- Residential Windows, Doors, & SkylightsENERGY STAR / U.S. Environmental Protection Agency · Government efficiency guidance used for air-leak location, installation, condensation, and escalation boundaries; exact window repairs remain model-specific.
Community feedback
Share a repair observation
Share a plain-text repair observation. Accepted observations are published automatically; this page may take a moment to update.