
On this page
Start here
Quick answer
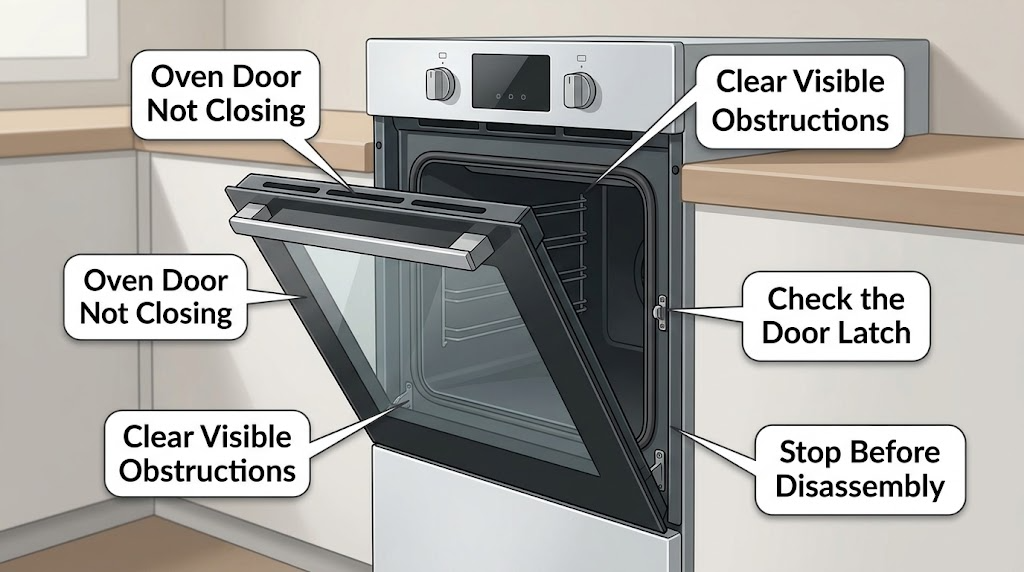
An Admiral oven door that will not close is usually being held open by an object or rack, a latch arm left in the locked position, a door that is not seated on both hinges, a bent or damaged hinge, a displaced gasket, or a range that has shifted out of level. Let the oven cool, remove only loose visible obstructions, and inspect the latch, hinge seating, door gap, and seal without forcing the door. Because Admiral models and door hardware vary, use the exact model manual for any door-removal or hinge procedure. Do not operate the oven with a persistent gap, use a chair or other object to hold it shut, bend a hinge, or reach into a spring-loaded mechanism; stop and arrange appliance-repair service if the latch is engaged or bent, one side hangs lower, the door was recently removed, glass or a hinge is damaged, or the door still will not close.
Work through in order
Diagnostic checks
Use only checks that match the exact appliance or system and its official guide.
-
Clear only loose, visible obstructions
Turn the oven off and wait until it is fully cool. Remove loose cookware, foil, packing material, or a rack only if it slides out normally, then look along the door edge, cavity frame, rack supports, and latch opening for food soil or an object that is visibly blocking the door. Do not pry against the glass, gasket, hinges, or latch.
Expected result: The door was blocked by cookware, a rack, packing material, or loose debris; the frame is visibly dirty but clear; or the door still stops at the same point with an empty, cool oven.
Next step: Remove only the loose item, wipe accessible cool surfaces without moving the gasket, and make one gentle closing attempt. If the door still stops or needs force, continue to the latch and hinge checks rather than pushing harder.
Stop if: Stop for hot surfaces, broken glass, a sharp edge, a projecting latch, a loose hinge, or anything that requires a tool or force to remove.
Why this matters
Why: A loose obstruction can explain a door that never reaches the frame, while a repeatable stop with the oven empty points toward the latch, hinge seating, gasket, frame, or range position. Whirlpool identifies racks, oversized bakeware, packing material, and food or soil as common physical blockers.
-
Inspect the upper door latch without moving it
With the cool door open, look at the top front of the oven frame above the gasket and compare the visible latch arm with the surrounding frame. Check whether it projects down or up into the door path, appears bent, or looks different from the position shown in the exact model manual. Do not insert a tool, defeat a lock, or pull the latch arm.
Expected result: The latch is visibly in the normal retracted position; it projects into the door path; it is bowed, bent, or damaged; or the model has a self-clean or locking mechanism whose state is unclear.
Next step: If the latch is clearly normal, continue to the hinge and gap inspection. If it projects, is damaged, or its state is unclear, leave the oven off and have appliance service identify the correct reset or replacement procedure for the Admiral model.
Stop if: Stop immediately if the latch is under tension, the oven indicates a locked or self-clean state, the arm is bent, or any reset would require opening the control area or applying force.
Why this matters
Why: A latch arm in the door path can physically prevent closing. A bent or uncertain latch is a repair condition, and an engaged locking mechanism must not be forced. Whirlpool's latch guidance specifically directs a visual check of the arm above the gasket.
-
Compare hinge seating and the closed-door gap
From in front of the cool appliance, open and gently close the door only as far as it moves freely. Compare the left and right sides for an even gap, a lower corner, a hinge arm visibly outside its receiver, or a door that was recently removed or reinstalled. Do not remove the door, move hinge locks, loosen screws, or touch a spring-loaded hinge.
Expected result: Both sides are level and the gap is even; one side hangs lower; the door sits proud of the frame; a hinge is visibly out of its receiver; or the door was removed before the symptom began.
Next step: Photograph both hinge areas and the full door gap. If the door was removed, consult the exact Admiral manual or request service for controlled reinstallation; do not use the door handle or force a hinge into place.
Stop if: Stop for a bent hinge, exposed spring, loose receiver, damaged glass, a door that shifts unexpectedly, or any need to remove or support the door.
Why this matters
Why: An uneven gap or a hinge outside its receiver points to seating, hinge, or receiver trouble rather than a simple obstruction. Whirlpool says a properly installed door should have an even gap and that a lower side indicates the hinge on that side is not properly installed. The correct seating state varies by model.
-
Inspect the gasket and frame for a seal obstruction
With the oven cool and the door open, look around the gasket, inner door edge, and mating frame for a folded seal, detached section, hardened soil, foreign material, or a visibly bent frame. Clean only loose surface soil from hard, accessible areas with a soft damp cloth; do not pull, press, cut, lubricate, or relocate the gasket.
Expected result: The gasket is even and seated; a section is folded, loose, torn, or displaced; soil or an object is trapped; or the frame or inner door edge is bent.
Next step: Take a close photo of any seal or frame defect, leave the oven off, and request appliance repair if the gasket is damaged, the frame is bent, or the door still has an uneven gap after loose soil is removed.
Stop if: Stop if insulation, sharp metal, broken glass, wiring, or a moving hinge is exposed, or if cleaning would require removing the gasket or door trim.
Why this matters
Why: A gasket or frame obstruction can keep the door from reaching the closed position, while a torn or displaced gasket can create a persistent heat leak even when the latch catches. A bent frame or damaged seal needs model-specific assessment and is not corrected by compressing the door harder.
-
Check the range position and prepare model-specific service details
From a safe standing position, observe whether the range rocks, sits visibly out of level, contacts an adjacent cabinet, or has shifted since installation. Record the full Admiral model number, fuel type if known, whether the door was removed, when the problem began, where it stops, and whether the latch or hinge looks abnormal. Do not pull the range out, adjust leveling legs, defeat the anti-tip bracket, or reach behind the appliance.
Expected result: The range appears stable and level; it rocks or has shifted; the door problem started after moving or cleaning; or the physical cause remains unclear.
Next step: Provide the observations and photos to an appliance-repair professional and ask them to assess the latch, hinges, receivers, frame, gasket, and range position as one system. Keep the oven out of service until the door closes normally.
Stop if: Stop if the range rocks, the anti-tip condition is unknown, a gas connection or power cord could be disturbed, or the cause cannot be assessed without moving or dismantling the appliance.
Why this matters
Why: Whirlpool includes range level and hinge reset in its door-not-closing decision path. A shifted or unstable range can change door alignment, but correcting leveling or anti-tip engagement requires the exact appliance procedure and may involve moving a heavy gas or electric appliance.
Use your observations
Decision map
Find the observation that best matches what you see, then follow the next safe action.
-
PATH 01Safety boundary
What you see
A rack, dish, packing material, foil, or loose soil was visibly blocking the door and the door now closes gently when the oven is cool.
Do this next
Leave the oven off until the door closes evenly and the latch engages without pressure. Monitor for a recurring gap or heat leak; if it returns, request service rather than forcing it.
Why this path and its safety boundary
Safety stop: Do not operate the oven if the door still needs pressure, does not latch, or the seal remains uneven.
-
PATH 02Safety boundary
What you see
The upper latch arm projects into the door path, is bent, or the oven's locking state is unclear.
Do this next
Keep the oven off and arrange appliance-repair service with the model number and a photo of the latch. Use only a model-specific documented reset if a qualified provider confirms it is safe.
Why this path and its safety boundary
Safety stop: Do not push the door against the latch, pry the arm, bypass the lock, or start a self-cleaning or heating cycle.
-
PATH 03Safety boundary
What you see
One side hangs lower, the gap is uneven, a hinge is outside its receiver, the door was recently removed, or a hinge or glass is damaged.
Do this next
Leave the door in the safest stable position and request appliance service or follow the exact Admiral model manual with appropriate support. Photograph both sides before any work.
Why this path and its safety boundary
Safety stop: Do not remove the door, unlock a hinge, bend a hinge, reach near springs, or carry the door by its handle without model-specific instructions and proper support.
-
PATH 04Safety boundary
What you see
The gasket is folded, loose, torn, or displaced, or the frame and inner door edge are visibly bent.
Do this next
Stop using the oven and request model-specific inspection of the gasket, frame, latch, and hinges. Do not order a seal from appearance alone.
Why this path and its safety boundary
Safety stop: Do not pull or cut the gasket, compress the door with an improvised object, or heat the oven while the seal is defective.
-
PATH 05Safety boundary
What you see
The range rocks or shifted, the anti-tip state is unknown, or the door still will not close after loose obstructions are removed and the latch and hinge clues are normal.
Do this next
Keep the appliance out of service and arrange appliance-repair assessment. Give the provider the full model number, fuel type, door history, gap photos, and exact point where the door stops.
Why this path and its safety boundary
Safety stop: Do not move a connected range, adjust leveling hardware, disturb a gas line or power connection, or keep cooking with a door that does not seal.
Helpful context
Understand the symptom
Start with the oven cold and empty. A door that stops short may have a rack or bakeware in the way, soil around the frame, a lock latch projecting above the opening, or a hinge and door that are no longer seated squarely. These clues are different from an electronic oven-control problem, so the useful first step is to map where the door physically stops rather than repeatedly pushing it closed.
The available official guidance is general Whirlpool Product Help guidance for ranges and ovens, not a model-specific Admiral manual. Whirlpool Corporation lists Admiral among its brand history in Canada, but that does not establish that every Admiral oven uses the same latch, hinge, gasket, or removal method. Record the full model number from the appliance label and use its manual before attempting any procedure that moves a hinge or removes the door.
Do not heat an oven that cannot seal
A door gap can let heat escape into nearby cabinets and can make cooking and self-cleaning unsafe. Keep the oven off until the door closes and latches normally. Do not use a weight, chair, tape, or improvised shim to hold it shut, and keep hands away from hinge arms and the top latch while inspecting.
If the door was removed for cleaning, the hinge locks or receivers may be in the wrong state even when the door looks attached. A crooked door or an uneven gap is a seating clue, not proof that a hinge should be bent or that a part should be ordered.
Only after diagnosis
Potential parts
- oven door hinge assembly
Consider this category only when the door gap is uneven or a qualified inspection confirms a bent, loose, or failed hinge after ruling out obstruction, latch position, and seating.
Match the full Admiral model and hinge design before ordering; do not assume left and right hinges or similar-looking oven hinges are interchangeable. - oven door hinge receiver
Consider this category only when the hinge is sound but the receiver or mounting point is damaged or no longer holds the door square, as confirmed during service inspection.
Confirm the exact appliance model, receiver location, mounting method, and approved repair procedure; do not shim or modify the chassis from a community suggestion. - oven door gasket
Consider this category only when the installed gasket is torn, detached, hardened, or displaced and the door and frame otherwise align correctly.
Verify the exact model, gasket profile, and installation direction before ordering. A gasket replacement will not correct a bent hinge, latch, or frame. - oven door latch or lock assembly
Consider this category only when the latch arm is damaged or the model-specific lock mechanism fails to retract after a qualified diagnosis.
Confirm the full model and whether the appliance uses a manual or motorized lock; do not bypass or replace the assembly based only on a door gap.
When checks do not resolve it
Need a professional?
Request appliance-repair service if the latch is engaged or bent, the door was removed, one side hangs lower, a hinge, receiver, gasket, glass, or frame is damaged, the range rocks or shifted, or the door still will not close after loose visible obstructions are removed. Keep the oven off while the door has a persistent gap.
Common questions
FAQ
Can an oven rack or baking dish keep an Admiral door from closing?
Yes. A rack that is not fully seated, an oversized dish, packing material, foil, or soil around the frame can physically stop the door. Remove only loose items from a fully cool oven; if the door still stops or needs pressure, check the latch and hinge branches instead.
What should I do if the oven door latch is sticking out?
Do not push the door against it or pry it back. Leave the oven off and compare the latch visually with the exact model manual. A bent or engaged latch may require a model-specific reset or repair, particularly if a locking or self-cleaning state is involved.
Why is one side of my oven door lower than the other?
An uneven gap can indicate that a hinge is not seated in its receiver, a hinge is damaged, the door was reinstalled incorrectly, or the range has shifted. Do not bend or unlock the hinge; photograph the gap and request appliance service or follow the exact model manual with proper support.
Can I hold the oven door shut while it cooks?
No. A chair, weight, tape, or improvised shim does not restore the intended seal and can create a heat or fire hazard. Keep the oven off until the door closes and latches normally.
Should I replace the hinge or gasket based on the appearance alone?
No. Hinge, receiver, latch, and gasket designs vary by model, and a similar-looking part may not fit or correct the cause. Confirm the full Admiral model number and have the physical fault identified before ordering a conditional replacement part.
When should I call an appliance-repair professional?
Call when the latch projects or is bent, the door was removed, one side hangs lower, glass or a hinge is damaged, the range rocks or shifted, the gasket is displaced, or the door still will not close after loose obstructions are removed. Keep the oven off while it has a persistent gap.
Read the exact guide
Official sources
- Oven door won't close, and before u suggest it, yes, I tried the hand towel in the hinge trick, it didn't work the 10 or so times I tried it. I also caught a video that shoes a guy loosening the attachment point on the oven side, adding a piece of a nail between the body and the attachment pointReddit, r/handyman · Anecdotal community discussion illustrating hinge, receiver, latch, and attachment-point uncertainty in a persistent oven-door gap.
- Canada | Whirlpool CorporationWhirlpool Corporation · Supports identifying Whirlpool's historical relationship to the Admiral brand in Canada and the need to verify the exact model rather than assuming one universal door design.
- Oven Door is Not Closing - Checking the Latch - Product HelpWhirlpool Product Help · Supports visually checking whether the latch arm above the gasket projects into the door path.
- Removing and Replacing the Oven Door - Product HelpWhirlpool Product Help · Supports explaining that hinge seating and door type affect the gap and that an uneven door can indicate incorrect hinge installation.
- Door Not Closing - Range - Product HelpWhirlpool Product Help · General range guidance relevant to an Admiral-branded oven only as a cautious physical troubleshooting framework when the exact model is unknown.
Community feedback
Share a repair observation
Share a plain-text repair observation. Accepted observations are published automatically; this page may take a moment to update.