
On this page
Start here
Quick answer
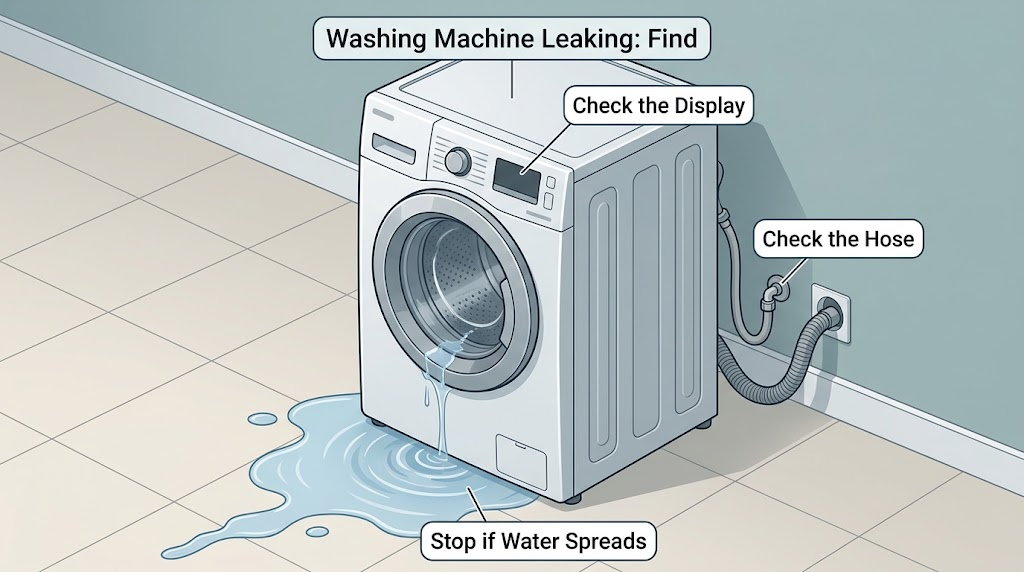
Stop the Admiral washer, keep it out of the cycle, and turn off the wall water valves before investigating a leak. If the floor, outlet, or power cord is wet, do not touch the plug or electrical parts; use a safe, accessible disconnect only if you can do so without entering water or a hazard. Identify whether water starts at the rear hose connections, front door seal, dispenser or top, drain hose and standpipe, or underneath the cabinet. Check only visible, reachable parts with power and water isolated: hose washers and cracks, the front-load seal, the drain hose and household drain, and signs of oversudsing or an unlevel load. A leak from inside the cabinet, a damaged tub or pump, a hose that needs replacement, recurring leakage, or any water near electrical parts needs qualified appliance service.
Work through in order
Diagnostic checks
Use only checks that match the exact appliance or system and its official guide.
-
Check 1
Stop the Admiral washer at its controls and note whether the leak is active. From a dry standing position, turn off the washer's wall water valves if they are clearly accessible and dry; keep the power cord and receptacle untouched if water is nearby. Do not restart the machine to reproduce the leak.
Expected result: Water continues entering while the washer is stopped, the leak stops when the valves are closed, or water is near the outlet, cord, or other electrical equipment.
Next step: Leave the valves closed and the washer unused. If water is near electrical parts, do not touch the plug or attempt a wet-area disconnect; keep people away and arrange qualified appliance or electrical help. Otherwise continue with dry, external observations only.
Why this matters
Why: Water entering while the cycle is stopped keeps an inlet valve, hose, or supply connection in focus. A leak that stops with the supply valves closed may still involve the machine or hose. Water near electrical equipment adds a shock hazard and overrides routine inspection.
-
Check 2
After the machine is stopped and the floor is safe, use a dry flashlight to locate the highest visible wet point without moving the washer or reaching beneath it. Check the rear inlet connections, drain hose connection, front door or lid edge, dispenser area, and the floor directly under the cabinet.
Expected result: The first wet point is at a rear hose, front door seal, top or dispenser, drain hose or standpipe, or underneath the cabinet; or no source is visible.
Next step: Photograph the location and keep the water supply closed. Follow the matching visible check below; if the source is underneath, behind a panel, or not visible, stop disassembly and arrange appliance service.
Why this matters
Why: The first wet point narrows the branch: rear moisture suggests an external hose, front moisture suggests seal, loading, or suds, drain-area moisture suggests hose or household drainage, and underneath moisture can indicate an internal hose, pump, or tub seal. A hidden source cannot be safely diagnosed by reaching inside.
-
Check 3
With the water valves closed and the machine idle, inspect both visible ends of each fill hose and the visible drain hose. Look for a missing or displaced rubber washer, loose-looking coupling, crack, bulge, kink, abrasion, or a drain hose that has pulled out or is backing water into the standpipe; do not use a wrench on a wet connection.
Expected result: A hose washer is missing or damaged, a hose is cracked or bulged, a connection is visibly leaking, or the hose looks intact and the household drain is not backing up.
Next step: Keep the valves closed and do not run the washer. A qualified person can replace a confirmed damaged hose or washer and verify the connection; a leak with intact external hoses moves the diagnosis toward service rather than more tightening.
Why this matters
Why: A damaged washer or hose can leak at the external connection, while a backed-up standpipe can send drain water back onto the floor. An intact exterior does not rule out an internal pump, tub, valve, or concealed hose fault.
-
Check 4
If the Admiral is a front-load model, inspect the visible door gasket and glass with the washer stopped, water supply closed, and power safely isolated. Look for lint, coins, clothing caught in the seal, flattened sections, cracks, or tears; do not pull hard on the gasket or remove the door assembly.
Expected result: Debris is visible in the seal, clothing is caught between the door and gasket, the gasket is torn or deformed, or the seal and glass look clean and intact.
Next step: Remove only loose, reachable debris with the machine idle and the seal undamaged, then leave the washer unused until the leak is evaluated. A torn or deformed seal, water from behind the cabinet, or recurring door leak needs appliance service.
Why this matters
Why: Debris or a trapped item can prevent a watertight door seal, while a tear or deformation can require a model-specific gasket. A clean, intact front seal shifts attention to loading, suds, hoses, drain flow, or an internal leak.
-
Check 5
Compare the leak timing recorded before stopping the washer with the cycle phase and recent use: filling, washing, rinsing, draining, or spinning. Note an overloaded or water-resistant load, heavy suds, a washer that rocks, or water that rises in the sink or standpipe; do not run another cycle to test these conditions.
Expected result: The leak followed filling, door washing, draining, or spinning, or it coincided with oversudsing, an uneven load, rocking, or drain backup.
Next step: Record the phase, load, suds, and drain behavior for the technician. Keep the machine out of service until the source is corrected, especially if water reached electrical equipment or the leak is from underneath.
Why this matters
Why: Filling points toward supply connections or an inlet path; front leakage during washing keeps the door seal, loading, or suds in focus; draining with backup points to the drain hose or household drain; spinning with rocking can involve leveling or load distribution. Timing is a diagnostic clue, not proof of a specific part.
Use your observations
Decision map
Find the observation that best matches what you see, then follow the next safe action.
-
PATH 01Next step
What you see
Water is at a rear fill connection, drain hose, or standpipe and the visible hose or washer is damaged or displaced
Do this next
Keep the wall water valves closed and do not run the washer. Arrange qualified appliance service or a qualified plumber for the confirmed hose, washer, drain connection, or household drain repair; do not tighten a wet connection with tools.
-
PATH 02Next step
What you see
A front-load washer leaks at the door and the gasket has debris or a tear
Do this next
Remove only loose reachable debris while the machine is idle. Keep using it stopped if the gasket is torn, deformed, or still leaks, and arrange model-specific appliance service for the seal and door alignment.
-
PATH 03Next step
What you see
The leak occurs while draining and water rises in or backs up from the household drain
Do this next
Stop using the washer and arrange qualified plumbing or appliance service for the standpipe, sink, drain hose, and household drain. Do not pour chemicals into the washer or open a concealed cleanout to chase the leak.
-
PATH 04Next step
What you see
Water appears underneath the cabinet, behind a panel, or with intact visible hoses and seals
Do this next
Keep the washer disconnected from use and leave the water valves closed. An internal pump, tub seal, valve, or hose needs qualified appliance diagnosis; do not tip the machine, remove panels, or reach into the cabinet.
-
PATH 05Next step
What you see
Water is near the power cord, receptacle, controls, or other electrical equipment, or the leak is active and worsening
Do this next
Do not touch the plug, cord, controls, or wet equipment. Keep people away, use a safe accessible disconnect only if it can be operated without entering water or a hazard, and obtain urgent qualified electrical or appliance help; call emergency responders for smoke, arcing, or fire.
Helpful context
Understand the symptom
The leak location changes the next check
Water at the rear points first to an inlet or drain connection; water at the front of a front-load model points toward the door seal, loading, or suds; water during draining can be a loose hose or a household drain that backs up. A puddle underneath can also come from an internal pump, tub seal, or hose. Do not infer the failed part from the puddle alone, because water can travel along the floor or cabinet before it appears.
Protect the floor and the electrical connection
Turn the washer off at its controls, stop the water supply, and leave the machine unused until the source is known. If water is near the receptacle, cord, or other electrical equipment, keep hands and feet out of the water and do not unplug it; use emergency or professional help for safe isolation. Never remove the cabinet, reach under a running washer, or run another cycle solely to watch for a leak.
Only after diagnosis
Potential parts
- washing machine fill hose and hose washer
Consider this only if inspection confirms a cracked or bulged external fill hose, a missing or damaged hose washer, or a connection that a qualified person identifies as the leak source.
Confirm the exact Admiral model, hose end type, length, water temperature connection, and installation instructions before selecting a replacement; do not reuse a damaged hose. - front-load washer door gasket
Consider this only if the Admiral is a front-load model and a qualified inspection confirms that a torn, deformed, or persistently obstructed gasket is causing the door leak.
Confirm the exact model and gasket design from the owner manual or manufacturer parts information; do not assume a generic seal fits or attempt cabinet and door disassembly as a leak test.
When checks do not resolve it
Need a professional?
Use professional service for an internal or recurring leak, damaged hose or gasket, drain backup, water near electrical parts, a leak that cannot be localized, or any repair requiring panels, pump, tub, inlet valve, wiring, or cabinet movement.
Common questions
FAQ
What should I do first when my Admiral washer is leaking?
Stop the cycle, keep the washer unused, and close the wall water valves if they are safely reachable. Do not touch the plug if water is near the receptacle or cord. Then identify whether the first wet point is at a hose, door, drain, dispenser, or underneath the cabinet.
Why is my Admiral washer leaking from the front door?
On a front-load model, inspect the visible gasket for lint, coins, clothing caught in the seal, flattening, cracks, or tears. Loading, oversudsing, and a damaged or obstructed seal can produce different leak paths; keep the washer stopped if the seal is torn or the leak continues.
Why does the washer leak from underneath during draining?
A drain hose or household drain can back up, while an internal pump, tub seal, or hose can leak underneath the cabinet. Check only the visible drain hose and standpipe with the washer stopped; if the source is below the cabinet or concealed, arrange appliance or plumbing service rather than removing a panel.
Can I run an empty cycle to find the Admiral washer leak?
Do not run another cycle when water is active, the source is concealed, or water is near electrical parts. Record when the leak occurred and inspect only safe visible areas with water and power isolated; a technician can reproduce and diagnose the leak under controlled conditions.
Read the exact guide
Official sources
- Front Load Washer Dripping Water from the DoorWhirlpool Product Help · The opened Whirlpool product-help page supports a front-load-only visual check of the door seal, debris or clothing caught in it, and gasket wear or tears.
- Leaking from Underneath or Bottom - Front Load WasherWhirlpool Product Help · The opened Whirlpool product-help page gives front-load leak branches for supply connections, drain-hose and household-drain backup, cracked hoses, dispenser closure, and detergent-related suds.
- Reasons Why Your Washing Machine Is LeakingWhirlpool · The opened Whirlpool guide is general washer guidance rather than a model-specific Admiral manual; it supports distinguishing bottom, hose, door, drain, pump, and oversudsing leak paths.
- Admiral Washing Machine Repair Manual ATW4475VQ0Admiral · The opened Admiral use-and-care manual is for model ATW4475VQ0; its leak checklist supports the general location and symptom branches while model-specific instructions remain controlling.
Community feedback
Share a repair observation
Share a plain-text repair observation. Accepted observations are published automatically; this page may take a moment to update.