
On this page
Start here
Quick answer
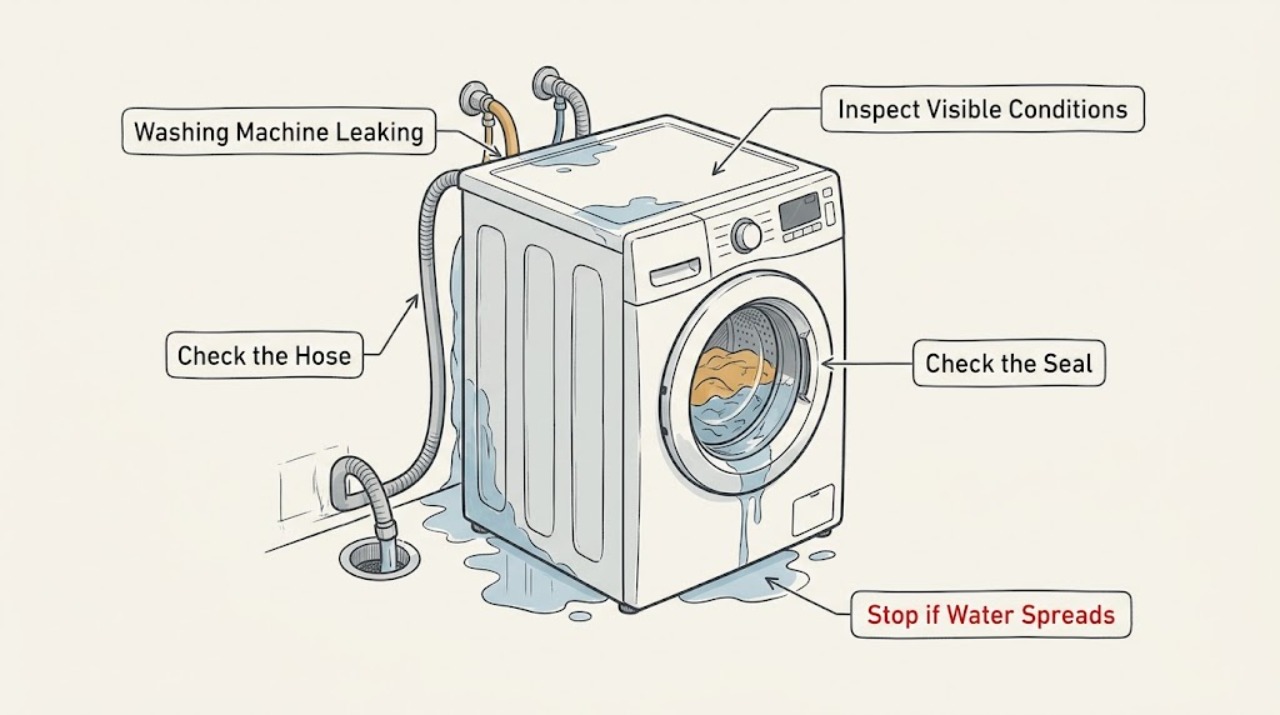
Stop the cycle and identify where the water first appears: at the rear connections, from a front-load door or dispenser, from beneath the cabinet, over the top of a top-load basket, or inside the tub while the washer is idle. If water is entering while the machine is off, Amana advises turning off the washer's water valve while waiting for service. Check only from a dry, safe position: inlet-hose washers and connections, the drain hose and household drain, front-load door seal and dispenser, load size and washer level. Amana links non-HE or excessive detergent to oversudsing and leaking, and says a slow or blocked drain can back up. Do not reach under a wet machine, move it across standing water, open panels, loosen pressurized hoses, or run another cycle when there is an active leak, electrical danger, a damaged hose, or water inside the cabinet.
Before you begin
Safety first
- Do not reach under or tip a wet washer, move it across standing water, loosen pressurized hoses, open panels, access a pump or internal valve, bypass a door or lid safety, or run repeated cycles to reproduce the leak. Stop immediately for rapid leakage, water near electrical equipment, a damaged cord, spraying hose, cabinet damage, or water entering while the washer is off.
Work through in order
Diagnostic checks
Use only checks that match the exact appliance or system and its official guide.
-
Check 1
Stop the cycle and observe from a dry, safe position where the water first appears: rear hose connections, front door or dispenser, top of a top-load basket, underneath the cabinet, drain standpipe or sink, or inside the tub while the washer is idle. Note whether the leak happens during fill, wash, drain, spin, or after the cycle.
Expected result: The first wet point is at the rear, front, top, underside, household drain, or inside the tub while idle.
Next step: Follow the matching hose/drain, front-load, top-load, idle-fill, or underside branch below. Do not run repeated cycles just to reproduce a leak.
Stop if: Stop immediately if water is near electrical equipment, the floor is unsafe, a hose is spraying or split, the cabinet is damaged, or the leak is too rapid to contain safely.
Why this matters
Why: Location and timing select different checks. Fill-time water at the rear points toward inlet plumbing; drain-time water at the rear or standpipe points toward the drain path; front-load water points toward the seal or dispenser; top-load overflow points toward level or load; water entering while idle needs an immediate water-valve and service branch.
-
Check 2
For a leak at the rear, inspect the visible hot and cold inlet-hose connections at the washer and household supply, including the hose washers, and check the drain hose for looseness, a kink, or a position that lets water escape. Verify that hot and cold hoses are connected to the matching washer ports without loosening a wet connection.
Expected result: A hose washer is missing, a connection is visibly loose or wet, the hoses are reversed, the drain hose is loose, or the external hoses are cracked; alternatively, the visible rear connections are dry and secure.
Next step: Close the water supply valves if a connection is actively leaking and that can be done safely. Do not tighten or replace a pressurized hose in standing water; arrange qualified appliance or plumbing service for damaged hoses, persistent leakage, or uncertain connections.
Stop if: Do not pull the washer, disconnect a hose under pressure, touch wet electrical parts, or continue if a hose is bulging, split, spraying, or cannot be isolated safely.
Why this matters
Why: Amana says both ends of inlet hoses should have hose washers and secure connections; reversed hot/cold connections can also allow leaking or condensation. A loose drain hose or a damaged external hose can explain a rear puddle. Dry, secure connections shift attention to a hidden or internal leak and require service.
-
Check 3
For a front-load leak, with the washer off and door safe to open, inspect the inner glass and rubber door seal for dirt, lint, hair, clothing, blocked drain openings, cracks, or tears. Check that the dispenser drawer is fully closed and not visibly clogged; remove only accessible residue without dismantling the washer.
Expected result: An item or buildup prevents the seal from contacting the glass, the gasket is damaged, the dispenser is blocked or open, or the front remains dry while the leak comes from elsewhere.
Next step: Clean accessible seal or dispenser residue with the washer off and make one supervised empty or model-approved test only if no active leak or electrical hazard remains. Arrange service for a torn seal, recurring door leak, internal dispenser leak, or water from beneath the tub.
Stop if: Do not stretch or cut the gasket, reach into a moving drum, open panels, run a cycle with the door unable to seal, or continue when water has reached electrical components.
Why this matters
Why: Amana says dirt or deposits on the door glass or seal, clothing caught under the seal, and a clogged or open dispenser can let water escape. A torn or distorted gasket is a part or service diagnosis, not a reason to force the door. If the front path is clear, return to the rear, drain, and underside branches.
-
Check 4
For a top-load leak from the front or top, inspect the load only after the cycle is stopped. Check whether the washer is visibly out of level, tightly packed, unevenly loaded, oversized, or washing a water-resistant item that could push water over the basket. Do not place hands in a moving or agitated basket.
Expected result: The cabinet is unlevel, the load is oversized or uneven, a water-resistant item is present, or the washer leaks with a normal balanced load and level cabinet.
Next step: Correct the load distribution and use the model's leveling instructions only when the washer is stable and dry. If it still leaks, stop using it and arrange appliance service rather than adjusting internal parts.
Stop if: Do not reach into a moving basket, tip the washer, remove cabinet panels, or continue if the machine walks, the floor is wet, or the leak is active and uncontrolled.
Why this matters
Why: Amana says an unlevel washer can let water bounce off the top of the basket or load, and oversized, uneven, or water-resistant loads can splash over the basket. If the leak repeats with a normal load and level machine, a fill, tub, hose, or internal fault becomes more likely.
-
Check 5
If the leak occurs during draining or from underneath, inspect the accessible household drain, standpipe or laundry sink for backup and the drain hose for a loose connection or blockage. Review the detergent type and amount used, and whether a single-dose product was placed in a dispenser where the model does not allow it.
Expected result: The household drain backs up or is slow, the drain hose is loose or blocked, excessive suds are present, non-HE or too much detergent was used, or the drain and detergent checks are normal.
Next step: Stop using the washer until a backed-up household drain is cleared or the cause is confirmed. Use the model-approved detergent instructions on the next cycle only after the leak is resolved; arrange qualified service for an internal or unexplained underside leak.
Stop if: Do not reach under the cabinet, tip the washer, open the pump filter or cabinet while water is present, pour chemicals into a blocked drain, or run more cycles to force a suspected blockage through.
Why this matters
Why: Amana says a slow or blocked drain can back up water, while non-HE or excessive detergent can create suds that lead to leaking and draining concerns. A normal drain and detergent result with water under the cabinet raises the possibility of an internal hose, pump, tub, or seal fault that cannot be safely identified from outside.
Use your observations
Decision map
Find the observation that best matches what you see, then follow the next safe action.
-
PATH 01Next step
What you see
Water first appears behind the washer during fill or drain.
Do this next
Check visible inlet hose washers, secure connections, correct hot/cold ports, and drain-hose placement. Isolate an active supply leak if safe; damaged or pressurized connections need qualified appliance or plumbing service.
-
PATH 02Next step
What you see
Water appears at the front door, gasket, or dispenser area.
Do this next
Inspect the glass and seal for residue or trapped clothing, confirm the dispenser is closed and clear, and verify the load is inside the basket. A torn seal, recurring leak, or internal dispenser leak needs appliance service.
-
PATH 03Next step
What you see
Water splashes over the basket or top/front of a top-load washer.
Do this next
Check level and load size/distribution, especially oversized or water-resistant items. If the same leak occurs with a normal balanced load and stable machine, stop and arrange service.
-
PATH 04Next step
What you see
The leak happens while draining and the standpipe/sink backs up, or excessive suds are visible.
Do this next
Treat the blocked household drain or detergent use as the leading branch. Clear only an accessible, safe obstruction and use the model-approved HE detergent amount; persistent backup or leak requires plumbing or appliance service.
-
PATH 05Next step
What you see
Water enters the washer while it is off, the tub remains filling, or water reaches electrical equipment or spreads rapidly.
Do this next
Stop using the washer. Close its water valves only if they are accessible without entering water or touching wet electrical equipment, and arrange qualified service. Do not open the cabinet or leave the washer connected while it continues to fill.
Helpful context
Understand the symptom
The first wet spot narrows the fault
Water at the rear usually starts with an inlet hose, hose washer, port connection, or drain hose. A front-load puddle at the door points toward the glass, gasket, clothing caught in the seal, dispenser, detergent, or leveling. A top-load spill over the basket points toward level, load distribution, or water-resistant items. Water from underneath can be a hose, drain backup, or internal leak. Wipe the area dry only if you can do so safely, then observe without putting hands beneath the cabinet.
A washer can leak because of the drain or the wash chemistry
A leak is not always a failed washer component. Amana says a loose drain hose or a slow or blocked household drain can send water back onto the floor, while non-HE or too much detergent can create excessive suds and leaking. Use only the detergent type and amount specified for the model and product instructions. If the drain backs up beyond the washer, treat the household drain as a plumbing problem rather than replacing the washer pump first.
Keep water and electrical hazards separate
Do not pull a wet washer forward, reach under it, or remove a panel to find the source. If water has reached the outlet, cord, control area, or motor space, leave the appliance off and get qualified help. For a washer that continues to fill while idle, close the accessible water valves if that can be done without entering water or touching wet electrical equipment, then arrange service. Internal valves, pumps, tubs, seals, and wiring are not identified safely by a puddle alone.
Only after diagnosis
Potential parts
- washer inlet hose and hose washer set
Consider this category only when an accessible inlet hose is cracked, damaged, missing a washer, or confirmed to leak at the hose connection.
Confirm the Amana washer model, connection type, hose rating, and installation instructions; do not replace a pressurized hose in standing water. - front-load washer door gasket
Consider this category only when the front-load seal is torn, distorted, or confirmed by service diagnosis after residue and trapped-clothing checks.
Confirm exact model fit and the manufacturer's installation procedure; a door leak may instead be caused by load, dispenser, leveling, or a hidden hose. - washer drain hose or internal drain component
Consider this category only when the household drain is clear and a qualified diagnosis confirms a loose, cracked, blocked, or failed washer-side drain component.
Confirm model-specific routing, connection size, pump or hose requirements, and safe service procedure; do not infer a pump failure from an underside puddle alone.
When checks do not resolve it
Need a professional?
Call qualified appliance service for an unexplained underside or internal leak, a torn front-load gasket, a dispenser or tub leak, water entering while the washer is idle, or any leak that persists after safe external checks. Call a plumber for a backed-up household drain or leaking supply-side connection. Stop immediately if water reaches electrical equipment, the leak is rapid, a hose is split or spraying, the cabinet is damaged, or you cannot safely isolate the water.
Safety scope: Do not reach under or tip a wet washer, move it across standing water, loosen pressurized hoses, open panels, access a pump or internal valve, bypass a door or lid safety, or run repeated cycles to reproduce the leak. Stop immediately for rapid leakage, water near electrical equipment, a damaged cord, spraying hose, cabinet damage, or water entering while the washer is off.
Common questions
FAQ
Why is my Amana washer leaking from the back?
Check the visible inlet hoses for hose washers, secure connections, and correct hot/cold ports, then inspect the drain hose and household drain for looseness or backup. A cracked hose, active spray, or leak that persists with dry secure connections needs qualified appliance or plumbing service.
Why is my Amana front-load washer leaking from the door?
Inspect the glass and rubber seal for residue, trapped clothing, blocked openings, cracks, or tears. Also check that the dispenser is closed and not clogged and that clothing is inside the basket. A damaged seal or recurring leak requires appliance service; do not stretch or replace it based on a guess.
Can too much detergent make an Amana washer leak?
Yes. Amana says non-HE detergent or more than the recommended amount can create excessive suds that contribute to leaking and draining concerns. Use only the detergent type and measured amount specified for the washer and product, but arrange service if leaking continues after the detergent issue is corrected.
Why does my Amana top-load washer splash water over the top?
Amana identifies an unlevel washer, an oversized or uneven load, and water-resistant material as causes of water splashing off the basket or load. Stop the cycle, correct the load and leveling only when safe, and arrange service if a normal balanced load still leaks.
What should I do if my Amana washer fills with water while it is off?
Stop using it and turn off the washer's water valve while waiting for service, as Amana advises. Do this only if the valves are safely accessible; do not reach through water, touch wet electrical equipment, or open the cabinet. Arrange qualified appliance service for the internal fill fault.
Read the exact guide
Official sources
- Leaking from Front - Front Load WasherAmana Product Help · Official Amana guidance for door glass and seal residue, trapped clothing, dispenser blockage, detergent, loading, and leveling.
- Leaking from Front or Top - WasherAmana Product Help · Official Amana guidance for level, load size, uneven distribution, oversized loads, and water-resistant materials that splash water over the basket.
- Leaking Inside the Tub - WasherAmana Product Help · Official Amana instruction for turning off the washer water valve while waiting for service when water leaks inside the tub.
- Leaking from Behind - WasherAmana Product Help · Official Amana guidance for inlet hose washers, hot/cold port orientation, drain hose and household drain checks.
- Leaking from Underneath or Bottom - Front Load WasherAmana Product Help · Official Amana troubleshooting for inlet hoses, drain backup, cracked hoses, dispenser, detergent, and underside leaks.
- Leaking from Dispenser - Front Load WasherAmana Product Help · Official Amana guidance for single-dose placement, closed dispenser drawer, and dispenser blockage.
Community feedback
Share a repair observation
Share a plain-text repair observation. Accepted observations are published automatically; this page may take a moment to update.