
On this page
Start here
Quick answer
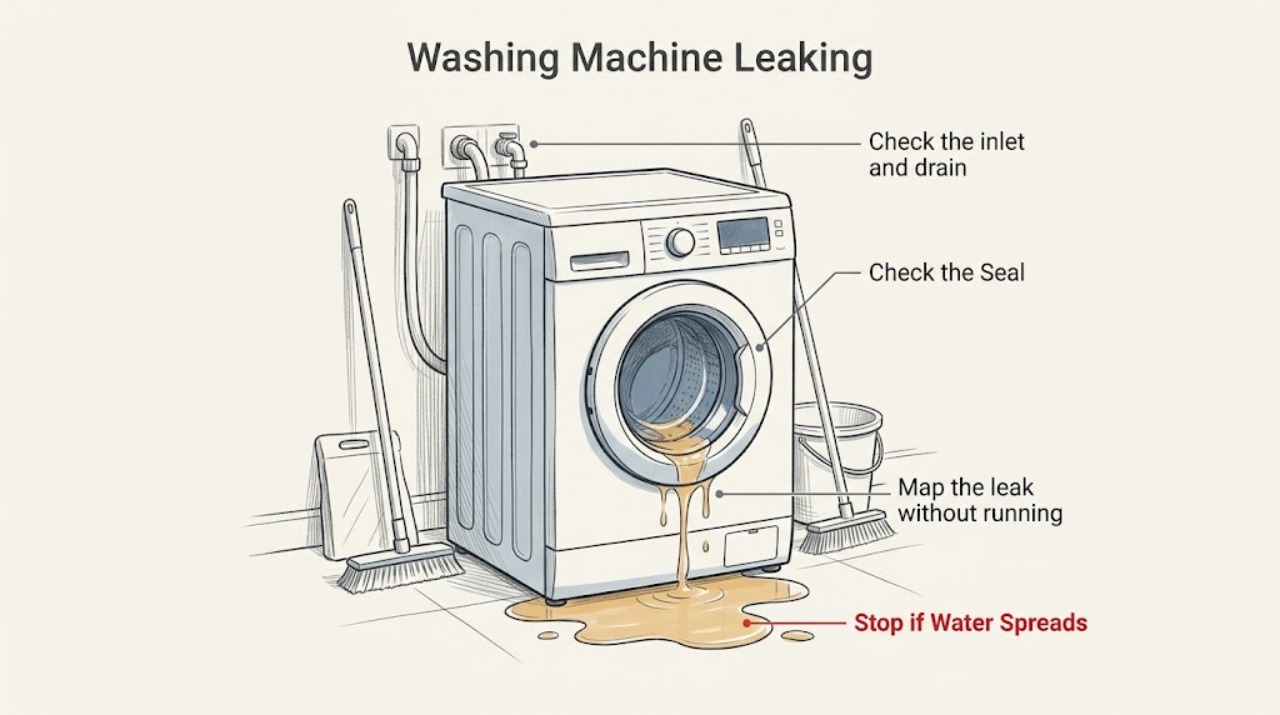
Stop the cycle, turn off the water supply, and note where and when the water appears. On a Beko washing machine, a leak at the rear during filling points first to an inlet connection, hose, or gasket; a front leak points to the door seal or detergent drawer; a leak during draining or from underneath points to the drain hose, pump-filter area, or an internal fault. Clean only accessible areas with the machine isolated, and stop using it and arrange professional service if the source is underneath, severe, electrical, or still unknown after these checks.
Work through in order
Diagnostic checks
Use only checks that match the exact appliance or system and its official guide.
-
Map the leak without running a hazardous test
With the programme stopped, close the water supply tap and look with a torch around the front door and detergent drawer, the rear hose connections, and the floor below the cabinet. Note whether water appeared while filling, washing, draining, or after the cycle.
Expected result: Water at the rear during fill, at the front during wash, or from below during drain are distinct patterns; no visible source after drying means the leak may be internal or intermittent.
Next step: Follow the matching location branch below. If water reached electrical parts, the leak is fast, or the source cannot be seen safely, leave the tap closed and stop for professional help.
Why this matters
Why: The pattern selects the next accessible check: inlet connections for a rear/fill leak, door or drawer sealing for a front/wash leak, and the drain or pump-filter path for a drain/bottom leak.
-
Check the inlet and drain connections
Keep the supply tap closed. Inspect the Beko inlet hose at the tap and machine, its two visible gasket areas, the drain hose, and any extension-hose clamp. Look for a loose nut, kink, crack, puncture, rust, or a hose pulled out of its connection. Hand-tighten an accessible inlet nut only; do not use a tool.
Expected result: A wet ring at one connector or a damaged hose identifies the leak path; a dry, sound connection shifts suspicion to the door, drawer, filter, or an internal component.
Next step: Replace a visibly damaged hose or gasket with a model-appropriate part, or have a professional do it. Once a sound connection is secured, dry it and perform only a brief supervised check; close the tap again if it becomes wet.
Why this matters
Why: A loose connection or gasket can leak during filling, while a kinked, blocked, or damaged drain hose can leak or overflow when water is pumped out. A cracked or rusted hose is not a tightening problem.
-
Inspect the door seal and detergent drawer
With the machine isolated and the drum empty, gently pull back the rubber door seal and remove lint, hair, or a trapped item from the sealing fold. Check for a cut or split. Pull the detergent drawer out only as far as the design allows, remove residue, and refit it fully so it closes squarely.
Expected result: Debris on the seal or a drawer that was not fully closed can explain water at the front; a tear, distorted seal, or clean drawer with continued front leakage indicates a part or internal water-path fault.
Next step: If the seal is torn or the front leak persists after the accessible surfaces are clean and closed correctly, stop using the washer and arrange a qualified repair rather than removing panels.
Why this matters
Why: The door must close against an unobstructed seal, and the drawer must be completely closed. Cleaning can correct an obstruction, but it cannot restore a torn seal or stop an unseen leak behind the front panel.
-
Check the pump-filter area before assuming a pump failure
Only when the machine is unplugged, the supply tap is closed, and the remaining water is safe to handle, place a shallow bowl and towels at the lower access cover. If the model has a small drain hose, use it to empty the water; otherwise loosen the pump filter slowly. Remove lint, hair, coins, or buttons, rinse the filter, wipe the cavity, and refit the filter clockwise until it is secure.
Expected result: Debris in the filter or a filter that was not seated can restrict draining and allow water to escape around the lower front; a clean, correctly seated filter with water still appearing from the base points beyond this user check.
Next step: Dry the access area and supervise a short drain check only if no electrical part is wet and the filter is secure. If the leak returns, water pours from underneath, or the filter cannot be safely opened, stop and call a technician.
Why this matters
Why: The filter is intended to catch foreign objects before they enter the drain hose. Finding debris supports a restricted drain path, but it does not prove the pump or an internal hose is sound.
-
Rule out movement or an overloaded, poorly closed load
With the drum empty, gently test whether the appliance rocks. Check that it sits on a solid, level floor, that the door closes with no fabric caught in it, and that the next load stays within the capacity and programme guidance in the Beko manual.
Expected result: A rocking cabinet, an item caught in the door, or an overloaded drum gives a correctable installation or loading clue; a stable machine with a properly closed door and a recurring puddle does not explain away the leak.
Next step: Adjust accessible feet according to the model instructions and remove the obstruction or reduce the load. If the same leak remains on a correctly levelled, correctly closed machine, stop testing and arrange service.
Why this matters
Why: An unlevel appliance can move water and stress connections, while a door obstruction can prevent the seal from closing. These checks are supporting checks, not a reason to ignore a leak from the base.
Use your observations
Decision map
Find the observation that best matches what you see, then follow the next safe action.
-
PATH 01Next step
What you see
Water appears at the rear while the machine is filling.
Do this next
Keep the tap closed and follow the inlet-hose, gasket, and connector check. Replace a visibly damaged hose or gasket with model-confirmed parts; call a professional if the connection still leaks or the leak is behind the cabinet.
-
PATH 02Next step
What you see
Water appears at the door or detergent drawer during washing.
Do this next
Clean the door-seal fold, remove anything caught in the door, and refit the detergent drawer fully. A torn seal or persistent front leak requires repair rather than panel removal.
-
PATH 03Next step
What you see
Water appears when draining or collects at the lower front.
Do this next
With power isolated and towels ready, inspect and clean the accessible pump filter and check the drain hose. If water comes from underneath, the filter is secure but the leak continues, or the pump area is inaccessible, stop using the washer and call a technician.
-
PATH 04Safety boundary
What you see
The leak is severe, reaches electrics, has no visible source, or returns after an accessible correction.
Do this next
Do not run another cycle. Keep the water supply closed, leave the appliance isolated if it can be done safely, and arrange qualified appliance service; use a plumber as well when the building supply or waste connection is the source.
Why this path and its safety boundary
Safety stop: True
Helpful context
Understand the symptom
Make the leak safe before diagnosing it
Cancel the programme if the controls respond. Close the water supply tap and mop up standing water. If water has reached a plug, socket, cord, or other electrical part, do not touch wet electrical equipment; keep clear and have a qualified professional make the area safe. Do not restart the machine just to reproduce a large or fast leak.
Use timing and location together
A few drops at the rear as the drum fills are different evidence from water at the front during washing or a puddle that appears when the pump runs. First identify the side and cycle phase, then inspect the matching accessible path. This keeps a loose connection from being mistaken for an internal pump or tub problem.
After a simple correction
Dry the area, make sure every cover and connection you handled is secure, and run only a short supervised rinse with the water tap available to close. Stop immediately if the leak returns. A repaired connection should stay dry at the same phase of the cycle; persistent water from the base needs a technician rather than repeated test cycles.
Only after diagnosis
Potential parts
- washing machine inlet hose gasket
Consider this only when water is proven to seep from an inlet-hose connection and the hose itself is sound.
Confirm the complete Beko model and the gasket specification before ordering. - washing machine inlet or drain hose
Consider a replacement only when the corresponding hose is visibly cracked, punctured, rusted, or unable to seal after correct routing.
Confirm the Beko model, hose position, connector size, and manufacturer fit information before ordering. - washing machine door seal
Consider this only when the front leak tracks to a torn or permanently distorted door seal after debris is removed.
Match the exact Beko model; door seals are not interchangeable solely because the machines look similar.
When checks do not resolve it
Need a professional?
A technician is appropriate for a persistent, severe, bottom-of-cabinet, or internal leak, and whenever the source cannot be identified safely.
Common questions
FAQ
Why is my Beko washing machine leaking from underneath?
A bottom leak can come from a damaged hose, pump-filter or drain path, or an internal leak. Check only the accessible hose and filter areas with the machine isolated; if water continues from the base, stop using it and call a technician.
What should I check if water leaks from the Beko washer door?
Inspect the rubber door seal for trapped debris, a tear, or a distortion, and make sure no fabric is caught when the door closes. Cleaning can remove an obstruction, but a torn seal or persistent leak needs repair.
Can a blocked pump filter cause a Beko washing machine leak?
It can contribute to draining problems and leakage around the lower front. With power and water isolated, drain any remaining water safely, clean the accessible filter and cavity, and stop if the leak returns or comes from underneath.
Should I keep using a Beko washing machine that is leaking?
No. Close the water supply and stop using it when the leak is severe, recurrent, unexplained, from the base or cabinet, or near electrical parts. Arrange qualified service before running another cycle.
Read the exact guide
Official sources
- My washing machine is leaking waterBeko UK · Beko washing machine leak location, timing, door seal, drain filter, bottom leaks, and professional escalation
- Connecting to Water SupplyBeko product documentation · Beko washing machine inlet-hose connection and leak check
- How to fix a washing machine that leaks?Beko Australia · Beko washing machine supply and drain hoses, gaskets, extension connections, pump filter, balance, door, and detergent drawer checks
Community feedback
Share a repair observation
Share a plain-text repair observation. Accepted observations are published automatically; this page may take a moment to update.