
On this page
Start here
Quick answer
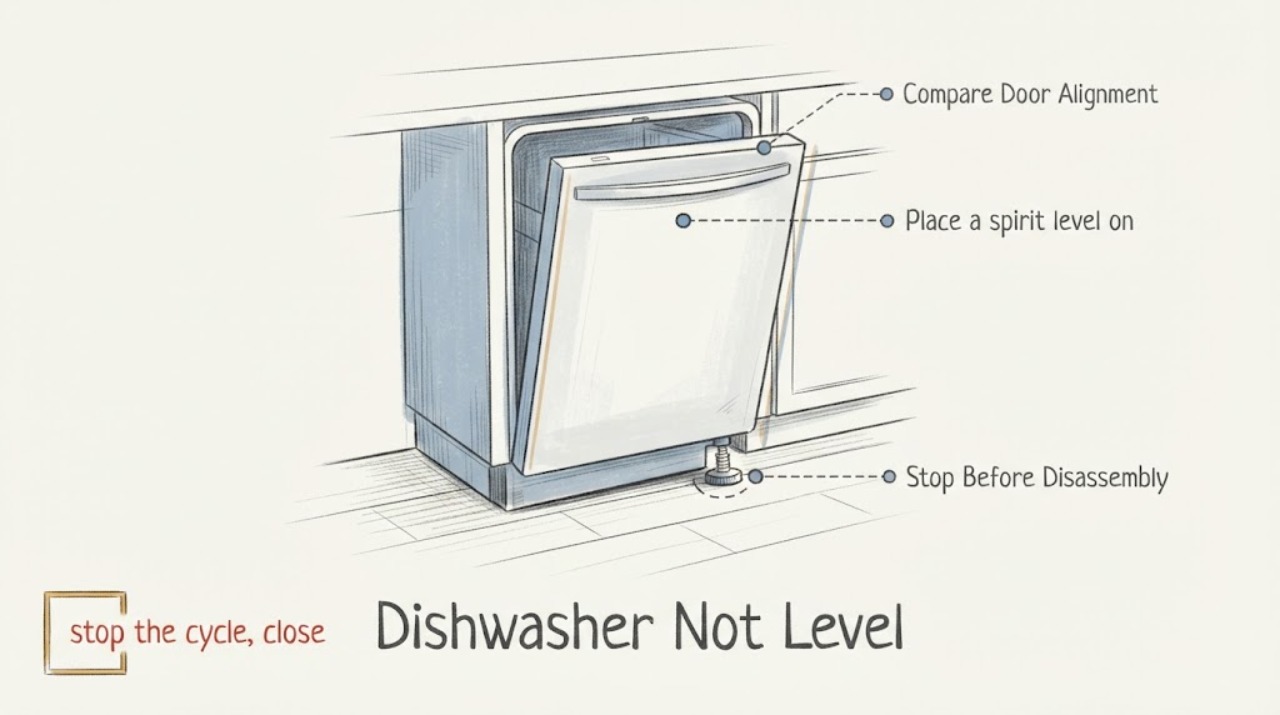
Check a Beko dishwasher for level from front to back and side to side with a spirit level, then check for rocking. Beko says the appliance should stand level and balanced on its feet; its generic leveling guidance describes adjusting the feet until they firmly contact the floor and hand-tightening the lock nuts. Do not pull an installed dishwasher against live water or power connections. If rear access, an integrated mounting point, or an anti-tip arrangement needs the appliance moved, isolate it only as safely accessible and use the exact model installation guide or a qualified installer.
Work through in order
Diagnostic checks
Use only checks that match the exact appliance or system and its official guide.
-
Check 1
Find the dishwasher model label and note whether the unit is freestanding or integrated; inspect the door alignment and cabinet gaps without pulling the appliance.
Expected result: The model is known or still missing, and the unit is identified as freestanding or integrated.
Next step: Use the exact installation guide for any adjustment beyond a visible level and wobble check; continue only with the applicable branch below.
Why this matters
Why: Installation hardware, mounting and foot access vary by model and installation type, so a brand-only anti-tip or removal procedure cannot be assumed.
-
Check 2
If any adjustment would require moving the dishwasher, stop the cycle, close the water supply, and use an accessible power isolator or breaker only when it can be reached safely; do not pull against attached connections.
Expected result: The appliance can be isolated without reaching exposed wiring, or water, drain or power connections remain attached, hidden or under tension.
Next step: Proceed only when the exact guide and safe isolation permit it. If isolation or rear access is uncertain, stop and arrange a qualified installer or service visit.
Why this matters
Why: A level problem does not justify stretching hoses, kinking a drain line or tugging a live connected appliance.
-
Check 3
Place a spirit level on a stable accessible surface of the dishwasher or use the model guide to identify the intended level reference, checking front-to-back and side-to-side; gently test whether the cabinet rocks.
Expected result: The bubble is off level, a corner lifts, or the cabinet rocks; alternatively the unit is level and stable.
Next step: If unstable, continue only to a permitted foot adjustment. If stable but the door still rubs or will not seal, use the exact model manual or service rather than forcing the door.
Why this matters
Why: An off-level or rocking result confirms an installation or floor-contact issue, while a stable level result means the door symptom may need a different model-specific path.
-
Check 4
Only when the exact Beko installation guide permits it and the appliance is safely isolated, adjust the accessible feet in small increments until they firmly contact the floor, then follow the guide for hand-tightening any lock nuts.
Expected result: All feet remain in firm contact and the wobble is gone, or the feet cannot be reached or the unit remains unstable.
Next step: Keep the successful setting and recheck the door. If the feet cannot be adjusted without moving an integrated or connected unit, stop and use the exact manual or installer.
Why this matters
Why: Beko's generic FAQ supports foot adjustment and hand-tightened lock nuts, but it does not define every model's access, bracket or anti-tip arrangement.
-
Check 5
For an integrated dishwasher, inspect only the visible alignment and securing context; do not remove cabinetry fasteners, brackets or panels to make the appliance level unless the exact installation guide explicitly assigns that task to the installer.
Expected result: The unit is visibly anchored or the door and cabinetry remain misaligned after permitted leveling, or no securing issue is visible.
Next step: If securing or alignment requires extraction, use a qualified installer. If the unit is stable and aligned, perform only the final leak and door checks.
Why this matters
Why: Beko treats integrated securing to cabinetry or brackets as an installation step, so the correct hardware and release method cannot be inferred from a generic symptom.
-
Check 6
After an approved adjustment, confirm the door closes evenly and the visible inlet, drain and connection areas remain dry; run a short test only when the appliance is fully secure and the exact guide allows it.
Expected result: The door seals and no visible leak appears, or the door still rubs, will not latch, or water appears.
Next step: Stop use if there is a leak, electrical concern or a door that cannot latch. Shut off water and power as safely accessible and arrange qualified service; do not keep testing.
Why this matters
Why: A persistent door or leak result is no longer a simple level confirmation and may involve installation alignment or a connection that needs professional attention.
Use your observations
Decision map
Find the observation that best matches what you see, then follow the next safe action.
-
PATH 01Next step
What you see
The spirit level is off or the dishwasher rocks, but the unit can be adjusted without pulling against connections.
Do this next
Follow the exact model installation guide for small foot adjustments, then recheck level, stability and the door.
Why this path and its safety boundary
Why it matters: The visible result is consistent with uneven foot contact or installation alignment, not proof of a failed internal component.
-
PATH 02Next step
What you see
The dishwasher is integrated, visibly anchored, or rear access would require extraction.
Do this next
Do not remove brackets or pull the connected appliance; use the exact manual or a qualified installer.
Why this path and its safety boundary
Why it matters: Mounting and anti-tip details are installation-specific and cannot be safely generalized from the Beko brand alone.
-
PATH 03Next step
What you see
The unit is level and stable but the door rubs, will not latch, or the seal is pinched.
Do this next
Stop forcing the door and arrange model-specific service or installer assessment.
Why this path and its safety boundary
Why it matters: The remaining symptom is not explained by the bubble reading alone and may involve alignment or a damaged installation part.
-
PATH 04Next step
What you see
A visible hose or connection leaks, is stretched, or the appliance cannot be safely isolated.
Do this next
Stop the cycle, shut off water and power only from safe accessible controls, and arrange qualified service; do not continue a test cycle.
Why this path and its safety boundary
Why it matters: Water and electrical hazards take priority over leveling.
Helpful context
Understand the symptom
Confirm the installation situation
Record the full model number and whether the dishwasher is freestanding or integrated. Look at the door, cabinet gaps and floor contact without pulling the appliance. A missing model means these checks can establish whether the machine is visibly unstable, but it does not establish the correct mounting hardware or a universal foot procedure.
What a level check can show
With the appliance stationary, use a spirit level to check both directions that are accessible without removing panels. Gently test for rocking. A bubble that is off level or a corner that lifts indicates an installation adjustment is needed; a level reading with continued movement points to floor contact, securing or structural concerns rather than a simple bubble reading.
Adjust only within the exact installation instructions
If the exact model guide permits user adjustment and the appliance is safely isolated, adjust the feet in small increments until they firmly contact the floor, then follow that guide for any lock nut. Do not guess a bracket, torque, thread direction or anti-tip layout. For an integrated unit, do not remove cabinetry fasteners or defeat its securing arrangement.
Do not move a connected dishwasher to reach the rear
If correcting the level would require pulling the dishwasher forward, first stop the cycle, use an accessible power isolator or breaker only if safe, and close the water supply. Never let a hose, drain line or power cord become stretched or kinked. If the connections are hidden, under tension, leaking, or cannot be isolated safely, stop and use a qualified installer or service technician.
Check the door and visible connections after an approved adjustment
Once the appliance is back in its approved position, confirm that the door closes evenly, the seal is not pinched, and visible water connections show no leak. Beko's installation guidance calls for checking for leaks and running a test cycle after connection work; do this only when the appliance is fully secure and there is no water or electrical hazard.
When checks do not resolve it
Need a professional?
Use a qualified installer or appliance technician if moving the dishwasher is required, an integrated mounting or anti-tip connection is involved, a hose or cord is under tension, the unit cannot be isolated safely, the door will not latch, or any leak appears.
Have this ready
- full model number
- freestanding or integrated installation
- where the cabinet rocks or sits off level
- whether the door rubs or leaks
- whether the symptom began after installation or movement
Common questions
FAQ
Can I pull a Beko dishwasher forward to adjust the feet?
Do not pull it while water, drain or power connections may still be attached. Isolate safely first, follow the exact installation guide, and use a qualified installer if rear access or integrated securing is involved.
Which way should the Beko dishwasher feet turn?
Beko's generic FAQ describes clockwise or counter-clockwise adjustment until the feet firmly contact the floor, but the exact access and installation procedure remains model-specific. Use the manual for the appliance in front of you.
Does a level dishwasher always mean the door problem is fixed?
No. A stable level reading does not prove that an integrated mount, door alignment or seal is correct. If the door still rubs, will not latch or leaks, stop forcing it and arrange model-specific service.
Read the exact guide
Official sources
- How to Install and Connect a New Dishwasher: A Step-by-Step GuideBeko UK · Opened official Beko UK installation guide. It is general installation guidance; the exact model manual controls details such as access and mounting hardware.
- How do I level my dishwasher?Beko · Opened Beko regional official FAQ. It gives a generic leveling check; the exact model and regional installation instructions still control.
Community feedback
Share a repair observation
Share a plain-text repair observation. Accepted observations are published automatically; this page may take a moment to update.