
On this page
Start here
Quick answer
Stop the blender, unplug it, and wait until every moving part has stopped before removing the jar or looking at the drive interface. With the power disconnected, check that the jar or pitcher is seated and locked as the appliance manual requires, look only at any externally visible drive socket or coupling for cracks or looseness, and check for a jam without touching the blades. If the drive interface is damaged, the blade assembly is seized or noisy, the jar will not lock, or the motor still runs without turning the blades after correct assembly, stop testing and use the exact model manual or qualified service; do not bypass an interlock, touch the blades, or guess a replacement coupling.
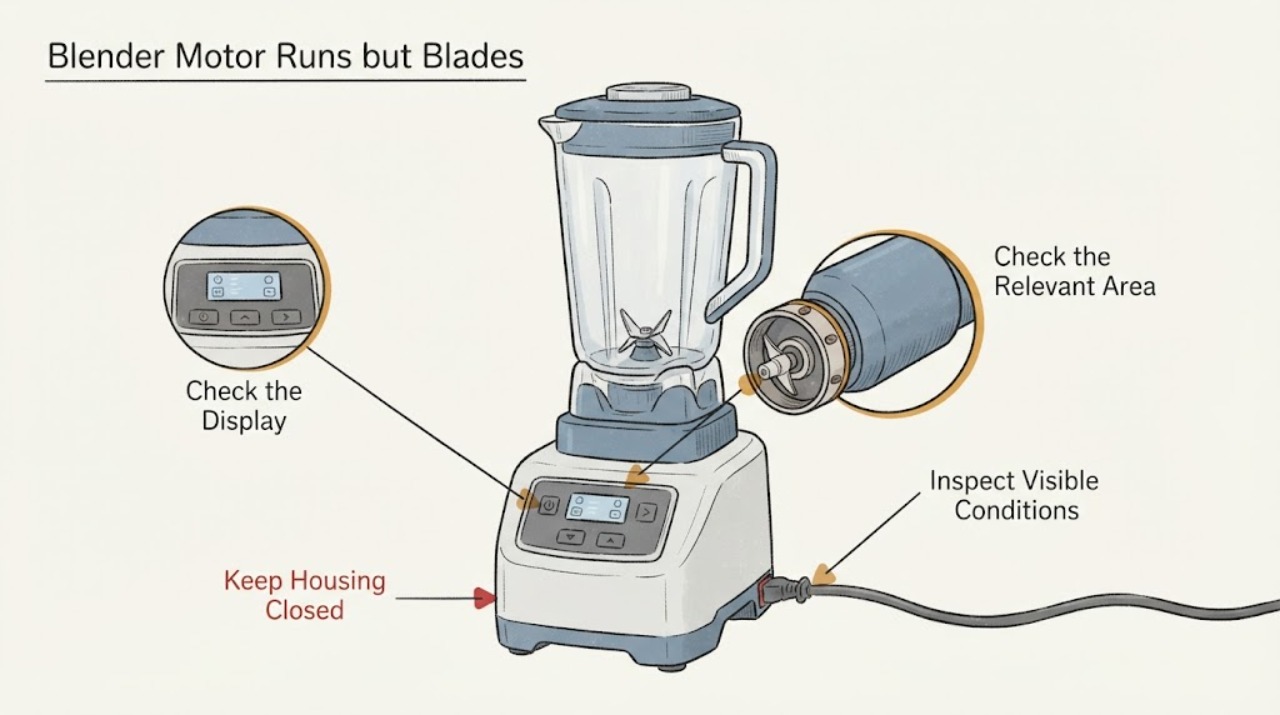
Work through in order
Diagnostic checks
Use only checks that match the exact appliance or system and its official guide.
-
Check 1
Turn the control off, unplug the blender, remove the jar only after the blades have completely stopped, and place the jar on a stable surface. Do not run the motor with the jar removed or put fingers or utensils into the blade area.
Expected result: The motor or blades continue moving after the control is released, the power cord/base is hot or damaged, or everything stops normally.
Next step: If there is heat, smoke, burning odor, damaged insulation, or continued motion, leave the blender unplugged and arrange qualified service. Otherwise continue with the unpowered checks.
Why this matters
Why: Unexpected continued motion, heat, smoke, odor, or cord damage is a safety stop rather than a blade-drive diagnosis. Normal stopping permits only an unpowered external inspection.
-
Check 2
With the blender unplugged, inspect the jar or pitcher seating, locking collar, lid/lock indicators, and blade assembly position from outside. Re-seat the container only in the manner shown by the exact manual; do not force a partial lock or bypass an interlock.
Expected result: The jar sits crooked, leaves a gap, does not reach the lock position, or the blade assembly is not fully attached; or the jar is fully seated and locked with no visible gap.
Next step: If the manual's seating procedure corrects the gap, perform only the manual's normal low-risk test with the lid secured. If the jar still will not lock or the motor runs while the blades remain stationary, stop and move to model-specific service.
Why this matters
Why: KitchenAid's blender instructions show that an improperly secured pitcher may fail to engage the coupler, and its support page says the jar must lock into the base. A similar symptom on another brand may have a different interlock or coupling design.
-
Check 3
Only if the exact model manual identifies a visible drive socket, coupling, or drive gear for owner inspection, look at it with the container removed and power disconnected. Do not pull the coupling out, turn the blade by hand, remove a base panel, or assume the visible part is universal.
Expected result: The visible drive piece is cracked, missing teeth, loose, detached, stuck, or appears intact; the blade assembly also may show a leak, grease, grinding mark, or damaged housing.
Next step: If any coupling, blade housing, seal, or bearing area is damaged, stop using the blender and provide photographs plus the model number to the manufacturer or a qualified technician. If the area looks intact but the symptom persists, do not keep cycling the motor; use the exact manual's service path.
Why this matters
Why: Vitamix says a cracked, immovable, or easily removed drive socket can require parts or service, and says grinding or grease can indicate blade-bearing trouble. Those findings are manufacturer-specific clues and do not name a compatible part for an unknown blender.
-
Check 4
With the container removed and unplugged, look through the opening for a hard object or dense pack that could hold the blade assembly. Follow the exact manual's cleaning or jam-clearance method; use no fingers, and do not wedge a tool against the blades or rotate them by force.
Expected result: The contents are visibly packed around the blade area, the blade housing is free of visible contents, or the container has leaked, smells burnt, or shows grinding damage.
Next step: If the manual permits safe clearance and the obstruction is removable without contact with the blades, clear it and stop if resistance remains. For a seized, leaking, noisy, or damaged assembly, leave it unplugged and request service.
Why this matters
Why: KitchenAid documents overload/jam protection and instructs owners to unplug before clearing a jam; Vitamix treats grinding and grease as service clues. A visible obstruction can explain the symptom, but a seized blade or damaged bearing cannot be confirmed safely from outside.
-
Check 5
Find the full brand, model, and serial information on the base or rating label and retrieve the matching owner manual before ordering anything. Record whether the appliance is a countertop jar blender, personal cup blender, or immersion attachment because the drive and safety instructions differ.
Expected result: The exact manual shows a user-accessible coupling or seating check, or it provides no owner procedure for the observed drive failure; the appliance may also be a different blender type than expected.
Next step: Follow only the matching manual's owner checks. If it does not cover the failure, provide the model, symptom, sound/odor history, and photographs to manufacturer support or a qualified appliance technician rather than guessing a part.
Why this matters
Why: The current topic has no brand or model, so no exact coupling, blade assembly, interlock, or replacement fit can be established. Manufacturer documentation is needed to distinguish a permitted external check from an internal repair.
Use your observations
Decision map
Find the observation that best matches what you see, then follow the next safe action.
-
PATH 01Next step
What you see
The jar is not fully seated or locked, and the exact manual shows that the coupling engages only after the correct lock position.
Do this next
Unplug, re-seat the jar exactly as instructed, secure the lid, and perform only the manual's normal test. If it still slips or the motor runs without blade motion, stop and request service.
Why this path and its safety boundary
Why it matters: The motor can run without transferring motion to the blade assembly when the container engagement is incomplete on that design.
-
PATH 02Next step
What you see
An externally visible drive socket or coupling is cracked, loose, missing teeth, or easily detached after the jar is removed and power is disconnected.
Do this next
Do not operate the blender or substitute a generic coupling. Use the exact model parts/service information or a qualified technician to identify the correct repair.
Why this path and its safety boundary
Why it matters: The motor-to-container drive path is damaged or out of engagement; Vitamix identifies these observations as requiring parts or service on its machines.
-
PATH 03Next step
What you see
The blade assembly is seized, grinds, leaks grease, has damaged blades, or remains stationary after correct jar seating while the motor runs.
Do this next
Keep the blender unplugged, do not touch or force the blades, and arrange manufacturer or qualified service with the model and photos. Do not disassemble the motor base.
Why this path and its safety boundary
Why it matters: The symptom is no longer a simple seating check; a blade bearing, drive interface, or internal assembly may need service, but the unknown model prevents a definitive component diagnosis.
-
PATH 04Next step
What you see
There is smoke, a burning smell, abnormal heat, damaged wiring, liquid in the motor base, or a safety interlock that appears defeated.
Do this next
Unplug only if it can be done without contact with a damaged cord or liquid, keep the appliance out of service, and obtain qualified service. Do not perform live testing or bypass a safety feature.
Why this path and its safety boundary
Why it matters: This is an immediate electrical or injury hazard, not a routine blade-drive adjustment.
Helpful context
Understand the symptom
The symptom identifies a lost drive path, not a specific part
Different countertop blenders couple the motor to the blade assembly in different ways. Vitamix describes inspecting its external drive socket when the motor no longer turns the blades, while a KitchenAid manual describes a pitcher-locking condition that prevents the coupler from engaging. Those are manufacturer-specific examples, not proof that an unknown blender uses either design. Use the exact manual to identify what may be observed from outside before considering parts.
Keep hands away from the blade path
Unplug before removing the container or inspecting the drive area, and wait for complete stop. Do not test with the jar removed, hold the blade while the motor is connected, insert a utensil into the container, or defeat a lid or jar interlock. If there is grinding, grease, smoke, burning odor, heat, or a damaged blade assembly, leave the unit out of service and arrange support.
When checks do not resolve it
Need a professional?
Arrange manufacturer or qualified appliance service when the jar will not lock, the visible coupling is damaged, the blade assembly is seized or noisy, the motor runs without blade motion after correct seating, or there is smoke, burning odor, heat, liquid in the base, or damaged wiring. Do not open the motor base or bypass a lid/jar interlock.
Have this ready
- Provide the brand, full model and serial number, blender type, whether the motor runs, whether the blade assembly moves at all, any grinding or grease, photos of the jar/base interface with power disconnected, and the exact manual section consulted.
Common questions
FAQ
Is the coupling definitely broken if the motor runs but the blades do not?
No. The container may not be locked into the drive, a jam may be holding the blade assembly, or the blade assembly itself may be damaged. Check only the external conditions allowed by the exact manual; do not identify or order a coupling without the model.
Can I hold the blade or turn it by hand to test it?
Do not touch or force the blade. Unplug the blender, wait for complete stop, and use only the manufacturer's specified inspection method. Damaged or seized blade assemblies should go to service.
Why does the brand and model matter for this failure?
Jar locks, drive sockets, blade assemblies, overload behavior, and interlocks vary by design. A KitchenAid manual and Vitamix support page show different manufacturer-specific checks, so an unknown blender cannot safely inherit either brand's replacement or disassembly procedure.
Read the exact guide
Official sources
- Use and Care - Immersion Blender AttachmentsVitamix · Vitamix safety manual used for the general injury boundary: keep hands and utensils away from moving parts, allow complete stop, unplug before detaching, and do not touch drive components. It is not used to identify a countertop blender's parts.
- Frequently Asked Questions |Service, Returns & TroubleshootingVitamix · Vitamix manufacturer guidance for its own machines: unplugging, inspecting an external drive socket, and escalating cracked/immovable/easily removed sockets, grinding, grease, or bearing concerns. It is not a universal part-fit guide for unknown brands.
- Owner's ManualKitchenAid · Opened KitchenAid blender manual showing a specific pitcher-lock/coupler explanation for blades not rotating, overload/jam unplug steps, and service escalation. The procedure is not transferred to an unknown brand.
- How to Use the Personal Cordless BlenderKitchenAid Product Help · KitchenAid instructions showing that its jar/blade assembly must be secured and locked to the motor base, and that the jar must not be removed while the motor is running. Used as a manufacturer-specific design example, not as universal unknown-model instructions.
Community feedback
Share a repair observation
Share a plain-text repair observation. Accepted observations are published automatically; this page may take a moment to update.