
On this page
Start here
Quick answer
Stop the Blomberg washer-dryer and contain the water before troubleshooting. If the floor, plug, socket, or other electrical equipment is wet, do not touch the plug or controls; leave the area and arrange qualified help unless power can be isolated safely from a dry location. Once the area is safe, identify whether water appears at the inlet or drain connections, the door seal, the lower filter area, or only during a model-specific drying function. Blomberg's guidance covers a kinked or crushed drain hose, a pump filter that releases water when opened, and a damaged door seal; its manual also says to check inlet connections for leaks and keep the drain hose secure. Clean or reseat only accessible parts as the exact model instructions allow. A leak from underneath, a torn seal or hose, an unknown source, a repeated leak, or any need to open the cabinet is a repair boundary, so keep the appliance out of service and request a qualified appliance technician.
Before you begin
Safety first
- No cabinet disassembly, live electrical work, forced appliance movement, pump dismantling, or generic component replacement. If electrical equipment is wet, stay clear and isolate power only from a dry safe location or ask an electrician.
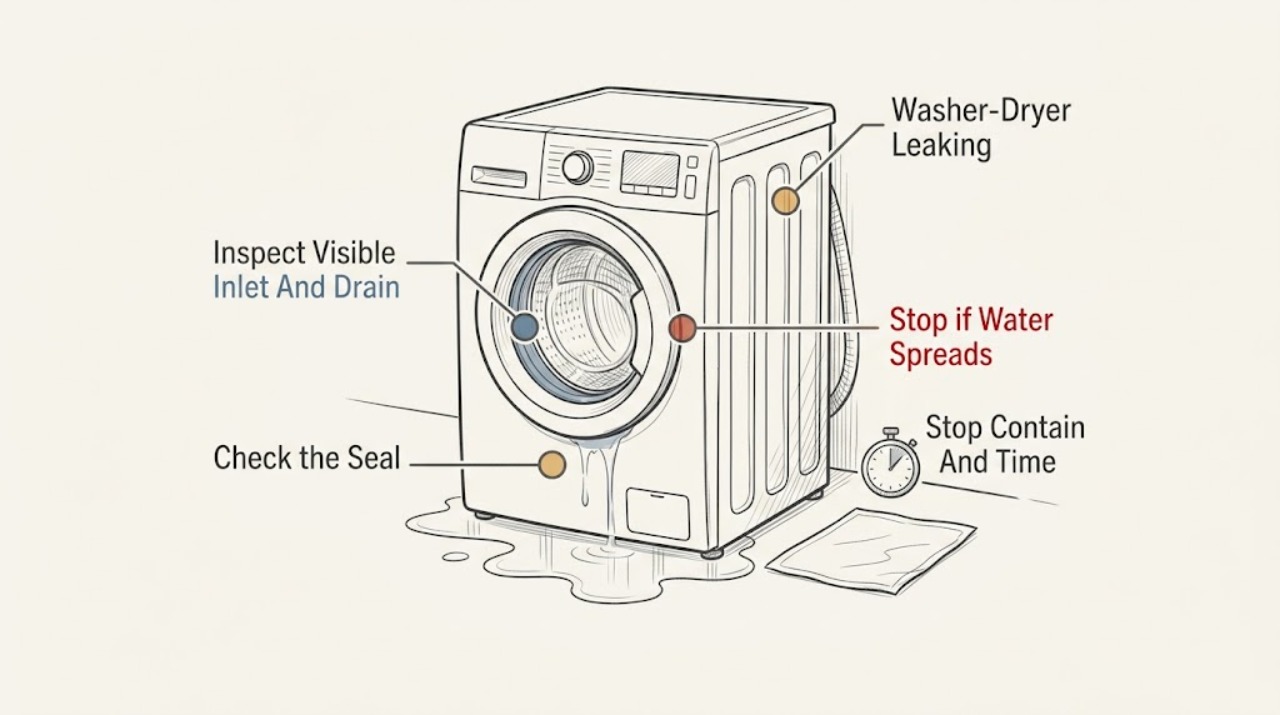
Work through in order
Diagnostic checks
Use only checks that match the exact appliance or system and its official guide.
-
Check 1
Stop the programme and keep the washer-dryer out of service. From a dry, stable position, mop or contain accessible water without reaching behind the appliance. Note whether the leak started during filling, washing, draining/spinning, or drying, and photograph the puddle and visible wet trail.
Expected result: Record the cycle stage, approximate location (front door, dispenser area, rear hose area, underneath, or drying-water area), whether water is still flowing, and whether water is near the plug, socket, extension lead, or other electrical equipment.
Next step: If the area is dry and there is no electrical hazard, continue with visual checks only. If water is near electrical equipment, the leak is severe or continuous, or the source is hidden, keep clear and arrange qualified help; do not restart the appliance.
Stop if: Do not touch a wet plug, socket, control, or cable; do not enter standing water to reach a switch; do not move the heavy appliance alone or remove a panel.
Why this matters
Why: The timing and location separate an inlet/door issue from a drain or pump-path issue, while a wet electrical area changes the task from diagnosis to immediate safety. A leak that continues while the machine is idle may be a live water-supply or connection problem.
-
Check 2
When the floor and connection area are dry and the appliance can be viewed without pulling it out, inspect the visible water-inlet and waste-hose connections from the front or an already accessible side. Look for a loose connection, kink, crush point, split, hose end that has moved, or water tracking from the connection; do not use tools or force the appliance.
Expected result: Classify the visible plumbing as dry and secure, damp at an inlet connection, damp at the waste connection, kinked/crushed, visibly damaged, or inaccessible.
Next step: If the exact model instructions permit a simple hand check, stop the water supply at the accessible tap and have the connection corrected or the damaged hose assessed; otherwise document the location and request service. Do not run another cycle to test a damaged hose.
Stop if: Stop for a split hose, water still flowing with the machine off, a connection behind the appliance that requires moving it, or any need to undo plumbing while the area is wet.
Why this matters
Why: A damp inlet or waste connection and a kinked or crushed drain hose can explain a localized leak or poor discharge. A dry, intact visible hose does not rule out an internal leak, and an inaccessible rear connection is not a reason to drag the machine forward alone.
-
Check 3
With the appliance stopped and the door open only if it releases normally, inspect the rubber door seal, its visible fold, and the glass edge for lint, coins, detergent residue, a displaced item, cracks, or a tear. If the seal is intact and the area is dry enough to handle, wipe it with a soft damp cloth or sponge and dry it; do not pull the seal away from the metal.
Expected result: Record whether debris was removed and whether the seal is clean and evenly seated, distorted, cracked, or torn; note whether water had appeared at the front of the door during filling or washing.
Next step: If cleaning removes debris and the seal remains intact, leave the appliance unused until the other checks are complete, then use only a cautious model-approved test if no safety boundary is present. For a tear, persistent door leak, or seal that will not sit correctly, arrange qualified repair and do not operate it.
Stop if: Do not lift the seal from the cabinet, stretch it into place, use harsh chemicals, pry the door, or attempt a door-seal replacement without the exact model procedure and suitable repair competence.
Why this matters
Why: Debris on the sealing surface can allow water past the door, while a tear or distortion indicates a part or fit problem that cleaning cannot repair. A dry, undamaged seal makes the door a less likely source and shifts attention to the dispenser, hoses, drain path, or drying function.
-
Check 4
Only if the exact Blomberg manual identifies a user-accessible pump filter and the floor, plug, and socket are dry, disconnect mains power, let any hot water cool, place a shallow container and towels at the filter, and open the filter housing slowly. If the model has an emergency drain tube, use it as the manual directs before opening the filter; do not reach into an unknown opening.
Expected result: Record whether water releases, whether the filter is blocked by lint or a small object, whether the filter and cover are intact, and whether the area remains wet or shows a damaged seal.
Next step: If the filter is intact and the manual permits it, rinse away loose debris, refit it securely, and keep the appliance disconnected until the leak source is resolved. If the filter will not close, the pump area is damaged, or the leak is from underneath, stop and book qualified service.
Stop if: Do not open the filter when the water may be hot, the electrical area is wet, or the manual does not describe access; do not insert tools, dismantle the pump, or operate the appliance with the cover loose.
Why this matters
Why: A blocked filter can impede discharge and contribute to water escaping elsewhere, while water release is expected when the filter is opened. A damaged filter, cover, persistent water flow, unusual pump noise, or leak that remains after a permitted clean points beyond a simple maintenance check.
-
Check 5
If the puddle appears only during a drying programme, identify the exact model and read its drying-section instructions before touching any tank, condenser, or drain connection. From ordinary safe access, check only whether a model-provided tank is full or not seated, a visible condenser cover is closed as instructed, or a visible drain hose is disconnected or damaged.
Expected result: Classify the drying path as not present on this model, dry and correctly seated, visibly full or displaced, blocked/dirty according to the manual, damaged, or unknown.
Next step: Follow only the exact model's care instructions for emptying or cleaning an accessible drying component; otherwise keep the machine out of service and provide the model number, programme stage, and photos to a technician.
Stop if: Do not open the cabinet, remove a condenser or cover by force, bypass a sensor, or assume that a separate tumble-dryer procedure applies to this washer-dryer.
Why this matters
Why: A model-specific drying-water container, condenser area, or drain hose can leak when the drying function runs, but the presence and location of those parts vary. A leak from an internal drying path or a leak that also occurs during washing needs appliance service rather than a generic dryer procedure.
-
Check 6
Do not run a test cycle unless the source was a permitted, corrected external issue, all accessible electrical areas are dry, the filter/cover and hoses are secure, the door seal is intact, and the exact model instructions allow a check. If those conditions are met, remain nearby for a short rinse or drain observation; stop immediately at the first new drip.
Expected result: Observe whether the machine stays dry through the selected stage, leaks at the same location, leaks only when draining, or shows a new electrical, pump, door, or drying symptom.
Next step: If any leak recurs, stop using the washer-dryer, close the accessible water taps when safe, preserve the photos and observations, and arrange qualified appliance repair. Do not keep cycling the machine to reproduce the fault.
Stop if: Never perform this check with active water near electricity, a damaged hose or seal, an unknown underside leak, burning smell, sparking, abnormal noise, or a cabinet that would need opening.
Why this matters
Why: A dry controlled check supports that the accessible issue was corrected but does not prove hidden components are sound. A repeat leak, leak from below, or different-stage leak means the original cause was not resolved or more than one fault is present.
Use your observations
Decision map
Find the observation that best matches what you see, then follow the next safe action.
-
PATH 01Safety boundary
What you see
Water appears at the front of the door during filling or washing, and the seal has debris but no visible tear.
Do this next
Clean with a soft damp cloth as Blomberg describes, dry it, and arrange repair if the leak returns.
Why this path and its safety boundary
Why it matters: A sealing-surface obstruction is plausible, but the seal must remain attached and intact.
Safety stop: Stop for a tear, distortion, persistent leak, or a door that does not close normally.
-
PATH 02Safety boundary
What you see
Water is localized at a visible inlet or waste connection, or the drain hose is kinked, crushed, or displaced.
Do this next
Keep the appliance off, stop the water supply from a dry accessible location if safe, and have the hose or connection corrected; use the exact model instructions.
Why this path and its safety boundary
Why it matters: The external plumbing path is a plausible source, but damaged connections should not be operated under pressure.
Safety stop: Stop if the connection is inaccessible, split, continuously flowing, or requires moving the appliance.
-
PATH 03Safety boundary
What you see
Water appears at the lower filter area or the washer-dryer does not empty, and the manual identifies a user-accessible filter.
Do this next
With dry electrics and cooled water, follow the exact manual and Blomberg's slow-drain/filter procedure; refit the cover securely.
Why this path and its safety boundary
Why it matters: A blocked filter or improperly seated cover may be involved, but opening the filter can release residual water.
Safety stop: Stop for hot water, a damaged cover/filter, continued leakage, or a leak from underneath; request service.
-
PATH 04Safety boundary
What you see
No leak occurs in washing, but water appears during drying and the model documentation identifies a tank, condenser, or drying drain path.
Do this next
Check only the accessible component named in the exact model instructions and request service if it is damaged, blocked internally, or not clearly identified.
Why this path and its safety boundary
Why it matters: The drying-water path is a plausible model-specific source; not every washer-dryer has the same arrangement.
Safety stop: Do not use a separate tumble-dryer procedure, open the cabinet, or force a condenser cover or tank.
-
PATH 05Safety boundary
What you see
Water comes from underneath, the source cannot be identified, the leak is severe or repeated, or water has reached electrical equipment.
Do this next
Stop using the appliance, keep people away from wet electrics, isolate power only from a dry safe location if possible, and arrange qualified appliance or electrical help as appropriate.
Why this path and its safety boundary
Why it matters: An internal pump, hose, seal, or electrical-safety issue cannot be safely diagnosed through external checks.
Safety stop: Do not pull the machine out, remove panels, probe the base, or continue test cycles.
Helpful context
Understand the symptom
The point where water appears narrows the diagnosis
A leak during filling points toward an inlet hose, connection, dispenser path, or door seal; a leak during draining or spinning points toward the drain hose, filter, pump, or waste connection. Water that appears only during drying needs model-specific checking because some Blomberg drying designs use a tank, condenser, or drain hose. Do not assume that a puddle under the appliance identifies a failed pump: water can travel from a higher connection before reaching the floor.
Use the model instructions for access points
Blomberg's washer-dryer FAQ places the pump filter low on the appliance and says to open it slowly with a container ready; the manual warns that residual water may be hot and says to disconnect mains power before removing an obstruction. Follow the manual for the exact model, allow hot water to cool, and do not pull the appliance out or remove panels to reach a hidden leak.
A clean seal is not a substitute for a seal repair
Blomberg recommends cleaning the rubber door seal with a soft cloth or sponge and says not to lift the seal away from the metal. Cleaning can remove lint or debris from the sealing surface, but it cannot restore a cut, tear, distortion, or loose seal. If the door area leaks again after a permitted cleaning, stop using the appliance and have the exact model assessed.
Safety boundary
Stop conditions
- Stop immediately for water near a plug, socket, extension lead, controls, or other electrical equipment; do not touch wet electrical parts or enter standing water to isolate power.
- Stop for a severe, continuous, underneath, or unexplained leak, or when the leak returns after an accessible check; keep the appliance out of service and request qualified repair.
- Stop before opening panels, reaching into the cabinet or pump, moving the heavy appliance, replacing a seal or hose without exact model guidance, or working on electrical parts.
- Stop filter access if the water may be hot, the floor/electrics are wet, or the exact model manual does not describe the access procedure.
When checks do not resolve it
Need a professional?
Use qualified appliance service for an underneath, internal, severe, recurring, or unknown leak, or whenever the safe external checks do not resolve it.
Safety scope: No cabinet disassembly, live electrical work, forced appliance movement, pump dismantling, or generic component replacement. If electrical equipment is wet, stay clear and isolate power only from a dry safe location or ask an electrician.
Have this ready
- Exact Blomberg model, programme and stage, first wet location, whether washing or drying triggers it, photos, and any visible hose/seal/filter observations.
Common questions
FAQ
Should I keep using a Blomberg washer-dryer that is leaking a little?
No. Stop the programme, contain the water, and identify the source only from a dry, safe position. A small leak can worsen and should not be repeatedly tested.
What if the water is coming from the bottom of the washer-dryer?
Treat an underside leak as an internal or plumbing fault unless a clearly accessible filter or hose check identifies a safe cause. Keep the appliance off and arrange qualified service; do not remove panels or move it alone.
Can cleaning the door seal stop the leak?
It can remove debris from an intact sealing surface, but it cannot repair a tear, distortion, or loose seal. Use a soft cloth as Blomberg directs and stop if the door still leaks.
Is it safe to open the pump filter when there is water inside?
Only if the exact manual describes the access, the electrical area and floor are dry, the machine is disconnected, and hot water has cooled. Use a container and open slowly; otherwise request service.
Why does my washer-dryer leak only during drying?
The drying programme may use a model-specific tank, condenser, or drain path. Check only the accessible component named in the exact manual; do not assume a separate tumble-dryer procedure applies.
Read the exact guide
Official sources
- Water from my Blomberg washer dryer is not emptying, what should I do?Blomberg · Blomberg washer-dryer drain hose, pump filter, and drain troubleshooting
- How do I clean the seal on my washing machine?Blomberg · Blomberg rubber door-seal cleaning and leak prevention
- User's ManualBlomberg · Installation, inlet/drain hose, levelling, electrical, and pump-filter safety guidance; model-specific details must be confirmed against the user's model
- Why is my Blomberg condenser tumbler dryer leaking?Blomberg · Conditional only when the washer-dryer's exact documentation identifies a comparable tank, condenser, hose, or door-seal path
Community feedback
Share a repair observation
Share a plain-text repair observation. Accepted observations are published automatically; this page may take a moment to update.