
On this page
Start here
Quick answer
First stop the Maytag washer-dryer and identify when the water appears: during fill or wash, during drain or spin, while the unit is idle, or only during drying or a steam option. From a dry, safe position, turn off the cycle and water supply if it can be done without touching a wet plugged-in appliance. Maytag points to inlet-hose washers and connections, the drain hose and household drain, level or loading, door or tub seals, excess suds, and—on steam or vented dryers—water connections, condensation, and restricted airflow. Do not run repeated test cycles, move the unit, open panels, or reach into water near power. If the appliance, cord, outlet, or floor is wet, or water continues with the controls off, keep clear and arrange qualified appliance service.
Before you begin
Safety first
- This article covers dry-position observation and accessible hose, drain, lint, and timing checks only. Do not touch wet energized equipment, move the unit, open the cabinet, disconnect pressurized hoses, or repair valves, pumps, seals, wiring, or venting.
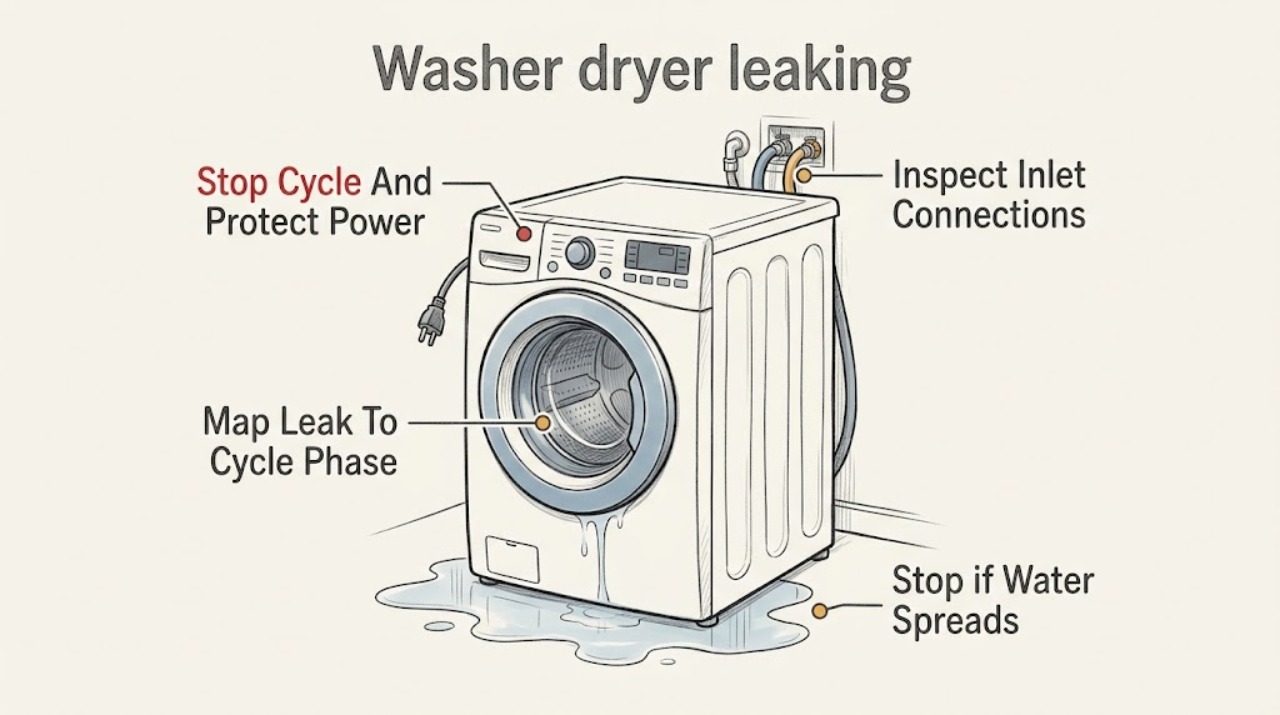
Work through in order
Diagnostic checks
Use only checks that match the exact appliance or system and its official guide.
-
Check 1
Stop the washer-dryer cycle with the normal control if you can reach it from a dry position, keep hands and feet out of pooled water, and keep the appliance connected to power untouched if its cord, outlet, or cabinet is wet. If the floor is dry and the water shutoff valves are safely accessible, close both washer water faucets.
Expected result: Water stops when the cycle stops, continues while the appliance is idle, or is present around the cord, outlet, cabinet base, or control area.
Next step: Keep the appliance out of service and arrange qualified help when water is near power, the leak continues while idle, or the cycle cannot be stopped safely. Do not pull the washer-dryer away from the wall.
Stop if: Do not touch a wet plugged-in appliance, cord, outlet, or water around it; do not reach into the cabinet or operate controls through water.
Why this matters
Why: A leak that stops with the cycle narrows the search to the phase that released water. Continued flow while idle suggests an inlet or household plumbing source. Water at an electrical area is a shock hazard, not a troubleshooting test.
-
Check 2
Without starting another cycle, record exactly when the puddle first appeared: during fill or wash, during drain or spin, while the unit was off, at the end of a wash, or during drying or a steam option. Photograph the puddle edge and the first visible trail from a dry, stable position.
Expected result: The leak is tied to filling or agitation, drain or spin, idle time, or dryer/steam operation; or the timing is unknown because the appliance was unattended.
Next step: Use the matching branch below and provide the phase, water location, load type, and photos to service. Do not repeat a full wash or dry cycle just to reproduce the leak.
Stop if: Stop any test if water spreads toward power, the appliance rocks, the door or lid cannot seal, there is a burning smell, or the leak becomes continuous.
Why this matters
Why: Fill timing favors inlet connections or an inlet valve; drain or spin timing favors the drain path, household drain, load movement, or seals; idle leakage favors a supply or valve; dryer or steam timing favors condensation, steam-water connections, or restricted exhaust.
-
Check 3
From the side or front, without moving the washer-dryer, visually inspect the accessible hot and cold inlet-hose connections and nearby floor for a drip trail, missing or displaced washers, cross-threading, a kink, a split hose, or a cracked visible inlet valve. Do not loosen fittings while water is present or use tools in a wet area.
Expected result: A connection or hose is visibly wet, a washer is missing or displaced, the hot and cold lines are reversed, the hose is damaged, or the inlet area is dry while the leak occurs in another phase.
Next step: If the area is dry and safely accessible, close both water faucets and document the connection without overtightening. Replace or repair only through the exact model instructions or qualified service; do not move the unit to reach the back.
Stop if: Do not over-tighten, disconnect a pressurized hose, probe an inlet screen, or continue if water reaches the cord, outlet, or your feet.
Why this matters
Why: Maytag identifies hose washers, tight connections, correct hot/cold ports, and a cracked inlet valve as relevant to water entering or leaking from the washer. A dry inlet area makes the drain path, tub, door, or dryer-side path more likely.
-
Check 4
Observe the accessible drain-hose entry, standpipe or laundry tub, and nearby household plumbing without pulling the appliance forward. Look for a hose that has come loose, a blocked or backing-up drain, a hose kink, or water emerging from the household drain rather than the washer cabinet.
Expected result: Water rises from the drain during pump-out, the drain hose is loose or not secured, the hose is kinked or damaged, or the household drain and nearby plumbing stay dry.
Next step: Stop using the appliance, keep the drain area clear, and arrange plumbing service for a household backup or qualified appliance service for a cabinet leak. Do not seal the drain opening with tape or dismantle the pump.
Stop if: Do not reach into standing water, remove panels, pull the appliance to inspect the pump, or run another drain cycle when the drain is backing up.
Why this matters
Why: A drain backup or loose connection can make wash water appear to come from underneath the washer-dryer. If the household path is dry but water appears from the cabinet during drain or spin, an internal pump, hose, tub, or seal is more likely.
-
Check 5
If water appears only during drying or steam operation, inspect from a dry position for moisture on the door or controls, a wet steam-water connection, a clean lint screen, and a visibly crushed or obstructed exhaust path. Do not remove cabinet panels or run a heated cycle to test airflow.
Expected result: A couple of drips occur at the door after a steam cycle, moisture and heat remain inside, drying is unusually long, airflow is weak, the vent is visibly kinked, or the water inlet connection is wet.
Next step: Stop the dryer if moisture, heat, or lint accumulation is abnormal; clean only the accessible lint screen and arrange qualified vent, steam-water, or appliance service for persistent moisture or a leak.
Stop if: Do not bypass the lint screen, disconnect a steam hose under pressure, open the dryer cabinet, or continue a heated cycle when there is smoke, burning smell, wet power equipment, or pooling water.
Why this matters
Why: Maytag says steam can condense on the door and that restricted exhaust can retain moist air, cause condensation, and produce floor puddles behind the dryer. A wet steam-water connection points to the supply path instead; water in every phase is not explained by dryer condensation.
Use your observations
Decision map
Find the observation that best matches what you see, then follow the next safe action.
-
PATH 01Safety boundary
What you see
Water begins during fill or appears while the washer-dryer is idle, and the trail leads to an inlet hose, connection, or visible inlet-valve area.
Do this next
Keep both water faucets closed and arrange model-specific or qualified service; do not loosen the connection or move the appliance while it is wet.
Why this path and its safety boundary
Why it matters: The supply side is more likely than the drain or dryer side; incorrect ports, missing washers, loose or damaged hoses, or a valve can allow water to enter or escape.
Safety stop: Do not touch a wet appliance near power, continue filling, or over-tighten a hose.
-
PATH 02Safety boundary
What you see
Water appears during drain or spin, rises at the standpipe or tub, or the drain hose is loose while inlet connections remain dry.
Do this next
Stop the cycle and arrange plumbing service for a backup or qualified appliance service for an internal leak; do not run another pump-out test.
Why this path and its safety boundary
Why it matters: A drain backup or drain-hose connection is more likely; if the household drain stays dry but the cabinet leaks, an internal pump, hose, tub, or seal may be involved.
Safety stop: Do not remove the pump cover, pull the unit forward, seal the drain opening, or reach into standing water.
-
PATH 03Safety boundary
What you see
Water appears from the door, dispenser, or cabinet during wash or agitation, while the supply and household drain remain dry; excess suds or a torn seal is visible.
Do this next
Keep the appliance out of service until the leak source is identified; document detergent type, load size, door or dispenser condition, and water location for qualified service.
Why this path and its safety boundary
Why it matters: An over-sudsing, dispenser, door gasket, tub seal, or load-splash issue is more likely than an external hose leak. Maytag notes that non-HE or excess detergent can produce suds that escape from a washer vent.
Safety stop: Do not add more detergent, scrub or stretch a gasket, open the front panel, or repeat a wash with a suspected seal leak.
-
PATH 04Safety boundary
What you see
Water appears only during drying or a steam option, with moisture on the door or controls, long dry times, weak exhaust flow, or a wet steam-water connection.
Do this next
Stop the dryer for persistent moisture, clear only the accessible lint screen, and request qualified vent, steam-water, or appliance service when the issue returns.
Why this path and its safety boundary
Why it matters: Condensation from restricted airflow or a steam-cycle water connection is more likely than a washer fill or drain leak. A few door drips after steam can be condensation, but pooling, repeated moisture, or heat buildup needs attention.
Safety stop: Do not run a heated cycle with pooling water, smoke, burning odor, wet controls, or a damaged vent; do not open the cabinet.
-
PATH 05Safety boundary
What you see
Water reaches the cord, outlet, control area, or cabinet base, continues after controls are OFF, or the source cannot be isolated without moving or opening the washer-dryer.
Do this next
Keep people away, do not touch the wet appliance, and obtain qualified appliance or electrical help; from a dry safe location, a qualified person can isolate power and water.
Why this path and its safety boundary
Why it matters: This is no longer a low-risk hose observation. Water and electricity, an active supply leak, or concealed cabinet damage can create shock, fire, flooding, or further appliance damage.
Safety stop: Do not unplug a wet appliance, operate a wet control, move the unit, or restart any cycle.
Helpful context
Understand the symptom
The cycle phase is the fastest way to narrow a washer-dryer leak
Water that appears as the machine fills points toward the supply hoses, washers, inlet valve, or a splash or seal issue. Water released during drain or spin points toward the drain hose, pump, household drain, oversudsing, load movement, or an internal seal. A puddle that appears only during drying, a steam option, or after the door opens can be condensation or a steam-water connection rather than wash water. A leak while the appliance is idle is a stop-and-isolate clue for a valve, hose, or household plumbing source.
Keep water and electricity separate
Do not touch a wet washer-dryer, its cord, outlet, or nearby water while it is connected to power. If the floor is wet near the electrical connection, keep clear and have a qualified person isolate the circuit. When the area and your hands are dry and the controls are accessible without reaching through water, stop the cycle and close the water faucets; do not pull the appliance out to reach hoses or inspect its underside.
A dryer-side puddle may be airflow or steam condensation
Maytag says restricted dryer airflow can retain moist air, produce condensation, and create puddles behind the dryer that can look like a washer leak. On steam cycles, a small amount of door condensation may drip when the door opens, while the water inlet hose still needs to be checked. Clean only accessible lint surfaces and observe the visible vent path; leave internal vent, pump, valve, and cabinet work to qualified service.
Safety boundary
Stop conditions
- Do not touch a wet washer-dryer, cord, outlet, or surrounding water while it remains connected to power.
- Do not restart cycles to reproduce a leak when water is near power, the source is continuous, or the floor is flooded.
- Do not move the washer-dryer, open panels, dismantle the pump or valve, disconnect pressurized hoses, or access concealed wiring as an ordinary check.
- Close water faucets only from a dry, safe position; if the valve, appliance, or floor is wet or inaccessible, keep clear and have a qualified person isolate it.
- Stop for smoke, burning odor, sparking, an unstable appliance, hot water injury risk, gas odor, or water entering the wall, outlet, or control area.
Only after diagnosis
Potential parts
- washer water inlet hose and washer set
Consider this category only if a dry-position inspection identifies a damaged hose, missing or displaced washer, or leaking threaded inlet connection and the exact model installation guidance supports replacement.
Confirm the Maytag model, hose length, connection type, hot/cold arrangement, and washer specification; do not disconnect a wet or pressurized hose. - washer-dryer drain hose or securing clamp
Consider this category only if water appears during drain or spin and inspection confirms a loose, cracked, kinked, or improperly secured drain path rather than a household drain backup or internal pump leak.
Confirm the exact Maytag model, drain routing, standpipe or laundry-tub arrangement, and installation requirements; do not seal the drain opening or pull the appliance forward. - washer door boot or tub seal
Consider this category only if qualified diagnosis confirms a torn, displaced, or damaged door or tub seal as the source of wash-stage water.
Confirm the exact Maytag model, washer configuration, seal orientation, and related clamp or support parts with qualified service. - water inlet valve or drain pump assembly
Consider this service category only after timing and accessible checks indicate an internal inlet valve or pump leak and qualified diagnosis identifies the failed component.
Confirm the exact Maytag model, appliance configuration, electrical and plumbing connections, and safe replacement procedure; these are not wet-area DIY repairs.
When checks do not resolve it
Need a professional?
Arrange qualified appliance service when a leak continues while idle, comes from the cabinet, pump, valve, tub, door seal, or dispenser, or cannot be isolated without moving or opening the washer-dryer. Arrange plumbing service for a backing-up household drain. For a dryer-side leak with long drying, internal moisture, weak exhaust, or steam-water connection problems, request qualified vent or appliance service. If water is near electrical equipment, do not touch the appliance; seek qualified electrical help from a dry safe location.
Safety scope: This article covers dry-position observation and accessible hose, drain, lint, and timing checks only. Do not touch wet energized equipment, move the unit, open the cabinet, disconnect pressurized hoses, or repair valves, pumps, seals, wiring, or venting.
Common questions
FAQ
How can I tell whether a Maytag washer-dryer leak is from the washer or dryer side?
Record the phase: fill or wash points toward inlet connections, loading, suds, door or tub seals; drain or spin points toward the drain hose, household drain, pump, or internal seals; idle leakage points toward a supply or valve; drying or steam leakage points toward condensation, exhaust airflow, or a steam-water connection. Do not run repeated cycles to reproduce it.
Should I unplug a Maytag washer-dryer if water is on the floor?
Do not touch a wet appliance, cord, outlet, or surrounding water while it is plugged in. If the appliance and electrical area are dry and the power connection can be reached safely, follow the model manual's power-isolation guidance; otherwise keep clear and have a qualified person isolate power and water.
Can dryer condensation look like a washer leak?
Yes. Maytag says restricted dryer airflow can retain moist air, cause condensation, and create puddles behind the dryer. Moisture that occurs only during drying or steam, especially with long dry times or weak exhaust, supports that branch; water during fill, wash, or drain needs washer-side checks instead.
Read the exact guide
Official sources
- Leaking Water Underneath - WasherMaytag Product Help · Maytag washer support guidance used to connect underneath puddles with inlet/drain paths, household plumbing, and load-related overflow; it does not authorize cabinet disassembly.
- Condensation on Controls or Display - DryerMaytag Product Help · Maytag dryer support guidance used for moisture on controls or display and the need to check accessible lint and vent conditions.
- Leaking During Steam Cycle - DryerMaytag Product Help · Maytag dryer support guidance used for dryer or steam-stage water and condensation; a washer-dryer model's manual controls whether a steam option exists.
- Leaking from Behind - WasherMaytag Product Help · Maytag washer support guidance used for accessible supply and drain observations; washer-dryer model-specific installation instructions control exact access and routing.
- WASHER/DRYERMaytag · Maytag washer/dryer owner's manual used for inlet, drain, household-plumbing, water-leak, and safe non-use guidance; the exact model manual controls where different.
- Dryer Vent may be Blocked or RestrictedMaytag Product Help · Maytag dryer vent guidance used to distinguish dryer-side moisture from a washer leak; model-specific venting instructions control the safe inspection scope.
- CPSC Warns of Generator, Carbon Monoxide and Fire Hazards Ahead of Hurricane SeasonU.S. Consumer Product Safety Commission · CPSC guidance used only for the rule not to touch a wet plugged-in appliance and to have wet appliance electrical systems evaluated; it is not a washer-dryer repair procedure.
- Leaking Inside - Front Load WasherMaytag Product Help · Maytag front-load support guidance used for internal wash-stage clues such as door seal, inlet valve, drain path, and excess suds; the exact washer-dryer design controls.
Community feedback
Share a repair observation
Share a plain-text repair observation. Accepted observations are published automatically; this page may take a moment to update.