
On this page
Start here
Quick answer
If a washer-dryer leaks from the drain-hose area, stop the washer portion of the cycle and first identify whether water is coming from the hose wall, the washer-side connection, the standpipe or tub, or a drain that is backing up. With the appliance stopped and the area safe, inspect the accessible hose for a split, kink, displaced clamp, or loose routing, and check that its drain-end guide is secured without an airtight seal. Do not pull a stacked or gas dryer to reach the back, open the cabinet, or disconnect a hose while water or electricity is uncontrolled. A damaged hose, an inaccessible rear leak, recurring overflow, or a leak that remains after a model-approved routing correction needs appliance or plumbing service.
Before you begin
Safety first
- This article supports stopping the cycle, protecting a dry area, and inspecting accessible external hose routing and drain connections only. Do not touch wet electrical parts, move stacked or gas equipment, open the cabinet, disconnect hidden or water-filled hoses, or force plumbing fittings.
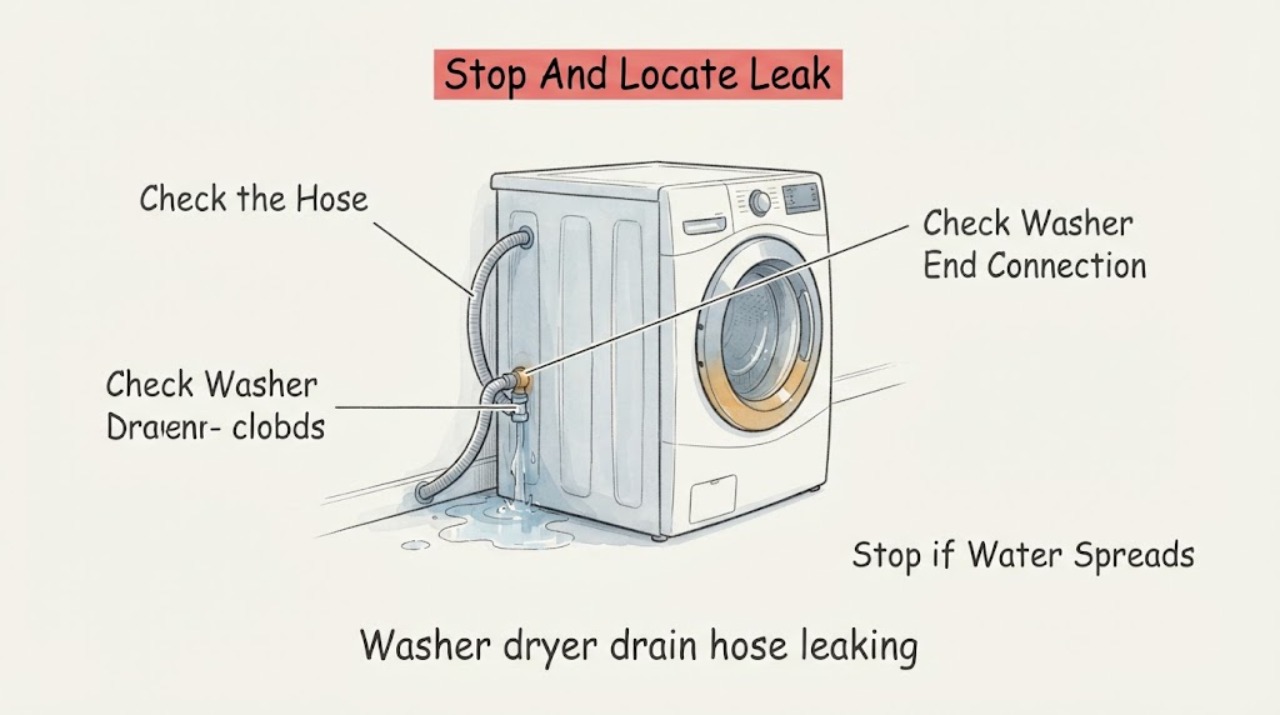
Work through in order
Diagnostic checks
Use only checks that match the exact appliance or system and its official guide.
-
Check 1
Stop the washer portion of the cycle and keep the appliance off; if the floor is wet, keep hands and feet away from the plug and outlet, and close the washer water valves only if they are accessible from a dry, stable position without forcing them.
Expected result: Note whether the leak is a small drip or a fast flow, whether it began during drain or spin, whether water is near an electrical connection, and whether the water level is rising in a standpipe or tub.
Next step: Keep the washer out of service until the floor is dry and proceed only with external, ordinary-access inspection; arrange service immediately if water cannot be controlled or the appliance area is unsafe.
Stop if: Do not touch a wet plug or outlet, keep running the cycle to reproduce the leak, force a stuck water valve, or move the appliance through standing water.
Why this matters
Why: A fast flow, water near electrical equipment, or an uncontrolled drain requires isolation and professional help before further checks. A leak that appears only while pumping points toward the drain path; a leak while filling or while idle may be an inlet, seal, pump-filter, or plumbing problem instead.
-
Check 2
With the washer stopped and the area dry, inspect the visible drain hose from end to end for a hole, split, rubbed spot, kink, flattened section, or water trail; do not pull a stacked unit or a gas dryer, and do not remove a cabinet panel.
Expected result: Record whether the hose wall is wet at one defect, wet along a kink, dry while the floor is wet, or impossible to view because the unit is stacked or tightly installed.
Next step: If a defect is visible, keep the washer off and identify a model-specific replacement hose; if the hose is dry or inaccessible, continue with the drain-end check or arrange service based on the leak location.
Stop if: Do not tape over a pressurized or pumping hose as a permanent repair, cut the hose, pull a stacked dryer, or open the cabinet to reach an internal leak.
Why this matters
Why: A localized wet split or rubbed-through section identifies a hose fault. A dry external hose makes the washer-side port, pump area, drain opening, or another hose more likely; an inaccessible rear area is a service boundary rather than a reason to dismantle the appliance.
-
Check 3
Inspect the accessible washer-side drain-hose connection, elbow, retaining clamp, and nearby hose routing without loosening the connection; compare it with the model installation guide and look for a clamp that has moved, an elbow that is not fully seated, or a damaged outlet.
Expected result: Use a dry paper towel to identify whether moisture starts at the connection, runs down from above, or is absent at the washer end while the drain end is wet.
Next step: If the model guide shows an ordinary-access clamp or elbow correction, secure it as instructed and wipe the area dry; if the port, clamp, or internal connection is damaged or not accessible, stop and arrange appliance service.
Stop if: Do not disconnect the hose with water in the machine, force a corroded clamp, substitute an unverified fitting, or remove rear panels.
Why this matters
Why: Moisture that starts at the washer-side joint with an intact hose points to a loose or damaged connection. Water arriving from above can be an inlet or other rear leak, while a dry washer-side joint shifts attention to the hose length or household drain.
-
Check 4
Inspect the hose end at the standpipe or laundry tub: confirm the model-supplied guide or support is present, the hose cannot fall out, the hose is not kinked, and the opening is not sealed airtight into the drain; do not force the hose deeper than the model guide allows.
Expected result: Record whether the hose slips out, water spills around the drain opening, the standpipe or tub rises during discharge, or the hose remains supported with an open air gap and drains without visible backflow.
Next step: Secure the drain end using the model's guide or tie method if it is plainly missing or loose; if the drain backs up, stop using the washer and have the household drain assessed instead of replacing the hose first.
Stop if: Do not tape or caulk the hose into an airtight seal, push excess hose into the pipe, pour water into a visibly overflowing drain, or use chemical drain products around a washer without plumbing guidance.
Why this matters
Why: A hose that slips out can spill directly onto the floor; a rising standpipe or tub indicates restricted household drainage and can mimic a leaking hose. Siphoning and drain-flow problems are installation-specific, and published limits differ among manufacturers, so a different brand's depth should not be treated as this appliance's specification.
-
Check 5
After a visible routing or support correction and only when the floor and electrical area are dry, run a short empty Rinse and Spin or equivalent drain test while staying beside the appliance; do not run a full unattended load.
Expected result: Watch the washer-side joint, hose wall, drain opening, and floor during fill, drain, and spin, and record the exact stage at which any water appears.
Next step: Stop the test at the first renewed leak, keep the washer off, and provide the leak stage and location to a qualified appliance technician or plumber; if it stays dry, return to normal use cautiously and recheck the hose after the next drain.
Stop if: Do not continue the cycle when water returns, the standpipe rises, the hose moves, the machine vibrates into the wall, or water approaches an electrical connection.
Why this matters
Why: No water after the correction makes a loose hose or routing issue more likely to have been the cause, but the result should be monitored on the next load. A repeat leak at the same joint confirms the correction did not hold; a leak from another location changes the diagnosis.
-
Check 6
Prepare the washer-dryer model number, a photo of the drain-hose routing and connections, the cycle stage when the leak starts, and whether the standpipe or tub backs up; leave the washer isolated if the source is internal or uncertain.
Expected result: Confirm whether the visible hose is cracked, the washer-side connection leaks, the drain opening overflows, or water appears from behind or underneath with no accessible source.
Next step: Give the observations and photos to a qualified appliance technician for a machine-side leak or to a plumber for a household drain backup; do not resume normal use until the active leak is controlled.
Stop if: Do not remove the cabinet, disconnect hidden hoses, pull a stacked or gas dryer, or keep operating the washer with an uncontrolled leak.
Why this matters
Why: A confirmed external hose defect supports a model-matched hose diagnosis. An internal or unexplained rear leak, recurring drain backup, structural damage, or any leak that returns after an approved correction needs professional inspection rather than repeated part changes.
Use your observations
Decision map
Find the observation that best matches what you see, then follow the next safe action.
-
PATH 01Safety boundary
What you see
The hose wall is wet at a visible split, hole, rubbed-through area, or crushed section, and the drain opening is not backing up.
Do this next
Keep the washer off and match a replacement hose to the exact model and connection style, or have an appliance technician install and verify it.
Why this path and its safety boundary
Why it matters: The drain hose itself is the leading fault; a routing restriction or age-related damage may have weakened it.
Safety stop: Do not rely on tape, glue, or a clamp over a damaged hose as a permanent repair, and do not run a test cycle until the defect is corrected.
-
PATH 02Safety boundary
What you see
Water starts at the washer-side elbow, clamp, or outlet while the hose wall is intact and the drain opening remains clear.
Do this next
Apply only the model guide's ordinary-access correction; if the port or joint is damaged or hidden, leave the appliance isolated and arrange appliance service.
Why this path and its safety boundary
Why it matters: A displaced clamp, incomplete seating, damaged washer outlet, or inaccessible internal hose joint is more likely than a household drain blockage.
Safety stop: Do not force the clamp, disconnect a water-filled hose, or remove panels to reach the joint.
-
PATH 03Safety boundary
What you see
The hose remains intact and supported, but the standpipe or laundry tub rises, spills, or leaks around its opening when the washer pumps out.
Do this next
Stop the washer and have the drain path assessed; keep the hose supported and do not seal it into the opening to conceal backflow.
Why this path and its safety boundary
Why it matters: Restricted or undersized household drainage, an odor trap that slows flow, or a loose hose end is more likely than a new hose-wall failure.
Safety stop: Do not keep discharging water into a rising drain, pour water into an already overflowing opening, or use unverified chemical cleaners near the appliance.
-
PATH 04Safety boundary
What you see
The drain hose and drain opening stay dry during a supervised drain test, but water appears while filling, around the door or dispenser, at a pump-filter area, or while the washer is idle.
Do this next
Keep the washer off if water is uncontrolled and follow the model-specific leak path or arrange appliance service instead of ordering a drain hose.
Why this path and its safety boundary
Why it matters: The reported puddle is probably not caused by the drain hose; an inlet hose, seal, pump-filter cap, dispenser, internal leak, or household plumbing needs a different diagnosis.
Safety stop: Do not keep repeating cycles to locate an unsafe leak or open the cabinet to search for it.
-
PATH 05Safety boundary
What you see
The hose was visibly loose, kinked, or unsupported, the model-approved correction was made, and a supervised empty drain test stays dry with no drain backflow.
Do this next
Use a small load first, observe the next discharge, and stop using the washer if the leak returns or the hose moves again.
Why this path and its safety boundary
Why it matters: Improper routing or a hose that had slipped out was likely the immediate cause, but the correction should be watched because movement or recurring overflow can return.
Safety stop: Do not treat one dry test as proof that an internal leak or weakened hose is safe to ignore.
Helpful context
Understand the symptom
Confirm that the drain hose is the leak source
A puddle behind a washer-dryer is not proof that the drain hose itself has failed. Water from an inlet hose, pump-filter area, door seal, or a backed-up standpipe can travel along the cabinet or floor and appear at the hose. Note whether the leak starts only when the washer pumps out, whether the hose wall becomes wet, and whether the standpipe or laundry tub rises. Keep the dryer portion off until the floor and the appliance area are dry.
Check the hose without making a model-specific assumption
The accessible drain hose should run smoothly from the washer to the drain, without a crushed bend or visible split. Its end must be supported so it cannot fall out, but it should not be sealed airtight into the standpipe. Insertion depth and height are model-specific: published manufacturer instructions do not all use the same numbers, so use the manual for this washer-dryer rather than copying a measurement from another brand.
A drain backup is a plumbing problem, not necessarily a new hose
If the drain opening or standpipe fills and spills only while the washer discharges, the household drain may be restricted. A hose that is loose at the drain opening can also throw water onto the floor even when the hose wall is intact. Do not seal the hose into the pipe to hide an overflow; keep the washer out of service and have the drain cleared if water backs up or the cause cannot be isolated.
Replace only a confirmed, accessible hose fault
A replacement drain hose is conditional on finding a split, hole, crushed section, or confirmed connection failure and matching the exact model's routing and fittings. A leak from inside the cabinet, pump area, or a washer-side port that cannot be safely reached is a service diagnosis, not a reason to pull the cabinet apart. Record the model and photograph the routing before arranging parts or service.
Safety boundary
Stop conditions
- Stop the washer immediately for a fast leak, a rising standpipe or tub, water near a plug or outlet, or water that cannot be controlled.
- Do not touch wet electrical parts, force water valves, pull a stacked or gas dryer, remove cabinet panels, or disconnect hidden hoses.
- Do not seal the drain hose airtight, push it deeper than the model installation guide allows, or use another brand's insertion measurement as a universal rule.
- Do not use tape, glue, or an unverified fitting as a permanent repair for a split hose or damaged washer outlet.
- Leave the appliance off and arrange service when the leak is internal, the hose is inaccessible, the drain backs up, or a supervised correction does not hold.
Only after diagnosis
Potential parts
- washer drain hose
Consider this part only when the accessible hose wall has a confirmed split, hole, crushed section, or model-diagnosed hose failure, rather than a drain opening backup or another leak source.
Match the exact washer-dryer model, hose length, inlet and outlet geometry, clamps, routing, and the manufacturer's installation instructions before ordering. - drain hose clamp
Consider this class only when the model instructions identify a missing or damaged external clamp and the hose and washer outlet are otherwise intact.
Confirm the model-specific clamp style, diameter, material, and placement; do not substitute a fitting that can cut the hose or fail during pumping. - drain hose guide or retaining strap
Consider this class only when the drain end repeatedly slips out or cannot stay supported after the correct model routing is verified.
Use the guide or strap specified for the washer-dryer and keep the drain opening non-airtight; a support part does not repair a blocked standpipe or cracked hose.
When checks do not resolve it
Need a professional?
Arrange appliance service when the drain hose is visibly damaged but the model-specific replacement or connection is uncertain, when water comes from inside the cabinet or an inaccessible rear joint, or when a leak returns after an approved external correction. Arrange plumbing service when the standpipe or laundry tub backs up, overflows around the opening, or cannot carry away the washer's discharge. Seek prompt help for fast flowing water, water near electrical equipment, a cracked outlet, or a leak that cannot be isolated.
Safety scope: This article supports stopping the cycle, protecting a dry area, and inspecting accessible external hose routing and drain connections only. Do not touch wet electrical parts, move stacked or gas equipment, open the cabinet, disconnect hidden or water-filled hoses, or force plumbing fittings.
Common questions
FAQ
How can I tell whether the washer drain hose itself is leaking?
Dry the accessible area, then inspect during a supervised drain test. A hose wall that becomes wet at a split, hole, or rubbed section points to the hose. If the hose stays dry but the standpipe rises, suspect drain backflow; if water starts at the washer-side joint, suspect the connection or an internal hose path.
Why does a washer leak only when it drains?
The drain pump produces its highest discharge flow during drain and spin. A loose hose end, kink, split, poorly seated washer-side connection, or restricted standpipe can therefore leak only at that stage. Check the hose and drain opening separately before choosing a replacement part.
Can I push the drain hose farther into the standpipe to stop a leak?
No. Excessive insertion can cause siphoning, and shallow or unsupported insertion can let the hose fall out. Published limits vary by manufacturer, so use the washer-dryer's installation guide, retain the required air gap, and secure the hose without sealing it airtight.
Should I replace the drain hose or call a plumber?
Replace or have a technician replace the hose only after a visible hose defect or model-diagnosed connection fault is confirmed. Call a plumber when the standpipe or tub backs up, and call an appliance technician when the leak comes from inside the machine, an inaccessible washer-side joint, or another appliance component.
Read the exact guide
Official sources
- Leaking from Underneath or Bottom - Front Load WasherWhirlpool Product Help · Whirlpool front-load washer leak guidance; the washer-dryer's model instructions control its exact hose and connection design.
- [LG Front Load Washer] Leaks During Drain CycleLG USA Support · LG front-load washer guidance; the same leak-source distinction is useful for washer-dryer drain diagnosis, while model-specific installation controls.
- Hooking Up a Washer: How to in 8 Easy StepsMaytag · General Maytag washer installation guidance; exact washer-dryer model instructions take precedence.
- Samsung washing machine is leakingSamsung Support · Samsung washing machine leak guidance; Samsung's dimensions are not universal and the washer-dryer's own manual controls.
- LG Washer – Why is My Front Load Washing Machine Leaking?LG USA Support · LG front-load washer leak-source guidance; exact washer-dryer model and installation documentation control.
- Service Pointer - W10611623 - Drain Hose InstallationMaytag · Maytag/Whirlpool-family technical installation pointer for listed washer drain systems; model documentation controls for other equipment.
Community feedback
Share a repair observation
Share a plain-text repair observation. Accepted observations are published automatically; this page may take a moment to update.