
On this page
Start here
Quick answer
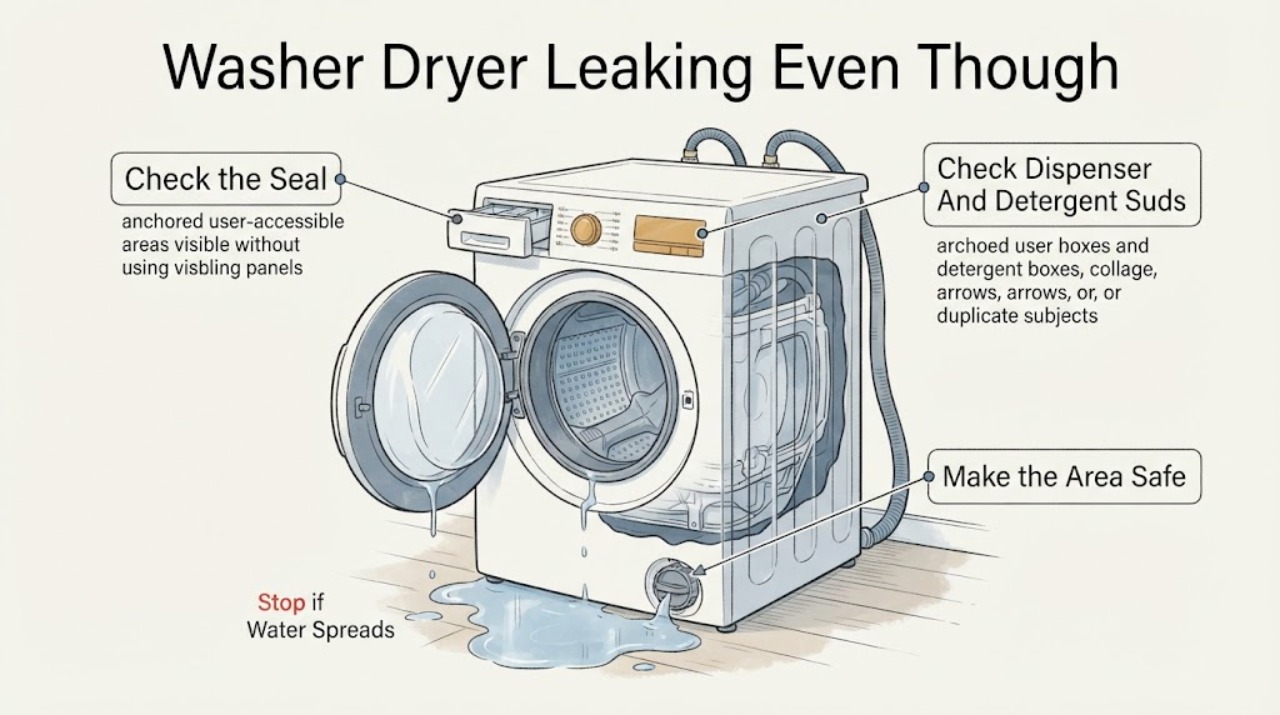
A washer-dryer can leak even when its door closes and latches. First stop the cycle, keep hands and feet away from pooled water, and turn the appliance off; if water is near electrical connections, do not touch the plug or breaker and get qualified help. Once the machine is cool and safe to inspect, identify where water first appears: the closed door, dispenser, rear hoses, drain hose or wall drain, lower pump-filter area, or underneath. On a front-loading combo, check the door glass and gasket for hair, lint, trapped fabric, residue, tears, or deformation; a closed door is not proof that the gasket seals. Check only visible hoses, the drain-hose route, and any user-accessible filter or cap according to the exact manual. Do not run repeated test cycles while the source is unknown. A damaged gasket, hose, filter seal, persistent leak, or water from underneath needs model-specific appliance service.
Before you begin
Safety first
- This article supports ordinary-access observation and exact-manual maintenance only. Do not move the appliance, open panels, reach under the cabinet, loosen pressurized connections, bypass a lock, or operate a leaking unit near electricity or pooled water.
Work through in order
Diagnostic checks
Use only checks that match the exact appliance or system and its official guide.
-
Check 1
Stop the cycle and switch the washer-dryer off from a dry, safe position; keep people away from pooled water and look from outside the cabinet for the first visible wet location, without touching water, wiring, or the underside.
Expected result: Record whether water is at the closed door, dispenser, rear hoses, drain or wall standpipe, lower access panel, floor beneath the unit, or nowhere visible; note smoke, arcing, burning odor, or water near electrical connections.
Next step: If water is near electrical parts or an urgent symptom exists, leave the area and obtain qualified or emergency help without touching switches, plugs, or breakers. Otherwise keep the appliance out of service while performing only the external checks below.
Stop if: Do not step into pooled water to unplug the unit, pull the machine forward, remove panels, or restart a cycle to locate a leak.
Why this matters
Why: The first wet location is more useful than the final puddle: door moisture suggests the gasket or glass, filling-time moisture suggests supply or dispenser paths, draining-time moisture suggests drain paths, and water from underneath may require internal service. Smoke, arcing, odor, or electrical contact makes this an urgent safety issue.
-
Check 2
On a cool, empty front-loading combo, open the door only if no water is pressing against it, then inspect the visible door glass and gasket lip for hair, lint, thread, trapped fabric, detergent residue, tears, cuts, hardening, folds, or displacement; wipe with a soft cloth only as the exact manual allows.
Expected result: Classify the gasket and glass as clean and intact, contaminated by removable debris, visibly damaged or deformed, or unsafe to inspect because water remains in the tub or glass is damaged.
Next step: Remove only loose surface debris using the model-approved method, leave the door and gasket clean and dry, and request service if damage is present or the leak persists. Do not force the gasket back into place or replace it without model-specific instructions.
Stop if: Do not reach into standing water, use sharp tools, scrub aggressively, spray cleaner into the seal, or operate the unit to test a damaged gasket or glass.
Why this matters
Why: Foreign material can create a gap despite a closed latch; LG and Samsung identify debris between the glass and gasket as a door-leak cause. A torn, deformed, or damaged seal or glass needs service, and a clean seal with continued leaking shifts attention to another leak path or an internal fault.
-
Check 3
Inspect the detergent drawer, its visible cavity, and the area below it for residue, overflow marks, a displaced insert, or a drawer that is not fully seated; compare the detergent type and amount with the exact combo manual without adding another product.
Expected result: Record whether the leak begins near the drawer during filling, whether residue or suds are visible, whether the drawer or cover is incomplete, or whether the dispenser is dry and the leak appears elsewhere.
Next step: With the machine off, clean and reseat only user-removable dispenser parts as directed by the manual, use only the specified detergent and amount on a future load, and arrange service if the drawer is damaged or the leak continues.
Stop if: Do not mix cleaners, pour a large volume of water into the drawer, dismantle the dispenser housing, or run a full load to compensate for an unexplained leak.
Why this matters
Why: A blocked or incompletely assembled dispenser and excess or unsuitable detergent can send water or suds over the front or internal channels. A dry dispenser with a leak during draining or spin points elsewhere; detergent changes cannot repair a torn gasket or hose.
-
Check 4
From ordinary safe access, inspect both visible inlet-hose connections, the visible drain hose, the wall drain or standpipe, and the lower front filter or residual-drain cap if the exact manual identifies it as user-accessible; do not move the machine.
Expected result: Look for a split, kink, loose connection, wet fitting, hose pulled from the drain, an overflowing or slow wall drain, or a pump-filter cap and residual hose that are not fully closed after maintenance.
Next step: Do not operate the unit. Photograph the location and ask a qualified technician to repair a damaged hose, filter seal, drain connection, or concealed leak; a plumbing professional may be needed when the home drain or supply is the source.
Stop if: Do not loosen pressurized hose fittings, reach behind the appliance, remove a pump cover with water in the tub, or use a drain chemical to address a washer leak.
Why this matters
Why: A rear wet fitting or split hose points toward the water supply; a drain hose or wall-drain overflow points toward drainage or backflow; a lower-panel leak after filter cleaning can be an incompletely seated filter or cap. If the visible paths are dry while water comes from underneath, the source is not established as user-serviceable.
-
Check 5
Using the leak history and the exact manual's cycle description, note when the leak occurs—while idle, filling, washing, draining, spinning, or drying—without repeatedly running the appliance; only a qualified person should reproduce a leak that could contact electricity or cause flooding.
Expected result: Record whether the leak is present before a cycle, starts as water enters, appears only when the drum tumbles, begins as the pump drains, follows high suds, or occurs during drying or condensation.
Next step: Give the timing, location, load condition, detergent used, and photos to service. Keep the appliance off if the source is unknown or if any water reaches the floor, wiring, or cabinet underside.
Stop if: Do not run an unattended, repeated, or full-load test, place hands under the machine, or bypass a door lock or safety control.
Why this matters
Why: A leak at rest can implicate a supply valve, hose, or tub-side fault; a fill leak favors the dispenser, inlet, or door path; a drain or spin leak favors the pump filter, drain hose, wall drain, or excessive suds; a drying-only moisture pattern may need combo-specific diagnosis. Timing narrows the path but does not prove a part has failed.
-
Check 6
Read the model and serial label from an ordinary-access location and collect the safe observations, photos, cycle phase, detergent information, and any recent filter or hose work; do not move the combo or open a panel to find the label.
Expected result: Record whether the unit is a front-load washer-dryer combo or another configuration, exact model identity if visible, leak side and timing, gasket condition, dispenser condition, visible hose or filter condition, and whether water remains in the tub.
Next step: Request appliance service when the leak persists, the gasket or glass is damaged, water comes from underneath, or the safe checks do not isolate a simple external cause; keep the unit out of service until cleared.
Stop if: Do not order a gasket, pump, hose, or door part from appearance alone, and do not remove the door, gasket retaining ring, cabinet, or rear cover as a first check.
Why this matters
Why: Combo layouts and user-accessible maintenance parts vary by model. A model-specific record lets the technician distinguish a gasket, door glass, dispenser channel, inlet, pump filter, drain hose, tub, or internal seal issue without unsafe exploratory disassembly.
Use your observations
Decision map
Find the observation that best matches what you see, then follow the next safe action.
-
PATH 01Safety boundary
What you see
Water first appears at the lower or side edge of the closed front door, and the gasket or glass has hair, lint, thread, trapped fabric, residue, a fold, tear, or deformation.
Do this next
Remove only loose debris with the manual-approved method if the appliance is safe and empty, then request service for any damage or continued leaking; do not run another load as a test.
Why this path and its safety boundary
Why it matters: The latch can be working while the gasket-to-glass seal is interrupted; a damaged seal or glass is more likely than a drain-hose problem.
Safety stop: Do not force, glue, cut, or replace the gasket without exact-model instructions, and do not operate with damaged glass or a torn seal.
-
PATH 02Safety boundary
What you see
The drawer area becomes wet during filling, residue or suds are present, or the drawer, insert, or cover is not fully seated.
Do this next
Stop the appliance, clean and reseat only accessible drawer parts as directed, confirm the model-approved detergent and amount, and request service if the leak returns or the drawer is damaged.
Why this path and its safety boundary
Why it matters: Water routing through the dispenser or excess suds is more likely than a door-seal failure, although water can travel down the front and mimic a door leak.
Safety stop: Do not pour extra water into the drawer, mix cleaning products, or dismantle the dispenser channel.
-
PATH 03Safety boundary
What you see
The door and dispenser remain dry, but water appears at a rear inlet or drain hose, the wall drain overflows, or the leak begins during draining.
Do this next
Keep the unit off, document the visible path, and arrange appliance or plumbing service as appropriate; do not move the combo or loosen a pressurized connection.
Why this path and its safety boundary
Why it matters: A supply connection, split or kinked drain hose, drain backflow, pump-filter cap, or drain-path issue is more likely than the closed door itself.
Safety stop: Do not use drain chemicals, reach behind the appliance, or keep running cycles to force the drain clear.
-
PATH 04Safety boundary
What you see
Water appears at the lower access panel, residual-drain hose, pump-filter area, or directly beneath the cabinet, especially after filter cleaning or with no visible external source.
Do this next
If the exact manual identifies the cap or filter as user-accessible and the tub is drained safely, verify only that it is closed as instructed; otherwise stop and request qualified service.
Why this path and its safety boundary
Why it matters: An incompletely closed filter or cap is possible, but water from underneath may involve an internal hose, pump, tub, seal, or cabinet fault that ordinary inspection cannot confirm.
Safety stop: Do not remove a filter with standing water, reach under the cabinet, tilt the combo, or open panels to chase the leak.
-
PATH 05Safety boundary
What you see
Moisture is noticed after drying or around the door, but no water path is visible and the appliance is a washer-dryer combo rather than a washer-only unit.
Do this next
Compare the amount and location with the combo manual's normal condensation guidance without operating an unsafe unit; request service if water escapes the cabinet, recurs while closed, or cannot be distinguished from a leak.
Why this path and its safety boundary
Why it matters: Condensation or residual moisture may be confused with a leak, but a wet floor, continued dripping with the door closed, or moisture from underneath still requires diagnosis.
Safety stop: Do not assume drying moisture is normal when it reaches wiring, the floor, or an access panel, and do not remove ducting or sealed drying components.
Helpful context
Understand the symptom
A latched door can still have a sealing problem
The latch holds the door closed; the flexible gasket and the clean, correctly seated door glass form the water seal. Hair, lint, thread, detergent residue, or a piece of fabric can leave a small gap even when the latch clicks. A torn, hardened, folded, displaced, or deformed gasket needs service rather than more detergent or tighter force on the door. For a top-load washer-dryer, there may be no front door gasket, so a leak at the lid, dispenser, hose, tub, or underneath follows a different path.
The first wet spot matters more than the largest puddle
Water can travel across the cabinet or floor, making a rear hose or drain overflow look like a door leak. Observe the earliest safe sign during a normal cycle phase only when the manufacturer permits a controlled empty check and there is no electrical or flood hazard. Filling points toward the supply, dispenser, or door area; draining points toward the drain hose, wall drain, pump filter, or pump; a leak at rest points toward a supply connection, valve, or tub-side fault. Never reach behind the machine or run it merely to reproduce a dangerous leak.
Washer-dryer combos add a drying and condensation context
A washer-dryer combo can show moisture around the door or gasket after a wash, while a true leak leaves water outside the cabinet or continues while the door is closed. Drying airflow, steam, detergent residue, and a wet load can make the location confusing, but they do not make a damaged gasket or loose drain connection safe. Use the exact combo manual for any filter-draining, maintenance, or empty-cycle instruction; do not open sealed panels or assume washer-only instructions fit every combo.
Safety boundary
Stop conditions
- Stop using the washer-dryer when water reaches the floor, cabinet underside, wiring, or electrical connections; do not touch a plug, breaker, or appliance while standing in water.
- Do not move the combo, pull it forward, tilt it, open a cabinet or rear panel, bypass a door lock, or reach under the machine to locate a hidden leak.
- Do not force, glue, cut, or improvise a door gasket, door glass, hose, filter seal, or dispenser repair; match parts only after exact-model diagnosis.
- Do not run repeated, unattended, or full-load tests for an unexplained leak, and do not use drain chemicals or mix cleaning products.
- Seek urgent help for smoke, arcing, burning odor, gas odor, rapidly spreading water, shattered door glass, or any electrical contact with water.
Only after diagnosis
Potential parts
- door gasket or door seal
Consider this category only when the leak is at the closed front door and inspection finds a torn, cut, hardened, deformed, displaced, or persistently contaminated gasket after approved cleaning.
Confirm the exact model, door configuration, retaining arrangement, and manufacturer fit information; do not stretch, glue, cut, or substitute a seal by appearance. - washer door glass or door assembly
Consider only if the glass is cracked, chipped, distorted, or cannot form the specified seal, or if service diagnosis finds door alignment or latch damage.
Match the exact model and door assembly through qualified service; do not operate with damaged glass or assume a universal panel fits. - inlet hose, drain hose, pump filter seal, or drain pump component
Consider the relevant category only when the leak location and timing identify a split or loose hose, a filter or residual-drain cap that cannot seal, or a diagnosed pump or drain-path fault.
Confirm the exact model, connection type, sealing method, and manufacturer procedure before ordering; do not improvise a hose clamp, seal, or pump replacement.
When checks do not resolve it
Need a professional?
Request qualified appliance service when the door gasket or glass is torn, deformed, or clean but still leaks; water comes from underneath; a hose, pump-filter cap, drain connection, or dispenser remains wet; the leak persists after an exact-manual maintenance check; or the leak occurs during drying and cannot be separated from condensation. A plumber may be needed when the household drain or supply connection is the source. Give the technician the exact model and serial if safely visible, combo configuration, first wet location, cycle phase, photos, detergent used, spill or filter-cleaning history, and any water or electrical symptoms.
Safety scope: This article supports ordinary-access observation and exact-manual maintenance only. Do not move the appliance, open panels, reach under the cabinet, loosen pressurized connections, bypass a lock, or operate a leaking unit near electricity or pooled water.
Common questions
FAQ
Why is my washer-dryer leaking if the door closes normally?
The latch can work while hair, lint, thread, fabric, residue, a folded gasket, or damaged door glass prevents a water-tight seal. Water can also come from the dispenser, inlet hoses, drain hose, pump-filter area, wall drain, or underneath. Find the first wet location without moving or restarting the machine.
Is a small drip from a front-load door always a leak?
Some moisture can remain on the door after a cycle or after opening it, but dripping while the door is closed or water reaching the floor is a leak condition. Samsung specifically distinguishes a normal drip after opening from a leak that occurs with the door closed.
Can I clean the washer-dryer door gasket myself?
You can inspect and remove loose hair, lint, thread, or residue only when the machine is off, cool, empty, and the exact manual allows it. Use a soft cloth, do not spray water into the appliance, and stop for a tear, deformation, damaged glass, standing water, or continued leaking.
Should I run another cycle to find where the washer-dryer leaks?
Do not repeatedly or unattended-test an unexplained leak. If the area is dry and the exact manual supports a controlled empty check, a qualified person can reproduce the appropriate cycle while watching from a safe position; stop immediately if water approaches electricity, spreads quickly, or comes from underneath.
What part usually needs replacement when the door is closed but leaking?
A door gasket or door glass is possible when the leak starts at the door and inspection finds damage, but the source may instead be a dispenser, inlet hose, drain hose, pump-filter seal, pump, wall drain, or internal hose. Do not order a part until the exact model and leak path are diagnosed.
Read the exact guide
Official sources
- Samsung washing machine is leakingSamsung · Samsung washer support guidance; exact model instructions control a particular washer-dryer combo or washer.
- [LG Front Load Washing Machiner] Door Maintenance GuideLG Electronics · LG front-load washer and washer-dryer-combo door maintenance guidance; exact model instructions control.
- LG Washer – Why is My Front Load Washing Machine Leaking?LG Electronics · LG support guidance covering washers and washer-dryer combos; the exact product manual controls maintenance and testing.
- LG Front Load Washer] Water leaks to the floorLG Electronics · LG front-load support guidance; a washer-dryer combo may have additional model-specific drying and drain arrangements.
Community feedback
Share a repair observation
Share a plain-text repair observation. Accepted observations are published automatically; this page may take a moment to update.