
On this page
Start here
Quick answer
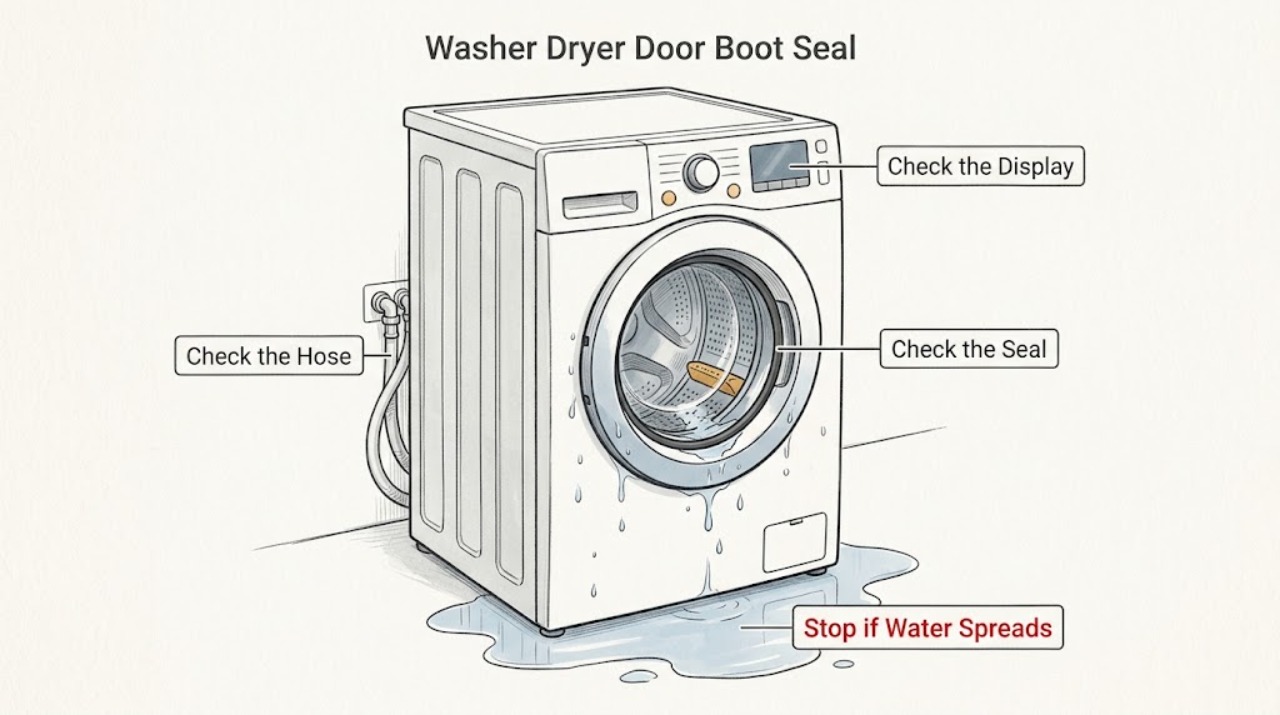
Stop the Electrolux washer dryer, keep the door area safe, and turn off the water supply before inspecting a door boot seal leak. With power disconnected and the drum stopped, look through the entire rubber fold for trapped clothing, coins, hair, detergent residue, tears, cracks, holes, looseness, or deformation; also check that laundry is not caught between the seal and glass and that the drum is not overloaded. Clean only removable debris with a soft, damp, non-abrasive cloth and follow the exact model manual. If the boot seal is damaged, loose, or still leaks after the fold is clean and the load is corrected, do not run wash or dry cycles: Electrolux directs owners to have the seal replaced by an authorised service engineer. If water is coming from the inlet, dispenser, drain filter, or inside the cabinet instead, follow that separate leak path rather than replacing the boot seal by guesswork.
Work through in order
Diagnostic checks
Use only checks that match the exact appliance or system and its official guide.
-
Check 1
Stop the Electrolux washer dryer with its normal control, keep the drum still, and disconnect power using the accessible plug or isolator only if the floor and plug area are dry and undamaged. Close the appliance's water supply before opening the door. Do not reach through standing water or touch a damaged cord.
Expected result: The leak stops when the appliance is idle, water continues to arrive with the machine off, or water is close to the cord, outlet, or other electrical parts.
Next step: Keep the appliance off. If safe from a dry position, close the water valve; otherwise keep clear and arrange qualified service or an electrician for the electrical hazard. Do not restore power to investigate.
Why this matters
Why: A leak that continues with the appliance off may be supply-side rather than a door boot leak. Water near electrical parts or a damaged cord is an immediate safety condition.
-
Check 2
Trace the first wet point from a dry towel or paper towel placed around the door perimeter, lower filter area, dispenser front, and visible inlet or drain hose connections. Do this only with the washer dryer stopped and isolated; do not pull out a stacked or integrated unit.
Expected result: The first wet trail starts at the door boot, comes from the lower filter, appears below a hose or tap, runs from the dispenser, or cannot be located because water is inside the cabinet.
Next step: Inspect the boot only when the door path is the first wet point. For another path, use the exact model's leak guidance and arrange service if the source is hidden; do not order a boot seal from a puddle alone.
Why this matters
Why: A door-origin trail keeps the boot-seal branch likely. A lower, upper, hose, or cabinet-origin trail makes a drain, dispenser, inlet, or internal leak more likely than the boot itself.
-
Check 3
Open the door after the drum has stopped and inspect the complete door boot seal: the lip against the glass, the bottom drain holes or sump area if visible, and the folds around the circumference. Remove only loose coins, buttons, hairpins, lint, or clothing caught in the fold; do not pull hard on the rubber or disassemble a clamp.
Expected result: The fold contains an object or garment, the boot is clean and seated, or the rubber has a tear, crack, hole, loose section, or permanent deformation.
Next step: Remove only loose debris and proceed to the cleaning and load checks. If the rubber is damaged, loose, or deformed, keep the water off and do not use the washer dryer; arrange authorised service for replacement.
Why this matters
Why: A trapped object or garment can hold the boot away from the glass and create a door leak. Damage or a loose/deformed seal means the sealing surface cannot be trusted, even if the leak is intermittent.
-
Check 4
With power and water isolated, wipe the inner and outer boot surfaces and the glass with a soft, damp, non-abrasive cloth. Inspect again for residue, a trapped sharp item, a rolled lip, or an area that will not sit evenly against the glass. Do not use abrasive pads, blades, glue, sealant, or harsh chemicals on the rubber.
Expected result: The leak-causing debris is removed and the boot lies evenly, or a cut, hole, rough edge, distortion, or loose fit remains.
Next step: If the seal is intact and evenly seated, continue to the load and door-closure checks without running a cycle yet. If any defect remains, leave the unit unused and book an authorised service visit.
Why this matters
Why: Dirt or a small object can prevent the normal seal from contacting the glass. Cleaning cannot restore missing or distorted rubber; a persistent defect needs replacement by service.
-
Check 5
Inspect the door glass, frame, and closing edge for a garment, packaging, residue, or sharp object trapped between the glass and boot. Check that the load is within the exact model's capacity and that items are not protruding when the door is closed. Do not force the door or use an oversized load as a leak test.
Expected result: Laundry is caught at the seal, the drum is overloaded or tightly packed, the door closes unevenly, or the door and load appear normal.
Next step: Remove the trapped item and reduce or redistribute the load according to the manual. If the door does not close squarely or the leak returns with a normal load, stop and arrange service rather than adjusting hinges or the boot yourself.
Why this matters
Why: Electrolux identifies trapped laundry and overloading as conditions that can stop the door from sealing correctly. If closure and loading are normal but the door path still leaks, a boot, hinge, door alignment, or internal water-path fault remains possible.
-
Check 6
Check the visible inlet hose and tap connection, detergent drawer, and lower drain-filter cover from outside the appliance. Look for a hose split, a loose hand-tight connection, drawer buildup or overflow, or a filter that is visibly not seated. Do not disconnect a full hose or open the filter while hot water may be present; use the exact manual for any user-accessible filter procedure.
Expected result: The first wet point is at an inlet hose or tap, dispenser, drain filter, or still at the door boot after these areas are dry and correctly fitted.
Next step: For an obvious external connection issue, close the water supply and follow the exact manual's correction. If water comes from inside the cabinet, a hose, pump, valve, or dispenser system, arrange service; do not substitute a boot seal.
Why this matters
Why: An inlet, dispenser, or filter leak can run along the front and mimic a boot-seal leak. A dry, correctly fitted exterior with a door-origin trail keeps the boot or door alignment as the leading concern.
-
Check 7
Use the exact Electrolux model manual to identify whether the leak occurs during filling, washing, rinsing, spinning, or the drying sequence, and record any display code or bottom-tray warning. Do not run a cycle with a damaged seal, and do not remove the front panel, retaining band, pump, hose, or control parts.
Expected result: A clean, intact boot leaks only under one phase, the appliance reports water in its base, a code returns, or the leak occurs on every programme.
Next step: Keep water and power isolated and provide the technician with the model, phase, code, first wet point, load, and photographs taken with power off. Arrange authorised appliance service for internal diagnosis or seal replacement.
Why this matters
Why: A phase-specific leak may point to water level, dispenser, drain, door alignment, or internal hose behavior rather than the rubber alone. A base-water warning or repeated leak confirms that continued operation can cause further damage.
Use your observations
Decision map
Find the observation that best matches what you see, then follow the next safe action.
-
PATH 01Next step
What you see
The first wet trail is at the door and a loose garment, coin, hair, or detergent residue is found in the boot fold, with no cut or permanent deformation.
Do this next
The object may have held the boot away from the glass; a complete seal replacement is not established yet.
-
PATH 02Next step
What you see
The door boot seal is torn, cracked, holed, loose, twisted, or permanently deformed, even if the leak is small or intermittent.
Do this next
The flexible sealing surface is faulty and may allow water to escape toward the floor or appliance base.
-
PATH 03Next step
What you see
The seal is intact, but laundry is caught between glass and boot, the door closes against a protruding item, or the drum is overloaded.
Do this next
The load or closure condition can prevent the boot from sealing correctly without proving that the boot itself has failed.
-
PATH 04Next step
What you see
The first wet point is the inlet hose or tap, detergent drawer, lower drain-filter area, or a cabinet edge rather than the door boot.
Do this next
The leak is more likely supply, dispenser, drain, or internal-path related; changing a door boot would be guesswork.
-
PATH 05Next step
What you see
The washer dryer reports water in its base, shows a leak-related code, or leaks repeatedly after the boot is clean and the load is normal.
Do this next
The remaining cause may be an internal hose, pump, valve, dispenser, door alignment, or boot fault, and the appliance may be carrying water in a concealed area.
-
PATH 06Next step
What you see
Water reaches the cord, outlet, controls, or cabinet wiring, or there is a damaged cord, burning odor, smoke, sparking, or a breaker trip.
Do this next
This is no longer routine leak isolation and creates an electrical or fire hazard.
Helpful context
Understand the symptom
Confirm the leak is from the door boot seal
A front puddle can begin at the door, but it can also run forward from a hose, dispenser, filter, or cabinet. The door boot seal is the flexible rubber bellows between the drum opening and the front panel. A coin, button, hairpin, or piece of laundry in its fold can hold the seal away from the glass; overloading or clothing caught at the door can do the same. Identify where the first wet trail appears before choosing a part.
Cleaning is a check, not a repair for damaged rubber
After isolating power and water, inspect the full inner and outer boot fold. Remove only loose objects and wipe the sealing surfaces with a soft, damp, non-abrasive cloth. A clean seal that still has a cut, hole, deformation, or loose fit is not made safe by scrubbing; Electrolux recommends authorised service replacement and says not to use the appliance with a damaged seal.
Keep washer-dryer repair behind the service boundary
The safe owner checks are limited to stopping the appliance, closing the water supply, disconnecting power safely, inspecting the visible boot and glass, removing loose debris, correcting a trapped garment or overloaded load, and checking the outside of hoses or filter access only when the exact manual permits it. Do not stretch or glue the boot, remove retaining rings or panels, tip an integrated appliance, reach into a moving drum, or run a wash or dry cycle to test a visibly damaged seal.
Safety boundary
Stop conditions
- Stop immediately for water near an outlet, plug, cord, or control, a damaged cord, smoke, sparks, burning odor, a breaker trip, or water that continues to flow when the appliance is off.
- Do not use wash or dry cycles with a damaged, cracked, holed, loose, twisted, or deformed door boot seal. Do not glue, stretch, clamp, or replace the boot by guesswork, and do not remove retaining bands, panels, pumps, or internal hoses.
- Stop when the boot is clean and intact but the leak returns, a base-water warning or code appears, the source is inside the cabinet, or the leak cannot be safely isolated; arrange authorised appliance service.
Only after diagnosis
Potential parts
- door boot seal
Only relevant when inspection finds a tear, crack, hole, looseness, or deformation, or an authorised technician confirms that the door boot is the source of the leak.
Confirm the complete Electrolux model and the exact seal specification; washer-dryer door seals and retaining arrangements vary by model and are not interchangeable by appearance. - door alignment or hinge component
Consider only when the boot is intact but the door closes unevenly or leaves a repeatable gap after the load and glass are clear and a technician confirms alignment is the cause.
Do not adjust or replace a hinge from a puddle alone; verify the model and service procedure. - inlet hose or connection seal
Relevant only when tracing shows the first wet point at the supply hose or tap rather than the door boot.
Confirm the model, hose connection, and local installation requirements before replacement; do not over-tighten or cross-thread fittings. - drain filter, pump, or internal hose
Relevant only when water originates at the lower filter or cabinet, remains after the filter is correctly fitted, or a technician isolates the drain path.
Filter and pump access differ by model; use the exact manual and qualified service for hot water, concealed leaks, or internal disassembly.
When checks do not resolve it
Need a professional?
Arrange authorised Electrolux appliance service when the door boot seal is damaged, loose, deformed, or still leaks after loose debris and trapped laundry are removed; when the door closes unevenly; when a base-water warning or code returns; or when the first wet point is an internal hose, pump, valve, dispenser, or cabinet. Keep the washer dryer unused and the water supply off for a damaged seal or water near electrical parts. Use an electrician for a wet or damaged circuit, repeated breaker trip, smoke, sparks, or burning odor.
Common questions
FAQ
Can a trapped sock or coin make an Electrolux washer dryer door seal leak?
Yes. Electrolux says clothing caught between the door seal and glass can let water run down the front, and its maintenance guidance says to check the fold for small objects. Isolate power and water, remove only loose debris, and stop using the appliance if the rubber is damaged or the leak returns.
Is it safe to run an Electrolux washer dryer with a cracked door boot seal?
No. Electrolux recommends not using the appliance when the door seal is damaged and directs owners to turn off the water supply and arrange service. Do not glue, stretch, or clamp the seal as a substitute for replacement.
How do I clean an Electrolux washer dryer door boot seal?
With the drum stopped and power and water safely isolated, check the folds for small objects and wipe the inner and outer seal with a soft, damp, non-abrasive cloth. Follow the exact model manual for any additional maintenance. Cleaning will not repair a tear, hole, loose fit, or deformation.
Why is water under my Electrolux washer dryer if the door boot looks fine?
Trace the first wet point. Electrolux also identifies inlet hoses and connections, overloading, detergent-drawer buildup, an incorrectly fitted drain filter, and internal hoses, pumps, or valves as other leak paths. Keep water off and arrange service for a cabinet leak or a source you cannot safely isolate.
When should I call for Electrolux washer dryer service for a door-seal leak?
Arrange authorised service for any damaged, loose, twisted, or deformed boot; a leak that returns after debris and load checks; an unevenly closing door; a water-in-base code; or a leak from inside the cabinet. Keep the appliance unused and the water supply off until it is assessed.
Read the exact guide
Official sources
- Washer dryer displays error message E30, C3 or emits 3 beepsElectrolux · Water at the bottom or inside a washer dryer, laundry caught between door seal and glass, and inspection of a damaged door seal
- How to clean and maintain your Electrolux washer dryerElectrolux · Door-seal cleaning and model-specific maintenance for Electrolux washer dryers
- Seal on the washing machine's door is damagedElectrolux · Loose, damaged, deformed, twisted, or leaking door seals on front-loading laundry appliances; use the exact model guidance for a washer dryer
- Electrolux Washing Machine Leaking Water – Causes and SolutionsElectrolux · Electrolux washing machines and washer dryers with leaks at the door, hoses, dispenser, drain filter, or cabinet
- Leakage from the door sealElectrolux · Visible leakage at a front-loading appliance door seal
Community feedback
Share a repair observation
Share a plain-text repair observation. Accepted observations are published automatically; this page may take a moment to update.