
On this page
Start here
Quick answer
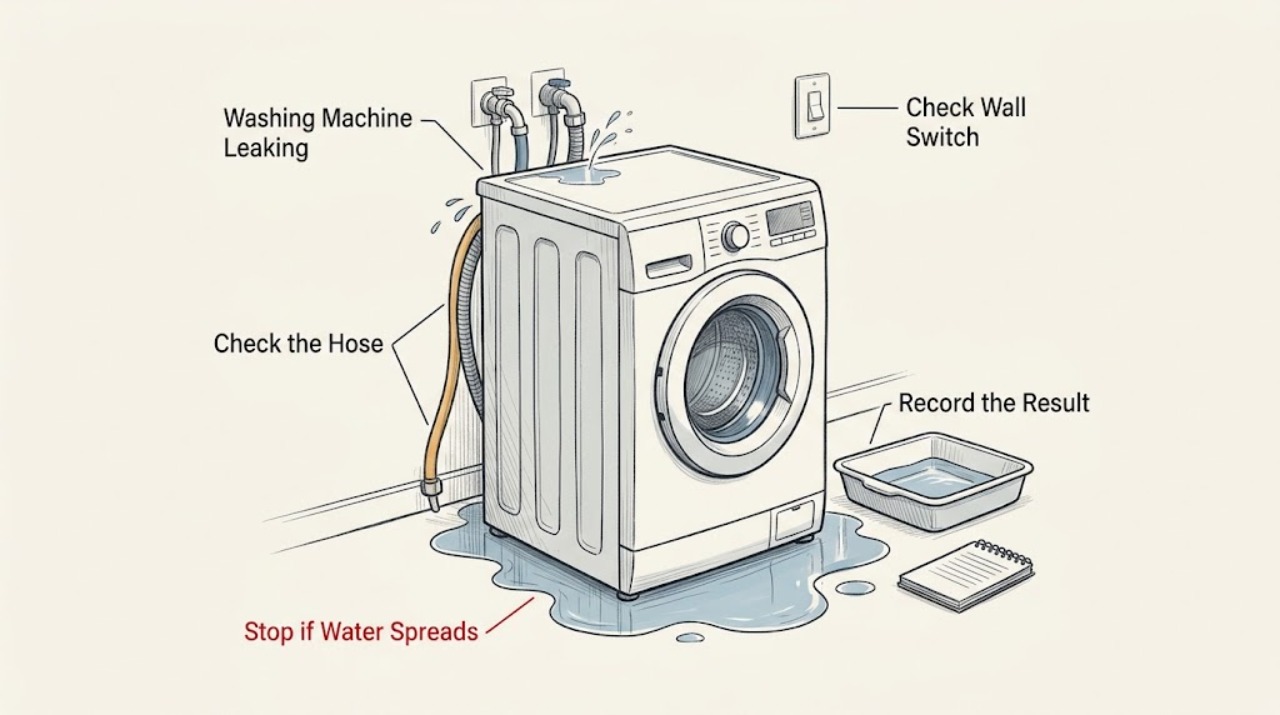
Stop the programme, unplug the washing machine if it is safe to reach the plug, and close the water inlet taps before investigating a leak. Mop up standing water without moving the machine alone. Note whether water appears during filling, draining, or spinning, and whether it comes from the inlet connections, door seal, dispenser, drain hose, pump-filter area, or underneath. With the machine disconnected and water cool, check the accessible hose seals, drain hose, and pump-filter closure; clean the door seal without pulling it away from the metal. If a hose, seal, cabinet, electrical connection, or internal leak is damaged, the leak continues after an accessible correction, or water is near electrics, keep the machine out of service and arrange qualified repair.
Work through in order
Diagnostic checks
Use only checks that match the exact appliance or system and its official guide.
-
Check 1
Press pause or cancel, switch the machine off, and close both water inlet taps. If the plug and socket are dry and safely reachable, disconnect the machine from mains power; keep clear of wet electrical connections. Mop up standing water and do not move the appliance alone.
Expected result: Water is still entering, the leak is large or fast, water has reached the plug or socket, or the leak has stopped after the taps were closed.
Next step: If water is near electrics, the machine cannot be safely disconnected, or the leak is uncontrolled, keep away from the area and arrange qualified help. Otherwise continue only with the machine disconnected and the water contained.
Why this matters
Why: A continuing supply leak can worsen even while the machine is idle. Water at an electrical connection or an appliance that is unsafe to disconnect is outside a normal user check and needs professional attention.
-
Check 2
Use a dry towel to trace the highest wet point without removing panels. Note whether the first visible water appears at an inlet hose connection at the rear, the front door seal or detergent drawer, the drain hose or standpipe, the lower pump-filter cover, or only from underneath. Also note whether it began while filling, washing, draining, or spinning.
Expected result: The leak has one clear external source and a clear cycle phase, or water is appearing from underneath with no visible source.
Next step: Use the identified location to choose the matching external check. If water is only coming from underneath or the source cannot be isolated without opening the cabinet, do not run the machine and arrange service.
Why this matters
Why: Blomberg identifies inlet-hose seals and the pump filter as likely causes of water leaking from the bottom; its guidance also distinguishes drain-hose and filter problems. Water that starts underneath without an accessible source may be an internal hose, pump, tub, or seal fault.
-
Check 3
Inspect the accessible inlet hoses and drain hose without disconnecting a pressurized connection. Look for a wet hose nut or gasket, a loose-looking tap connection, a kink, crush point, twist, or a drain hose that has moved out of its support or standpipe. Do not pull the machine forward alone.
Expected result: An inlet-hose seal or tap connection is wet, the drain hose is kinked or crushed, or the visible hose path is dry and correctly supported.
Next step: With the water taps closed, correct only a visibly displaced or kinked hose and dry the area. Do not force a damaged hose or make a repair under pressure; replace or service the connection if it remains wet. If the hose path is normal, continue to the filter and seal checks.
Why this matters
Why: The Blomberg manual links bottom leaks to inlet-hose seals and says the tap connection must be tight; it also warns that an incorrectly positioned or displaced drain hose can flood the drain area. A dry, correctly positioned external path shifts suspicion toward the filter or an internal component.
-
Check 4
If the leak is around the lower filter cover and the machine is unplugged, place a shallow container and towels below the filter. Wait until any water has cooled, then open the filter housing slowly only as described for the model, clear visible lint or objects, and reinstall the filter fully and squarely. Stop if the cover, threads, seal, or housing is damaged.
Expected result: The filter is loose, not fully closed, or contains debris; the filter and cover are clean and seated; or water cannot be safely contained.
Next step: Secure a clean, undamaged filter only if the model's instructions allow it and no water or electrical hazard remains. If the filter will not seal, the cover is damaged, water is too hot, or the leak continues, keep the machine out of service and call qualified repair.
Why this matters
Why: Blomberg's troubleshooting instructions identify a clogged pump filter and an incompletely closed filter as leak or drainage concerns. The manual warns that water inside can be very hot and requires power to be disconnected before filter work, so a damaged or inaccessible filter is not a safe repair.
-
Check 5
Inspect the front door seal and detergent drawer area with the machine off. Wipe visible lint, hair, or detergent residue from the rubber seal's crevices with a soft cloth, then dry it; do not lift the seal away from the metal or use harsh chemicals. Look for a cut, split, deformation, or an object caught in the door.
Expected result: The seal or drawer has residue or a trapped item but no damage, or the seal is torn, displaced, or still wet after cleaning.
Next step: Remove only visible residue or an object without pulling the seal, then leave the door area dry. If the seal is damaged, the drawer is cracked, or water returns from the front, do not run a cycle; arrange service and provide the leak location.
Why this matters
Why: Blomberg says moisture, mould, and grime around the rubber seal can affect its condition and increase leak risk, and specifically says not to lift the seal away from the metal. A torn or displaced seal cannot be restored by wiping.
-
Check 6
After an accessible correction, do not resume a full wash. If there was no electrical contact, cabinet leak, damaged seal or hose, and the filter is securely closed, restore water and power only while standing clear and observe a brief supervised fill or drain step. Stop immediately if any water reappears.
Expected result: The area stays dry through the observed step, or water returns from the same or a new location.
Next step: If water returns, close the taps, disconnect power only if safe, and arrange qualified repair. Do not repeat cycles or open the cabinet to chase an internal leak.
Why this matters
Why: A dry short observation supports the corrected external cause but does not prove that hidden seals, the pump, pressure system, or control components are sound. Any returning water means the leak is unresolved.
Use your observations
Decision map
Find the observation that best matches what you see, then follow the next safe action.
-
PATH 01Safety boundary
What you see
Water is uncontrolled, near a plug or socket, or the machine cannot be safely disconnected.
Do this next
Keep clear, close the water taps if that can be done without entering water or touching wet electrics, and arrange qualified help. Do not operate the machine.
Why this path and its safety boundary
Safety stop: Continue with the machine unplugged, the taps closed, and standing water contained.
-
PATH 02Safety boundary
What you see
The source is an accessible hose, drain path, pump-filter closure, door seal, or dispenser area.
Do this next
Perform only the matching external check with water and power isolated; stop if a hose, seal, cover, or housing is damaged.
Why this path and its safety boundary
Safety stop: Treat water appearing from underneath or inside the cabinet as an internal fault and arrange service without running another cycle.
-
PATH 03Safety boundary
What you see
A short supervised observation after a safe accessible correction remains dry.
Do this next
Monitor the next normal use and keep the seal, filter area, and hose route clean and correctly seated; stop at the first recurrence.
Why this path and its safety boundary
Safety stop: Close the taps, disconnect power when safe, and arrange qualified repair with the observed leak phase and location.
Helpful context
Understand the symptom
The timing and location of the water are more useful than the size of the puddle. A leak during filling points toward the inlet side, while one during draining points toward the drain hose or pump-filter area. Water at the front can also come from the door seal or detergent drawer and travel along the base before it becomes visible.
Treat this as a water-and-electricity problem. Do not run another cycle to locate a leak, open the cabinet, work on wiring, or pull a heavy machine forward by yourself. The model manual takes a cautious approach to filter work: disconnect the machine first and wait for the water to cool before draining it.
When checks do not resolve it
Need a professional?
Keep the taps closed and the machine out of service for water near electrics, an uncontrolled leak, damaged hose or seal, an unsealing filter, an internal leak, or a recurrence after the external checks.
Have this ready
- Provide the model number, where the water first appeared, whether it happened during filling, washing, draining, or spinning, the affected hose or seal, filter findings, and whether power and water were safely isolated.
Common questions
FAQ
What should I check first when a Blomberg washing machine leaks from the bottom?
Close the inlet taps and isolate power safely, then inspect the accessible inlet-hose seals and the pump-filter closure. Blomberg also identifies a twisted or blocked drain hose as a common related problem. If the source is underneath and not visible, arrange service.
Can I clean the Blomberg washing-machine door seal to stop a leak?
You can wipe visible residue or debris from the seal's crevices with a soft cloth and dry it, but do not lift the seal away from the metal. A torn, displaced, or still-leaking seal needs qualified repair.
Is it safe to open the pump filter while the washing machine is leaking?
Only consider the model's external filter procedure after the machine is unplugged, the water has cooled, and a container can safely catch the release. Stop if water is hot, the area is electrically wet, or the filter or cover will not seal.
Read the exact guide
Official sources
- Why is my washing machine not draining properly?Blomberg · Official Blomberg washing-machine support guidance for accessible drainage checks.
- Washing Machine / User's ManualBlomberg · Official Blomberg manual for a washing-machine model; use the appliance's own manual for model-specific details.
- How do I clean the seal on my washing machine?Blomberg · Official Blomberg support guidance for cleaning and inspecting a washing-machine door seal.
Community feedback
Share a repair observation
Share a plain-text repair observation. Accepted observations are published automatically; this page may take a moment to update.