
On this page
Start here
Quick answer
If a Bosch dishwasher is leaking, stop the cycle and, only if you can do so without touching wet electrical parts, turn off the dishwasher's water supply and power. Note whether water is coming from the door, underneath, or the rear connection, and whether it appears only while filling, washing, or draining. Bosch lists excessive suds, a door seal pulled out of its track, a blocked condensation vent, and improper installation among leak causes. If the display shows E15 or the dishwasher has detected water in its base, leave the water supply off and arrange Bosch or qualified appliance service. Do not remove panels, defeat a leak sensor, probe wiring, or dismantle pumps and hoses while the appliance is wet.
Before you begin
Safety first
- The user may stop the cycle, close an accessible water shutoff, observe the leak from a dry safe position, check detergent and the visible door seal, and inspect accessible plumbing without loosening wet connections. Qualified service must handle wet-base access, enclosure or pump-panel removal, leak-sensor work, internal wiring, pumps, hoses, and installation corrections.
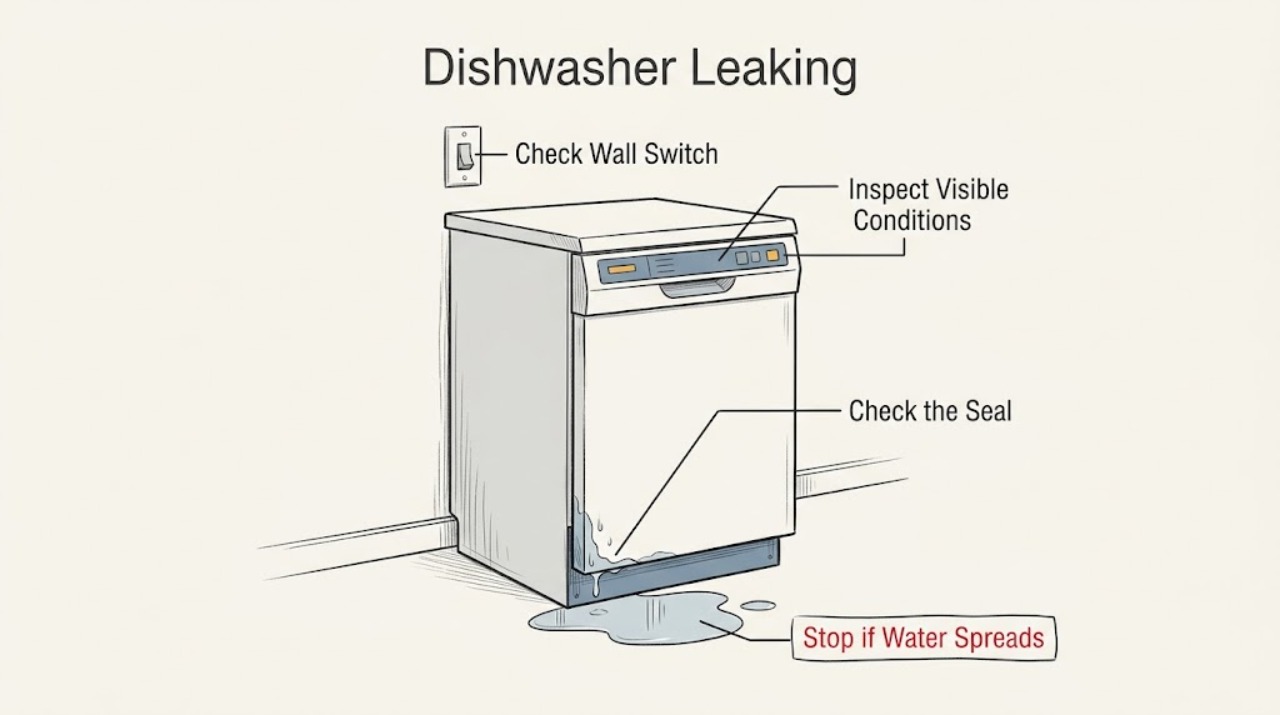
Work through in order
Diagnostic checks
Use only checks that match the exact appliance or system and its official guide.
-
Check 1
Stop the current cycle. If the floor and electrical area are dry and it is safe to do so, switch off the dishwasher and close its accessible water shutoff. Look from outside the appliance for the first wet area, and note whether the leak began during filling, washing, or draining and whether an error is displayed.
Expected result: Water is at the door edge, under the cabinet, or near a rear/under-sink connection; the leak occurs during a particular part of the cycle; or the display shows E15 or another code.
Next step: Keep the water supply off while checking only the accessible areas below. For E15, water in the base, a wet electrical area, or an unknown source, arrange Bosch or qualified appliance service rather than restarting the dishwasher.
Why this matters
Why: Timing and location separate a door or suds path from a supply/drain or installation path, but a puddle alone does not identify a failed component. E15 or water in the base means Bosch's leakage protection has activated and should be treated as a service condition.
-
Check 2
Inspect the detergent situation without opening panels: look for persistent foam or suds at the door or in the tub, and confirm that the product used was dishwasher detergent rather than hand dish soap or another cleaner. Check the exact model manual before following any suds-clearing instruction.
Expected result: Foam remains after the cycle stops, the wrong detergent was used, or there is no visible suds and the water is clear.
Next step: Do not add more detergent or run another normal cycle. Follow the exact Bosch model instructions for clearing suds; if foaming or leaking returns with the correct product, keep the appliance off and arrange service.
Why this matters
Why: Excess suds can push water past the door and are a more plausible immediate cause when foam is present. If there are no suds, detergent is less likely to explain the leak and the seal, vent, hose, or installation checks become more important.
-
Check 3
With the dishwasher empty and power off, inspect the visible door gasket around the perimeter for a fold, debris, detachment, or a section pulled out of its track. Check that no rack, utensil, or tall item prevents the door from closing evenly. Do not remove the door panel or force the gasket.
Expected result: The gasket has a visible gap or is out of its track, the door is obstructed, or the gasket and door contact appear even all around.
Next step: Remove only an obvious loading obstruction and clean accessible seal surfaces as allowed by the model manual. Keep the dishwasher off and arrange service for a damaged gasket, door alignment issue, or a leak that continues with a seated seal.
Why this matters
Why: A door-seal gap or obstruction can let wash water escape at the front. A correctly seated visible gasket does not rule out a leak elsewhere, and a torn or distorted seal is not proof that a particular replacement part will fit.
-
Check 4
Check the accessible condensation-vent area and the space around the door for a blocked opening or an item that directs water out of the cabinet. Do not remove the vent cover or insert anything into an opening; compare the installation and leveling only with the exact Bosch manual.
Expected result: The visible vent is blocked, the dishwasher appears uneven or improperly installed, or the vent and accessible installation area look normal.
Next step: Clear only an obvious external obstruction. Do not reposition a built-in dishwasher, loosen mounting hardware, or alter plumbing as a leak experiment; have installation verified by qualified personnel if the leak continues.
Why this matters
Why: Bosch lists a blocked condensation vent and improper installation among possible leak causes. A clear visible vent and apparently level cabinet reduce those explanations but cannot exclude a hidden installation or internal fault.
-
Check 5
From the dry, accessible area under the sink or behind the kick panel only if the model permits that view without removing safety panels, look for a visible drip, kink, or displaced connection at the supply and drain hoses. Do not loosen or disconnect a wet hose, and do not reach into the dishwasher base.
Expected result: A connection or hose is visibly wet, the leak is at the rear or under-sink area, a hose is kinked, or all accessible connections are dry.
Next step: Keep the water shutoff closed and have a qualified installer or appliance technician verify the connection and drainage route. If the accessible plumbing is dry but the dishwasher still leaks, do not remove panels or run repeated test cycles; arrange appliance service.
Why this matters
Why: A visible rear or under-sink drip makes a supply, drain, or installation connection more likely than a door-seal issue. Dry accessible connections do not prove that an internal pump, hose, or base is sound.
Use your observations
Decision map
Find the observation that best matches what you see, then follow the next safe action.
-
PATH 01Next step
What you see
Foam is present and the leak starts at the front during washing, especially after a non-dishwasher detergent was used, while the visible gasket is seated.
Do this next
Keep the water supply off, follow the exact model manual's suds-clearing instruction, and use only dishwasher detergent thereafter. Escalate if foam or leaking returns.
Why this path and its safety boundary
Why it matters: Suds forcing water past the door is more likely than a confirmed gasket or pump failure.
-
PATH 02Next step
What you see
The door-edge leak recurs with clear water, and the gasket has a gap, is out of its track, or cannot make even contact because of a loading or door-alignment problem.
Do this next
Remove only the loading obstruction if present. Keep the dishwasher off and have the gasket and door alignment assessed before ordering a model-matched part.
Why this path and its safety boundary
Why it matters: A door-sealing or alignment problem is more likely, but the observed gap does not establish which gasket or door part is needed.
-
PATH 03Next step
What you see
The display shows E15, water is suspected in the base, or the leak source cannot be safely located without reaching under panels or into wet electrical areas.
Do this next
Leave the water inlet off and do not reset, tilt, dismantle, or bypass the protection. Contact Bosch or qualified appliance service with the model/E-Nr, displayed code, leak timing, and location observed from outside.
Why this path and its safety boundary
Why it matters: Bosch's leakage protection has detected a base-water condition, or the fault has crossed the boundary of a safe visual check.
-
PATH 04Next step
What you see
The leak is at an accessible rear or under-sink connection, the condensation vent or installation appears obstructed, or the dishwasher is not level, while no suds are present.
Do this next
Keep the supply shut off and have the installation and connections verified by a qualified installer or appliance technician. Do not pull out a built-in unit or loosen plumbing as a home test.
Why this path and its safety boundary
Why it matters: A supply, drain, ventilation, or installation issue is more likely than a detergent-related front leak.
-
PATH 05Next step
What you see
There are no visible suds, the gasket is seated, the accessible vent and plumbing look normal, but water returns on a supervised cycle or the dishwasher reports a base-water condition.
Do this next
Stop using the dishwasher, keep its water supply off, protect the surrounding floor, and arrange Bosch or qualified appliance service. Do not operate with panels removed or probe the wet base.
Why this path and its safety boundary
Why it matters: The accessible checks have not isolated the cause; an internal hose, pump, seal, installation, or leak-protection fault may be involved, and the symptom does not identify a safe part replacement.
Helpful context
Understand the symptom
The leak location and timing narrow the next check
Dry the accessible floor and record where the first drop appears rather than assuming that the lowest puddle is the source. A front-edge leak that starts during washing points toward the door area or suds; a drip below the cabinet or at the rear points more toward a hose, connection, or installation issue. Water that appears after the dishwasher reports a base-water condition needs the appliance left out of service until it is assessed. The exact Bosch model manual controls any model-specific cleaning or reset procedure.
Keep wet electrical and internal work out of a home diagnosis
Do not reach into standing water near a plug, outlet, wiring, or the dishwasher base. Do not operate the dishwasher with enclosure panels removed, bypass a door or leak interlock, open the pump area, or loosen a hose just to find the source. Bosch's manual reserves repairs and installation verification to qualified personnel; use Bosch support or a qualified appliance technician when the accessible checks do not identify a safe correction.
Only after diagnosis
Potential parts
- dishwasher door gasket
Consider this category only if inspection or qualified service confirms a damaged, detached, or persistently unseated gasket after the door and loading alignment are correct; a leak alone does not identify the gasket.
Confirm the complete Bosch model/E-Nr and manufacturer fit information before ordering; do not assume that a visually similar seal fits. - dishwasher inlet or drain hose
Consider this category only if a qualified installer or appliance technician confirms a hose or connection leak; a dry accessible connection and a front leak do not justify replacing a hose.
Confirm the exact model, hose function, connection type, and manufacturer fit information before ordering; hose replacement and built-in access should be handled by qualified service.
When checks do not resolve it
Need a professional?
A technician should assess a recurring leak, base-water condition, damaged door seal, internal hose or pump suspicion, installation fault, or any leak that cannot be located without removing panels.
Safety scope: The user may stop the cycle, close an accessible water shutoff, observe the leak from a dry safe position, check detergent and the visible door seal, and inspect accessible plumbing without loosening wet connections. Qualified service must handle wet-base access, enclosure or pump-panel removal, leak-sensor work, internal wiring, pumps, hoses, and installation corrections.
Common questions
FAQ
Why is my Bosch dishwasher leaking from the door?
Check for persistent suds, the wrong detergent, a gasket pulled out of its track, debris or a rack preventing the door from closing, and a blocked visible condensation vent. Keep the water supply off if the leak continues and arrange service for a damaged seal or an unexplained front leak.
What does E15 mean on a Bosch dishwasher?
Bosch says E15 means the safety switch detected water in the base and leakage protection has activated. Turn off the water inflow and contact Bosch or qualified appliance service; do not tilt, dismantle, or bypass the protection as a user reset.
Can too much soap make a Bosch dishwasher leak?
Yes. Bosch lists suds as a possible cause of water leaks. Stop the cycle, do not add more detergent, follow the exact model manual's suds-clearing instruction, and use only dishwasher detergent. If the leak or foam returns, keep the dishwasher off and arrange service.
Should I run my Bosch dishwasher again to find the leak?
Do not repeatedly run a leaking dishwasher. First close the accessible water shutoff and identify the location and cycle timing from a dry safe position. A single supervised test is not appropriate when E15, water in the base, a wet electrical area, or an unknown source is present; those conditions need qualified service.
Read the exact guide
Official sources
- Bosch Dishwasher Troubleshooting & Repair Guide | Bosch – Fix Common Dishwasher ProblemsBosch · Official Bosch dishwasher troubleshooting resource for model-specific owner checks and unresolved appliance problems.
- DISHWASHER USE AND CARE MANUALBosch · Official Bosch dishwasher use and care manual; the listed model family and the exact appliance manual control model-specific procedures.
- Bosch Dishwasher Error Codes: Troubleshooting Guide | BoschBosch · Official Bosch dishwasher error-code guidance for E15, water in the base, leakage protection, and model-specific support.
- Repair Service for large home appliances | Bosch HomeBosch · Official Bosch repair-service page for large appliances, including dishwashers, when a leak requires model-specific diagnosis.
Community feedback
Share a repair observation
Share a plain-text repair observation. Accepted observations are published automatically; this page may take a moment to update.