
On this page
Start here
Quick answer
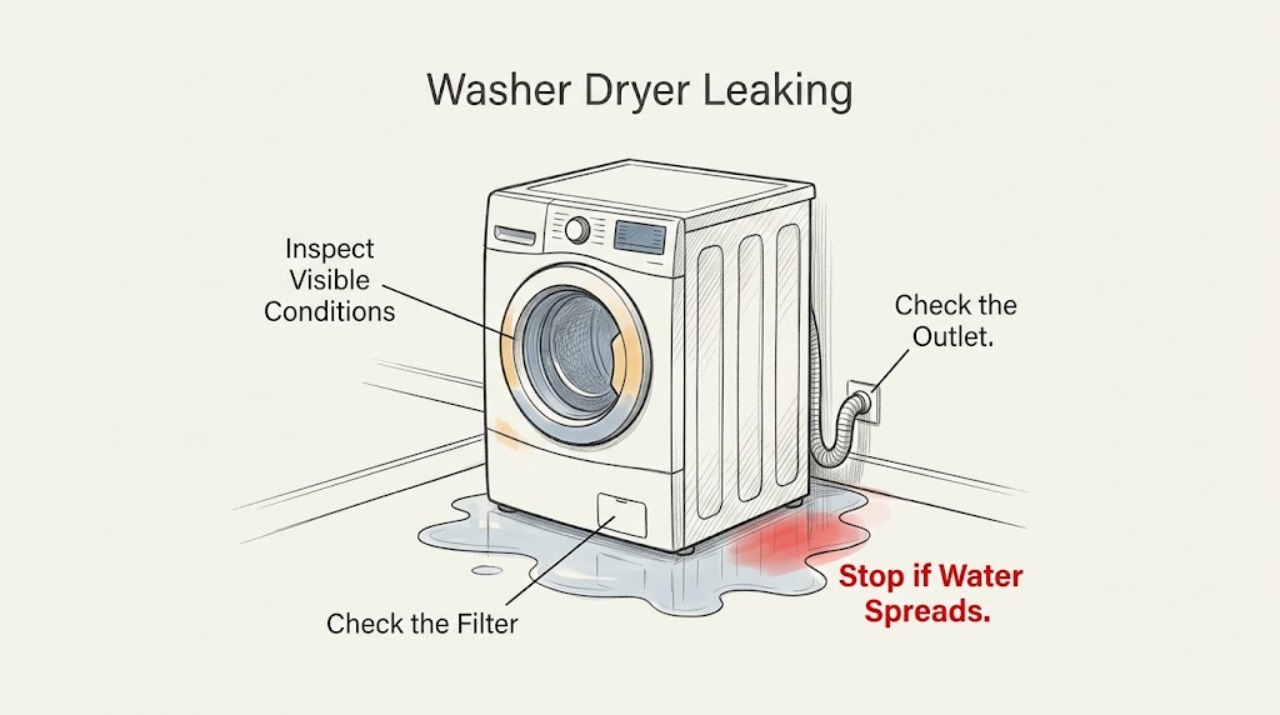
Treat a leaking Bosch washer-dryer as a water and electrical safety issue first. If water is actively flowing, switch off the water tap; disconnect power only when the plug and floor can be reached without touching water, and never handle a wet plug or appliance. The leak location is the best first clue: the front commonly points to the door seal, detergent drawer, or filter area; the back points to the inlet or waste hose; water directly underneath can indicate an internal leak. Check only visible, model-appropriate items such as a door obstruction, seal residue, detergent excess, or hose routing. If the leak continues, comes from underneath, a water-protection indication appears, or there is damage, smoke, odor, or a repeated fault, stop using the appliance and arrange qualified service.
Work through in order
Diagnostic checks
Use only checks that match the exact appliance or system and its official guide.
-
Check 1
If water is flowing or pooling, stop the programme, turn off the water tap if it is safely reachable, and disconnect the appliance only if the plug and outlet are completely dry and accessible without touching water.
Expected result: The flow stops, the water is only a small residual puddle, or water is near the plug, outlet, or underside and cannot be approached safely.
Next step: Do not touch a wet plug, outlet, or appliance. Keep the machine off, contain water only from a dry safe position, and arrange qualified appliance or electrical help. If the area is dry and isolated, continue by locating the highest wet point without moving the appliance.
Why this matters
Why: Stopping the supply limits additional water, but an electrically unsafe wet area must not be handled as a routine user check. A continuing flow, water near electrics, or rapid pooling increases the urgency of service.
-
Check 2
With the appliance off and dry to approach, inspect the front for water at the door seal, detergent drawer, or lower filter area; remove only visible fluff or detergent residue from the door contact surface and check that no clothing is caught in the door.
Expected result: The seal or door contact is dirty or obstructed, foam is present at the drawer, the filter area is wet, or the water does not originate at the front.
Next step: Clean only the visible seal and door contact area and use the detergent dose stated for the load. Do not remove the door seal or filter cover while water is hot or the appliance is powered. If the leak returns, move to service rather than substituting a seal or other part.
Why this matters
Why: Residue or an obstruction can prevent a door seal from closing cleanly, and excessive detergent can produce foam near the drawer. Water at the lower filter area or a front leak with an intact clean seal may indicate a drain or internal issue.
-
Check 3
Inspect the rear from a dry, stable position without pulling the appliance forward: look for water at the visible fill-hose connection or waste-hose route, a loose-looking connection, a kink, or a split hose.
Expected result: Water tracks from the fill or drain hose, a hose is kinked or damaged, a connection is visibly loose, or the rear is dry while the floor below is wet.
Next step: Keep the water tap off and do not disconnect a pressurized hose or move a heavy appliance through pooled water. Arrange service for a damaged hose or connection; if the rear is dry, use the underside branch and do not open the cabinet.
Why this matters
Why: A rear water trail makes hose routing or connection a stronger lead than the door seal. A damaged hose or leak that cannot be isolated safely can continue even when the programme is stopped.
-
Check 4
After the appliance is dry and only if the previous checks found no active leak, record whether water first appeared during filling, washing, draining, spinning, or drying; do not start another full load to reproduce a leak.
Expected result: The leak is repeatable at one programme stage, appears only with foam, occurs immediately from the rear, or appears underneath without a visible source.
Next step: Write down the stage, approximate water location, load and detergent conditions, and any display code. If a controlled model-directed test is needed, let a technician perform it; do not run the machine with an active leak.
Why this matters
Why: The stage narrows the technician's inspection toward supply, door or drawer, drain, or internal systems. A leak directly underneath after visible checks is not safely diagnosable from outside.
-
Check 5
If the manual identifies a simple user correction and the area remains dry, correct that visible condition once, switch the appliance on only as the exact manual permits, and watch from a safe dry position for the first signs of water.
Expected result: No water appears during the confirmation, or the same leak, water-base indication, unusual noise, or display returns.
Next step: Stop immediately if water returns. Turn off the tap, keep the appliance disconnected when safe, preserve the code and timing notes, and arrange qualified Bosch or appliance service. Do not remove covers or replace internal parts from a general leak symptom.
Why this matters
Why: A dry confirmation supports a corrected external condition but does not prove that an internal seal, pump, valve, or hose is sound. A repeat leak or water-base indication requires inspection rather than repeated operation.
Use your observations
Decision map
Find the observation that best matches what you see, then follow the next safe action.
-
PATH 01Safety boundary
What you see
Water is actively flowing or is near the plug, outlet, or an unsafe wet floor.
Do this next
Do not touch wet electrical parts. Turn off the water only from a dry safe position, keep the appliance off, and arrange qualified appliance or electrical help.
Why this path and its safety boundary
Safety stop: Continue by locating whether the residual water is at the front, rear, or underneath.
-
PATH 02Safety boundary
What you see
Water is pooling at the front near the door, drawer, or lower filter area.
Do this next
Inspect the visible door contact and seal for residue or trapped clothing, consider detergent foam, and do not open the lower filter area while hot or powered.
Why this path and its safety boundary
Safety stop: Use the rear-hose or underneath branch.
-
PATH 03Safety boundary
What you see
Water tracks from the rear fill or waste hose.
Do this next
Keep the tap off, avoid pulling the appliance or disconnecting a pressurized hose, and arrange service for a damaged or persistent connection leak.
Why this path and its safety boundary
Safety stop: If the rear is dry but the floor below is wet, treat it as a possible internal leak.
-
PATH 04Safety boundary
What you see
Water appears directly underneath after visible front and rear checks.
Do this next
Do not remove the covering or tilt the washer-dryer. Keep it off and arrange a trained technician to inspect the internal leak.
Why this path and its safety boundary
Safety stop: If the area remains dry after one model-directed visible correction, monitor only the first safe confirmation and stop at the first recurrence.
-
PATH 05Safety boundary
What you see
A water-in-base, water-protection, or recurring fault display appears.
Do this next
Turn off the tap, disconnect power only from a dry safe position, record the display, and contact qualified service rather than repeatedly resetting the machine.
Why this path and its safety boundary
Safety stop: Use the location and programme-stage branches, then stop if the leak returns.
Helpful context
Understand the symptom
Stop the leak before diagnosing it
Keep people away from pooled water. Turn off the appliance's water tap if it can be reached safely. If the floor, plug, and outlet are dry, switch off and unplug the appliance; if water surrounds the plug or outlet, do not reach through it and use qualified electrical help. Do not run another cycle just to locate a leak.
Where the water appears changes the likely path
A front puddle is a different investigation from water at the rear or directly below the cabinet. Front leaks can follow the door seal, detergent drawer, or filter area. Rear leaks often follow the fill or drain hose. A leak from underneath after those visible checks is not a reason to remove the cover; it is a service boundary.
Use detergent and cycle clues carefully
Foam or water at the drawer can follow excess detergent, while water at the door can follow residue or clothing caught in the seal. A leak that appears only while filling, draining, spinning, or drying gives a technician a useful timing clue, but it does not identify an internal part by itself.
Safety boundary
Stop conditions
- Stop immediately for active flowing water, rapid pooling, water near the plug or outlet, smoke, burning odor, a damaged cord, or a breaker that trips.
- Do not touch a wet plug or outlet, move the appliance through pooled water, or disconnect a pressurized hose from an unsafe position.
- Do not open the door if water is visible through the glass or the water may be hot; do not remove a filter cover while powered or hot.
- Do not remove the appliance covering, tilt the washer-dryer, bypass a safety device, or test live electrical parts to find a leak.
- After one visible correction, stop if the leak, water-base indication, unusual noise, or display returns and arrange qualified service.
When checks do not resolve it
Need a professional?
Arrange qualified appliance or electrical service for an active or recurring leak, water directly underneath, a water-in-base or water-protection display, a damaged hose or cord, a leak near electrics, a repeated breaker trip, or any leak that remains after the visible door, drawer, and hose checks.
Common questions
FAQ
What should I do first if my Bosch washer dryer is leaking?
Stop the programme and turn off the water tap from a dry safe position. Disconnect power only when the plug and outlet are dry and reachable without touching water; otherwise keep away from the wet electrical area and arrange qualified help.
Does the puddle location identify the leak?
It provides a useful first clue. Front water can involve the door seal, detergent drawer, or filter area; rear water can involve the fill or waste hose; water directly underneath after those checks may be an internal leak.
Can detergent cause a Bosch washer dryer to leak?
Excessive foam can escape around the detergent drawer, especially with a large dose or lightly soiled load. Correct the dose according to the detergent and model guidance, but request service if water continues or appears elsewhere.
Should I pull the machine forward to inspect the hoses?
Only inspect visible hose routing from a dry, stable position. Do not pull a heavy appliance through pooled water or disconnect a pressurized hose; keep the tap off and arrange service for a damaged or persistent rear connection.
When is a Bosch washer dryer leak a service issue?
Use service for water in the base, a water-protection display, an active or recurring leak, water near electrics, a damaged cord or hose, a repeated breaker trip, or water directly underneath after visible checks. Do not open the covering to investigate.
Read the exact guide
Official sources
- Why is my washing machine leaking?Bosch UK · Bosch laundry-appliance leak guidance
- Washer dryerBosch · Bosch washer-dryer instruction manual
- Washer dryerBosch · Bosch washer-dryer fault and safety guidance
- Washer | Error CodesBosch · Bosch washer error and water-leak guidance
Community feedback
Share a repair observation
Share a plain-text repair observation. Accepted observations are published automatically; this page may take a moment to update.