
On this page
Start here
Quick answer
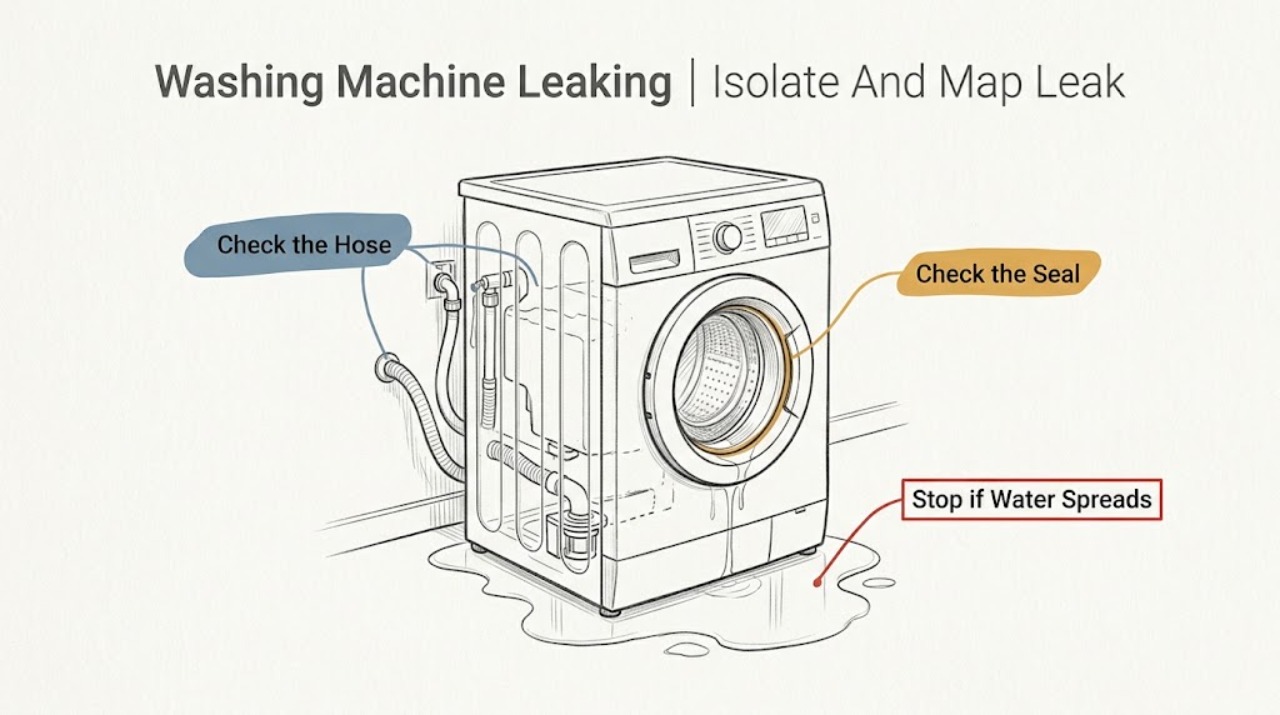
Stop the cycle and turn off the water tap. If water is near the outlet or power cord, do not touch the plug; isolate power only when it can be done without standing in water and the plug and outlet are dry. The location of the pooled water narrows the next check: water at the front door points to the door seal or door contact area; water from the detergent drawer points to residue, blockage, excess detergent, or foaming; water at the rear points to an inlet or drain hose and its connection; water under the base, an active leak, or an E23/F23 code means keep the machine off, leave the tap closed, and arrange service. On a dry, safely accessible machine, inspect only the visible seal, drawer, hoses, and the drain path described by the exact model manual. Do not remove cabinet panels or work on live electrical parts.
Before you begin
Safety first
- This article covers safe isolation and ordinary-access checks only. Leave AquaStop, electrical, pump, cabinet, water-valve, tub, and internal hose work to qualified appliance service.
Work through in order
Diagnostic checks
Use only checks that match the exact appliance or system and its official guide.
-
Check 1
Stop the programme, close the water tap, and use a dry position to identify where water first appears. Look briefly at the front door, detergent drawer, visible rear hose connections, drain outlet, and floor edge without moving the machine.
Expected result: Record whether water starts at the door, dispenser, rear inlet or drain connection, drain outlet, or underneath the cabinet. Note whether the leak is active, whether the drum contains water, and whether an E23 or F23 code is displayed.
Next step: Choose the matching seal, drawer, hose, or drain-path check below. For an active leak, water under the base, or E23/F23, leave the tap closed and arrange service instead of restarting the washer.
Stop if: Do not touch a wet plug, outlet, cord, or electrical control. Do not stand in water to isolate power or continue testing.
Why this matters
Why: Bosch uses the pooling location to direct troubleshooting. A base leak or E23/F23 is not a routine cleaning branch; it can indicate an internal leak or AquaStop activation.
-
Check 2
With the water tap closed and the machine safely isolated, inspect only the visible inlet and drain hoses and their accessible connections. Look for a crack, split, abrasion, kink, displaced clamp, or a loose connection; do not pull the appliance out by force.
Expected result: Find whether a hose or connection is visibly wet, damaged, kinked, or loose, and whether the wet trail begins at that point rather than at the cabinet base.
Next step: For a loose accessible connection, follow the exact model installation instructions and keep the tap closed until it can be correctly secured. Replace a cracked or damaged hose with one confirmed for the exact model, or have a technician do it. If hoses are dry, continue to the location-specific checks.
Stop if: Do not loosen a pressurized fitting, cut a hose, reach behind a trapped appliance, or continue if water is near electrical parts or the leak is from inside the cabinet.
Why this matters
Why: Bosch identifies cracked or loose inlet and drain hoses as leak sources. A damaged hose is not made safe by tightening a fitting, while a dry hose shifts attention to the door, drawer, drain path, or an internal leak.
-
Check 3
If water appears at the front, open the door only when the machine is stopped and safe. Inspect the rubber door gasket, its folds, the glass contact area, and the lower edge for fluff, detergent residue, a trapped object, tear, split, or deformation.
Expected result: Record whether debris or residue prevents an even seal, or whether the gasket or glass contact area is torn, cut, permanently distorted, or otherwise unable to seal.
Next step: With the machine off, remove loose residue using a soft cloth and keep the seal seated. If the gasket is damaged or the leak returns, arrange a model-specific seal inspection or replacement; do not glue or puncture the gasket.
Stop if: Do not run another cycle with a torn gasket, do not use sharp tools or solvents on the rubber, and stop if hot water or a trapped object makes access unsafe.
Why this matters
Why: Bosch recommends cleaning the seal and the door contact area when the front door leaks. Damage or persistent wetness after a clean seal is a replacement or service branch, not a reason to increase door pressure.
-
Check 4
If water or foam appears at the dispenser, remove the detergent drawer only as the model manual permits and inspect the compartments, visible inlet openings, and drawer channel for hardened detergent, fabric-softener residue, or blockage.
Expected result: Record whether the drawer is blocked or overflowing, whether old or excess detergent is present, and whether the washer produces unusually heavy foam during a cycle.
Next step: Clean the removable drawer with the method in the exact model manual, use the detergent type and amount specified for the load, and keep the machine off until the drawer is fully refitted. Arrange service if the drawer leaks while clean or cannot be removed safely.
Stop if: Do not force the drawer, pour cleaner into an unknown opening, mix chemicals, or run a test cycle while the dispenser is overflowing.
Why this matters
Why: Bosch says too much or old detergent can create excessive foaming and a drawer leak; residue or a blockage can also stop the drawer from flowing normally. A clean drawer with continued leakage points to a supply path or internal fault.
-
Check 5
If water remains in the drum or the leak is near the drain side, inspect the visible drain hose for a kink or blockage. Clean the pump filter or emergency drain only if the exact model manual provides that procedure and the machine is cool, unplugged safely, and positioned to contain residual water.
Expected result: Record whether the drain hose is kinked or blocked, whether the manual-accessible filter contains lint, coins, or other debris, and whether water drains without a new leak after the approved cleaning.
Next step: Restore only the manual-specified drain and filter parts without force, keep the water tap closed, and request service if the approved check does not resolve the leak or if access exposes internal components.
Stop if: Residual water may be hot. Do not open a filter cap under pressure, chip debris with a sharp tool, run the pump with a known leak, or work near wet electrics.
Why this matters
Why: Bosch identifies a kinked or blocked drain hose and a clogged pump filter as possible drainage problems. A clear path with a continuing leak, a damaged filter housing, or water from the base suggests an internal pump or hose fault.
-
Check 6
Stop home diagnosis when the source is under the base, an E23/F23 code appears, the leak remains after the accessible checks, or a hose, seal, pump, or internal connection appears damaged. Keep the tap closed and prepare the appliance information for service.
Expected result: Record the exact model, leak location and timing, programme or fill/drain stage, displayed code, whether the water was hot or soapy, and every safe external check already completed.
Next step: Arrange qualified Bosch appliance service and provide the model and leak evidence. Leave the washer off and the water tap closed until the cause is repaired and checked.
Stop if: Do not remove cabinet panels, bypass AquaStop, reconnect a leaking hose to test it, or repeatedly power-cycle the washer.
Why this matters
Why: Bosch directs users not to use the machine with E23/F23 and to contact support; persistent or internal leaks cannot be safely distinguished from an external leak without model-specific service access.
Use your observations
Decision map
Find the observation that best matches what you see, then follow the next safe action.
-
PATH 01Safety boundary
What you see
Water first appears at the front door or the lower door edge.
Do this next
Inspect and gently clean the gasket and contact area with the washer stopped; arrange a model-specific seal service if damage or repeat leakage is present.
Why this path and its safety boundary
Why it matters: The door seal or the seal-to-glass contact area may contain residue, a trapped object, or damage.
Safety stop: Do not run the washer with a torn or displaced seal, and do not use sharp tools or solvents on it.
-
PATH 02Safety boundary
What you see
Water or foam comes from the detergent drawer or its front edge.
Do this next
Clean the drawer using the exact model manual and correct the detergent type and amount; service a clean drawer that still leaks.
Why this path and its safety boundary
Why it matters: Residue, a blocked drawer, old or excessive detergent, or excessive foaming may be disrupting the dispenser flow.
Safety stop: Do not force the drawer or add more chemical cleaner to an overflowing dispenser.
-
PATH 03Safety boundary
What you see
The first wet point is a visible inlet or drain hose, connection, or drain outlet at the rear.
Do this next
Keep the tap closed; follow model installation instructions for an accessible connection and replace a damaged hose only with exact-model-compatible service or parts.
Why this path and its safety boundary
Why it matters: A loose connection, kink, crack, split, or displaced hose may be the source.
Safety stop: Do not loosen a pressurized connection, pull the washer by its door, or reach behind it in a wet area.
-
PATH 04Safety boundary
What you see
Water remains in the drum, the drain path is wet, or the visible drain hose is kinked or blocked.
Do this next
Use only the exact model's approved emergency-drain or pump-filter procedure, contain residual water, and arrange service if the path is clear but leakage continues.
Why this path and its safety boundary
Why it matters: A drain hose blockage or pump-filter obstruction may be preventing normal drainage and can contribute to water escaping at the wrong point.
Safety stop: Stop for hot residual water, a damaged filter housing, wet electrical parts, or any access beyond the manual procedure.
-
PATH 05Safety boundary
What you see
Water comes from under the cabinet, the leak is active or persistent, or E23/F23 is displayed.
Do this next
Leave the machine off with the water tap closed and arrange qualified Bosch service, providing the model, code, location, and timing.
Why this path and its safety boundary
Why it matters: An internal leak or AquaStop activation is possible and cannot be safely diagnosed by external cleaning.
Safety stop: Do not use the machine, bypass AquaStop, open panels, or repeatedly restart it.
Helpful context
Understand the symptom
Make the machine safe and map the leak
Stop the programme and turn off the water supply before inspecting anything. Note whether the first wet area is at the door, dispenser, rear hose connections, drain outlet, or underneath the cabinet; water can travel across the floor, so the largest puddle is not always the source. Keep hands away from the plug and outlet if they are wet. Only disconnect power when the path is dry and safely reachable without standing in water.
Use the source location to choose a check
A front leak makes the door gasket and the glass-to-seal contact area the first accessible checks. A dispenser leak makes detergent residue, a blocked drawer, old detergent, too much detergent, or excessive foam more likely. A rear leak makes an inlet or drain hose, kink, crack, or loose connection more likely. A leak from the base, a persistent leak after these checks, or an E23/F23 code needs a technician because the cause may be inside the appliance.
Keep the repair boundary explicit
Do not run repeated test cycles to chase an active leak, remove the cabinet, reach into a pump or wiring compartment, or loosen a hose while the supply is open. Water left in the drum or hoses may be hot. Follow the exact Bosch model manual for any approved drain or filter procedure; stop if the procedure requires force, exposes wiring, or leaves water near electrical parts.
Safety boundary
Stop conditions
- Turn off the water tap and stop the washer for an active leak, water under the cabinet, or an E23/F23 code.
- Do not touch a wet plug, outlet, cord, or control; isolate power only from a dry, safely reachable position and never while standing in water.
- Treat water left in the drum or drain path as potentially hot; cool the machine before any manual-approved drain or filter procedure.
- Do not remove cabinet panels, bypass AquaStop, work on live wiring, or loosen a hose while it is pressurized.
- Stop and arrange qualified service for a damaged seal, cracked hose, persistent leak, base leak, damaged filter housing, or a clean drawer that still leaks.
Only after diagnosis
Potential parts
- washing-machine door gasket
Consider this only when inspection confirms a torn, deformed, displaced, or persistently leaking door seal after the contact area is clean.
Confirm the complete Bosch model and part revision before ordering; gasket fit and installation method are model-specific. - washing-machine inlet or drain hose
Consider this only when a visible hose is cracked, split, damaged, or has a confirmed connection fault.
Match the exact Bosch model, hose type, length, connection, and any water-protection feature; close the tap before hose work. - washing-machine drain pump or pump filter assembly
Consider this only after the exact model's approved filter and drain-path checks and a qualified diagnosis confirm pump or housing damage.
Confirm the exact model and electrical and mechanical specification; do not open or test the pump while energized or with uncontrolled residual water.
When checks do not resolve it
Need a professional?
Arrange qualified Bosch appliance service when water comes from under the cabinet, the leak is active or returns after the accessible check, a door seal or hose is damaged, the dispenser leaks while clean, E23/F23 appears, or safe access would require moving the appliance, opening a panel, or working near water and electricity.
Safety scope: This article covers safe isolation and ordinary-access checks only. Leave AquaStop, electrical, pump, cabinet, water-valve, tub, and internal hose work to qualified appliance service.
Common questions
FAQ
Why is my Bosch washing machine leaking from the front door?
Check the rubber door gasket and the glass contact area for fluff, detergent residue, a trapped object, or a tear. Bosch recommends cleaning the seal and contact area; a damaged or still-leaking seal needs model-specific service.
Why does water come out of the Bosch detergent drawer?
Residue or a blocked drawer can disrupt flow, and too much or old detergent can cause excessive foaming. Clean the drawer as the model manual describes and use the specified detergent amount; service a clean drawer that still leaks.
What should I do if my Bosch washer shows E23 or F23?
Turn off the water tap and do not use the washer. Bosch says E23/F23 means the AquaStop hose has activated and may indicate a leak, so arrange qualified service rather than repeatedly restarting the machine.
Could a drain hose or pump filter cause a Bosch washer leak?
A kinked or blocked drain hose and a clogged pump filter can cause drainage problems. Inspect the visible hose and use the exact model manual for any filter procedure; stop for hot water, wet electrics, force, or leakage from the base.
When should I stop troubleshooting a leaking Bosch washing machine?
Stop with an active or base leak, E23/F23, a damaged hose or door seal, water near electricity, or any need to open the cabinet. Close the water tap, keep the washer off, and provide the technician with the model, code, leak location, and timing.
Read the exact guide
Official sources
- Washing machine error code E23 or F23Bosch Home Appliances · Bosch US support guidance for the E23/F23 code; code behavior and reset details remain model-specific.
- Bosch Washing Machine Troubleshooting & Repair GuideBosch Home Appliances · Bosch US troubleshooting overview; use the exact model manual for access, draining, filter, and replacement instructions.
- Why is my Bosch Washing Machine Leaking? How to TroubleshootBosch Home Appliances · Bosch US support guidance for washing-machine leaks; exact procedures vary by model and the model manual controls.
Community feedback
Share a repair observation
Share a plain-text repair observation. Accepted observations are published automatically; this page may take a moment to update.