
On this page
Start here
Quick answer
First separate a setup or timing issue from a heating fault. On Breville Smart Oven families, the selected function, temperature, time, rack position, and START/CANCEL state all matter; the door should be closed and the oven allowed to complete its model-specific preheat. A preheat alert does not always mean the final target temperature has already been reached: the BOV845 manual says its alert can sound at 75% of target temperature, and the oven can need about 8–10 minutes from startup including the door opening. Element iQ models may pulse power, so an element that looks dark between short bursts is not by itself proof that it has failed. Check only the plug/outlet, displayed mode, settings, door, crumb tray, and visible contamination from a cold, unplugged oven. If the display shows a persistent error, an E03 over-temperature condition, smoke, burning smell, damaged cord, repeated breaker trips, or the oven still does not heat after the exact manual's external checks, stop using it and contact Breville; do not open the case or test elements, thermostats, fuses, wiring, or controls.
Before you begin
Safety first
- The user may check the accessible plug/outlet, documented controls and settings, normal door closure, crumb tray, visible loose debris, and model-permitted cold cleaning. Qualified service personnel must handle the enclosure, elements, thermal protection, sensors, relays, controls, wiring, and live testing.
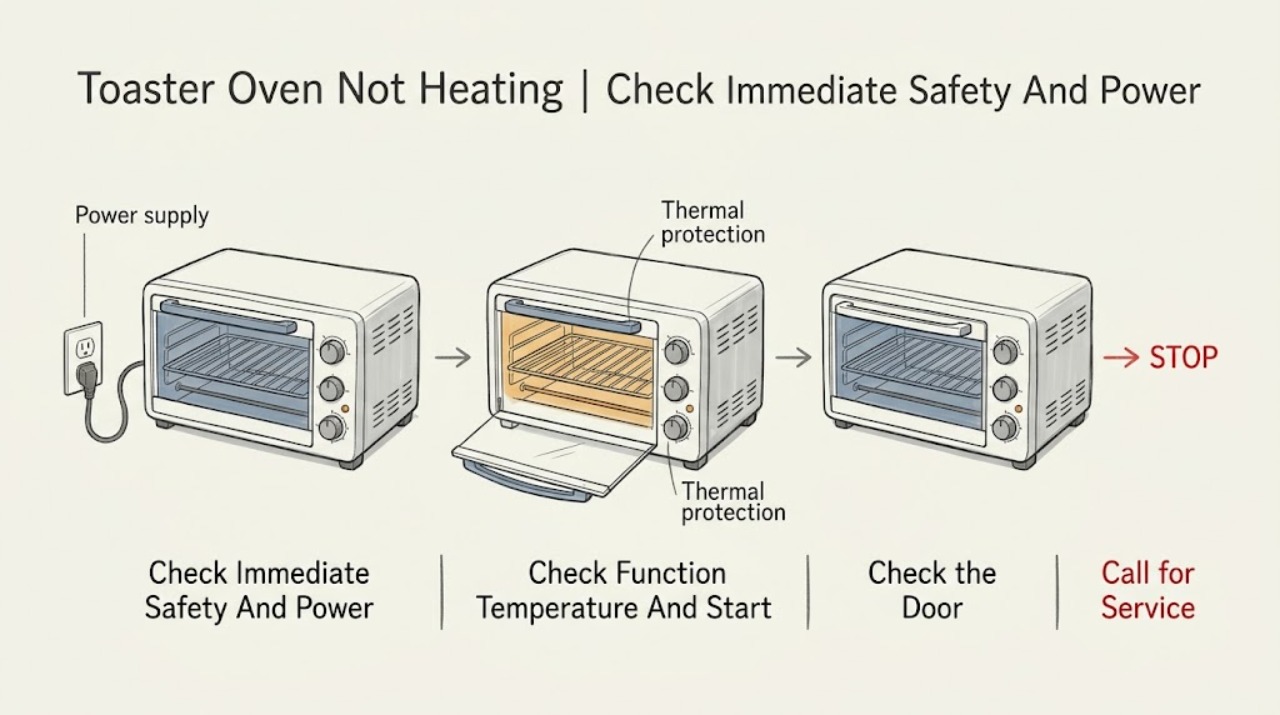
Work through in order
Diagnostic checks
Use only checks that match the exact appliance or system and its official guide.
-
Check 1
Stop the oven and look from a safe position for smoke, flame, a burning smell, a hot or damaged plug/cord, liquid near controls, a damaged casing or door, or a breaker that opens again. If none is present and the plug and outlet are dry and intact, check that the plug is fully inserted and that the outlet works as the exact manual permits; use an independent outlet rather than an extension or shared high-load connection.
Expected result: The display is dark, the outlet or breaker fails, the display works but the oven will not start, or a fire/electrical hazard is present.
Next step: For a hazard, leave the oven off and disconnect only from a safe dry location, then arrange service. For a failed outlet, use a qualified electrician; for a functioning outlet and display, continue with model-specific controls without opening the oven.
Stop if: Do not keep resetting a breaker, use a damaged cord or plug, touch hot/exposed electrical parts, or remove the cabinet to investigate a no-start or no-heat condition.
Why this matters
Why: A failed supply or dark display is different from an oven that starts but does not heat. Smoke, heat, damage, liquid, or repeated protection trips is an immediate safety boundary and cannot be treated as a mode problem.
-
Check 2
With the oven cool and empty of loose packaging, confirm the exact model's intended function on the FUNCTION control, set a deliberate temperature and time, and press START/CANCEL so the control indicates an active cycle. Confirm the required rack and tray position and close the door normally; do not assume that a setting or frozen-food option is available in every function.
Expected result: The oven starts and displays preheating, it remains in standby or does not start, the selected function does not allow a chosen option, or the function/settings are correct but food remains cold.
Next step: Use only the exact manual's control sequence and available function options. If the display still will not start or a correctly started cycle produces no heat, stop repeated testing and proceed to the preheat/door and service boundary.
Stop if: Do not use undocumented key combinations, bypass a control lock or door state, or open the control panel to force a cycle.
Why this matters
Why: A standby state, an unstarted cycle, an unavailable option, or a model-specific mode can look like no heating. A correctly started cycle that remains cold after its documented timing is more consistent with a heating/control fault, but the external check cannot identify the failed component.
-
Check 3
If the display says PREHEATING or the preheat alert has sounded, follow the exact model's sequence: insert the food only after the documented alert, close the door fully, and allow the cycle to continue without repeatedly opening it. Note the elapsed time and whether the timer has begun; on models that explain an early alert, do not treat the alert or a brief door-open heat drop as a final no-heat diagnosis.
Expected result: The oven reaches normal cooking behavior after the door is closed, the preheat alert sounds before the target reading, the door will not close normally, or the oven remains cold after the model's stated preheat/cycle timing.
Next step: Close the door normally and use the exact manual's timing and rack guidance once. If the door is damaged or the oven remains cold after the documented cycle, turn it off, record the model and display state, and arrange service.
Stop if: Do not hold, tape, defeat, or disassemble the door/latch, repeatedly open the door to chase a temperature reading, or continue a cycle that produces smoke, odor, arcing, or unsafe heat.
Why this matters
Why: An early preheat alert and heat loss when the door opens can be normal documented behavior. A door that cannot close, a cycle that never advances, or a correctly timed cycle that stays cold points away from ordinary preheat timing and toward a control, thermal, or heating fault.
-
Check 4
After pressing START/CANCEL, unplugging, and allowing the oven to cool completely, inspect only the visible crumb tray, rack, pan, door area, and heating elements for loose packaging, foil, food or grease buildup, or an item touching an element. Clean only the areas and quartz elements that the exact manual permits, using a soft damp cloth with no cleanser on the element, and dry everything before reconnecting power.
Expected result: Loose packaging or residue is visible, the crumb tray is missing or wet, an element appears dark or pulses, or the visible interior is clean and correctly assembled.
Next step: Remove only loose, accessible material, clean and dry the documented user areas, reinstall the crumb tray as directed, and stop if the oven still has no heat. If an element is cracked, displaced, visibly damaged, or contaminated in a way the manual does not cover, leave the oven unplugged and call service.
Stop if: Do not scrape an element with metal, use cleanser on quartz elements, touch the interior while hot, bend or replace an element, or restore power before all cleaned surfaces are dry.
Why this matters
Why: Packaging or buildup can create a fire risk or disturb operation, while a dark or intermittently bright Element iQ element can be normal pulsing. A clean, dry, correctly assembled oven that remains cold does not prove which internal part failed.
-
Check 5
Read and record any exact LCD error before resetting. If the model shows E03, follow the manual's shutdown and cooling instruction: remove the plug, allow the oven to cool for 15 minutes, and reconnect only if the cord and oven are safe. If E01, E02, or E05 appears, or E03 continues, leave the oven off and contact Breville Consumer Support. For a no-heat symptom without an error, provide the model, function, target setting, preheat behavior, door result, and whether either element ever pulsed or heated.
Expected result: The error clears after the documented model-specific step and the oven behaves normally, the error returns, or the oven still does not heat with no error after safe external checks.
Next step: If any error returns or heating remains absent, keep the appliance out of use and use Breville's support/warranty path. Do not order an element, thermostat, fuse, sensor, or control board from the symptom alone.
Stop if: Do not bypass thermal protection, repeatedly power-cycle an overheating oven, perform continuity or voltage tests, remove the enclosure, or replace internal electrical or heating parts yourself.
Why this matters
Why: A one-time over-temperature state may clear after the documented cool-down, but a returning code or persistent no-heat symptom is not safely localized by a user. Internal element, thermal protection, relay, sensor, control, or wiring work requires qualified service.
Use your observations
Decision map
Find the observation that best matches what you see, then follow the next safe action.
-
PATH 01Safety boundary
What you see
The LCD is dark but STANDBY is shown, the cycle was never started, the selected option is unavailable in that function, or the oven starts after the documented control sequence.
Do this next
Wake the oven or select a documented function and press START/CANCEL once according to the exact manual. If it still will not start, use the power/service path rather than opening the controls.
Why this path and its safety boundary
Why it matters: A standby or model-specific control state is more likely than a failed heating element.
Safety stop: Do not use undocumented resets, bypass a control or door state, or keep cycling a unit with electrical or heat hazards.
-
PATH 02Safety boundary
What you see
The oven displays PREHEATING or gives its alert, the door was opened, and the food was inserted before the model's documented cycle timing or the door is not fully closed.
Do this next
Close the door and allow one documented cycle to proceed without repeated opening. If the door will not close or the oven remains cold after the exact model's timing, call service.
Why this path and its safety boundary
Why it matters: The apparent no-heat condition can be temporary preheat/door heat loss or an uncompleted cycle; on some models the alert is intentionally before the final target temperature.
Safety stop: Do not tape or defeat the door, repeatedly open the oven for temperature checks, or continue if smoke, odor, arcing, or unsafe heat appears.
-
PATH 03Safety boundary
What you see
The selected cycle is active, the oven produces normal heat, and an Element iQ element looks dark between short bursts or appears to pulse.
Do this next
Keep the exact manual's settings and avoid unnecessary inspection. If cooking remains consistently under-temperature or the element becomes cracked, displaced, or unsafe, stop and arrange service.
Why this path and its safety boundary
Why it matters: Pulsed element power is documented temperature control on these models; visual darkness alone does not prove an element failure.
Safety stop: Do not touch or probe a live element, scrape it with metal, or dismantle the oven to make it glow continuously.
-
PATH 04Safety boundary
What you see
The display shows E03, E01, E02, or E05, the code returns after the model's documented step, or the oven has smoke, burning odor, damaged cord, repeated breaker trips, or abnormal heat.
Do this next
For E03, perform only the documented unplug-and-cool step if the oven is otherwise safe; for a persistent code or any hazard, leave it off and contact Breville support or qualified appliance service.
Why this path and its safety boundary
Why it matters: The symptom has crossed the user boundary. A persistent over-temperature or non-resettable code can involve thermal protection, control, sensor, wiring, or heating hardware.
Safety stop: Do not repeatedly reset an overheating oven, re-energize after smoke or odor, bypass thermal protection, or open the enclosure.
-
PATH 05Safety boundary
What you see
The display and controls run a documented function, the door closes, the oven has completed the model-appropriate preheat/cycle timing, visible packaging/residue is addressed, and food still does not heat.
Do this next
Stop further tests, keep the oven unplugged or out of use as appropriate, and arrange Breville or qualified appliance service with the exact model and symptom record.
Why this path and its safety boundary
Why it matters: An internal heating, switching, sensing, or thermal-protection fault is more likely than a setting or preheat misunderstanding, but the safe checks cannot identify the component.
Safety stop: Do not test or replace the heating elements, thermostat, thermal fuse, relay, sensor, control board, wiring, or power components yourself.
Helpful context
Understand the symptom
A dark element is not automatically a failed element
Breville's Element iQ troubleshooting text says the oven controls heat by pulsing power to the elements in short bursts. An element can therefore look dark between bursts, and different functions can call for different heating behavior. Judge the oven by its selected function, preheat behavior, and food result—not by one glance at a single element. A persistent failure to heat after the documented cycle is a service symptom, not permission to probe the element.
Preheat and temperature readings need model context
Some Smart Oven manuals explain that the preheat alert is intentionally early so food can be inserted with less wasted waiting; on the BOV845 family it can sound at 75% of the target temperature. Opening the door then causes a temporary heat loss. The LCD temperature is also calibrated in a specified test position, so do not compare a reading from an arbitrary rack position or with the door repeatedly opened and conclude that the oven cannot heat.
Model identity controls the troubleshooting path
BOV845 Smart Oven Pro, BOV670 Smart Oven, and BOV860 Smart Oven Air Fryer manuals share some controls but not every function, alert, or procedure. A frozen-food setting may be available only in certain functions, and an over-temperature error has a model-documented cooling step. Find the model on the data plate and use its manual before changing settings or interpreting an error.
Safety boundary
Stop conditions
- Stop using the toaster oven for smoke, flame, burning odor, a hot or damaged cord/plug, exposed wiring, liquid near controls, a damaged door/casing, repeated breaker trips, or unsafe overheating.
- Turn the oven off, unplug it, and allow it to cool completely before cleaning, moving, or inspecting the crumb tray or visible heating elements; restore power only when all cleaned surfaces are dry.
- Do not bypass or disassemble the door/latch, thermal protection, controls, or any safety device, and do not repeatedly power-cycle an oven that displays a returning over-temperature or non-resettable error.
- Do not perform live voltage or continuity tests, remove the enclosure, or access/replace elements, thermostats, thermal fuses, sensors, relays, control boards, or internal wiring.
- If the exact model's documented mode, start, preheat, door, and visible-cleaning checks do not restore heating, stop testing and arrange professional service.
When checks do not resolve it
Need a professional?
Safety scope: The user may check the accessible plug/outlet, documented controls and settings, normal door closure, crumb tray, visible loose debris, and model-permitted cold cleaning. Qualified service personnel must handle the enclosure, elements, thermal protection, sensors, relays, controls, wiring, and live testing.
Common questions
FAQ
Why does my Breville toaster oven say preheating but not heat?
Confirm the exact function, temperature, time, START/CANCEL state, rack position, and closed door. On some Breville Smart Oven manuals, the preheat alert is intentionally early—BOV845 documents about 75% of the target temperature at the alert and approximately 8–10 minutes from startup including the door opening. If the oven remains cold after the exact model's cycle timing, stop and arrange service.
Is it normal for a Breville heating element to look dark or pulse?
On Element iQ models, Breville says power is pulsed in short bursts for temperature control, so an element need not glow continuously. A dark appearance alone is not a diagnosis. Cracking, displacement, smoke, persistent underheating, or a cycle that remains cold after correct preheat and settings needs service.
What should I check if my Breville toaster oven will not start or heat?
From a safe dry position, check the plug and outlet as the exact manual permits, wake the display if it is in standby, select a valid function, set temperature and time, press START/CANCEL, and close the door. Do not infer that every option works in every function. If the display stays dark, the outlet/breaker fails, or the oven still will not start, use electrical or Breville service support.
What does E03 mean on a Breville toaster oven?
In the Breville manuals consulted, E03 indicates that the oven temperature is above the model's set maximum limit. The documented response is to unplug it, allow it to cool for 15 minutes, and contact Breville if E03 continues. Do not repeatedly reset an overheating oven or open it to test thermal parts.
When should I call a professional for a Breville toaster oven that is not heating?
Call when correct model-specific settings, start/preheat timing, closed-door, and cold visible-cleaning checks do not restore heat; when an element is cracked or displaced; when E01, E02, or E05 appears; when E03 returns after cooling; or whenever smoke, burning odor, damaged cord, liquid near controls, unusual heat, or repeated breaker trips occurs. Internal elements, fuses, thermostats, sensors, relays, controls, and wiring are not user-level checks.
Read the exact guide
Official sources
- BOV860 Instruction ManualBreville · Official BOV860 model-family manual; apply its function and error instructions only to the matching model family and verify another model separately.
- BOV845 Instruction ManualBreville · Official BOV845 model-family manual; use the exact manual for another Breville oven because functions and error behavior vary.
- Product Hub – Find Support, Spare Parts & Service for Your MachineBreville · General Breville US support hub; the correct manual and service route depend on the exact product model and market.
- BOV670 Instruction ManualBreville · Official BOV670 model-family manual; its controls and calibration details are not a universal procedure for every Breville toaster oven.
Community feedback
Share a repair observation
Share a plain-text repair observation. Accepted observations are published automatically; this page may take a moment to update.