
On this page
Start here
Quick answer
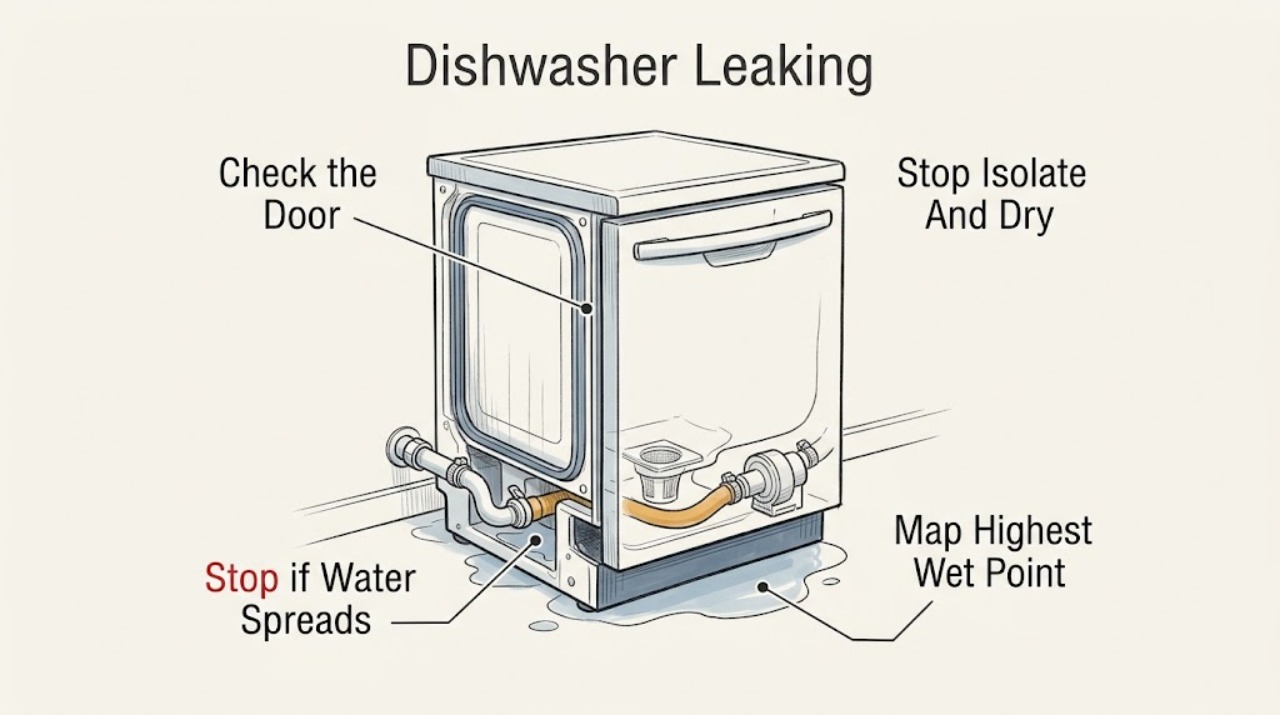
Stop the programme, keep water away from the plug, outlet, controls, and other electrical parts, and close the water supply if the leak is substantial or continues while the dishwasher is idle. Dry the floor and trace the highest wet point only from the outside: water at the door front suggests loading, leveling, or a door-seal problem; water under the sink points first to an inlet or drain connection; water appearing during rinsing can involve drainage or the internal water circuit; and foamy water suggests a detergent or rinse-aid problem that must be corrected before another cycle. Check the exact Candy manual for the model, clean only accessible filters as directed, and do not pull panels or work on the pump, valve, hose clamps, base pan, or wiring. A persistent leak, water in the base, an unknown source, or water near electrics requires Candy or qualified appliance service.
Before you begin
Safety first
- The user may stop the programme, close the water supply, dry accessible surfaces, inspect external connections without disconnecting a pressurized line, inspect a reachable door seal, and clean an accessible filter exactly as the model manual directs. Electrical parts, base pans, leak sensors, pumps, valves, hose clamps, tub joints, hidden hoses, and wiring are for qualified service personnel.
Work through in order
Diagnostic checks
Use only checks that match the exact appliance or system and its official guide.
-
Check 1
Press Cancel/Stop and keep the dishwasher closed while the spray stops. If water is still entering, close the dishwasher's water-supply valve or the household supply. If water has reached the plug, outlet, controls, wiring, or another electrical part, do not touch the wet area; isolate power only from a safe, dry location and arrange service.
Expected result: The leak stops when the programme and water supply are stopped, or water continues, is substantial, or has reached electrical parts.
Next step: Dry the floor without moving a heavy built-in unit. Record the amount and location of water, then continue only with external observation if no electrical exposure exists; otherwise leave the appliance isolated and call service.
Stop if: Do not restart a wet dishwasher, touch a wet plug or outlet, remove panels, or keep using it to see whether the leak gets worse.
Why this matters
Why: A stopped leak can be traced safely from outside after drying. Continued flow suggests a supply-side or valve issue, while water near electrical parts is an immediate stop-use condition.
-
Check 2
With the dishwasher stopped and isolated, inspect from the front, sides, and under-sink area without removing the kickplate or cabinet. Identify the highest wet point and note whether water first appeared at the door front, beneath the base, at the inlet connection, at the drain connection, or only during filling, rinsing, draining, drying, or idle time.
Expected result: Water begins at the door edge, under-sink hose/connection, rear or base area, or the source cannot be seen.
Next step: Follow the matching branch below. Photograph the wet point and model label for service if the source is hidden or the dishwasher must be pulled out.
Stop if: Do not run an unattended cycle, pull out a wet integrated appliance, or reach beneath it near wiring or a wet electrical connection.
Why this matters
Why: Door-front water makes a seal, loading, foam, or leveling pattern more likely; under-sink water makes an external connection more likely; cycle-specific water can involve the corresponding supply, drain, or internal circuit. An unseen base leak cannot be safely localized by more cycles.
-
Check 3
If water is concentrated along the lower door or front corners, inspect the visible door seal for food debris, tears, displacement, or a section that is folded. Check that racks and dishes are not preventing the door from closing, and that the dishwasher is level as the exact Candy installation instructions require. Do not remove a seal unless the model manual explicitly identifies it as a user-replaceable part.
Expected result: The seal is dirty, visibly damaged, displaced, or the door is obstructed/unlevel; or the door and seal appear normal.
Next step: Wipe a reachable seal and correct an obvious loading issue without force. If the seal is torn, the door does not close squarely, or water returns, stop using the dishwasher and arrange a model-specific diagnosis.
Stop if: Do not force the door, shim the cabinet, scrape the seal with a sharp tool, or treat water emerging from the base as a door-seal cleaning problem.
Why this matters
Why: Candy identifies door-seal failure and an unlevel appliance as possible causes of a front leak. A normal-looking seal does not rule out a hidden tub, hinge, spray-arm, or internal leak.
-
Check 4
If water is under the sink or at an accessible rear connection, keep the water supply closed and visually inspect the inlet and drain hose connections for a loose joint, kink, crushed hose, split, or water track. Do not disconnect a pressurized inlet line or pull the appliance from cabinetry to reach a hidden connection.
Expected result: A visible connection or hose is wet/damaged, the drain hose is kinked or displaced, or all accessible connections are dry.
Next step: Leave the water supply closed and arrange a qualified installer or Candy service for a damaged or pressurized connection. If an accessible, nonpressurized fitting is only visibly loose, follow the exact installation manual; do not overtighten or substitute parts.
Stop if: Do not work on a pressurized hose, cut or extend a hose, pull a built-in unit through pooled water, or reconnect power while a connection is wet.
Why this matters
Why: Candy notes that under-sink water may be a connection fault and that supply joints can loosen or fail. A dry accessible connection shifts suspicion toward an internal connection, pump, valve, base, or a leak that is tracking from elsewhere.
-
Check 5
If the leak appears during rinsing/draining or the tub contains suds, wait for the appliance to be safe and follow the exact Candy manual for cleaning the accessible filter and using the correct automatic-dishwasher detergent and rinse aid. Remove only visible debris that the manual identifies as user-accessible; do not open the pump housing or add improvised chemicals.
Expected result: The filter is visibly clogged, the water is clear but drains slowly, or foam is overflowing at the door; or the filter is clear and the leak is not foam-related.
Next step: Clean and refit only the accessible filter as the manual directs, correct detergent use, and keep the water supply closed until the leak source is clear. Call service if water remains in the base, the leak recurs, or the filter is clear.
Stop if: Do not dismantle the pump, probe the sump, pour drain cleaner or hand soap into the dishwasher, or run repeated cycles to flush foam.
Why this matters
Why: Candy lists a clogged filter as a possible contributor to leakage and links rinse-stage leaks to drainage or the internal water mechanism. Foam points toward a detergent/rinse-aid or loading issue, but a clear leak or base water still needs mechanical diagnosis.
-
Check 6
If the leak continues after the safe external checks, returns while the dishwasher is idle, collects beneath the appliance, or has no visible source, keep the water supply closed and the dishwasher out of service. Give Candy support the model, serial information, cycle stage, leak location, and photos of the wet point.
Expected result: The leak is resolved by an accessible correction and does not return, or it persists/recurs, involves the base, or affects electrical parts.
Next step: Use Candy's official manual and technical-service route to request a model-specific diagnosis. Do not order a pump, valve, clamp, or seal from the symptom alone.
Stop if: Do not remove panels, tip the dishwasher, bypass an overflow or leak sensor, test live wiring, or restart while water remains in the base or near electrics.
Why this matters
Why: A resolved external connection, loading, foam, or accessible filter issue is different from a repeatable hidden leak. Persistent base water can involve a pump, valve, hose clamp, tub, sensor, or other internal part that the user cannot safely identify.
Use your observations
Decision map
Find the observation that best matches what you see, then follow the next safe action.
-
PATH 01Safety boundary
What you see
The highest wet point is at the lower door edge or front corners, especially during washing, and the under-sink connections are dry.
Do this next
Inspect the accessible seal and door closure, correct loading, check level only as the exact manual permits, and stop using the unit if the seal is damaged or water returns.
Why this path and its safety boundary
Why it matters: A damaged or displaced door seal, an unlevel appliance, an obstructing load, or foam is more likely than an inlet hose leak.
Safety stop: Do not force or shim the door, replace a seal without model confirmation, or keep running cycles with a front leak.
-
PATH 02Safety boundary
What you see
Water is first seen beneath the sink or at an accessible inlet/drain connection, with the dishwasher itself not yet wet.
Do this next
Close the water supply, keep power isolated if the area is wet, and have a qualified installer or Candy service inspect the connection. Do not disconnect a pressurized hose.
Why this path and its safety boundary
Why it matters: A loose or failed hose joint, supply valve connection, or drain connection is more likely than a door leak.
Safety stop: Do not overtighten, cut, extend, or pull a built-in dishwasher through water to reach the connection.
-
PATH 03Safety boundary
What you see
The leak starts during rinsing or draining, the machine drains slowly, or the accessible filter contains debris, without a door-front or supply-connection source.
Do this next
Clean and refit only the model-approved accessible filter. Keep the appliance out of service and request diagnosis if the leak persists, the base contains water, or the filter is clear.
Why this path and its safety boundary
Why it matters: A clogged filter, drain path, or internal water mechanism is more likely. A filter issue may be user-accessible; a pump, hose clamp, sump, or valve is not inferred from the symptom alone.
Safety stop: Do not dismantle the pump or base, use drain chemicals, or repeatedly run a leaking appliance.
-
PATH 04Safety boundary
What you see
Visible suds or foam rise to the door and spill, with no separate clear-water track while the appliance is idle.
Do this next
Stop adding products, allow the machine to settle, follow the exact Candy manual for detergent and rinse-aid use, and call service if the overflow recurs or the water is clear and persistent.
Why this path and its safety boundary
Why it matters: Wrong detergent, too much detergent, or spilled/overused rinse aid is more likely than a failed hose. Foam does not rule out a mechanical leak if clear water returns later.
Safety stop: Do not add hand soap, bleach, drain cleaner, or repeated detergent doses, and do not run unattended cycles to clear suds.
-
PATH 05Safety boundary
What you see
Water collects beneath the dishwasher, appears behind the kickplate, returns while the machine is idle, or the highest wet point cannot be reached safely.
Do this next
Close the water supply, isolate power only from a safe dry location, leave the dishwasher out of service, and arrange Candy or qualified appliance service.
Why this path and its safety boundary
Why it matters: An internal pump, hose clamp, valve, tub, base, or hidden connection is more likely; Candy notes that internal pump or clamp leaks may need an expert.
Safety stop: Do not tip or pull the appliance, remove the base, bypass a leak sensor, test wiring, or restart with water in the base.
Helpful context
Understand the symptom
Trace the leak by location and cycle stage
Do not start by ordering a seal. Put the dishwasher in a safe stopped state, dry the visible water, and note the first place that becomes wet. Water at the lower door edge or front corners is a different pattern from water under the sink, water at the rear, or water collecting beneath the appliance. Also note whether it appears while filling, washing, rinsing, draining, drying, or while the machine is off. Candy's own guide recommends this timing-and-location approach: a rinse-cycle leak can point toward the internal water mechanism or drainage, while an under-sink leak may be a connection rather than the dishwasher cabinet.
Foam is a separate clue from clear water
If suds or foam are pushing out of the door, do not add another detergent dose or run repeated cycles. Record whether the product used was made for automatic dishwashers and whether rinse aid was spilled or overfilled, then follow the exact Candy manual's detergent and rinse-aid instructions. Foam can make a machine appear to leak at the door, but it does not explain clear water that returns with the supply valve open or water pooling under the base. Persistent overflow, a leak with the appliance idle, or an unclear source needs service rather than a chemistry experiment.
Keep the base, pump, and valves on the service side
A filter or visible door gasket may be accessible on some Candy models, but model layouts differ. Water in the base pan, an internal pump or hose-clamp leak, a supply valve, or a leak behind the kickplate cannot be reliably diagnosed from the outside. Candy's guidance says an internal pump or clamp leak may need an expert. Do not remove the base, tip a built-in dishwasher, pull a hose under pressure, or probe wiring while the appliance is wet or connected to power.
Safety boundary
Stop conditions
- Stop using the dishwasher and close its water supply for a substantial, persistent, or unexplained leak; isolate power only from a safe, dry location when water is near the cord, outlet, controls, or wiring.
- Do not restart while water remains in the base or near electrical parts, and do not run repeated cycles to locate or flush a leak.
- Do not remove panels, tip or pull a built-in dishwasher through water, bypass an overflow/leak sensor, or work on the pump, inlet valve, hose clamps, sump, base pan, wiring, or controls.
- Do not disconnect a pressurized inlet line, cut or extend hoses, overtighten fittings, or substitute a seal or hose without exact model confirmation and qualified installation guidance.
- Do not use hand soap, drain cleaner, bleach, or improvised chemicals to clear foam; use only the exact Candy manual's detergent, rinse-aid, and filter instructions.
Only after diagnosis
Potential parts
- Candy dishwasher door seal
Consider this category only when the exact model's seal is visibly damaged or a qualified diagnosis confirms a door leak; it will not correct a supply, drain, foam, pump, or base leak.
Match the complete Candy model/product code and door configuration before ordering or fitting. - Candy dishwasher inlet or drain hose and connection seal
Consider this category only when an external hose or joint is confirmed damaged and a qualified installer approves the replacement; an external hose part will not fix an internal leak.
Confirm model, hose type, water-stop arrangement, connection size, and installation requirements; do not work on a pressurized line. - Candy dishwasher pump or internal hose-clamp assembly
Candy identifies internal pump and hose-clamp failures as possible causes, but these are service-diagnosis categories rather than user-orderable conclusions from a wet floor.
Do not order or install without an exact model diagnosis by Candy or qualified appliance service.
When checks do not resolve it
Need a professional?
Arrange Candy or qualified appliance service when water reaches electrical parts, the leak is substantial, persistent, recurring while idle, hidden beneath the appliance, or not resolved by an exact-model accessible seal, loading, detergent, filter, or external-connection check. Internal pump, valve, hose-clamp, tub, base-pan, sensor, and wiring faults are professional work.
Safety scope: The user may stop the programme, close the water supply, dry accessible surfaces, inspect external connections without disconnecting a pressurized line, inspect a reachable door seal, and clean an accessible filter exactly as the model manual directs. Electrical parts, base pans, leak sensors, pumps, valves, hose clamps, tub joints, hidden hoses, and wiring are for qualified service personnel.
Common questions
FAQ
Why is my Candy dishwasher leaking from the front door?
A front leak makes a damaged or displaced door seal, an unlevel appliance, an obstructing load, or foam more likely. Candy lists door-seal failure and leveling among possible causes. Inspect only the visible seal and door closure with the machine stopped; stop using it if the seal is torn or water returns.
Why is my Candy dishwasher leaking under the sink?
Candy says water under the sink may be a connection rather than a cabinet fault. Close the water supply, keep power isolated if the area is wet, and visually inspect accessible inlet and drain connections for wet joints or hose damage. Do not disconnect a pressurized hose or pull out a built-in machine through water.
Can too much foam make a Candy dishwasher leak?
Foam can spill through the door and should be treated as a detergent or rinse-aid-use clue, not as proof that a seal has failed. Stop adding products, follow the exact Candy manual for automatic-dishwasher detergent and rinse aid, and call service if the overflow recurs or clear water leaks while the machine is idle.
Is a Candy dishwasher leak from underneath a pump problem?
It may be, but a wet base can also reflect a valve, hose, tub, drain, or connection issue. Candy identifies internal pump and hose-clamp faults as possible causes and notes that an expert may be needed. Keep the water supply closed and do not remove the base or test internal parts yourself.
Read the exact guide
Official sources
- Dishwasher Leaking: What To Do And What Are The Most Common Causes?Candy · Candy consumer guidance for dishwasher leaks; exact parts, access, and procedures depend on the model and market.
- Technical assistance for our appliancesCandy · Candy UK support page; contact methods and service coverage vary by country and warranty status.
- Repairs & ServiceCandy · Candy UK repair service; availability, warranty, and appointment terms vary by location and appliance.
- Product user manualsCandy · Candy manual portal; the correct manual and procedure depend on the complete model/product code and market.
Community feedback
Share a repair observation
Share a plain-text repair observation. Accepted observations are published automatically; this page may take a moment to update.