
On this page
Start here
Quick answer
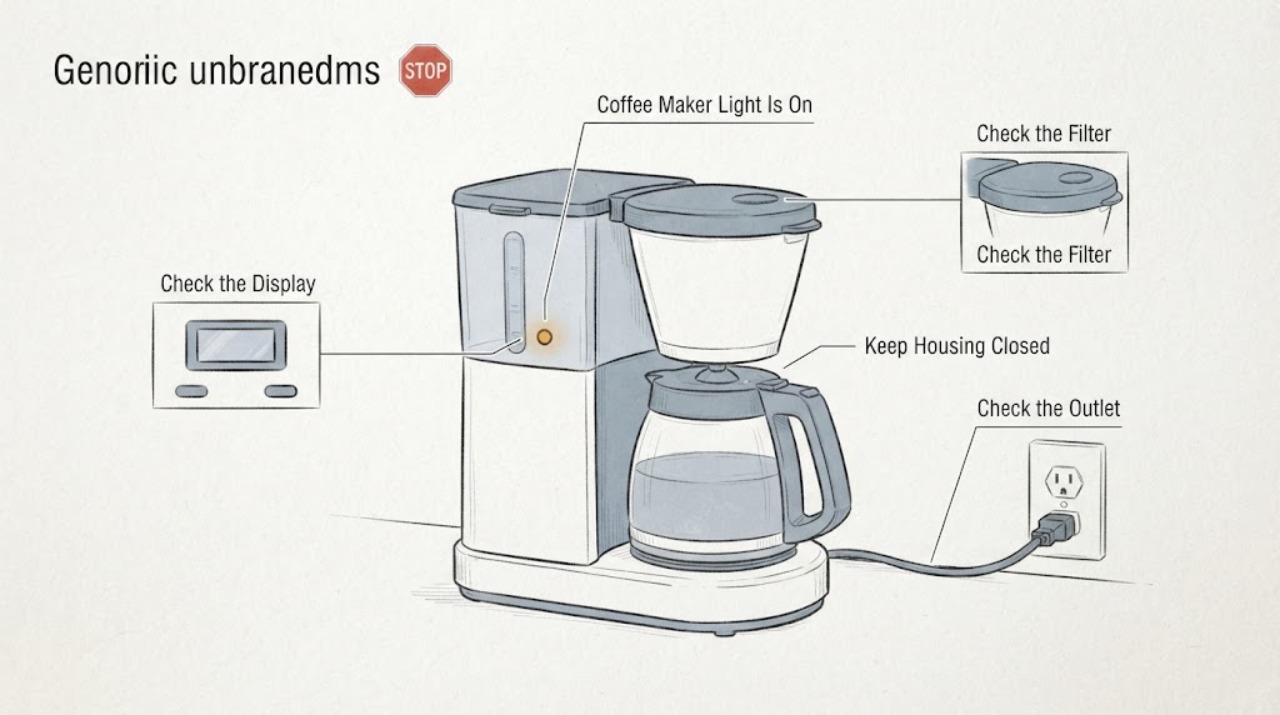
A light that is on proves only that some power or indicator state is present; it does not prove that a brew cycle has been accepted, that the reservoir is seated, or that water is moving. First identify whether the machine is a drip brewer, pod brewer or espresso-style machine and follow its exact manual. Check the reservoir level and seating, the lid or brew head, the selected brew command and any add-water/ready indicator. If the manual allows a water-only test, use a heat-safe cup and observe whether water flows. A partial or absent flow can come from an empty or mis-seated reservoir, an unclosed brew head, a clogged brew path or scale, but these causes and cleaning steps vary by model. Do not probe a needle, open the housing, bypass a lid interlock or keep testing if there is a burning smell, smoke, leaking water near the cord, abnormal electrical noise or repeated tripping. If the model-specific external checks and manufacturer cleaning procedure do not restore flow, stop and use the manufacturer's service channel.
Before you begin
Safety first
- Do not open the housing, bypass a lid or pod interlock, insert sharp tools into an unidentified brew path, test live electrical parts, repeatedly reset a breaker, or continue hot-water tests after a leak or burning smell.
Work through in order
Diagnostic checks
Use only checks that match the exact appliance or system and its official guide.
-
Check 1
Identify the coffee-maker type, full model number and the exact light that remains on. Read the model manual or control legend to determine whether the light means power, ready, heating, add water or an active brew state; do not assume that an illuminated light means the heater or pump is operating.
Expected result: The light is a power/standby indicator, an add-water or warning indicator, a flashing brew indicator, or a ready state that does not change when the brew command is pressed.
Next step: Follow the exact manual's displayed prompt. If the model and light meaning cannot be identified, stop at external checks and use the manufacturer's support channel rather than trying another brand's sequence.
Why this matters
Why: The indicator meaning narrows the next check, but without the model manual it cannot identify a failed heater, pump, sensor or control board.
-
Check 2
With the machine cool and stable, check that the water reservoir contains the model's required amount, is fully seated, and is not blocked by a displaced filter or float. On a pod-style machine, confirm the pod holder and brew head are closed exactly as the manual shows; on a drip machine, confirm the carafe and filter basket are correctly positioned.
Expected result: The machine shows add-water, the reservoir is not seated, the brew head is open, the filter basket/carafe is out of position, or all external conditions match the manual.
Next step: Correct only the visible reservoir, carafe, filter-basket or lid condition described by the exact manual, then make one normal brew attempt. If the manual condition is already satisfied, continue to a permitted water-only test.
Why this matters
Why: A missing water condition or unclosed brewing assembly can inhibit the brew command while the power light remains on. Matching external conditions does not prove an internal component fault.
-
Check 3
If the exact manual permits a water-only or cleansing brew, place a heat-safe container under the outlet and run that documented test without coffee or a pod. Keep hands away from hot water, steam and sharp pod needles, and stop if the machine leaks or behaves abnormally.
Expected result: Water flows normally, flows only partially or drips, or no water flows while the indicator remains on.
Next step: Use the exact manual's cleaning/descaling path only when it matches the model. If no water flows or the machine stops mid-test, discontinue testing and request manufacturer service.
Why this matters
Why: Normal water-only flow points toward the coffee/pod/filter preparation rather than a total water-delivery failure. Partial or absent flow is consistent with a restricted path, water condition, seating issue or unresolved model-specific fault, but does not identify a part.
-
Check 4
If the model manual identifies a cleanable brew head, pod holder, filter basket or scale procedure, perform only that documented cleaning with the machine unplugged where the manual requires it. Do not insert a paper clip, needle or other tool into an unknown brewer and do not open the housing.
Expected result: The manual identifies a removable, user-cleanable path and the machine improves after cleaning, or the flow remains unchanged, leaks, or the machine has no model-matched cleaning instruction.
Next step: Rinse or descale only as the exact manual directs and make one supervised test. If the symptom persists, stop and contact the manufacturer or a qualified appliance technician.
Why this matters
Why: Improvement after documented cleaning supports a restricted user-serviceable path. No improvement or no supported cleaning procedure leaves the cause unresolved; it is not evidence for a failed pump or heater.
-
Check 5
Stop using the coffee maker immediately if there is a burning smell, smoke, sparking, repeated breaker or GFCI operation, water near the cord or outlet, a damaged cord, or abnormal electrical noise. Disconnect it only if the plug and surrounding area are dry and safe to reach.
Expected result: A hazard is present, or the machine still will not brew after the model-matched external checks and cleaning procedure.
Next step: Keep the appliance out of service and contact the manufacturer or a qualified service provider. Do not repeatedly reset a breaker, bypass a lid switch, open the housing or continue hot-water tests.
Why this matters
Why: These conditions exceed safe user troubleshooting and may involve electrical, heating or pressurized-hot-water hazards that cannot be distinguished by the light alone.
Use your observations
Decision map
Find the observation that best matches what you see, then follow the next safe action.
-
PATH 01Next step
What you see
The light is an add-water or reservoir warning, or the reservoir is empty or not seated.
Do this next
Fill and reseat the reservoir exactly as the model manual directs, then make one normal brew attempt. Do not use another model's minimum-fill instruction.
Why this path and its safety boundary
Why it matters: The control is reporting a water condition even though the coffee maker has power.
-
PATH 02Next step
What you see
The reservoir is ready but the pod lid or brew head is not fully closed, or the manual shows a required brew command that has not been accepted.
Do this next
Close the assembly and issue the documented brew command once. If the control still does not change state, stop and use model-specific support.
Why this path and its safety boundary
Why it matters: The machine may be in a powered but not-ready state rather than a confirmed heating or pump failure.
-
PATH 03Next step
What you see
A documented water-only test flows normally but coffee does not brew.
Do this next
Follow the exact manual for the pod/filter and brew-head setup. Do not substitute a different pod or basket specification without model evidence.
Why this path and its safety boundary
Why it matters: The water path works under that model's test, so the preparation, pod, filter basket or coffee-specific path needs review rather than an immediate internal diagnosis.
-
PATH 04Next step
What you see
No water flows, flow remains partial after the exact cleaning/descaling procedure, or there is a leak, burning smell or repeated electrical trip.
Do this next
Unplug the machine if safe, leave it out of service and arrange manufacturer or qualified appliance service. Do not open the housing or guess at a pump, heater or valve.
Why this path and its safety boundary
Why it matters: The supported user-level path has not resolved the problem and continued operation could create a hot-water or electrical hazard.
Helpful context
Understand the symptom
The light is a status clue, not proof that brewing has started
Indicator behavior differs by coffee-maker family. In the opened Keurig guides, a brew button changes state during heating and brewing, while an add-water indicator can prevent brewing; the Mr. Coffee support examples likewise distinguish an illuminated Brew/Off button from the conditions needed to start a brew. Because the task has no brand or model, use the exact manual to identify what the light means before treating it as a failed heater or pump.
Start with the reservoir and brew-head conditions
The opened manufacturer guidance repeatedly points to water level, reservoir seating and a fully closed pod or brew head before internal diagnosis. These are external checks that can explain a light-on/no-brew symptom, but the shapes, minimum levels and lid controls are model-specific. Do not force a lid or substitute a pod-holder sequence from another machine.
Cleaning and descaling are conditional, not a universal reset
Keurig and Mr. Coffee materials identify a clogged brew path, needle or scale as possible reasons for partial or failed brewing, but their cleaning instructions are tied to their own pod assemblies and manuals. Use only the cleaning or descaling procedure published for the exact coffee maker. An illuminated light does not justify opening the housing or inserting a sharp tool into an unknown machine.
When checks do not resolve it
Need a professional?
Contact the manufacturer or a qualified appliance technician if the exact model's external checks and cleaning procedure do not restore brewing, or immediately for smoke, burning odor, sparks, a damaged cord, water near the outlet, abnormal electrical noise or repeated breaker/GFCI operation.
Safety scope: Do not open the housing, bypass a lid or pod interlock, insert sharp tools into an unidentified brew path, test live electrical parts, repeatedly reset a breaker, or continue hot-water tests after a leak or burning smell.
Have this ready
- Provide the full brand and model, the light's color and behavior, whether water flows in a documented water-only test, reservoir and brew-head status, any cleaning/descaling already performed, and any leak, smell, noise or breaker event.
Common questions
FAQ
Does an illuminated power light mean the coffee maker is working?
No. Manufacturer guides distinguish power or indicator illumination from a confirmed brew state. A machine can have power while waiting for water, a seated reservoir, a closed brew head or the correct brew command.
Can I run a cleaning cycle to see whether it starts brewing?
Only use a water-only or cleaning cycle if the exact model manual supports it and the appliance has no leak, burning smell or electrical warning. Do not apply a pod-brewer needle or descaling sequence to an unidentified machine.
Should I clean the needle or open the coffee maker?
Do not open the housing. A needle or brew-path cleaning step is model-specific; use it only when the exact manufacturer manual identifies that user-cleanable part and gives the procedure. Otherwise use service.
What should I tell service when the light is on but no coffee brews?
Give the brand and model, the light behavior, reservoir and brew-head status, whether a documented water-only test flowed, the cleaning or descaling history, and any smell, leak, abnormal noise or electrical trip. Do not diagnose a pump or heater from the light alone.
Read the exact guide
Official sources
- Support and FAQs for BVMC-KG6 Coffee MakerMr. Coffee · Opened model-specific support page used conditionally for reservoir water, securely closed brew head, illuminated Brew/Off state and model-specific cleaning/descaling; not evidence for other machines' controls.
- Support and FAQs for BVMC-KG5 Coffee MakerMr. Coffee · Opened model-specific support page used conditionally for water level, brew button/heating indicator, partial flow and needle/descaling warnings; no KG5 part or procedure is generalized to unidentified machines.
- Keurig K10 Use and Care GuideKeurig · Opened model-specific Keurig guide used to show that indicator states, reservoir conditions, brew-head reset, partial flow, descaling and service thresholds vary by model; no K10 sequence is presented as universal.
- Keurig Platinum B70 User GuideKeurig · Opened model-specific Keurig guide used only as a conditional pod-brewer example for reservoir seating, brew-head state, add-water behavior, cleansing, descaling and service escalation; it is not universal coffee-maker guidance.
Community feedback
Share a repair observation
Share a plain-text repair observation. Accepted observations are published automatically; this page may take a moment to update.