
On this page
Start here
Quick answer
First determine what not completing means on your Crosley dryer: it may stop early while clothes are damp, stop completely during a cycle, or keep tumbling after the display says the cycle is complete. For an early stop, check the load size and moisture-sensing behavior, clean the lint screen, and confirm the vent moves air. For a normal post-cycle tumble, turn off the Extended Tumble or Wrinkle Prevent option if your model has it. If the dryer stops with a burning odor, visible damage, repeated breaker trips, or no airflow, stop using it and arrange qualified service.
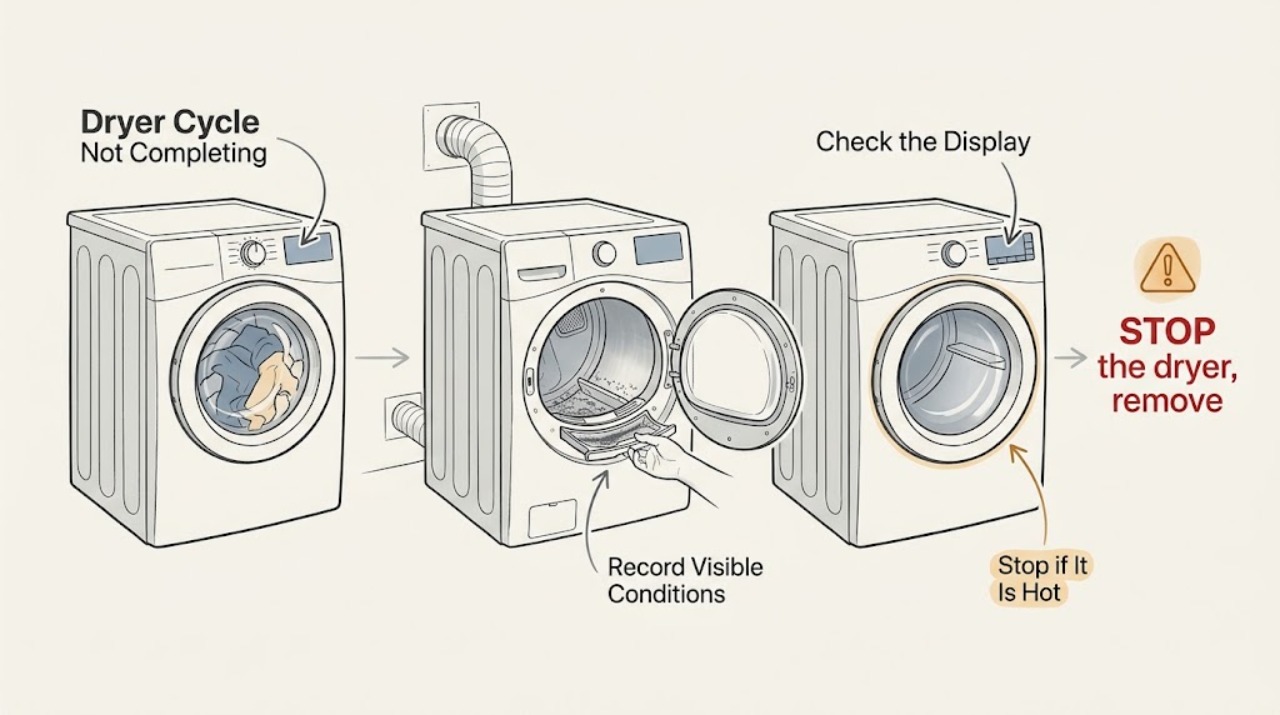
Work through in order
Diagnostic checks
Use only checks that match the exact appliance or system and its official guide.
-
Check 1
Run one load observation and classify the symptom: note whether the dryer stops before the clothes are dry, stops completely in mid-cycle, or continues to tumble after the display says Complete. Record the selected cycle, dryness setting, load size, and whether the door was opened during the cycle.
Expected result: An early stop with damp clothes points toward sensing, load contact, airflow, or a selected cycle. Continued tumbling after Complete points toward an end-of-cycle option. A full stop with wet clothes points toward power, door, start, heat, or service conditions.
Next step: Follow the branch that matches the observed timing, starting with the cycle and load check for an early stop.
Why this matters
Why: The symptom timing determines which checks can change the result; treating every non-completion complaint as a failed timer can lead to the wrong repair.
-
Check 2
For an early stop with a small load or damp collars and waistbands, redistribute the items so they can tumble freely and choose Timed Dry for the test. If the model uses Sensor Dry or Auto Dry, adjust the Dry Level only according to the available control settings.
Expected result: If Timed Dry completes while the sensor cycle ended early, the load was not giving the sensor a reliable moisture signal or the selected dryness was reached for most of the load. If both cycles stop early, continue to the lint and airflow check.
Next step: Use a correctly sized, loosely loaded test load. If it still stops early or never advances, inspect the lint screen and vent before requesting service.
Why this matters
Why: Crosley explains that very small loads and partially dry loads can make automatic sensing end before damp edges are dry; a timed test separates that behavior from a general stop fault.
-
Check 3
Stop the dryer, remove the lint screen, and clean it as directed for the model. Reinstall it firmly. Then check the accessible exhaust hood and the visible vent path for lint, crushing, kinks, or an obstruction; with the dryer operating normally and no safety concern, confirm that air exits at the outside hood.
Expected result: A screen coated with lint or residue, a crushed vent, or little air movement at the outside hood indicates restricted airflow. Strong airflow with a clean screen makes a load or control selection more likely than a simple vent blockage.
Next step: Clear only user-accessible lint and restore a correctly routed vent. If the vent requires cabinet disassembly, roof access, or internal service, stop and use a qualified technician.
Why this matters
Why: Restricted airflow increases drying time and can make the dryer stop before the load is completely dry or trigger overheating protection; it should be corrected before diagnosing internal parts.
-
Check 4
If the dryer keeps tumbling after the display says Complete, inspect the control for Extended Tumble, Wrinkle Prevent, or a similarly named end-of-cycle option and turn it off for one test if the model allows it. Do not confuse a cool-down or intermittent no-heat tumble with a continuing heated cycle.
Expected result: The drum periodically starts and stops without heat when an end-of-cycle tumble feature is active. The dryer should stop that behavior when the option is disabled or the door is opened, depending on the model.
Next step: If the drum continues heating, runs continuously, or ignores the option, stop using the dryer and arrange service rather than bypassing a control.
Why this matters
Why: Continued no-heat movement after completion can be an intentional wrinkle-prevention feature rather than a timer that failed to advance.
-
Check 5
If the dryer stopped completely after the door was opened, close the door fully, select a new dry cycle, and press Start as required by the control design. If the panel is dark, check the appliance plug and the household breaker or fuses without opening the appliance or measuring live power.
Expected result: A new cycle that starts after the door is closed and reselected indicates an interrupted cycle, not necessarily a failed part. A dead panel, repeated breaker trip, or drum that never restarts points to an electrical or control fault.
Next step: If the breaker trips again, the plug or cord is damaged, or the dryer will not restart with stable household power, stop and arrange qualified electrical or appliance service.
Why this matters
Why: Crosley instructions require a cycle to be selected again after an interrupted load on some models, while power interruptions can stop the dryer independently of the sensing system.
-
Check 6
If clothes remain wet and the dryer becomes unusually hot, stop the cycle and check only the outside of the vent system and lint screen. Do not continue repeated test cycles with blocked airflow, and do not open the cabinet to inspect a thermal fuse, motor, heater, or wiring.
Expected result: A hot cabinet, burning odor, smoke, little exhaust air, or a repeated safety shutdown is abnormal. A clean, open vent with normal temperature but a persistent stop still requires an internal diagnosis.
Next step: Leave the dryer off and arrange qualified service. Give the technician the cycle selected, when it stopped, whether the load was hot or damp, and what the outside vent was doing.
Why this matters
Why: Overheating and an internal safety or drive fault can look like a cycle that simply fails to complete; continuing to run it can add fire or equipment risk.
Use your observations
Decision map
Find the observation that best matches what you see, then follow the next safe action.
-
PATH 01Next step
What you see
The dryer stops early only with a very small load or damp edges, while Timed Dry completes.
Do this next
Use a suitable load size, allow items to tumble freely, and use Timed Dry for the small or unevenly damp load when appropriate.
-
PATH 02Next step
What you see
The lint screen is coated, the vent is crushed or blocked, or little air exits the outside hood.
Do this next
Clean the user-accessible screen and correct the accessible vent restriction. Use a qualified technician for internal or inaccessible duct cleaning.
-
PATH 03Next step
What you see
The drum tumbles without heat after the display says Complete.
Do this next
Turn off Extended Tumble or Wrinkle Prevent for a test if available; this may be normal end-of-cycle behavior.
-
PATH 04Next step
What you see
The dryer stopped after the door was opened or a cycle was interrupted.
Do this next
Close the door, select a new dry cycle, and press Start. If it will not restart with stable power, arrange service.
-
PATH 05Next step
What you see
The dryer is hot, smells burnt, has smoke, repeatedly trips a breaker, or has no exhaust airflow.
Do this next
Stop using the dryer and arrange qualified appliance or electrical service. Do not bypass a safety device or continue test cycles.
Helpful context
Understand the symptom
Separate an early stop from a normal end feature
A sensor cycle is designed to stop when the selected dryness is sensed, so its displayed time can change with fabric, load size, and dryness setting. A small load may not contact the sensing area consistently and can end while collars or waistbands are still damp. By contrast, Extended Tumble or Wrinkle Prevent can periodically tumble without heat after the drying portion ends. These are different decisions: improve sensing and airflow for an early stop, or change the end feature when the load is already dry.
Dryer safety
Keep the lint screen installed and do not run the dryer with a loose, damaged, blocked, or missing screen. Do not reach into a moving drum. If you smell gas, smoke, or a strong burning odor, stop the appliance, leave the area when appropriate, and get qualified help. Cleaning inside the cabinet or exhaust duct is a service task when it requires disassembly.
When checks do not resolve it
Need a professional?
Qualified appliance service is appropriate when a Crosley dryer still stops early after the load, lint screen, vent, and cycle settings are corrected, or when the dryer has an electrical, heating, motor, or safety symptom.
Common questions
FAQ
Why does my Crosley dryer stop before the clothes are dry?
A small or loosely contacting load can make a sensor cycle end early. Try a suitable load, clean the lint screen, check accessible exhaust airflow, and use Timed Dry for a small load when appropriate. If every cycle stops early, service may be needed.
Why does my Crosley dryer keep tumbling after it says Complete?
Extended Tumble or Wrinkle Prevent may periodically tumble the load without heat after the drying portion ends. Turn that option off for a test if your model provides the control. Continuous heated operation is not the same and needs service.
Can a blocked vent make a Crosley dryer stop before the cycle ends?
Yes. Crosley identifies a clogged lint screen or restricted exhaust as causes of longer drying and incomplete drying. Clean the user-accessible screen, check the outside hood for airflow, and use qualified help for inaccessible duct or cabinet work.
What should I do if the Crosley dryer stops after I open the door?
Close the door, select a new dry cycle, and press Start as required by the model. If the dryer will not restart, the panel is dead, or the breaker trips again, stop and arrange qualified service.
Read the exact guide
Official sources
- Dryer Owner's ManualCrosley · Crosley owner guidance for cycle interruption, small loads, damp clothes, leveling, lint care, and safe service boundaries.
- Electric or Gas Dryer Use and Care GuideCrosley · Crosley guidance for sensor and timed cycles, early cycle completion, lint screens, exhaust airflow, end-of-cycle tumble, power, and service boundaries.
- Quick Start Guide Crosley DryerCrosley · Crosley guidance for cycle selection, Automatic Dry sensing, Timed Dry, Wrinkle Control, and the Start control.
Community feedback
Share a repair observation
Share a plain-text repair observation. Accepted observations are published automatically; this page may take a moment to update.