
On this page
Start here
Quick answer
Some frost or ice crystals can follow humid air, frequent door opening, warm or uncovered food, or a package touching the freezer wall. Heavy frost is different: on a frost-free Crosley refrigerator it commonly points to a door that is not sealing, blocked airflow, or a defrost/air-circulation fault. First identify whether the exact model is manual-defrost or frost-free, then check only the visible door closure, gasket, food clearance, vents, settings, and moisture sources. If the model's manual allows manual defrost, unplug it and let the frost melt naturally with towels or a pan; do not chip ice with a knife, screwdriver, or other sharp tool and do not use a hair dryer, heat gun, boiling water, or other heat source. A manual-defrost guide for one Crosley model uses a 3–5 mm layer as a defrost cue, but that threshold must not be applied to every model. If frost returns quickly after a complete safe thaw, covers the rear wall or vents, the refrigerator temperature rises, the door or gasket is damaged, or diagnosis would require panels or live electrical work, leave the appliance to the exact model's instructions and arrange qualified service.
Before you begin
Safety first
- Owner checks stop at visible door, gasket, load, vent, moisture, model, and safe natural-thaw observations permitted by the exact manual. Qualified service must handle evaporator covers, fans, defrost heaters, sensors, drains, controls, refrigerant circuits, wiring, and live testing.
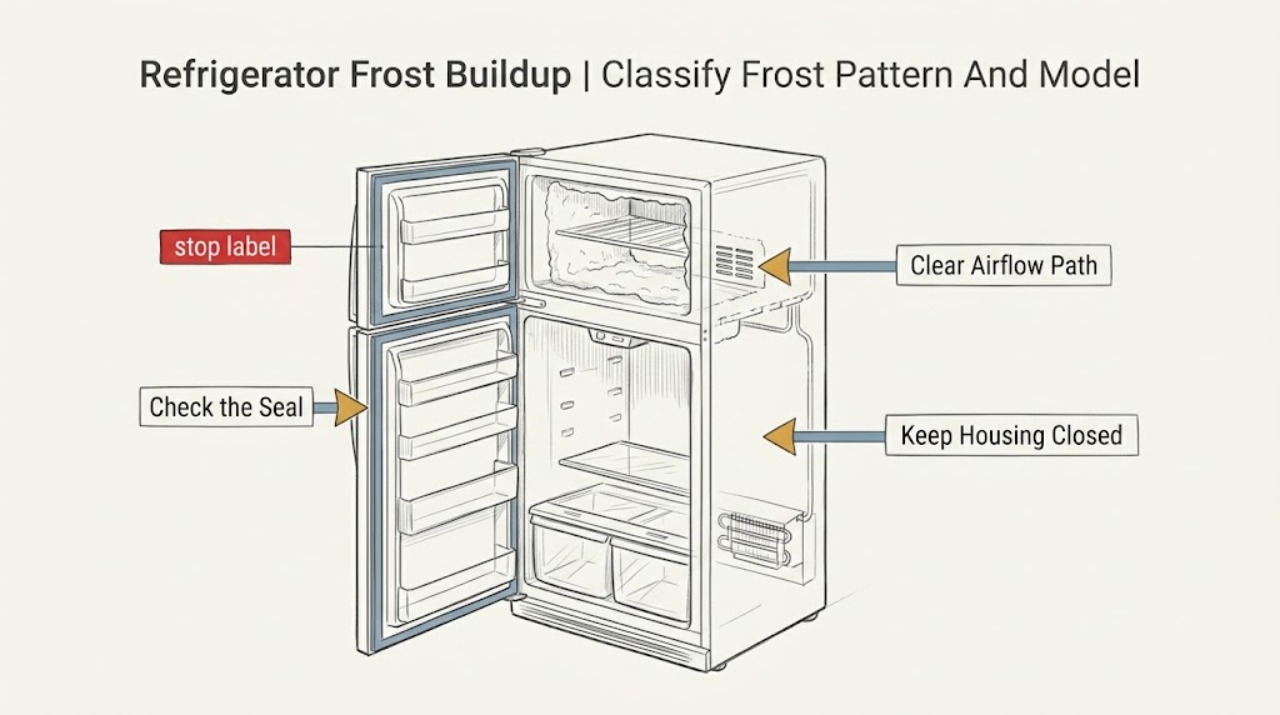
Work through in order
Diagnostic checks
Use only checks that match the exact appliance or system and its official guide.
-
Check 1
From the outside label, paperwork, or a support account, identify the exact Crosley model. Without scraping the ice, observe whether the frost is a few crystals on packages, a thick layer on the freezer wall, concentrated around the door opening, or covering the rear wall and air outlets; note whether the manual calls the refrigerator manual-defrost or frost-free.
Expected result: The frost is light and localized, thick around the door edge, spread over a wall or vent, or the appliance's defrost type is unknown.
Next step: Use the exact manual for the model type, then continue with visible door, gasket, load, and vent checks. Do not choose a defrost method from a different Crosley model.
Stop if: Do not chip, puncture, pry, or heat the ice to reveal the surface or model label.
Why this matters
Why: Light localized crystals can reflect moisture entering during normal use. A door-edge pattern makes a seal or closure problem more likely, while a broad rear-wall or vent pattern on a frost-free model makes airflow or automatic defrost more likely. An unknown model type means no manual-defrost threshold should be assumed.
-
Check 2
Check the freezer and refrigerator doors or drawers from the front. Remove only a cool, loose package that is visibly stopping closure, and look at the gasket for a tear, split, loose section, fold, or gap against the cabinet. Keep the gasket and frame clean and dry with a soft cloth; do not force the door or reshape the seal with heat.
Expected result: A package or shelf prevents closure, the gasket does not contact evenly, the gasket is torn or loose, the door is misaligned, or the door closes and seals evenly.
Next step: Correct only the accessible obstruction and clean/dry the gasket. Do not keep operating with a torn gasket, damaged hinge, misaligned door, or a door that will not seal; arrange service or a model-confirmed gasket replacement.
Stop if: Do not tape the door shut, bend hinges, force the gasket, use a hair dryer or other heat, or remove door hardware unless the exact manual explicitly assigns that work to the owner.
Why this matters
Why: A closure obstruction, uneven contact, or damaged gasket lets warm humid air enter and makes frost around the opening more likely. A visibly even seal makes a blocked vent, moisture load, or defrost/airflow fault more plausible, but it does not prove the seal is perfect under operation.
-
Check 3
With the doors open only as needed, check that packages are not pressed against the freezer rear wall or blocking visible air outlets, shelves and bins are seated, warm food is covered and cooled as appropriate, and containers are closed. Note frequent or prolonged door opening and any unusually humid room conditions.
Expected result: Food touches the rear wall or vents, containers are uncovered, warm food was recently loaded, the door is opened frequently, or no loading/moisture obstruction is visible.
Next step: Rearrange only accessible items to preserve the model's vent clearance, cover moisture-laden food, minimize door-open time, and observe whether the pattern stops growing. Do not remove interior covers to reach a hidden vent or fan.
Stop if: Do not use a tool to clear a vent, touch a fan or heater, or dismantle shelves, covers, or ducting to reach ice.
Why this matters
Why: Contact with a cold wall, blocked air path, and added moisture can create localized or temporary frost without proving a failed part. If those causes are corrected but a frost blanket or rising temperature remains, a seal or internal defrost/air-circulation issue becomes more likely.
-
Check 4
If the exact Crosley manual identifies a manual-defrost design and permits owner defrosting, remove food, unplug the refrigerator, let the frost melt naturally while the doors are positioned as the manual directs, and place towels or a pan to catch water. If the model is frost-free or the manual is unavailable, do not scrape or heat the ice; keep the appliance closed as much as practical and arrange model-specific guidance.
Expected result: The exact manual confirms manual defrost, the model is frost-free, the manual is unavailable, water is melting safely into a towel or pan, or water threatens flooring or nearby furniture.
Next step: Follow only the exact manual, monitor meltwater, and dry the area after thawing. Stop if the manual cannot be confirmed, water spreads, food cannot be kept safe, or the frost does not release naturally; arrange service.
Stop if: Never use a knife, screwdriver, pointed scraper, hair dryer, heat gun, boiling water, open flame, or other heat source, and do not pierce the freezer surface.
Why this matters
Why: Natural thaw is an appropriate owner step only for a model and procedure that support it. Frost-free models with heavy recurring ice may have an airflow or automatic-defrost problem; water that cannot be contained is a property-damage risk, not a reason to use heat or sharp tools.
-
Check 5
After the visible cause is corrected or the exact manual's safe thaw is complete, monitor the frost pattern and compartment temperature without opening panels. Record how quickly frost returns, whether the rear wall or vents ice over again, whether the door seal remains even, and whether food is becoming warmer than expected.
Expected result: Frost stops growing, returns rapidly, returns across the rear wall or vents, appears only at the door edge, or occurs with a rising compartment temperature or a non-running internal fan sound.
Next step: Leave the refrigerator at the model's documented settings and arrange qualified service for rapid recurrence, poor cooling, or suspected internal fan/defrost trouble. Do not keep repeating thaw-and-restart cycles as a substitute for diagnosis.
Stop if: Do not remove the evaporator cover, test a heater or fan live, bypass a thermostat or sensor, or continue operation if wiring, refrigerant lines, or electrical parts are exposed.
Why this matters
Why: A stable pattern after correcting moisture or closure points toward an environmental or loading cause. Rapid recurrence, broad frost on a frost-free cabinet, reduced cooling, or suspected fan/defrost behavior makes an internal airflow, sensor, heater, drain, or control fault more likely and cannot be confirmed safely from outside.
Use your observations
Decision map
Find the observation that best matches what you see, then follow the next safe action.
-
PATH 01Safety boundary
What you see
Only a small amount of frost or crystals is present after frequent door opening, humid conditions, or warm/uncovered food, with an even door seal and clear vents.
Do this next
Cover food, shorten door-open time, keep packages clear of the rear wall and vents, and monitor the pattern without scraping or heating the frost.
Why this path and its safety boundary
Why it matters: Moisture entering during normal use is more likely than a failed defrost component, and the pattern may stop after the moisture source is reduced.
Safety stop: Escalate if frost becomes a thick layer, returns quickly, blocks vents, or temperatures rise.
-
PATH 02Safety boundary
What you see
Frost is concentrated around the freezer door or drawer opening and a package, shelf, gasket, hinge, or alignment issue prevents a uniform seal.
Do this next
Remove only the accessible obstruction and clean/dry the gasket. Arrange service or a model-confirmed gasket repair if the seal is torn, loose, misaligned, or still uneven.
Why this path and its safety boundary
Why it matters: Warm humid air is likely entering at the closure, so correcting the visible obstruction or cleaning the gasket is more relevant than adjusting a defrost part.
Safety stop: Do not force, tape, bend, heat, or dismantle the door assembly.
-
PATH 03Safety boundary
What you see
A frost blanket covers the rear wall or air outlets of a frost-free Crosley refrigerator, frost returns soon after a safe thaw, or the refrigerator temperature rises.
Do this next
Keep vents unobstructed and arrange qualified refrigerator service. If the exact model manual permits a natural thaw, follow it once while protecting food and flooring; do not repeat thaw cycles or open internal covers.
Why this path and its safety boundary
Why it matters: An internal airflow, fan, drain, sensor, heater, or control issue is more likely after visible closure, load, and moisture causes are excluded; the exact failed part cannot be identified safely by scraping or resetting.
Safety stop: Do not chip ice, apply heat, remove the evaporator cover, test live wiring, or bypass a defrost or temperature control.
-
PATH 04Safety boundary
What you see
The exact manual identifies a manual-defrost Crosley model and the frost has reached its stated defrost cue, or melting water cannot be contained safely.
Do this next
Unplug and allow natural melting only as the exact manual directs, with towels or a pan, then dry and restore operation only according to that manual. Call service if the procedure is unavailable, the surface is pierced, the frost rapidly returns, or water spreads.
Why this path and its safety boundary
Why it matters: Natural manual defrost may be the intended maintenance step, but the owner's procedure and threshold are model-specific. Water damage, a pierced surface, or frost that will not melt naturally is a service boundary.
Safety stop: Do not use sharp tools, a hair dryer, heat gun, boiling water, open flame, or any other heat source.
Helpful context
Understand the symptom
First separate light crystals from a frost blanket
A few crystals after a door opening, humid weather, or warm uncovered food can be a moisture response. Crosley guidance identifies a door that is not sealed, packages preventing closure, restricted freezer vents, and uncovered food as common frost contributors. Frost that forms a thick layer, returns soon after thawing, or covers the rear wall of a frost-free cabinet changes the next step toward a seal, airflow, or defrost-system diagnosis.
The model determines whether manual defrost is appropriate
Crosley appliances are not all the same. The opened BCD118 guide is for a small manual-defrost refrigerator and says to unplug it and allow frost to melt when the stated layer is reached. A different Crosley refrigerator guide describes automatic defrost as part of normal operation. Do not copy a threshold, control position, or defrost sequence from one model to another; use the exact model or product code and its manual.
Sharp tools and heat turn frost into a repair
Never attack a frost layer with a knife, screwdriver, scraper with a sharp edge, or any pointed object. The Crosley BCD118 manual warns that freezer refrigerant lines can be pierced. Do not speed melting with a hair dryer, heat gun, boiling water, or another heat source. If safe defrosting cannot be completed using the exact manual's natural-melt procedure, stop and arrange service.
Safety boundary
Stop conditions
- Do not use a knife, screwdriver, pointed scraper, or any sharp object on freezer ice; a pierced refrigerant line can make the refrigerator inoperable.
- Do not use a hair dryer, heat gun, boiling water, open flame, or another heat source to accelerate defrosting.
- Unplug before any model-approved manual defrost or cleaning, and keep water contained and away from flooring, furniture, outlets, and cords.
- Do not remove interior covers, touch a fan or heater, bypass a sensor or thermostat, or perform live electrical or sealed-system work.
- Arrange qualified service for heavy frost on a frost-free model, rapid recurrence after a safe thaw, poor cooling, damaged door sealing, exposed wiring or refrigerant lines, or any condition that cannot be addressed using the exact model manual.
Only after diagnosis
Potential parts
- refrigerator or freezer door gasket
Consider this category only when the exact model's gasket is visibly torn, split, loose, or unable to contact the cabinet evenly after accessible obstructions are removed; frost alone does not identify a gasket.
Confirm the complete Crosley model and the manufacturer's fit information before ordering; door seals are model-specific.
When checks do not resolve it
Need a professional?
Safety scope: Owner checks stop at visible door, gasket, load, vent, moisture, model, and safe natural-thaw observations permitted by the exact manual. Qualified service must handle evaporator covers, fans, defrost heaters, sensors, drains, controls, refrigerant circuits, wiring, and live testing.
Common questions
FAQ
Is a small amount of frost in a Crosley freezer always a fault?
No. Humid air, frequent door opening, warm or uncovered food, and packages touching the wall can create limited crystals. A thick or rapidly recurring layer, blocked vents, rising temperature, or an uneven door seal needs a different diagnosis.
Can I scrape Crosley freezer ice with a knife or melt it with a hair dryer?
No. Crosley's manual warns against sharp or pointed tools because they can pierce refrigerated gas lines. Do not use a hair dryer, heat gun, boiling water, or another heat source; use only the exact model manual's natural-thaw procedure or call service.
How do I know whether manual defrost applies to my Crosley refrigerator?
Check the exact model or product code and its manual. One Crosley BCD118 guide specifies manual defrost at a 3–5 mm frost layer, while other Crosley refrigerator documentation describes automatic defrost; do not transfer that threshold to another model.
When does frost buildup require service?
Arrange service when frost returns quickly after a permitted safe thaw, covers the rear wall or vents of a frost-free model, the refrigerator warms, the door cannot seal, water threatens the floor or electrical parts, or diagnosis would require opening a panel or testing an internal component.
Read the exact guide
Official sources
- CROSLEY FRIDGE FREEZER User ManualCrosley · Opened official Crosley use-and-care PDF; control, defrost, and troubleshooting details vary by model.
- BCD118Crosley · Opened official Crosley PDF for the BCD118 model; the defrost threshold and procedure are model-specific examples, not universal Crosley instructions.
- Troubleshooting Tips... Before you call for serviceCrosley · Opened official Crosley refrigerator troubleshooting PDF; examples concern the listed refrigerator family and general frost patterns, not every Crosley model.
Community feedback
Share a repair observation
Share a plain-text repair observation. Accepted observations are published automatically; this page may take a moment to update.