
On this page
Start here
Quick answer
Some frost is expected in a manual-defrost Danby freezer, but heavy or recurring buildup needs a cause check. First determine whether the unit is manual-defrost or frost-free, then inspect from ordinary access for a door that does not close or seal, frequent opening, warm food, blocked air passages, or a temperature setting outside the model guidance. If it is a manual-defrost model and the frost is obstructing storage or airflow, unplug it, move food to insulated temporary storage, let the ice soften, and use only the model-approved plastic or wooden tool; never use a knife, ice pick, sharp object, or an unapproved heat or electrical appliance. If frost returns quickly after a complete, safe defrost, appears on a frost-free model, the seal is damaged, water escapes, food has thawed, or the liner or refrigerant path may have been punctured, stop and arrange qualified appliance service.
Before you begin
Safety first
- This article covers visual checks, ordinary closure and loading observations, and a model-approved manual defrost with non-sharp tools only. Sealed-system work, electrical repair, panel removal, refrigerant handling, liner repair, and forced ice removal require qualified service.
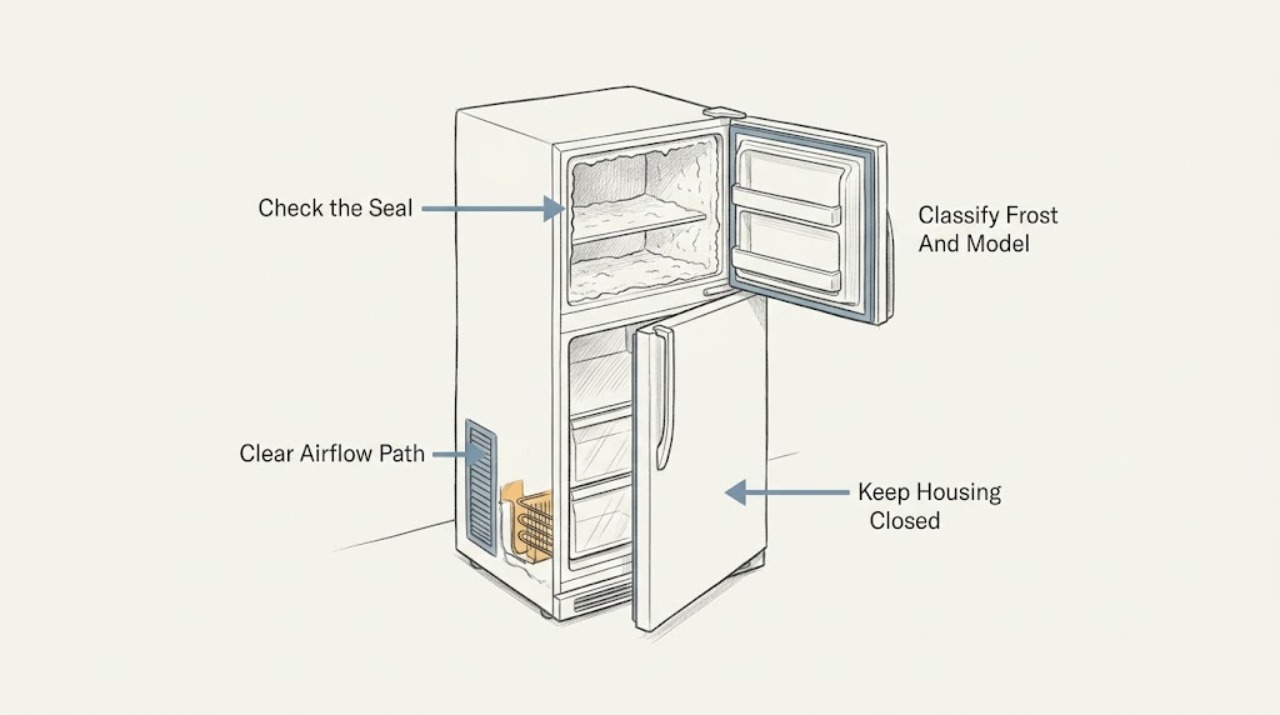
Work through in order
Diagnostic checks
Use only checks that match the exact appliance or system and its official guide.
-
Check 1
From a dry, stable position, photograph the frost pattern and identify from the rating label or owner guide whether the Danby freezer is manual-defrost or frost-free; do not chip ice or remove interior panels to identify the design.
Expected result: Frost is a thin gradual layer on a manual-defrost unit, a thick layer that restricts space or airflow, concentrated around the door edge or one wall, or recurring on a frost-free unit.
Next step: Continue to the closure and usage check. If the model is frost-free and has heavy recurring frost, preserve the photos and arrange qualified service instead of starting repeated manual defrosts without the model guide.
Stop if: Stop for a punctured liner, visible refrigerant or oil residue, water near electrical components, unstable flooring, or any need to remove a panel.
Why this matters
Why: Gradual frost on a manual-defrost unit supports routine defrosting. Door-edge frost suggests warm air entering at the closure, while rapid or frost-free buildup needs a defrost, airflow, or sealing assessment rather than a certain diagnosis from appearance alone.
-
Check 2
Close the empty door or lid normally and inspect the visible gasket, frame, hinges, and nearby packages for gaps, folds, dirt, frost interference, or an item preventing full closure; clean only the accessible sealing surface with a soft method allowed by the manual.
Expected result: The gasket contacts evenly and the door closes fully; a package or ice prevents closure; the gasket is split, loose, deformed, or not contacting; or the hinge or frame is damaged.
Next step: Remove only an obvious package obstruction and dry the accessible seal, then close the unit and monitor the pattern. If the seal, frame, or hinge is damaged or frost returns at the same edge, arrange service and do not force the door.
Stop if: Do not stretch, cut, glue, heat, or replace the gasket by appearance, and do not force a door or lid against ice or a misaligned hinge.
Why this matters
Why: An obstruction or poor seal can admit warm moist air and create localized frost. A sound visible seal does not rule out alignment or hidden damage, and a damaged hinge or frame is not a user adjustment target.
-
Check 3
Review the frost timeline and inspect the interior arrangement without disturbing a heavy ice layer: note frequent opening, warm or steaming food, recent large loading, blocked vents, or food pressed against the wall or door; follow the exact manual for the intended temperature setting.
Expected result: Frost began after frequent opening or warm food, food blocks an air passage, the cabinet is overloaded, or none of these patterns is present.
Next step: Move food away from visible vents and the liner without breaking ice, close the door promptly, avoid adding warm food, and monitor whether new frost slows. Keep a dated record if buildup continues.
Stop if: Do not force frozen packages out of ice, remove vents, alter the thermostat beyond the model guidance, or operate with food thawing or a damaged interior.
Why this matters
Why: Warm air and moisture can add frost, and blocked airflow or overloading can impair cooling. If no usage or loading change explains rapid frost, a seal or defrost-system issue remains possible and cannot be confirmed by rearranging food alone.
-
Check 4
If the model is manual-defrost and the frost is obstructing storage or airflow, unplug the freezer, move frozen food to insulated temporary storage, leave the door or lid open as the manual directs, place towels or a pan for meltwater, and let the ice soften before using only the specified plastic scraper or wooden tool.
Expected result: Ice softens and releases without force; water drains or can be contained; ice remains bonded and hard; or the liner, drain, cord, or cabinet shows damage.
Next step: Remove only loose ice with the approved non-sharp tool, dry the interior completely, replace any drain plug as the manual directs, and reconnect only when the model procedure is complete. Arrange service if safe defrosting cannot proceed.
Stop if: Never use a knife, ice pick, sharp object, electrical appliance, heat gun, or open flame to speed defrosting; stop if the liner or refrigerant path may have been pierced.
Why this matters
Why: Softening and controlled melt indicate a normal defrost path. Ice that will not release safely, a blocked or unknown drain, water near electrical parts, or damage means the documented procedure cannot be completed safely.
-
Check 5
After a complete model-approved defrost, dry the cabinet and seal, restore food without blocking airflow, reconnect according to the manual, and record the date and location of any new frost; do not keep restarting the freezer if food is thawing or the cabinet is damaged.
Expected result: Frost does not return unusually, frost quickly reforms in the same area, the unit is frost-free but ices over again, the door does not seal, or food temperature cannot be maintained.
Next step: Keep the unit closed as much as practical and arrange qualified appliance service for recurrence, sealing damage, or cooling concerns; move food to safe alternate storage if its condition is uncertain.
Stop if: Stop using the unit for a suspected refrigerant leak, punctured liner, exposed wiring, burning odor, water intrusion, or food that has become unsafe to keep.
Why this matters
Why: A stable result supports a maintenance or usage contribution. Fast recurrence or a frost-free failure points to a seal, airflow, defrost, or cooling fault that requires diagnosis; food thawing changes the urgency because safe storage may no longer be assured.
Use your observations
Decision map
Find the observation that best matches what you see, then follow the next safe action.
-
PATH 01Safety boundary
What you see
The unit is manual-defrost and frost accumulated gradually without a damaged seal or cooling symptom.
Do this next
Complete the model-approved unplugged defrost with food protection and a non-sharp tool, then reduce warm-air entry through the door and loading habits.
Why this path and its safety boundary
Why it matters: The frost is consistent with a maintenance defrost rather than proof of a component failure.
Safety stop: Do not scrape with sharp objects or restart while the interior is wet or the food condition is uncertain.
-
PATH 02Safety boundary
What you see
Frost is concentrated around the door or lid edge, and closure, gasket, hinge, or package interference is visible.
Do this next
Remove only an obvious obstruction, clean and dry the accessible seal, and monitor. Request service if the gasket is split, loose, deformed, or still fails to contact evenly.
Why this path and its safety boundary
Why it matters: Warm moist air may be entering at the closure, although a visible inspection cannot prove gasket alignment or hidden frame damage.
Safety stop: Do not bend, glue, heat, cut, or force the gasket, hinge, door, or lid.
-
PATH 03Safety boundary
What you see
Buildup followed frequent opening, warm food, large loading, or blocked interior airflow.
Do this next
Keep food cold before loading, open the door less often, restore the intended air passages, and record whether new frost slows after the safe defrost.
Why this path and its safety boundary
Why it matters: Additional warm moisture or restricted air movement can contribute to frost and uneven cooling, but it does not rule out a separate fault.
Safety stop: Do not force food out of ice, block vents, or change the temperature setting beyond the owner guide.
-
PATH 04Safety boundary
What you see
The unit is identified as frost-free or heavy frost reforms quickly after a complete approved defrost.
Do this next
Keep the door closed, document the pattern and food condition, and arrange qualified appliance service rather than repeatedly scraping or opening the cabinet.
Why this path and its safety boundary
Why it matters: The pattern is not explained by routine manual defrost alone and may involve sealing, airflow, defrost, or cooling service; appearance cannot identify the failed part.
Safety stop: Stop for food thawing, water intrusion, abnormal noise or odor, damaged liner, or exposed wiring.
-
PATH 05Safety boundary
What you see
Ice will not release without force, meltwater cannot be controlled, a drain is blocked or unknown, or the liner or cooling path may be damaged.
Do this next
Leave the freezer unplugged and protected from further damage, move food to safe alternate storage if needed, and arrange qualified service.
Why this path and its safety boundary
Why it matters: The user-safe defrost boundary has been reached; forcing ice can damage the liner or refrigerant lines and create a larger failure.
Safety stop: No knife, pick, sharp tool, heat source, electrical appliance, cabinet removal, or refrigerant work.
Helpful context
Understand the symptom
Decide whether this is expected manual-defrost frost
Danby distinguishes freezers that need regular manual defrosting from frost-free designs. A thin layer that accumulates gradually on a manual-defrost unit is a maintenance condition. Frost that returns rapidly, covers a frost-free unit, forms around the door edge, or follows a damaged seal is a reason to document the pattern and arrange assessment instead of repeatedly scraping the liner.
Warm air is the first pattern to investigate
Danby explains that frost forms when warm, moist air enters the cold cabinet. Frequent door openings, warm food, an incomplete closure, and a compromised seal can all increase that moisture load. Check the closure and everyday use from the outside, but do not bend the gasket, remove panels, or make a seal repair by guesswork.
Defrost without damaging the liner or cooling circuit
For a manual-defrost model, the safe sequence is to unplug, protect the food, allow ice to soften, collect meltwater, and use only the tool and drain procedure named in the model guide. Danby warns that sharp tools can damage the liner and refrigerant lines. A freezer that cannot be defrosted without force, or that has a puncture or leak, has reached the service boundary.
Safety boundary
Stop conditions
- Unplug before manual defrosting or cleaning, protect frozen food, and contain meltwater away from electrical parts.
- Never use a knife, ice pick, sharp object, electrical appliance, heat gun, or open flame to remove or melt frost.
- Do not puncture the liner, remove panels, access the sealed cooling system, or improvise a gasket, drain, or thermostat repair.
- Stop for a damaged liner, possible refrigerant or oil residue, exposed wiring, burning odor, water intrusion, or food that is thawing or unsafe.
- Arrange service when frost rapidly returns, appears on a frost-free unit, the door cannot seal, or safe defrosting requires force.
When checks do not resolve it
Need a professional?
Arrange qualified appliance service when frost returns quickly after a complete model-approved defrost, accumulates on a frost-free Danby unit, concentrates at a damaged or poorly closing seal, cannot be removed without force, is accompanied by water, abnormal cooling, food thawing, damaged liner, or exposed wiring, or requires access to a panel, drain, sealed cooling system, or electrical component.
Safety scope: This article covers visual checks, ordinary closure and loading observations, and a model-approved manual defrost with non-sharp tools only. Sealed-system work, electrical repair, panel removal, refrigerant handling, liner repair, and forced ice removal require qualified service.
Common questions
FAQ
Is frost buildup normal in a Danby freezer?
Some gradual frost is expected in a manual-defrost unit. Heavy, rapid, door-edge, or recurring frost on a frost-free unit needs a seal, airflow, defrost, or cooling assessment rather than repeated scraping.
What causes a Danby freezer to frost up?
Danby points to warm moist air entering during door openings, warm food, an incomplete seal, and a need for regular defrosting on non-frost-free units. Blocked airflow or a unit fault can also require model-specific assessment.
How do I safely defrost a Danby freezer?
Follow the exact model guide, unplug the freezer, protect the food in insulated temporary storage, allow ice to soften, contain meltwater, and use only an approved plastic or wooden tool. Never use a knife, ice pick, sharp object, electrical appliance, or open flame.
Why does frost return after I defrost the freezer?
Check whether the door closes and seals, whether warm food or frequent opening preceded the buildup, and whether the unit is frost-free. Rapid recurrence after a complete safe defrost should be documented and assessed by qualified appliance service.
When should I call for Danby freezer service?
Call when frost rapidly returns, appears on a frost-free unit, the gasket or hinge is damaged, food is thawing, water or abnormal cooling is present, the liner may be punctured, or ice cannot be removed without force. Do not open the sealed system or improvise a repair.
Read the exact guide
Official sources
- OPERATING INSTRUCTIONSDanby · Official Danby freezer manual used for safety boundaries and an example of model-specific defrost controls; the assigned model's manual takes precedence.
- How to Defrost a FreezerDanby Canada · Official Danby general defrost guide; the exact model manual controls whether a drain and which scraper or drain steps are present.
- The freezer is frosting up. How can I prevent this?Danby USA · Official Danby freezer FAQ applicable as general prevention guidance; the exact owner guide controls the unit's defrost design and settings.
Community feedback
Share a repair observation
Share a plain-text repair observation. Accepted observations are published automatically; this page may take a moment to update.