
On this page
Start here
Quick answer
Stop the cycle if a garment is torn, scorched, or smells burnt. With the dryer off, cool, and empty, identify whether the damage is a snag or a heat mark, then inspect the visible drum opening, lint-filter area, and door edge for a place where fabric can catch. Remove foreign objects, fasten zippers and hooks, reduce an overloaded load, and choose a cycle and temperature that match each care label. If damage repeats with a small, correctly prepared load, or you find a sharp edge, fabric caught under the drum edge, smoke, or a burning smell, leave the dryer out of service and arrange model-specific repair rather than opening panels or guessing at a part.
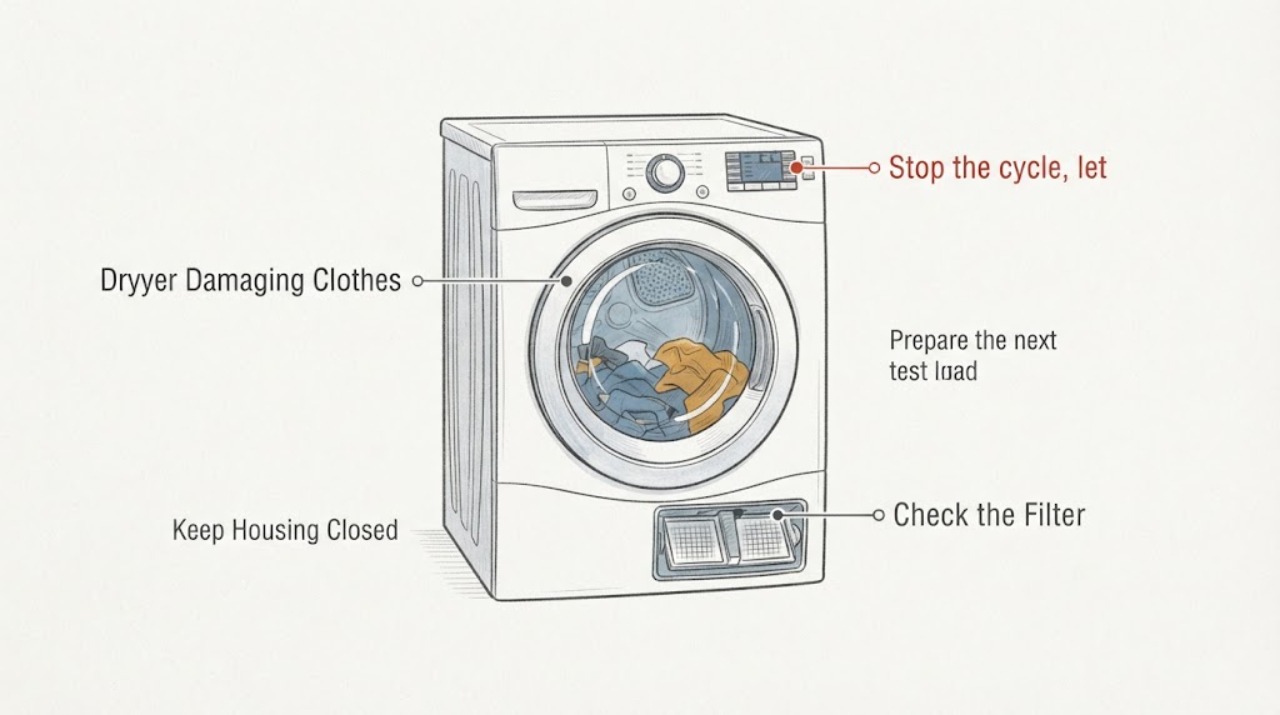
Work through in order
Diagnostic checks
Use only checks that match the exact appliance or system and its official guide.
-
Check 1
Stop the cycle, let the drum cool, and compare the damaged items with the pattern of damage: a pulled thread or hole, a black/brown mark, shrinkage, or an odor or residue.
Expected result: The damage is a localized snag or tear, a heat-like mark or odor, or a fabric change without a visible catch.
Next step: If there is smoke, a burning smell, or active scorching, keep the dryer off and move directly to service guidance. Otherwise continue only after the drum is cool.
Why this matters
Why: A localized snag directs the check toward a catch point or foreign object; a mark, odor, or shrinkage directs it toward heat, airflow, load size, or an unsuitable cycle. Do not assume all damage has the same cause.
-
Check 2
With the dryer unplugged or otherwise safely isolated and cool, remove the load and look from the drum opening around the visible drum edge, lint-filter or sensor area, door edge, and baffles for a loose object, fabric caught under an edge, or a visibly jagged surface. Do not run a hand over a suspected sharp edge.
Expected result: You find a coin, pin, paper, or other object; fabric is caught at the opening; or the dryer has a visible jagged or damaged area.
Next step: Remove only loose, clearly accessible objects without tools. If fabric is trapped, an edge is jagged, or the source cannot be safely removed from the opening, stop using the dryer and arrange service; do not scrape, bend, or dismantle the drum area.
Why this matters
Why: An object or catch point can create tears, holes, snags, or black marks. A damaged or jagged dryer surface is a repair condition rather than a normal load issue.
-
Check 3
Prepare the next test load according to the garment labels: empty pockets, close zippers and hooks, secure long straps, turn suitable garments inside out, and separate items that require different heat or drying treatment.
Expected result: The affected garment has a metal object, open fastener, loose strap, or a care label that does not permit the selected heat or tumble method.
Next step: Remove the unsuitable item from the dryer, correct the load preparation, and use the label-compatible cycle and temperature. Do not use a “test” cycle on another delicate garment if the original damage was severe.
Why this matters
Why: Loose hardware and attached accessories can damage other garments, while the wrong cycle or heat can damage heat-sensitive fabric even when the dryer is mechanically sound.
-
Check 4
For a correctly prepared load, reduce the quantity so items can tumble loosely, clean the lint filter, and check the visible exhaust connection or outside outlet for an obvious crushed or blocked path without disassembling ductwork.
Expected result: The drum was overfilled, the lint filter was clogged, or the visible exhaust path is restricted; or the load already had room and the filter and visible path were clear.
Next step: Correct the load and clean the user-maintainable filter before any further use. If heat marks or damage return after that correction, stop testing and request service rather than increasing the cycle temperature or time.
Why this matters
Why: An overloaded load can hold fabric against the back of the drum, and a clogged filter or restricted exhaust can raise dryer temperature. A clear filter and reasonable load make those explanations less likely but do not prove the dryer is sound.
-
Check 5
After the dryer is cool and the load has been corrected, decide whether the same damage repeats on a small, label-compatible load without a visible foreign object or catch point.
Expected result: The damage repeats, or the dryer makes scraping/rubbing sounds, becomes unusually hot, or produces smoke or a burning smell.
Next step: Stop using the dryer, disconnect power when safe to do so, and arrange manufacturer or qualified appliance service. Do not open panels, bypass a safety device, or continue running loads to locate the fault.
Why this matters
Why: A repeatable fault under a corrected load is not safely explained by garment preparation alone; a hidden drum, seal, airflow, or temperature problem may require model-specific diagnosis, but this symptom does not identify a particular part.
Use your observations
Decision map
Find the observation that best matches what you see, then follow the next safe action.
-
PATH 01Next step
What you see
The garment has a localized tear or snag and the inspection finds fabric caught near the lint-filter, sensor, drum edge, or another visible damaged surface.
Do this next
Keep the dryer out of service and have the exact model inspected; do not reach behind the opening or try to smooth or bend the suspected surface.
Why this path and its safety boundary
Why it matters: This pattern is consistent with a physical catch point, and GE says catching around these dryer areas is generally a service condition.
-
PATH 02Next step
What you see
The item has a black or brown mark, shrinkage, or a burnt odor, especially after a large load or with a clogged filter or visibly restricted exhaust.
Do this next
Stop heat use, correct only the user-maintainable load and filter conditions, and arrange service if any mark, odor, or overheating returns.
Why this path and its safety boundary
Why it matters: Heat or airflow conditions are plausible, and LG identifies care settings, lint restriction, duct restriction, and excessive load size as relevant checks for burning or discoloration.
-
PATH 03Next step
What you see
Damage occurs only with open zippers, hooks, loose straps, metal objects, or a cycle and temperature that do not match the garment label, and no dryer catch point is visible.
Do this next
Prepare the load as the label and manufacturer guidance require, use a suitable lower or no-heat option when specified, and monitor one small compatible load. Stop if damage recurs.
Why this path and its safety boundary
Why it matters: The clothing preparation or selected drying treatment is a stronger explanation than a confirmed mechanical failure, but it does not establish that the dryer is defect-free.
-
PATH 04Next step
What you see
The damage repeats with a small, correctly prepared load, or there is smoke, a burning smell, scraping, a jagged visible surface, or fabric trapped in the dryer.
Do this next
Leave the dryer unused and obtain model-specific professional service. Provide the model label, photos of the damage and visible drum area, the cycle and heat setting, and whether the load was gas or electric if known.
Why this path and its safety boundary
Why it matters: The remaining issue is outside safe user-level identification; a generic part recommendation or continued test cycle could worsen clothing or create a fire or injury hazard.
Helpful context
Understand the symptom
“Clothes getting damaged” describes several different patterns. A straight tear or repeated snag points toward fabric catching on the dryer opening or a foreign object; a brown or black mark, shrinking, or a burnt odor points toward heat, an unsuitable care setting, restricted airflow, or a load that is too large. The pattern determines whether a simple load correction is reasonable or the dryer should stay out of service.
The checks below are limited to an off, cool dryer and parts visible from the drum opening. They do not involve reaching behind panels, testing live wiring, scraping a suspected sharp edge, or running the appliance with damaged clothing or an unresolved burning smell.
When checks do not resolve it
Need a professional?
Stop and arrange service if clothes are caught, the drum opening or visible surface is jagged or damaged, damage repeats after load and cycle corrections, the dryer is unusually hot, or there is smoke or a burning smell. Do not operate it to reproduce a dangerous symptom.
Common questions
FAQ
Can a dryer damage clothes even when the dryer still runs?
Yes. A dryer can still tumble while fabric catches around a visible drum or filter area, or while heat, load size, airflow, or an unsuitable cycle damages clothing. A repeating snag or heat mark needs a service decision even if the motor continues to run.
Should I keep testing with another load?
Only after the dryer is cool and you have corrected the load preparation, filter, and clearly visible conditions. Do not test again after smoke, a burning smell, a jagged catch point, or repeatable damage; leave it off and arrange service.
Do I need a replacement drum or seal?
This symptom does not identify a specific part. A visible catch point or repeatable damage should be assessed against the exact model before any part is ordered; do not assume a similar-looking component fits.
Read the exact guide
Official sources
- LG Dryer - Troubleshooting Burning or DiscolorationLG Electronics USA · LG general dryer troubleshooting for clothing burns or discoloration, including care labels, lint filter, drum objects, exhaust restriction, load size, and service boundary.
- LG Direct Service BrochureLG Electronics USA · LG dryer care guidance on load size, lint filters, temperature/care instructions, over-drying, and exhaust maintenance; used only as general dryer-care evidence, not model-specific repair instructions.
- Dryer - Clothes Catching Around Filter, Sensor or DrumGE Appliances · GE dryer support guidance on clothing caught around the lint filter, sensor, or drum and when repair service is indicated.
- [LG Dryer] Clothes are damaged (torn or holes)LG Electronics USA · LG general dryer guidance on foreign objects, metal attached to clothing, zippers, hooks, straps, and preventing fabric damage; the page states it was created for all models.
- [LG Dryer] I want to know what drying cycle to choose in relation to the fabric of various laundry loadsLG Electronics USA · LG general dryer cycle selection by fabric type and model-dependent cycle behavior.
Community feedback
Share a repair observation
Share a plain-text repair observation. Accepted observations are published automatically; this page may take a moment to update.