
On this page
Start here
Quick answer
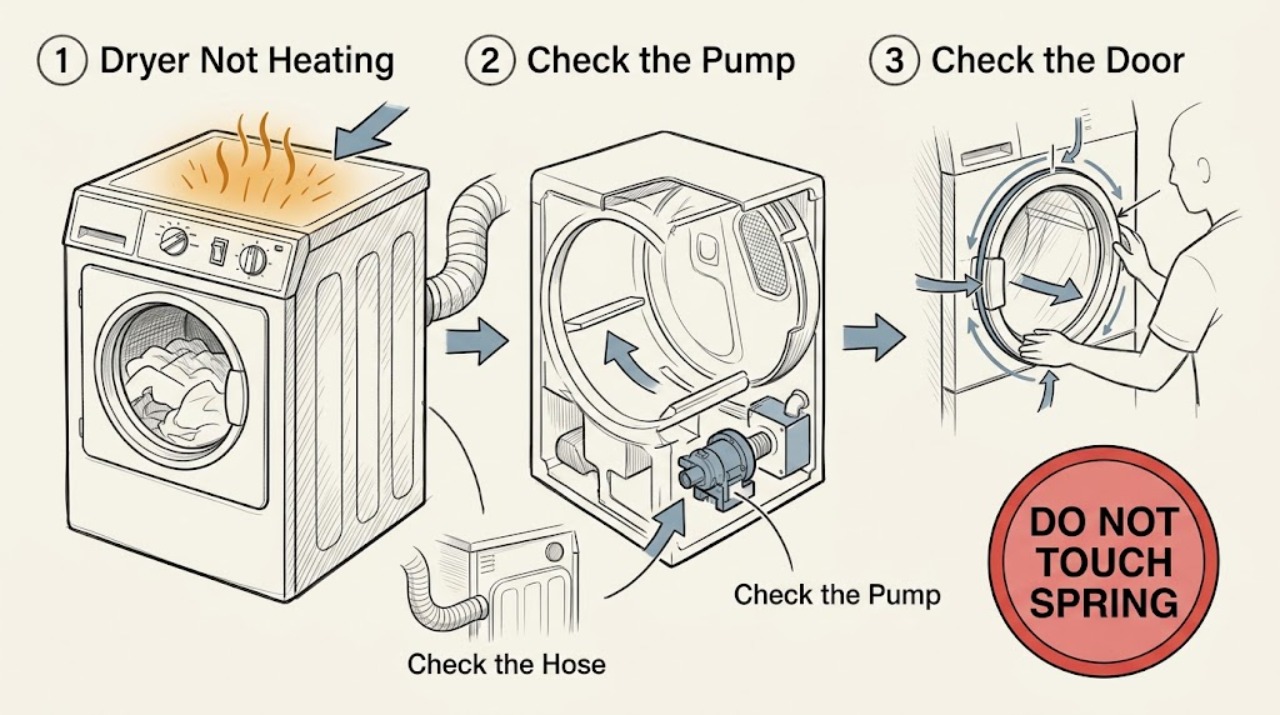
If a dryer is not heating, first confirm whether it is actually running a heated cycle or an Air, Air Fluff, No Heat, or cool-down cycle. Then check the load, lint screen, visible exhaust, and accessible power connection with the dryer off and cool. An electric dryer may tumble with only part of its supply available, while a gas dryer may tumble without heat when its fuel supply is interrupted; the exact manual determines the safe supply check. Condenser and heat-pump dryers use different airflow and water paths and can run at a lower-feeling temperature. Stop immediately for gas odor, smoke, burning smell, excessive heat, arcing, a hot or damaged connection, repeated breaker trips, or water near electrical parts.
Work through in order
Diagnostic checks
Use only checks that match the exact appliance or system and its official guide.
-
Check 1
Identify the dryer as electric, gas, vented, condenser, or heat-pump from the rating label and owner's guide. Note the selected cycle, heat setting, load size, whether the drum turns, and whether the dryer ever feels warm or only blows room-temperature air.
Expected result: Air, Air Fluff, No Heat, or cool-down can be intentional no-heat operation. A tumbling drum with no warmth points toward the cycle, supply, fuel, or heat system; warmth with damp clothes points more toward load or airflow.
Next step: Use the exact manual for the identified model and continue only with the matching branch. If smoke, burning odor, excessive heat, arcing, gas odor, or a hot connection is present, stop immediately.
Why this matters
Why: Dryer types use different heat and exhaust paths. A symptom is not enough to select a fuse, element, igniter, valve, or sensor.
-
Check 2
With the dryer empty, cool, and free of safety warnings, change from Air, Air Fluff, No Heat, energy-saving, or cool-down to the model's documented heated or timed cycle and the intended temperature. Confirm the door is fully closed and the cycle actually starts.
Expected result: If heat returns on the documented heated cycle, the prior setting was the cause. If the drum turns but remains cold on a heated cycle, continue to the supply and airflow checks; if it will not start, follow the model's control and power path.
Next step: Do not change hidden service settings or repeatedly restart the dryer. If a correct heated cycle still has no heat, document the result and continue with the dryer-type branch.
Why this matters
Why: Control names and energy features vary by model, so a setting that looks similar may intentionally reduce or remove heat.
-
Check 3
With the dryer off and cool, clean the lint screen and inspect the accessible exhaust hose, outlet, and surrounding area for lint, crushing, kinks, disconnection, clutter, or a closed exterior flap. Do not open the cabinet or run with a disconnected duct as a substitute for service.
Expected result: Heavy lint, weak or absent outside airflow, a crushed hose, or longer drying suggests restricted airflow. Scorching, glowing lint, smoke, a very hot cabinet, or a recurring burning odor is a stop condition.
Next step: Correct only an obvious accessible obstruction according to the manufacturer's installation instructions and reconnect the exhaust before use. Use qualified vent or appliance service for hidden blockage, internal lint, or a persistent no-heat symptom.
Why this matters
Why: CPSC warns that lint and exhaust restriction can reduce airflow, build excessive heat, and create a fire risk; clearing an external screen does not prove the hidden chassis is clean.
-
Check 4
For an electric dryer, check the appliance's accessible breaker or fuse status against the model installation instructions without opening the terminal block or measuring voltage. Some electric designs use separate supply paths for the motor and heater, so do not assume a running drum proves the full supply is present.
Expected result: A partially tripped or blown supply path can allow tumbling but prevent heat. A breaker that trips again, a hot or damaged outlet, a loose or melted cord, smoke, or arcing indicates an electrical fault.
Next step: If the connection is damaged or the breaker trips again, leave the dryer off and call a qualified electrician or appliance technician. If the connection is intact, use only the one reset the manual authorizes, then escalate if heat does not return.
Why this matters
Why: Power must be correct for the model, but a no-heat symptom is not permission to work inside the appliance or repeatedly reset a protective device.
-
Check 5
For a gas dryer, verify only from a safe, accessible location that the appliance is intended for the available fuel and that the user-accessible supply shutoff has not been closed, following the exact installation instructions. For a condenser or heat-pump dryer, check only the manual-specified filter, water container, drain, and heat-exchanger access area.
Expected result: A closed or interrupted gas supply can leave a gas drum turning without heat. A full water container, blocked drain, filter restriction, or dirty heat exchanger can limit a ventless model's drying performance. A gas odor, hissing, leak, water near controls, or inaccessible component is a stop condition.
Next step: Follow the exact model manual once. If gas is suspected, leave the area and call from a safe location; if a water or heat-pump fault persists, keep the dryer off and arrange qualified service.
Why this matters
Why: Fuel and water paths differ by dryer type; never apply a gas-valve or vented-dryer procedure to a condenser or heat-pump model, and never open a gas train.
-
Check 6
If no safety warning is present, perform only the model's documented single reset or diagnostic confirmation, then record whether heat returns and whether the symptom appears at startup, after tumbling, or after the dryer warms. Do not remove a panel to press a hidden reset or perform a live test.
Expected result: Heat that returns and remains stable after the documented reset may follow a temporary control or supply interruption. A returning no-heat symptom, unusual noise, error, excessive heat, or any odor indicates an unresolved fault.
Next step: Leave the dryer off and give a technician the model, dryer type, cycle, supply observations, airflow result, and reset result. Do not keep retrying to make it heat.
Why this matters
Why: A reset is an observation, not a repair. The permitted sequence and whether a reset exists depend on the exact model.
Use your observations
Decision map
Find the observation that best matches what you see, then follow the next safe action.
-
PATH 01Next step
What you see
The dryer was set to Air, Air Fluff, No Heat, energy-saving, or cool-down, and it otherwise operates normally.
Do this next
Select the exact model's documented heated or timed cycle and temperature. If the correct heated cycle remains cold, continue to the type-specific supply path.
-
PATH 02Next step
What you see
The dryer tumbles but drying is slow, clothes remain damp, the lint screen is loaded, or outside exhaust is weak.
Do this next
Stop and correct the accessible lint or exhaust restriction according to the installation instructions; use qualified service for hidden vent or chassis lint and recurring heat loss.
-
PATH 03Next step
What you see
An electric dryer tumbles but does not heat, and the model instructions identify separate supply paths for motor and heater.
Do this next
Check the accessible breaker or fuse status only as the manual permits. If a breaker trips again or the cord or outlet is damaged, stop and call a qualified electrician or appliance technician.
-
PATH 04Next step
What you see
A gas dryer tumbles but does not heat, and there is no gas odor or other emergency sign.
Do this next
Confirm the model's fuel and accessible supply shutoff only from the manual's safe external procedure. If supply is present and heat is still absent, arrange qualified appliance service without opening the burner or gas train.
-
PATH 05Next step
What you see
A condenser or heat-pump dryer shows low heat, a water or drain message, or reduced drying after the filter and load checks.
Do this next
Follow the exact manual for the water container, drain, filter, and heat-exchanger path. Stop for a leak near electrical parts or an inaccessible component and call qualified service.
-
PATH 06Next step
What you see
The no-heat symptom persists after the correct cycle and safe external checks, or an error, unusual noise, excessive heat, or odor appears.
Do this next
Keep the dryer off and arrange qualified appliance service with the full model, dryer type, cycle, supply, airflow, and symptom history. Do not guess a part or run repeated tests.
Helpful context
Understand the symptom
First decide what no heat means
A dryer can tumble without heat by design, because Air, Air Fluff, No Heat, energy-saving, or cool-down settings may not energize the heater. A dryer that heats but leaves clothes damp has a different path from one that never warms. Record the cycle, temperature choice, dryer type, load, and whether air exits outside. Do not use another cycle to reproduce an unsafe smell or overheating condition.
Electric, gas, and ventless systems are not interchangeable
On an electric dryer, the drum motor and heater can depend on separate sides of the household supply, so a drum may turn while heat is unavailable. On a gas dryer, a fuel shutoff or supply interruption can leave the drum turning without heat. Condenser and heat-pump dryers do not use a conventional outside exhaust in the same way; check their filter, water, and heat-exchanger instructions instead. Never infer a code, part, or reset sequence from another brand or model.
Keep diagnosis outside the cabinet
Clean the accessible lint screen and inspect the visible duct or outlet only with the dryer off and cool. Do not remove panels, open a terminal block, reach into a heater or burner, bypass a thermal or door switch, or measure live electricity. Internal lint, heating elements, gas valves, sensors, and controls require model-specific qualified service.
When checks do not resolve it
Need a professional?
Call a qualified appliance technician when the correct heated cycle and safe external checks do not restore heat, when an internal heater, igniter, gas valve, sensor, motor, control, water path, or thermal device is suspected, or when a ventless system continues to report a fault. Call a qualified electrician for a hot, damaged, wet, sparking, or repeatedly tripping power connection. For gas odor or a carbon-monoxide alarm, leave first and contact emergency or gas service from a safe location.
Common questions
FAQ
Why does my dryer run but not heat?
Check whether Air, Air Fluff, No Heat, energy-saving, or cool-down is selected, then check the exact model's airflow and supply path. An electric dryer may have a partial supply, a gas dryer may have interrupted fuel, and a ventless model may have a water or filter condition.
Can a blocked vent cause a dryer to stop heating?
Restricted airflow can cause long drying and excessive heat, and a protection system may stop or limit heating. Clean the accessible lint screen and inspect the visible exhaust when cool; use qualified service for hidden blockage or recurring heat problems.
What should I do if the dryer smells like gas or burning?
Stop immediately. For gas odor, do not operate switches, flames, motors, or a phone indoors; leave and call from a safe location. For burning odor, smoke, unusual heat, arcing, or a hot connection, stop using the dryer and obtain emergency or qualified electrical help.
Read the exact guide
Official sources
- Recognizing and Responding to Pipeline EmergenciesU.S. Department of Transportation Pipeline and Hazardous Materials Safety Administration · Natural gas odor and suspected gas emergency response in homes and workplaces
- CPSC Guide to Home Wiring HazardsU.S. Consumer Product Safety Commission · Appliance cord, plug, outlet, overheating, smoke, sparks, arcing, and breaker-trip safety
- Appliance and Electrical Fire SafetyU.S. Fire Administration · Major appliance outlet, extension-cord, damaged-cord, and residential fire safety
- Basement and Garage Fire SafetyU.S. Fire Administration · Washer and dryer lint, vent duct, outlet, clutter, and laundry-area fire safety
- Overheated Clothes Dryers Can Cause FiresU.S. Consumer Product Safety Commission · Clothes dryer lint, exhaust blockage, overheating, fire prevention, and volatile-contamination safety
Community feedback
Share a repair observation
Share a plain-text repair observation. Accepted observations are published automatically; this page may take a moment to update.