
On this page
Start here
Quick answer
On Dyson vacuum cleaners that have a clear bin with a lower door or base, the door usually will not close because the bin is overfilled, dust is trapped in the base or cyclone opening, the cyclone is not in its normal position, the clear bin is not aligned on its runner, or the catch/rod is damaged. Switch the machine off and disconnect it from the charger or outlet before emptying or inspecting it. Empty the bin before the MAX mark, remove visible dry debris without forcing the latch, push the cyclone down to its normal position, align the bin with its runners, and press the base upwards until it clicks securely. The bin should have no visible gap when closed. Dyson models differ, so do not force a door or use a different model's disassembly method. If the catch, rod, hinge, bin, seal, or cyclone is cracked or still will not latch after the user-level checks, stop using the vacuum and contact Dyson support; never operate without the clear bin and filters in place.
Before you begin
Safety first
- The user may switch off and disconnect the machine, empty the bin, clear loose visible dry debris, and refit the clear bin/cyclone exactly as the model manual shows. Main-body disassembly, hidden latch or spring repair, electrical-contact work, battery/charger diagnosis, live testing, and unverified part substitution are for Dyson or qualified personnel.
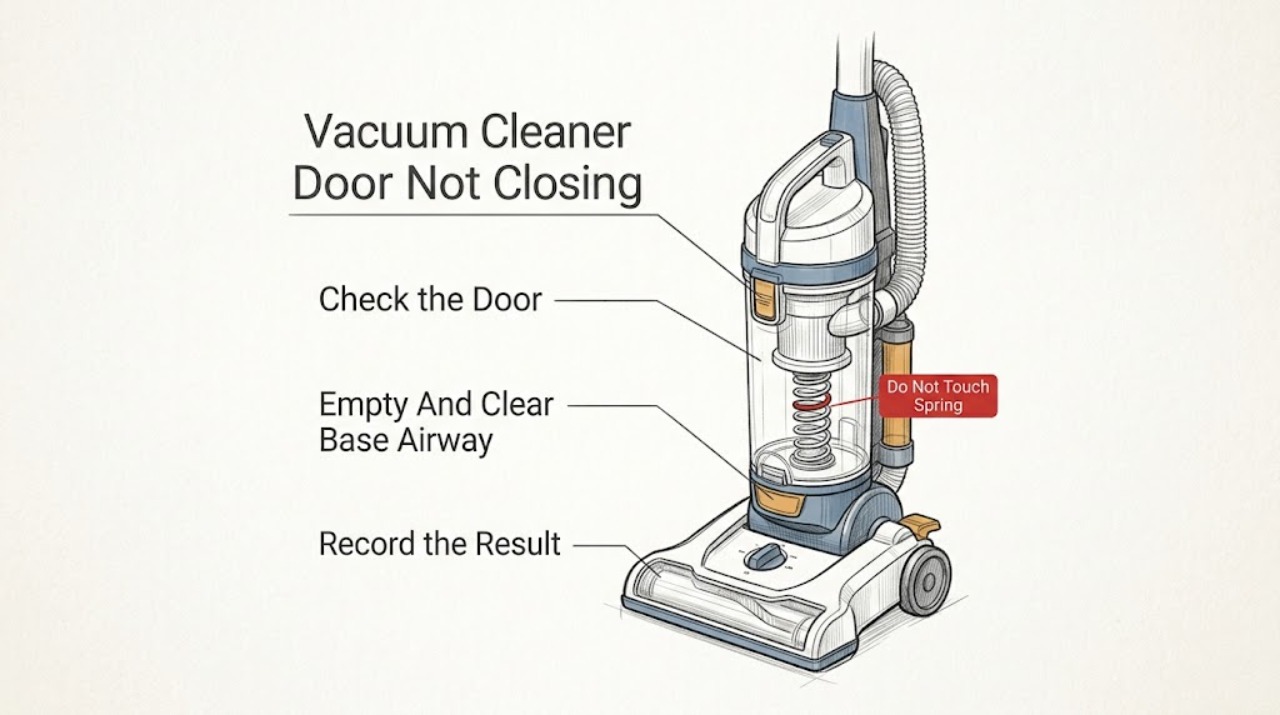
Work through in order
Diagnostic checks
Use only checks that match the exact appliance or system and its official guide.
-
Check 1
Turn the vacuum off and unplug it, or remove it from the charger, before touching the clear bin. Identify whether the problem is the lower bin base not latching, the clear bin not sliding onto the cyclone/body, the release button or rod not moving, or a different cover on the cleaner head. Keep fingers away from the trigger while inspecting.
Expected result: The lower clear-bin base is open or springs back; the full bin cannot be seated; the release mechanism is stiff/broken; or the reported door is not part of the clear-bin assembly.
Next step: Continue only if this is a clear-bin/base issue and the machine is disconnected. If it is another component or the design cannot be identified, stop forcing it and locate the exact Dyson model guide using the serial number.
Stop if: Do not operate the vacuum with the bin open, hold the door shut while running, or insert tools into an unidentified mechanism.
Why this matters
Why: Dyson vacuum designs use different bin and release mechanisms. A lower base that will not click has a different check from a bin that will not slide onto its runner, and a model without that style of clear bin needs its own manual.
-
Check 2
Empty the clear bin before the dust reaches the MAX mark. With power disconnected, look at the bin base, its rim, the airway opening, the cyclone shroud, and the inlet flap for compacted dust, lint, hair, or a hard object that prevents the base from sitting flat. Remove only loose, visible dry material using the model-approved dry brush or cloth; do not pry the catch.
Expected result: Dust or debris is packed around the base/rim/airway or shroud; the bin is over the MAX mark; or the surfaces are clear but the base still does not sit flat.
Next step: Empty and clear the visible obstruction, then inspect the rim and hinge for cracks or distortion. If the base remains uneven, leave the machine unused and proceed to the damage/service branch rather than applying force.
Stop if: Do not use a knife, screwdriver, compressed air into the cyclone, liquid, detergent, or lubricant to force debris from the latch; do not immerse the cyclone.
Why this matters
Why: Dyson links a clear airway and clean shroud with correct bin refitting, and warns that overfilling can pull excess dust into the filter or mechanism. A clear opening with a persistent gap makes misalignment or physical damage more likely.
-
Check 3
Following the exact model guide, return the cyclone to its normal position, align the clear bin tabs with the grooves or runner, and slide it into the main body until the catch engages. Then manually push the lower bin base upwards, or press the model's base clip, until it clicks. Check all around the joint for a continuous fit and no visible gap; do not press diagonally on one corner.
Expected result: The base clicks and stays flush with no gap; the base clicks but pops open when the bin is moved; the bin will not slide fully home; or the cyclone is not reaching its normal position.
Next step: If the fit is secure, reinstall only the parts the manual requires and perform a brief supervised check. If it is not secure, remove the bin again while disconnected, recheck alignment once, and then stop for service if the result is unchanged.
Stop if: Do not tape, clamp, glue, bend the bin, defeat the catch, or run the machine with a gap or a base that can open by hand.
Why this matters
Why: A secure click and flush joint indicate that the user-level alignment is likely correct. A partial click, gap, or bin that cannot reach the runner end indicates misalignment, trapped debris, a release-rod problem, or damaged plastic rather than a need for more force.
-
Check 4
With the bin removed only as shown in the model guide, observe the release catch/rod and the inlet flap without dismantling the cyclone. The catch should move through its normal travel and the inlet flap should move freely and return; check for visible damage, a displaced seal, or debris behind the flap. Keep the machine disconnected and avoid the electrical contacts at the bin/body interface.
Expected result: The rod or catch does not move, the inlet flap is jammed by fibers, a hinge or seal is cracked, the bin is distorted, or the mechanism moves freely but the base still will not latch.
Next step: Remove only loose visible debris and refit the parts once. If the catch, flap, hinge, seal, or bin is damaged or remains inoperative, record the model and serial number and contact Dyson support for the correct replacement or repair route.
Stop if: Do not open the cyclone, remove hidden springs, bend the rod, bridge electrical contacts, or test the motor with the bin removed or unsecured.
Why this matters
Why: Dyson troubleshooting identifies debris around the inlet flap and release path as a possible mechanical obstruction. Free movement with a persistent failure points more toward a damaged bin/catch, a cyclone or runner alignment issue, or an internal fault that cannot be safely isolated by sight.
-
Check 5
If the bin has been emptied, the visible airway is clear, the cyclone and runner are correctly aligned, and the base still will not remain closed, stop troubleshooting and document the exact model, serial number, whether the latch ever clicks, where the gap appears, and any crack, drop, unusual smell, heat, pulsing, or loss of suction. Keep the vacuum disconnected until Dyson support or a qualified technician confirms the next step.
Expected result: The latch remains unreliable, a part is visibly broken, the vacuum has electrical/thermal symptoms, or the door closes securely and the machine operates normally.
Next step: For a persistent or damaged assembly, arrange Dyson support/service and provide the model and serial information. If the fit is secure and there are no other symptoms, resume normal use only with all required filters and parts installed.
Stop if: Do not run with a loose bin, reproduce the fault by holding the base shut, perform live electrical tests, or install an unverified substitute part.
Why this matters
Why: Persistent failure after the documented user checks cannot identify whether the bin, seal, release mechanism, cyclone, electrical contact, or main body is at fault. A securely latched bin with normal operation ends this door-specific diagnosis; a loose or damaged bin is not safe to use.
Use your observations
Decision map
Find the observation that best matches what you see, then follow the next safe action.
-
PATH 01Safety boundary
What you see
Dust is at or above the MAX line, the bin base is not flat, or lint is visible around the base airway, shroud, inlet flap, or rim.
Do this next
Disconnect, empty below MAX, clear only visible dry debris with the model-approved method, and refit the bin and cyclone.
Why this path and its safety boundary
Why it matters: Overfilling or compacted dust is more likely to be blocking the base or preventing the latch from reaching its seat than a failed electrical component.
Safety stop: Stop if the base remains distorted, debris is behind a sealed mechanism, or removal would require prying or liquid.
-
PATH 02Safety boundary
What you see
The bin reaches the body but the cyclone is not fully down, the tabs do not enter the grooves, or the bin stops before the runner/catch engages.
Do this next
Remove and refit once according to the exact manual, keeping the machine disconnected, then verify a click and continuous seal.
Why this path and its safety boundary
Why it matters: Alignment or a remaining obstruction is more likely than a broken latch; the clear bin and cyclone must be in their normal positions before the base can seal.
Safety stop: Do not force the bin upward, bend tabs, or use the door as a handle to overcome misalignment.
-
PATH 03Safety boundary
What you see
The release rod/catch is stiff or the bin inlet flap does not move freely, with visible lint or dust around the hinge or release path.
Do this next
With power isolated, remove loose visible debris only, refit the bin, and stop if movement does not return or the part is damaged.
Why this path and its safety boundary
Why it matters: A visible obstruction can prevent the latch or flap from completing its travel; it does not justify dismantling the cyclone or bypassing the mechanism.
Safety stop: Do not remove hidden springs, pry the rod, lubricate the mechanism, or reach near electrical contacts.
-
PATH 04Safety boundary
What you see
The base pops open after a click, leaves a gap, the clear bin/hinge/catch is cracked, or the latch is visibly broken or distorted.
Do this next
Do not use the vacuum; photograph the damage and contact Dyson with the exact model and serial number for an approved part or service decision.
Why this path and its safety boundary
Why it matters: Physical damage or a failed seal/catch is more likely than a cleaning issue. The clear bin is part of the airflow and containment path and must not be held shut with tape or force.
Safety stop: Do not glue, clamp, tape, bend, or fit an unverified bin or latch.
-
PATH 05Safety boundary
What you see
The bin is correctly aligned and unobstructed but will not latch, or the issue is accompanied by pulsing, unusual smell, heat, smoke, battery/charger damage, or a fault indication.
Do this next
Keep the machine disconnected and arrange Dyson support or qualified service. Provide the model, serial number, and the exact sequence that causes the failure.
Why this path and its safety boundary
Why it matters: An internal mechanical, electrical-contact, motor, battery, or control fault is possible and cannot be diagnosed safely by holding the door shut or testing energized parts.
Safety stop: Do not use the appliance, charge a damaged battery/charger, bridge contacts, open the main body, or perform live tests.
Helpful context
Understand the symptom
What “door” means on a Dyson vacuum
Dyson uses several vacuum designs. In this topic, “door” most often means the clear-bin base that opens to release dust, or the clear bin itself not seating on the cyclone. The base must close and latch before the machine is used. A bin that is merely difficult to open is a different symptom from a base that will not stay shut, a bin that will not slide up, or a latch that no longer moves. The precise release button, runner, and bin shape are model-specific; use the guide for the serial-numbered machine rather than forcing a similar-looking part.
The safe order is empty, clear, align, then click
A small amount of dust in the base airway, cyclone shroud, or release path can stop the base from reaching its latch. Overfilling can also pack dust against the mechanism. Disconnect the machine first, empty it below the MAX line, remove only the bin or cyclone pieces the model guide shows, and clear dry, visible debris. Refit the clear bin on its runner, return the cyclone to its normal position, and press the base closed until it clicks. Do not lubricate the latch, wash the cyclone, or push against a misaligned bin.
A door that still will not latch is a stop-use condition
The clear bin contains the airflow path and, on some models, electrical contacts. If the base springs open, leaves a gap, the bin is cracked, the catch is broken, or the bin cannot lock onto the body, do not tape it shut or run the vacuum. A loose bin can leak dust, reduce filtration, or let parts move into the airway. Dyson's manuals limit maintenance to the procedures shown in the applicable manual; a damaged bin, cyclone, release rod, hinge, or seal should be assessed by Dyson support or a qualified service provider.
Safety boundary
Stop conditions
- Switch off and disconnect the Dyson before emptying the bin, clearing an obstruction, removing a filter/bin, or checking the latch.
- Do not operate with the clear-bin base open, a visible gap, a cracked bin, a broken catch, missing filters, or a bin that can open by hand.
- Do not use knives, screwdrivers, clamps, tape, glue, lubricants, detergent, or liquid to force or repair the latch; do not immerse the cyclone.
- Do not open the main body, bridge electrical contacts, charge a damaged battery/charger, or perform live electrical tests.
- Use only the exact model manual and Dyson-recommended parts; persistent or damaged bin, seal, rod, hinge, cyclone, or body faults require Dyson support or qualified service.
When checks do not resolve it
Need a professional?
Contact Dyson support or a qualified service provider when the clear-bin door/base remains loose after emptying, clearing visible dry debris, and model-correct refitting; when the catch, rod, hinge, seal, bin, cyclone, or runner is cracked or distorted; when the base pops open or leaves a gap; or when pulsing, unusual smell, heat, battery/charger damage, or a fault indication is also present. Have the exact model and serial number, photos of the gap or damage, and the checks already completed ready.
Safety scope: The user may switch off and disconnect the machine, empty the bin, clear loose visible dry debris, and refit the clear bin/cyclone exactly as the model manual shows. Main-body disassembly, hidden latch or spring repair, electrical-contact work, battery/charger diagnosis, live testing, and unverified part substitution are for Dyson or qualified personnel.
Common questions
FAQ
Why won't the door on my Dyson vacuum bin close?
On a clear-bin model, dust at or above the MAX line, debris in the base airway or cyclone shroud, a cyclone that is not fully down, a bin that is not aligned on its runner, or a damaged catch can prevent the base from latching. Disconnect the machine, clear only visible dry debris, and refit it according to the exact manual.
How do I close a Dyson clear-bin base?
After emptying the disconnected machine, return the cyclone to its normal position, align the clear bin with its grooves or runner, and push the base upwards until it clicks securely. Check for a continuous fit and no gap. The exact catches differ by model.
Can I tape or glue the Dyson bin door shut?
No. The clear bin and base are part of the dust-containment and airflow path. Do not operate a vacuum with a loose, cracked, or taped bin. Contact Dyson with the exact model and serial number for the approved part or service route.
What should I do if the Dyson bin latch is stuck?
Disconnect the machine and check for loose dry lint or dust around the visible inlet flap, release path, base, and cyclone shroud. Do not pry, lubricate, remove hidden springs, or dismantle the cyclone. If the catch still does not move or looks damaged, arrange Dyson support.
Is it safe to use a Dyson if the bin door will not stay closed?
No. Do not hold the base shut or run the vacuum with a gap, broken catch, cracked bin, missing filter, or base that pops open. Keep it disconnected and contact Dyson or a qualified service provider, especially if there is pulsing, unusual smell, heat, or battery/charger damage.
Read the exact guide
Official sources
- Base plate reassembly and clear-bin care - Dyson UP15 manualDyson · UP15 model only for exact clear-bin and maintenance details; used to show model-specific variation and the no-gap/click requirement.
- How to clean the bin and cyclone - Dyson SupportDyson · The model-specific troubleshooting flow shown by Dyson; follow the exact machine guide for whether the clear bin can be removed or rinsed.
- The bin inlet flap is jamming - Dyson Support TroubleshootingDyson · The Dyson model and reference-code flow presented on the support page; the same page is used only for the documented bin, cyclone, debris, and click-fit observations.
- Clear the inlet and refit the bin - Dyson SupportDyson · A Dyson support troubleshooting path; buttons, catches, and removal steps vary by model.
- Dyson CY28 User GuideDyson · CY28 manual only for its maintenance limits; used for the general boundary that users should perform only manual-described maintenance and use Dyson-recommended parts.
- Using your Dyson machine - SV11 clear-bin user manualDyson · SV11 manual only for its exact procedure; used to support the general safety boundary and click-fit mechanics, not to assert that every Dyson model is identical.
- Vacuum cleaners support - DysonDyson · General Dyson vacuum support navigation; exact repair and parts guidance requires the machine identity.
Community feedback
Share a repair observation
Share a plain-text repair observation. Accepted observations are published automatically; this page may take a moment to update.