
On this page
Start here
Quick answer
A vacuum cleaner door that will not close usually needs the bin, inlet flap, seal, and latch inspected in that order. Empty the bin, clear lint from the hinge or inlet, and check that the bin is fully seated. Do not force the door or operate the vacuum with an open dust path.
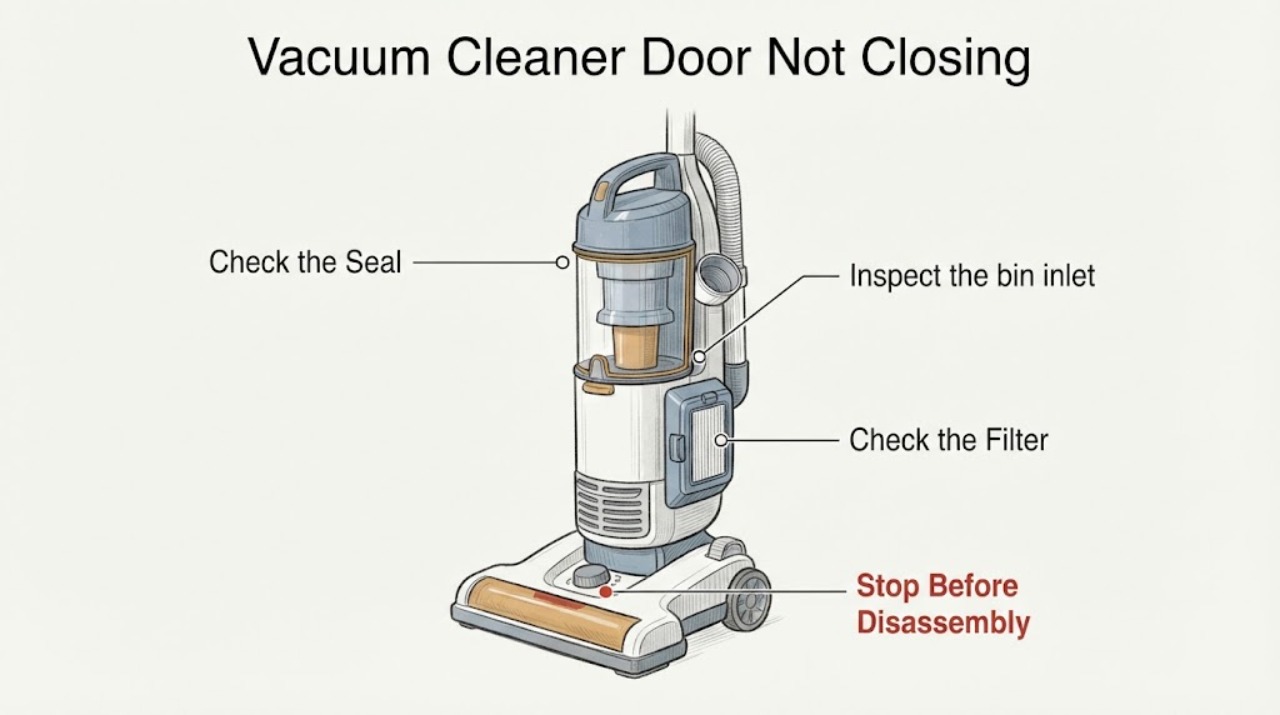
Work through in order
Diagnostic checks
Use only checks that match the exact appliance or system and its official guide.
-
Check 1
Remove the bin only as the model instructions show and empty it fully; inspect the door edge and seal for trapped debris.
Expected result: The bin is overfilled, debris is on the rim, or the rim and seal are clean.
Next step: Clean only accessible dry debris and reseat the bin without forcing it.
Why this matters
Why: A full bin or debris can hold the door away from its seal; a clean rim moves the check to the inlet flap or latch.
-
Check 2
Inspect the bin inlet or flap for lint and fibers that stop it moving freely.
Expected result: The flap is jammed, does not return, or moves freely.
Next step: Clear dry fibers gently with the bin removed and follow the model’s reassembly instructions.
Why this matters
Why: Dyson identifies a jammed inlet flap as a cause of poor suction and pulsing; it can also prevent proper bin closure.
-
Check 3
Check that the bin clicks or seats fully into the main body and that no filter, cyclone, or wand is misaligned.
Expected result: The bin does not seat, a component is misaligned, or all parts seat correctly.
Next step: Stop using the vacuum if the latch cannot engage; do not bend the door or bypass a catch.
Why this matters
Why: Misalignment can keep the door latch from reaching its catch; a correct fit with a loose door suggests latch or hinge damage.
-
Check 4
Close the door once after the dry checks and observe the seal all around without switching the motor on.
Expected result: The door closes flush, springs open, or leaves a visible gap or damaged seal.
Next step: Keep the vacuum off and arrange service for a persistent gap or broken hinge.
Why this matters
Why: A flush closure supports a resolved obstruction; a gap or damaged latch or seal needs model-specific service.
Use your observations
Decision map
Find the observation that best matches what you see, then follow the next safe action.
-
PATH 01Next step
What you see
The door closes after emptying and clearing the inlet flap.
Do this next
Monitor suction and empty the bin before it reaches the fill line.
Why this path and its safety boundary
Why it matters: The likely cause was bin debris or flap obstruction.
-
PATH 02Next step
What you see
The bin is clean but cannot seat or the latch will not engage.
Do this next
Keep the vacuum off and arrange qualified service; do not force it.
Why this path and its safety boundary
Why it matters: A bin, hinge, seal, or latch alignment fault is more likely.
-
PATH 03Next step
What you see
The door looks closed but the flap remains jammed or suction pulses.
Do this next
Clear only accessible dry debris and arrange service if movement does not return.
Why this path and its safety boundary
Why it matters: The inlet path still has an obstruction or damaged moving part.
Helpful context
Understand the symptom
This guide focuses on the bin door, inlet flap, and latch alignment. The symptom is a starting point, not a part diagnosis; each result changes the next safe check.
The cited manufacturer guidance supports these external checks. Confirm model-specific controls, parts, and service procedures in the appliance manual.
Only after diagnosis
Potential parts
- bin seal, door, or latch
Relevant only when the bin is clean and correctly seated but the door still has a physical gap.
Confirm the exact appliance model and manufacturer instructions before ordering.
When checks do not resolve it
Need a professional?
Arrange qualified vacuum service when the bin, hinge, seal, or latch is damaged or will not engage after safe cleaning.
Common questions
FAQ
Can I run the vacuum with the bin door open?
No. Keep the dust path closed and correctly seated; an open or damaged bin can reduce containment and safe operation.
What if the flap will not move after cleaning?
Stop using the vacuum and arrange model-specific service rather than forcing the hinge or replacing an unverified part.
Read the exact guide
Official sources
- Dyson V8 Animal vacuumDyson · vacuum bin inlet and flap movement checks
Community feedback
Share a repair observation
Share a plain-text repair observation. Accepted observations are published automatically; this page may take a moment to update.