
On this page
Start here
Quick answer
“Dyson vacuum leaking” is not one diagnosis: Dyson supports dry vacuums, wet and dry vacuums, and dedicated wet cleaners, so first identify the model and whether the leak is dry dust/debris or liquid. A conventional dry Dyson manual says not to use the machine on wet surfaces or to pick up water; if liquid is coming from or has entered a dry vacuum, switch it off, unplug it or remove it from its charger, keep hands dry, and do not restart it. If the leak is dry dust, stop the machine, empty the bin at its MAX mark, and check only the model-approved bin and filter seating; do not assume a part fits another Dyson. If the machine is a named wet cleaner or a wet roller attachment, locate the liquid at the clean-water tank, dirty-water tank, waste tray/cassette, roller head, or drip tray and follow that model’s support guide for seating, emptying, and cleaning. Do not operate a wet cleaner with a cracked tank, an unsecured cassette, liquid near the electrical body, or a leak that continues after the documented external check. Do not open the motor or battery, test wiring, or borrow a wet-cleaner procedure for a dry vacuum. If the model, liquid path, or safe procedure is unclear, leave it off and use Dyson’s model-specific support or qualified service.
Before you begin
Safety first
- This article covers model identification and safe external bin, filter, tank, waste-tray, cassette, roller, and dock observations only. Qualified Dyson service must handle internal seals, pumps, valves, wiring, batteries, motors, controls, and any liquid ingress into the electrical body.
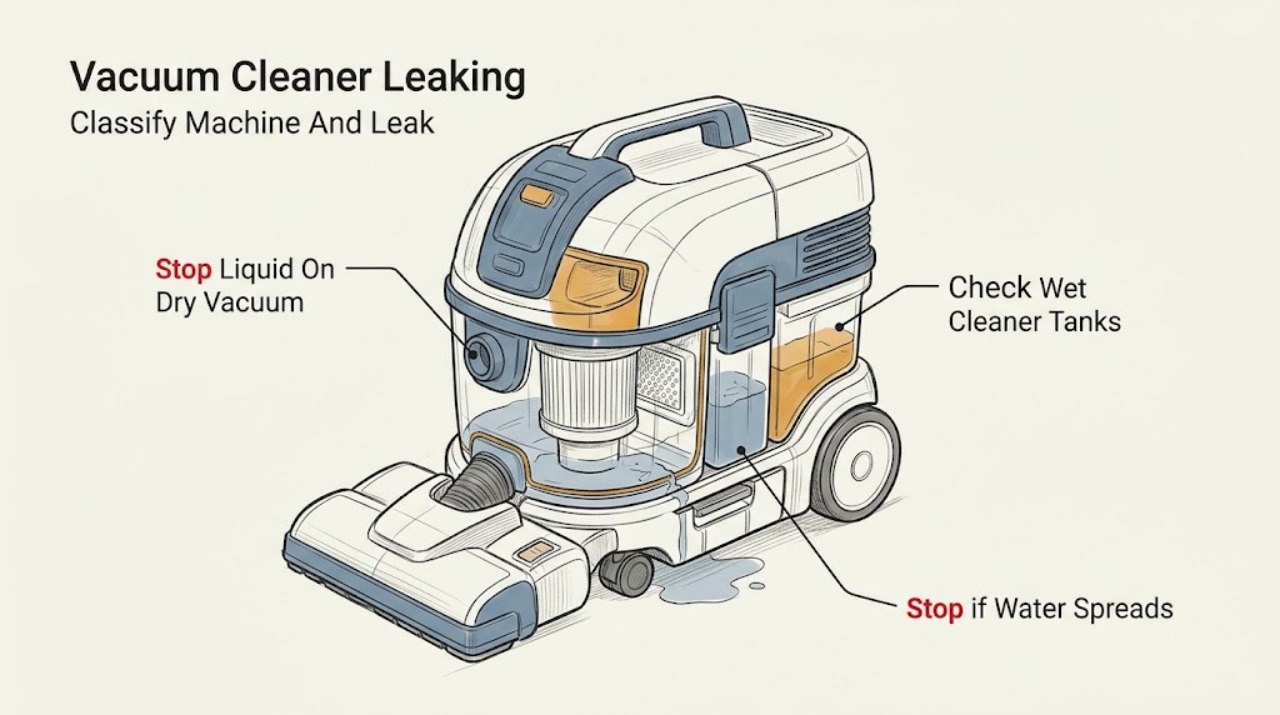
Work through in order
Diagnostic checks
Use only checks that match the exact appliance or system and its official guide.
-
Check 1
Turn the Dyson off without pulling the trigger again and identify the model, serial or product family, installation/charging state, and attached tool. From the outside, classify the material as dry dust/debris, clean water, dirty water, cleaning solution, or an unknown liquid, and note whether it is coming from the bin/filter area, a wet tank, a waste tray/cassette, a roller head, a dock/drip tray, the wand, or the main body.
Expected result: The machine is a conventional dry vacuum, a named wet cleaner, a wet-and-dry machine or wet roller attachment, a robot, or an unknown model; the material is dry, liquid, or not identifiable; and the leak is localized or reaching the electrical body.
Next step: Use the dry-vacuum stop branch for any liquid involving a dry model. Use the identified wet-cleaner branch only when the model and wet attachment are confirmed. If the liquid or model is unknown, keep the machine off and obtain model-specific Dyson support.
Stop if: Do not disassemble the machine or continue operating it to make the leak easier to see.
Why this matters
Why: A dry vacuum and a wet cleaner have different permissible liquid paths. Dyson's support categories confirm that wet cleaners and wet-and-dry vacuums are separate product families, so an unknown model or liquid location is not evidence for a particular tank, seal, or replacement part.
-
Check 2
If the identified machine is a dry Dyson vacuum, disconnect it from the outlet or charger from a dry position and keep it off. Do not pick up more liquid. Inspect only the outside for a wet clear bin, filter area, cord/plug, battery/charging contact, or liquid that has reached the main body; do not immerse, rinse, or open the vacuum.
Expected result: The dry vacuum has picked up or contains water/liquid, liquid has reached the motor body or electrical connector, the cord/plug is wet or damaged, or the apparent leak is only dry dust from a bin or filter area.
Next step: For any liquid in or near a dry vacuum, leave it unplugged/off and arrange Dyson or qualified service; do not test it after drying. For dry dust only, follow the model manual to empty the bin at its MAX mark and refit only clean, completely dry parts before one normal use.
Stop if: Do not power on a wetted dry vacuum, charge it, wash the motor body, remove the battery, or open the cyclone or motor housing.
Why this matters
Why: Dyson's dry-vacuum manual says not to use the vacuum on wet surfaces or to pick up water or other liquids, and says a machine dropped into water or not working properly should not be used. Dry dust escaping from a bin is a different user-level observation, but the exact bin/filter design still depends on the model.
-
Check 3
Only if the model is confirmed as a Dyson wet cleaner or a wet roller system, stop the machine and place the wet head in its model-provided tray or over a sink as the support guide shows. Inspect the clean-water tank, dirty-water tank, waste tray or cassette, cap, clips, and visible seals for an overfill, crack, loose cap, or incomplete click-in. Do not substitute a tank or cleaner head from another model.
Expected result: The leak is at a clean-water tank, dirty-water tank, waste tray/cassette, cap, roller head, drip tray, or an unknown point; a tank/cassette is not fully seated; a container is cracked; or the visible wet components are correctly fitted.
Next step: Empty, rinse, dry, and refit only the identified model's user-removable tank, waste tray, cap, or cassette as its official guide directs. If a crack, missing seal, incomplete fit, liquid near the electrical body, or continued leak remains, stop and arrange Dyson service.
Stop if: Do not overfill past the model mark, use hot/boiling water or unapproved chemicals, force clips, glue a tank, or run the wet cleaner while a component is cracked or unsecured.
Why this matters
Why: Dyson's WashG1 and PencilWash support pages document separate water tanks and waste systems, and show model-specific emptying, rinsing, drying, and fitting steps. An unsecured or cracked wet component can explain liquid at that component, but an unknown leak does not justify replacing a tank or opening the cleaner head.
-
Check 4
For an identified wet cleaner, distinguish expected residual moisture in the roller or drip tray from active liquid escaping during use or storage. Keep the head level while removing the model-approved cassette or tanks, empty dirty water into a sink, wipe the machine externally, and allow washable parts to dry as the official guide specifies. Do not run a cleaning cycle to test a leak that is already reaching the floor or dock contacts.
Expected result: Only the roller or drip tray is damp after cleaning; water is actively pooling on the floor; the dirty-water system is full; the head leaks when tilted or stored; the dock/contacts are wet; or the liquid is not clearly from the wet system.
Next step: Follow the exact model guide for emptying and drying once. If active pooling, an unclear source, a wet dock, or recurrence remains, leave the machine off and contact Dyson service with the model and leak location.
Stop if: Do not keep charging, self-cleaning, tilting, shaking, or operating a wet cleaner with liquid near electrical contacts or an unresolved active leak.
Why this matters
Why: A wet cleaner is expected to retain water in its intended tanks or roller path, but pooling outside that path points to seating, cap, tray, seal, crack, or internal flow trouble. Liquid at the dock or electrical body is a stop condition, not a normal residual-water observation.
-
Check 5
Record the model/serial, dry or wet machine family, attachment, material, leak location, whether the machine was running or charging, tank/bin fill level, visible crack or damage, and the result of one model-documented external clean, empty, and refit. Photograph the dry exterior and the liquid location only if doing so does not require powering or moving a wet electrical body.
Expected result: The leak stops after a correct user-removable tank/bin/cassette correction, dry dust continues to escape, liquid returns, a crack or damaged seal is visible, the main body or dock is wet, or the model/path remains uncertain.
Next step: Keep the machine off or disconnected and provide the record to Dyson support or a qualified repair service. Use Dyson's model-specific troubleshooting and repair route rather than a generic vacuum leak procedure.
Stop if: Do not replace internal parts, open the motor or battery, test continuity/live voltage, or resume use after liquid ingress, smoke, heat, or electrical odor.
Why this matters
Why: A stable correction supports a documented container, seating, overfill, or maintenance issue for that identified model. Recurrence, damage, an unknown path, or liquid near the electrical body makes an internal seal, pump, valve, body, battery, or control fault possible without identifying a safe part.
Use your observations
Decision map
Find the observation that best matches what you see, then follow the next safe action.
-
PATH 01Safety boundary
What you see
The machine is a dry Dyson vacuum and the reported leak is water or another liquid from the bin, filter, wand, cleaner head, or main body, or the vacuum has been used on a wet surface.
Do this next
Switch off, unplug or remove from the charger from a dry position, keep it off, and arrange Dyson or qualified service. Do not attempt a drying test.
Why this path and its safety boundary
Why it matters: The machine is outside the dry-vacuum use described in Dyson's manual. Liquid may have reached the motor, wiring, battery, or control area; the source cannot be safely diagnosed by powering it again.
Safety stop: Do not pick up more liquid, charge, rinse the body, open the housing, or remove the battery.
-
PATH 02Safety boundary
What you see
The identified machine is a dry vacuum and only dry dust or debris is escaping around its model-specific clear bin, filter, or release area, with no liquid or electrical hazard.
Do this next
Turn off and unplug, empty at the model's MAX mark, and refit only clean, fully dry, model-approved parts as the exact manual directs. If dust still leaks or a part is damaged, arrange service.
Why this path and its safety boundary
Why it matters: An overfilled bin, incomplete seating, wet filter, damaged container, or blocked/incorrectly refitted part is possible, but Dyson designs differ and the observation does not prove a particular seal or replacement part.
Safety stop: Do not run without the bin or filters, use a wet filter, glue a crack, or borrow another Dyson model's bin procedure.
-
PATH 03Safety boundary
What you see
The model is confirmed as a Dyson wet cleaner or wet roller system and liquid is localized to a clean/dirty tank, waste tray/cassette, cap, roller head, or drip tray.
Do this next
Empty, rinse, dry, and refit only the model-approved removable component using its Dyson support guide. Stop and arrange service for a crack, missing seal, leak recurrence, or liquid near the body or dock.
Why this path and its safety boundary
Why it matters: The named wet system provides a plausible liquid path, and an overfill, incomplete seating, dirty full tank, or visible damage is more likely than a dry-vacuum leak. Exact tank and cassette steps remain model-specific.
Safety stop: Do not overfill, use unapproved chemicals or hot water, force the component, or operate while it is cracked or unsecured.
-
PATH 04Safety boundary
What you see
The model or attachment is unknown, the liquid path is unclear, liquid reaches the motor body, battery, plug, charger, or dock, or a correct external tank/bin/cassette check does not stop the leak.
Do this next
Keep the machine off and disconnected, avoid handling wet electrical contacts, and use Dyson's model-specific support or qualified service. Provide the model and leak record.
Why this path and its safety boundary
Why it matters: There is insufficient evidence to name a safe component or procedure. The fault may be internal or may involve a machine family whose structure has not been identified.
Safety stop: Do not test, charge, dismantle, dry with direct heat, or install a guessed tank, seal, filter, pump, or battery.
Helpful context
Understand the symptom
Do not treat every Dyson as a wet vacuum
Dyson's support catalog includes several machine families. A dry vacuum that is leaking liquid is a safety stop, while a wet floor cleaner is designed around clean-water and dirty-water systems. The same word—leaking—can also mean dry dust escaping from a bin or liquid escaping from a wet cleaner head. Identify the model and attachment before following any maintenance step.
Use the exact model guide
Dyson's wet-cleaner pages show that tank, roller, waste-tray, cassette, dock, and alert behavior is model-specific. A WashG1, PencilWash, Submarine-equipped vacuum, cordless dry vacuum, upright, and robot do not share one universal leak path. Use the serial number or model information to open the correct Dyson support journey before removing a tank or attachment.
Keep liquid away from the electrical body
Stop the machine before handling a wet head, tank, bin, filter, or cassette. Keep the motor body, battery, charging contacts, dock connector, and mains plug dry. Never open the body to find a leak, bridge a switch, test live wiring, or keep charging a machine that has been wetted or is leaking toward electrical parts.
Safety boundary
Stop conditions
- Stop immediately for liquid in or near a dry vacuum, motor body, battery, charger, dock, plug, or electrical contact; keep the machine off and disconnect it only from a safe, dry position.
- Do not use a conventional dry Dyson vacuum on wet surfaces or to pick up water or other liquids, and do not resume operation merely because the outside appears dry.
- Do not open the motor, cyclone, battery, charger, or cleaner head; perform live or continuity tests; bypass a switch; or replace a seal, pump, valve, or battery without model-specific qualified guidance.
- Do not force, glue, overfill, or operate a wet-cleaner tank, waste tray, cassette, roller head, or cap that is cracked, damaged, or not fully seated.
- If the model, attachment, material, or leak location cannot be identified, or the leak recurs after one documented external correction, leave the machine unused and arrange Dyson service.
When checks do not resolve it
Need a professional?
Safety scope: This article covers model identification and safe external bin, filter, tank, waste-tray, cassette, roller, and dock observations only. Qualified Dyson service must handle internal seals, pumps, valves, wiring, batteries, motors, controls, and any liquid ingress into the electrical body.
Common questions
FAQ
Why is my Dyson vacuum leaking liquid?
First identify whether it is a dry vacuum, wet-and-dry machine, wet floor cleaner, or wet roller attachment and locate the liquid. A conventional dry Dyson manual says not to pick up water or use the machine on wet surfaces; switch it off and keep it disconnected. Use tank or cassette checks only for a confirmed wet model.
Can I use a dry Dyson vacuum to pick up water?
No. The opened Dyson dry-vacuum manual says the vacuum is for dry locations and must not pick up water or other liquids. If liquid entered the machine, keep it off and arrange Dyson or qualified service rather than testing it after drying.
Where can a Dyson wet cleaner leak?
Only after identifying a wet model, inspect its documented clean-water tank, dirty-water tank, waste tray or cassette, cap, roller head, and drip tray. WashG1 and PencilWash use different documented wet systems, so follow the exact model guide and do not substitute parts or procedures.
What if my Dyson is leaking dust rather than water?
Turn it off and unplug it, then use the exact model manual to empty the bin at its MAX mark and refit only clean, completely dry, model-approved bin and filters. If dust continues to escape or a container is cracked, arrange service; do not assume another Dyson bin or seal fits.
Can I keep charging a Dyson wet cleaner that is leaking?
No. Stop charging or self-cleaning if liquid reaches the dock, contacts, battery, plug, or main body, or if an active leak is pooling. Keep the machine off and use the exact Dyson support route or qualified service.
When should I call Dyson service for a leak?
Arrange service for liquid in a dry vacuum, a cracked or unsecured wet-cleaner tank/cassette, liquid near electrical parts, a leak that recurs after one documented external correction, continued dust escape, smoke, heat, electrical odor, or an unknown model or leak path.
Read the exact guide
Official sources
- Dyson PencilWash wet floor cleaner supportDyson · PencilWash wet cleaner only; the page's tank and cassette instructions are not universal.
- Vacuum cleaners supportDyson · Dyson support catalog; available products and model-specific procedures vary by region and machine.
- Using your Dyson vacuum cleanerDyson · The opened DC26 manual is model-specific; dry-vacuum safety principles must be matched to the exact Dyson model.
- Book a repair or serviceDyson · Dyson service route; repair availability and warranty coverage vary by model and region.
- Support for Dyson WashG1 wet cleanerDyson · WashG1 wet cleaner only; tank, tray, roller, dock, and alert procedures do not transfer to other Dyson models.
Community feedback
Share a repair observation
Share a plain-text repair observation. Accepted observations are published automatically; this page may take a moment to update.