
On this page
Start here
Quick answer
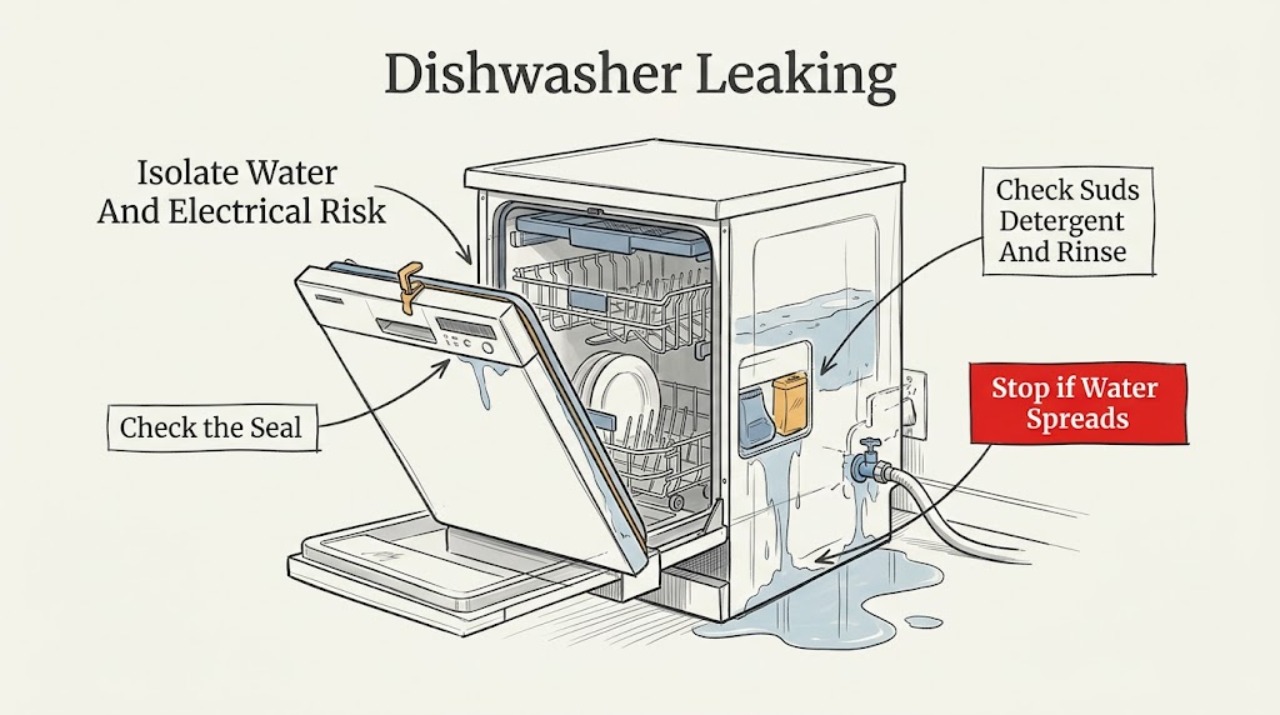
Stop the cycle if water is spreading toward a receptacle, cord, junction, or other electrical part; do not touch wet electrics. If it is safe, stop the dishwasher, close the household water supply, and remove standing water from the accessible floor area. Then identify whether water is coming from the front door, underneath, the inlet connection, or the drain connection. A door leak can follow an obstructed rack or kick plate, a poor seal, an unlevel installation, or oversudsing. Electrolux says non-dishwasher soap, excess detergent, and spilled rinse aid can create foam and leaks. A supply leak points to the water-valve hose connection or a kink; a drain leak points to the drain hose, high-loop/connection, filter or glass trap, a blocked sink connection, or a missed garbage-disposal knockout plug. Some water below the filter after a completed cycle can be normal, but water covering the filter screen or rising onto the floor is not. Make only accessible checks with power and water safely isolated; do not pull out a built-in unit, remove the base, open a pump or valve, or run a cycle to chase an active leak. Persistent leaking, water in the base, a damaged hose, a failed door seal/latch, pump/valve suspicion, or water near electrical parts requires qualified service.
Before you begin
Safety first
- The user may stop the cycle, close the household water supply, isolate power only from a dry safe position, wipe accessible floor water, inspect visible door/loading/level and hose paths, and clean the accessible filter or glass trap as the exact manual permits. Built-in movement, pressurized connections, pumps, valves, tub/base seals, flood protection, wiring, live tests, and internal repairs are for qualified personnel.
Work through in order
Diagnostic checks
Use only checks that match the exact appliance or system and its official guide.
-
Check 1
Stop the dishwasher and do not start another cycle. From a dry position, note where water is visible and whether it is near a receptacle, cord, junction, power connection, or other electrical part. If safe without touching wet electrical components, switch off the dishwasher's power and close the household water-supply valve; wipe only accessible floor water.
Expected result: Water is near electrical parts, the source is still actively flowing, there is a burning odor/smoke/spark, the water supply cannot be stopped, or the leak is limited to a dry accessible area after the cycle.
Next step: Keep people away from wet electrics and arrange qualified service for an active, uncontrolled, or electrical-area leak. Otherwise continue with the dishwasher off and water supply isolated while locating the visible leak path.
Stop if: Do not touch wet plugs, cords, junctions, or electrical parts; do not reset a breaker or restart the dishwasher to test an active leak.
Why this matters
Why: Water near electrics or an uncontrolled active leak is a stop-use safety condition. A dry accessible area permits external source identification, but the dishwasher should not be run again until the cause is understood.
-
Check 2
With the dishwasher off, inspect the front door, gasket contact, racks, tall pans, spray-arm clearance, and lower kick plate. Make sure no item holds the door open, the gasket is not visibly folded or contaminated, and the kick plate is not striking the door. Check from outside that the appliance is not obviously tilted; do not remove trim or adjust leveling hardware unless the exact installation guide permits an accessible adjustment.
Expected result: A rack or dish blocks closure, the kick plate interferes, the gasket has a visible gap or damage, the unit is visibly out of level, or the door and seal appear normal.
Next step: Remove only the visible loading or kick-plate obstruction and clean the accessible gasket contact area as the manual permits. If the gasket/latch is damaged, the door will not close, or the unit needs built-in leveling work, arrange service and do not run it.
Stop if: Do not force the door, bend the gasket, remove the door, pull out the built-in dishwasher, or run a cycle with a visible seal or latch defect.
Why this matters
Why: An obstructed or poorly sealed door can direct wash water over the front edge, and an unlevel appliance can contribute to front leakage. A normal visible seal makes suds, hoses, drainage, tub, pump, or base causes more likely; it does not prove the gasket is sound under pressure.
-
Check 3
Look for foam or a soapy film in the tub and around the door. Record whether hand/dish soap, excess automatic detergent, detergent placed directly in the tub, or spilled rinse aid was used. Remove only accessible suds or residue as the exact manual permits, wipe a visible rinse-aid spill with a damp cloth, and do not add more detergent to test the theory.
Expected result: There is heavy foam, the wrong soap was used, the detergent amount exceeded the manual/dispenser line, detergent was put directly in the tub, rinse aid spilled, or the tub is not sudsy.
Next step: Stop using the appliance until the foam/residue is cleared according to the exact manual, then use only the documented detergent dispenser and amount. If water still leaks without suds, arrange service rather than increasing or changing chemicals.
Stop if: Do not mix cleaners, pour chemicals into the tub to suppress foam, use hand soap, or run repeated cycles while the dishwasher is leaking.
Why this matters
Why: Electrolux identifies non-dishwasher soap, excess detergent, direct tub placement, and spilled rinse aid as oversudsing conditions that can cause leaks. If there is no foam, a door, hose, drainage, tub, pump, valve, or base cause becomes more likely.
-
Check 4
With the water supply closed and power isolated, inspect only the visible water-supply hose from the shutoff area to the dishwasher connection. Look for a wet trail, loose connection, cross-threading, kink, abrasion, bulge, or a hose touching a sharp edge. Do not loosen a pressurized fitting; if a connection must be disturbed, leave it to the installer or a qualified technician.
Expected result: The leak begins at the supply hose or water-valve connection, the hose is kinked/damaged, the connection is dry and secure, or the leak appears only when the dishwasher fills.
Next step: Keep the water supply closed and arrange qualified installation/appliance service for a wet, damaged, or inaccessible supply connection. Do not operate until the connection is repaired and checked for safe containment.
Stop if: Do not tighten fittings on a wet pressurized line, replace an inlet valve, pull the unit out, or work inside the cabinet.
Why this matters
Why: A wet supply connection or kinked/damaged hose shifts suspicion to the inlet hose/valve connection or installation. A leak that appears only during filling is not explained by a drain hose or post-cycle residual alone. A dry visible supply path makes the door, drain, tub, pump, or base path more likely.
-
Check 5
After the accessible area is dry and power/water remain isolated, check the visible drain hose for a kink, displacement, or poor connection and note whether the dishwasher is connected to a sink or garbage disposal. If a new disposal was installed, verify from the installation documentation that its knockout plug was removed; do not disassemble the disposal. Remove and rinse only the accessible filter or glass trap as the exact manual permits, and compare the water level with the filter screen.
Expected result: Water covers the filter screen, the drain hose is kinked or displaced, the sink/disposal connection is blocked or missing a documented knockout removal, the filter/glass trap is clogged, or only a small residual amount remains below the filter after a cycle.
Next step: Correct only a visible hose alignment or clean the accessible filter/glass trap as directed. If water remains high, the drain connection is inaccessible, or the hose/pump path leaks, keep the dishwasher off and arrange service.
Stop if: Do not reach into the sump, remove the pump or base, probe a blockage with sharp tools, or run repeated cycles with standing water rising toward the door.
Why this matters
Why: Electrolux says small bottom water can be normal, while water covering the filter screen calls for drainage checks. A kink, clogged filter/glass trap, blocked sink connection, or unremoved disposal knockout can prevent drainage and push water toward a leak path. Persistent water after clear accessible checks raises concern for a pump, sump, hose, or control/flood condition.
-
Check 6
After the door/loading, suds, supply, drain, filter, and bottom-water checks, record when the leak appears—during fill, wash, drain, or after shutdown—and the exact location, amount, water path, cycle, and any error or flood indication. Keep the water supply closed and do not remove the base, side panels, pump, valve, or tub components.
Expected result: The leak stops after a safe visible correction, returns without foam or obstruction, comes from below the tub or base, appears at the pump/valve/hose area, leaves water near electrical parts, or the dishwasher repeatedly fails to drain.
Next step: Keep the dishwasher off, water supply closed, and area dry while arranging qualified Electrolux/appliance service. Provide the exact model, leak timing/location, water level, detergent history, connection observations, and photos if safe.
Stop if: Do not run a cycle to reproduce an active leak, pull out a built-in unit, open panels, bypass flood protection, perform live tests, or replace internal parts by symptom alone.
Why this matters
Why: A leak that stops after a documented visible correction supports loading, door closure, oversudsing, supply connection, or drain-path conditions. A persistent under-unit leak or repeated drainage failure can involve a pump, valve, hose, tub/base seal, flood protection, wiring, or control; the symptom does not select a part.
Use your observations
Decision map
Find the observation that best matches what you see, then follow the next safe action.
-
PATH 01Next step
What you see
Water first appears at the front edge or corners during washing, and a rack/kick plate, gasket gap, visible tilt, or loading obstruction is present.
Do this next
Remove only the visible obstruction and clean the accessible seal contact area as the manual permits. Do not run the dishwasher if the gasket, latch, door, or installation needs repair.
Why this path and its safety boundary
Why it matters: Door closure, seal contact, level, or an obstructed spray/door path is more likely than a hidden pump or supply failure. Electrolux specifically warns that the kick plate can prevent complete closure.
-
PATH 02Next step
What you see
Foam or soapy residue is present and the history includes hand/dish soap, too much detergent, detergent placed in the tub, or spilled rinse aid.
Do this next
Clear the residue only as the exact manual permits, use the correct dispenser and amount on the next safe cycle, and arrange service if the leak recurs without suds.
Why this path and its safety boundary
Why it matters: Oversudsing is a supported explanation for a front or floor leak. A leak without foam should not be attributed to detergent alone.
-
PATH 03Next step
What you see
Water is wet at the visible supply hose/water-valve connection or appears only during the fill phase, with a kink, damaged hose, or loose/inaccessible connection.
Do this next
Keep the household water supply closed and arrange qualified installation/appliance service to repair and verify the connection.
Why this path and its safety boundary
Why it matters: The inlet hose, connection, shutoff, or valve path is more likely than a drain or door cause. A pressurized connection should not be disturbed by the user while wet.
-
PATH 04Next step
What you see
Water covers the filter screen, remains high after a cycle, appears during draining, or follows a kinked/displaced drain hose, clogged filter/glass trap, blocked sink connection, or unremoved disposal knockout.
Do this next
Correct only an accessible hose alignment or filter/glass-trap condition as directed. Keep the dishwasher off and arrange service for persistent standing water, an inaccessible connection, pump suspicion, or a recurring leak.
Why this path and its safety boundary
Why it matters: A drainage restriction or connection problem is more likely. A small amount below the filter can be normal, but water reaching the screen or floor needs correction or service.
-
PATH 05Safety boundary
What you see
The leak persists after accessible checks, comes from below the tub/base or an internal pump/valve/hose area, the unit repeatedly fails to drain, or water reaches electrical parts.
Do this next
Keep power and water isolated when safe, do not run another cycle or pull out a built-in unit, and arrange qualified Electrolux/appliance service with the model and leak record.
Why this path and its safety boundary
Why it matters: An internal hose, pump, inlet valve, tub or base seal, flood protection, wiring, or control fault is more likely, but the location does not prove a specific part. Water near electrics is a stop-use hazard.
Safety stop: Do not remove panels/base covers, bypass flood protection, probe live wiring, or work on pumps, valves, hoses, seals, or electrical parts.
Helpful context
Understand the symptom
Make the area safe before finding the source
Water on a dishwasher floor can travel away from the actual leak. If water is near a plug, cord, junction, or other electrical part, stop and do not touch wet components. If it can be done without contacting water or damaged wiring, stop the dishwasher and isolate its power and household water supply. Use a dry position to inspect the front, sink-cabinet connections, and visible floor; do not pull a built-in dishwasher forward or remove its base to look underneath.
Front-door leaks often start with closure, loading, level, or foam
Check that racks, pans, and the kick plate are not preventing the door from latching or sealing. A dirty or damaged gasket, an unlevel installation, or oversudsing can send water over the front edge. Electrolux warns that hand or dish soap, too much automatic detergent, detergent placed directly in the tub, and spilled rinse aid can produce foam and leaking. Correct only the visible loading or detergent condition and do not assume a gasket replacement without confirming the leak path.
Under-unit and drain leaks need connection checks
A leak that appears below the dishwasher or during draining can involve the supply hose, water-valve connection, drain hose, sink or disposal connection, filter, glass trap, or pump path. Inspect accessible connections for looseness, kinks, or a wet trail while the machine is off. A new garbage disposal may still have its knockout plug, and a kinked drain line can leave water pooled in the tub. Do not loosen plumbing connections or run repeated cycles while water is accumulating.
Standing water is not the same as a floor leak
Electrolux says a small amount of water in the bottom after a cycle can be normal. Water covering the filter screen, rising toward the door, or reaching the floor indicates a drainage or leak condition that needs a clear, model-appropriate check. Remove and rinse only the accessible filter or glass trap as the manual permits, and check a visible drain hose for kinks. A pump, sump, tub, base seal, inlet valve, or flood-protection condition must be diagnosed by a qualified technician.
Safety boundary
Stop conditions
- Stop immediately if water is near a plug, cord, junction, control, motor, or other electrical part, or if there is smoke, sparks, a burning odor, or a hot electrical connection.
- Stop if water is actively flowing and the household supply cannot be safely closed, or if the dishwasher has a damaged hose, door, tub, base, or unstable built-in installation.
- Do not pull out a built-in dishwasher, remove the base or side panels, open a pump or inlet valve, bypass flood protection, or perform live electrical tests.
- Do not run repeated cycles to locate an active leak, especially with rising bottom water, foam, or water near electrical parts.
- Use only the exact model's instructions for filter, glass-trap, spray-arm, drain-hose, detergent, and rinse-aid checks; do not mix cleaners or add chemicals to suppress suds.
- Arrange qualified service for persistent leaks, water under the tub, recurring drainage failure, a failed seal/latch, hose or valve damage, or any suspected pump, tub/base, wiring, or flood-protection fault.
When checks do not resolve it
Need a professional?
Arrange qualified Electrolux/appliance service when the leak persists after safe door/loading, suds, supply-connection, drain-hose, filter/glass-trap, and bottom-water checks; when water comes from under the tub or base; when the door seal/latch, hose, pump, valve, tub, or floor-level installation is damaged; or when drainage repeatedly fails. Stop immediately for water near electrical parts, smoke, sparks, burning odor, a hot connection, an uncontrolled water flow, or a damaged built-in installation. Keep power and the water supply isolated when safe and do not remove panels or run another cycle to reproduce the leak.
Safety scope: The user may stop the cycle, close the household water supply, isolate power only from a dry safe position, wipe accessible floor water, inspect visible door/loading/level and hose paths, and clean the accessible filter or glass trap as the exact manual permits. Built-in movement, pressurized connections, pumps, valves, tub/base seals, flood protection, wiring, live tests, and internal repairs are for qualified personnel.
Common questions
FAQ
Why is my Electrolux dishwasher leaking from the door?
Check that racks, pans, and the kick plate are not holding the door open, and inspect the visible gasket for a gap or damage. Electrolux also identifies unlevel installation and oversudsing as leak-related possibilities. Correct only visible loading or gasket-contact issues; a damaged seal, latch, door, or built-in leveling problem needs service.
Can too much detergent make an Electrolux dishwasher leak?
Yes. Electrolux says hand or dish soap, too much dishwasher detergent, detergent placed directly in the tub, and spilled rinse aid can create excess suds that lead to leaking. Stop using the dishwasher until the foam is cleared according to the exact manual, then use only the documented dispenser and amount.
Why is there water in the bottom of my Electrolux dishwasher?
A small amount below the filter after a cycle can be normal. If water covers the filter screen, rises toward the door, or reaches the floor, check only the accessible filter/glass trap and visible drain hose for debris or kinks as the manual permits. A blocked sink/disposal connection, pump, sump, or drain hose may require service.
Can the drain hose or garbage disposal connection cause an Electrolux dishwasher leak?
Yes. Electrolux identifies an incorrectly installed or kinked drain hose, blocked drainage, and a garbage-disposal knockout plug that was not removed as drainage problems that can leave water in the dishwasher and contribute to leaking. Inspect only accessible connections with the machine off; do not disassemble plumbing or pull out a built-in unit.
What should I check if water is leaking from under my Electrolux dishwasher?
Keep the cycle stopped, isolate power and the household water supply from a dry safe position, and inspect only visible supply and drain connections for wet trails, kinks, or displacement. A leak from beneath the tub or base can involve an internal hose, pump, valve, tub/base seal, or flood-protection condition and should be diagnosed by a qualified technician.
When should I stop using a leaking Electrolux dishwasher?
Stop immediately for water near electrical parts, smoke, sparks, burning odor, a hot connection, uncontrolled flow, a damaged hose, or repeated drainage failure. Keep power and water isolated when safe and arrange service. Do not run another cycle to reproduce the leak, pull out a built-in unit, remove the base, bypass flood protection, or work on pumps, valves, hoses, seals, or wiring.
Read the exact guide
Official sources
- Why is water in the dishwasher after it runs?Electrolux · General guidance distinguishing a small normal bottom-water amount from water covering the filter screen and identifying drainage and disposal checks.
- Dishwasher - Water LeakingElectrolux · General Electrolux dishwasher guidance for door closure, kick plate, drain and supply hoses, filters/glass trap, detergent, suds, rinse aid, and escalation; exact model installation instructions control.
- Dishwashers - Not DrainingElectrolux · General Electrolux dishwasher guidance for drain-hose high loop/kinks, filter/glass trap, garbage-disposal knockout, standing water, and escalation; exact model instructions control.
- Dishwasher - Not FillingElectrolux · General guidance for open water valves, blocked or restricted supply lines, and a safe power-reset interval; it does not authorize internal valve or electrical repair.
Community feedback
Share a repair observation
Share a plain-text repair observation. Accepted observations are published automatically; this page may take a moment to update.