
On this page
Start here
Quick answer
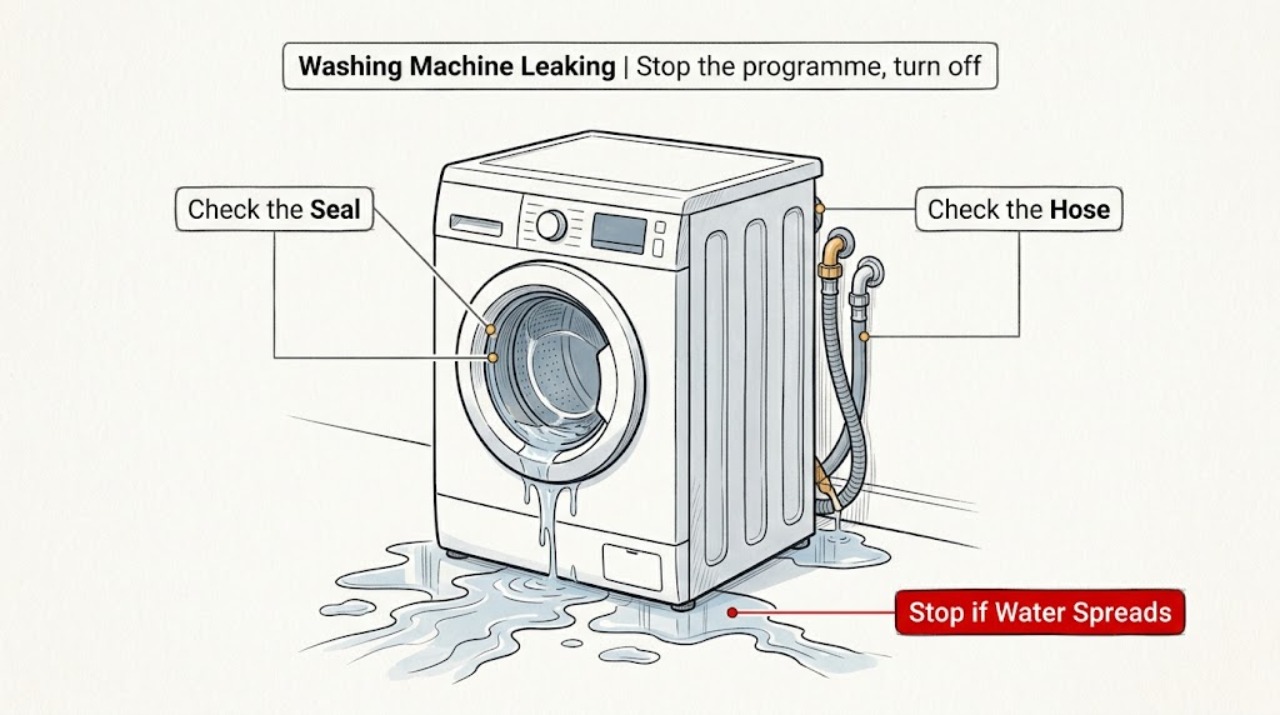
When an Electrolux washing machine is leaking, stop the cycle, turn off the water supply, and disconnect power when it is safe. Trace the first wet point: a tap or inlet connection, drain hose, detergent drawer, door seal, filter area, or water from inside the cabinet each leads to a different check. Inspect hose connections by hand, remove visible clothing or buildup from the drawer and seal, and check that the drain filter is correctly fitted only according to the exact model instructions. Do not use the appliance with an active leak, a damaged door seal or hose, water near electricity, smoke, a burning smell, or an unexplained cabinet leak. If the external checks do not stop the leak, arrange qualified Electrolux service.
Work through in order
Diagnostic checks
Use only checks that match the exact appliance or system and its official guide.
-
Check 1
Stop the programme, turn off the water supply, and disconnect power only when safe. Place towels or a shallow container to limit floor damage, then note whether the leak starts during filling, tumbling, draining, or after the machine stops.
Expected result: The first wet point is at a tap or inlet hose, the rear drain hose, the front door, the dispenser, the lower filter area, or inside the cabinet.
Next step: Follow the matching hose, door, dispenser, or filter check below. If the source is inside the cabinet or electrical area, keep the appliance off and request service.
Why this matters
Why: The timing and first wet point identify the relevant water path; a leak inside the cabinet or near electricity is not an ordinary user-cleaning issue.
-
Check 2
With water off and the appliance safely isolated, inspect both ends of each visible inlet hose and the tap for a crack, split, missing seal, cross-threading, or a loose connection. Tighten only by hand as directed; do not use pliers or continue using a damaged hose.
Expected result: The hose or seal is damaged, a connection or tap is wet, the hose is kinked, or all visible inlet connections are dry and secure.
Next step: Keep water off and replace or have a damaged hose or connection serviced. If the visible inlet path is sound, continue with the drain and front-of-machine checks.
Why this matters
Why: A damaged or loose inlet path can leak during filling; a dry inlet path makes the drain, dispenser, door seal, filter, or internal cabinet path more likely.
-
Check 3
Inspect the drain hose from the outside for damage, a loose connection, or water missing the standpipe, and check the household drain for backup without disconnecting a full or pressurized system. Do not send another wash into a drain that is already backing up.
Expected result: The drain hose is loose or damaged, water backs up at the household drain, or the drain path appears secure and open.
Next step: Secure only the external hose position described by the model installation guide and have a blocked household drain cleared. Request appliance service for a damaged hose or an unresolved leak.
Why this matters
Why: A loose or damaged drain hose can discharge outside the drain, while a blocked household drain can overflow even when the appliance hose is intact.
-
Check 4
Check the door seal, glass, and dispenser drawer for trapped clothing, hair, lint, detergent buildup, a drawer that is not seated, or a visible tear or hole. Remove only accessible residue or clothing; do not pull a damaged seal, force the drawer, or overload the drum.
Expected result: The seal or glass is dirty or obstructed, the seal is torn or deformed, the dispenser has buildup or is not fully closed, or the front areas are clear.
Next step: Clean and reseat only user-accessible parts according to the model manual. Do not use the appliance with a damaged door seal; request service for a torn seal, leak from the cabinet, or a recurring front leak.
Why this matters
Why: Trapped laundry or a damaged seal can let water escape at the door; dispenser buildup or a mis-seated drawer can spill water from the front; clear areas shift the diagnosis elsewhere.
-
Check 5
If the exact model provides a user-accessible drain or fluff filter, isolate the appliance, prepare for residual water, and check that the filter is seated and tightened by hand as the manual directs. Use the correct detergent amount and record any error or repeated leak; do not open panels or run a test with a known active leak.
Expected result: The filter is loose, blocked, or damaged, excessive foam is present, the leak returns from inside the cabinet, or the filter and detergent path are correct.
Next step: Correct only the model-documented filter or detergent issue and dry the area. If the filter is damaged, the leak returns, or water comes from inside the cabinet, leave the appliance off and arrange qualified service.
Why this matters
Why: A poorly fitted filter, blockage, or excessive foam can let water escape; a recurring internal leak after these checks suggests an internal hose, pump, valve, or dispenser fault.
Use your observations
Decision map
Find the observation that best matches what you see, then follow the next safe action.
-
PATH 01Next step
What you see
The leak starts at a tap, inlet hose, or rear inlet connection during filling.
Do this next
Turn off the tap, inspect the seal and hose, and hand-tighten only as directed. Keep the appliance off and arrange service for a crack, damaged connector, or leak that remains.
Why this path and its safety boundary
Why it matters: The water-supply path is the leading source.
-
PATH 02Next step
What you see
The leak appears while draining or water backs up at the standpipe or household drain.
Do this next
Stop the cycle, keep the drain from backing up, and have the hose or household drain corrected. Request appliance service for a damaged hose or unresolved appliance leak.
Why this path and its safety boundary
Why it matters: A drain-hose routing, connection, damage, or household-plumbing problem is likely.
-
PATH 03Next step
What you see
Water comes from the door area and clothing is trapped, the drum is overloaded, or the seal is torn or deformed.
Do this next
Remove only visible trapped laundry or excess load. Do not use the appliance with a damaged seal; arrange qualified service for a seal or door problem.
Why this path and its safety boundary
Why it matters: The door-seal path is not safely containing water.
-
PATH 04Next step
What you see
Water spills from the detergent drawer or the lower filter area.
Do this next
Clean and reseat only the documented user-accessible part, use the correct detergent amount, and keep water off until the area is dry. Request service if it leaks again or a part is damaged.
Why this path and its safety boundary
Why it matters: Residue, drawer seating, excessive foam, or filter fitment is a plausible cause.
-
PATH 05Next step
What you see
All visible checks are secure but water leaks from inside the cabinet, reaches electricity, or the appliance has smoke, burning odor, repeated power trips, or a serious active leak.
Do this next
Keep water and power isolated when safe, do not run another cycle, and arrange qualified Electrolux service. Do not remove cabinet panels or work on live wiring.
Why this path and its safety boundary
Why it matters: An internal hose, valve, pump, dispenser, electrical, or other safety fault requires professional diagnosis.
Helpful context
Understand the symptom
Trace the first wet point
Water can travel along the cabinet and floor, so the puddle location is not always the source. Check whether it appears during filling, washing, draining, or after the cycle, then trace upward to the first wet connection. Electrolux's official guidance covers washing machines and washer dryers, but hose routing, filter access, dispenser design, and door construction vary by model.
Start with the low-risk external causes
A loose or cracked inlet hose, an unsecured drain hose, residue in the dispenser, trapped clothing in the seal, an overloaded drum, or an incorrectly fitted drain filter can all create different leak patterns. Turn off water before inspecting a hose and use hand-tightening only where the manufacturer says it is appropriate. Do not use pliers, force connectors, or remove cabinet panels.
Stop if the leak is unsafe
Do not continue a wash with an active leak. Keep water away from the plug, outlet, controls, and extension connections. A damaged door seal, cracked hose, water from inside the cabinet, smoke, a burning smell, or repeated electrical trips needs qualified service rather than another test cycle.
Only after diagnosis
Potential parts
- inlet hose or hose sealing washer
Consider this category only if inspection confirms a cracked, split, deformed, or persistently leaking inlet hose or connection seal.
Confirm the complete Electrolux model and manufacturer's fit information before ordering; turn off water before handling the hose. - door gasket or seal
Consider this category only if the door seal has a confirmed tear, hole, deformation, or leak after visible clothing and debris are removed.
Do not use the appliance with a damaged seal. Verify the exact model and have replacement handled according to manufacturer guidance. - drain pump, filter, or internal hose component
Consider this category only if a qualified diagnosis finds a recurring leak or drain fault after the external hose and documented filter checks.
Confirm exact model compatibility through qualified service; do not open the cabinet or order from puddle location alone.
When checks do not resolve it
Need a professional?
Call qualified Electrolux service when the leak continues after the visible hose, drain, dispenser, door-seal, detergent, and model-directed filter checks; when water comes from inside the cabinet; or when a hose, seal, pump, valve, or electrical component needs diagnosis. Stop immediately for an active damaged-seal or hose leak, water near electricity, smoke, burning odor, repeated power trips, or a serious floor leak.
Common questions
FAQ
Where should I look first if my Electrolux washer is leaking?
Trace the first wet point and note whether it occurs during filling, washing, or draining. Check the matching inlet hose, drain hose, door seal, dispenser, or filter area with water off and power isolated when safe.
Can too much detergent make an Electrolux washing machine leak?
Yes. Excess foam can contribute to leaks, and buildup in the dispenser can spill water from the drawer. Use the correct detergent and amount for the model and load.
Can I use my Electrolux washer with a damaged door seal?
No. Stop using the appliance, turn off water, and arrange qualified service. A damaged seal can leak and cause further appliance or property damage.
Read the exact guide
Official sources
- Electrolux Washing Machine Leaking Water – Causes and SolutionsElectrolux · Electrolux washer and washer-dryer inlet, drain filter, dispenser, detergent, overload, door seal, safety, and service checks
- Seal on the washing machine's door is damagedElectrolux · Electrolux front-load door seal damage, trapped laundry, overload, and stop-use boundary
- Laundry front loading washer is leaking water.Electrolux · Electrolux inlet hose, drain hose, household drain, door, dispenser, level, and connection checks
- Washing Machine Inlet Hose Leaking: Causes & Fix GuideElectrolux · Electrolux inlet hose, tap, connection, seal, hand-tightening, water shutoff, and service boundary
- How to fix Water Related Issues of Electrolux Washing MachinesElectrolux Singapore · Electrolux drainage, pump filter, water-supply, leak, door seal, and service checks across applicable models
- Washer - dryer inlet hose is leakingElectrolux · Electrolux washer-dryer hose, tap, connection, hand-tightening, damaged-hose, and service boundary
Community feedback
Share a repair observation
Share a plain-text repair observation. Accepted observations are published automatically; this page may take a moment to update.