
On this page
Start here
Quick answer
For a leaking Fisher & Paykel washing machine, stop the cycle, keep clear of wet electrical parts, close the water taps, and find when the water appears: during filling, while draining, at the dispenser, around the door, or underneath. Fisher & Paykel guidance identifies inlet or drain hoses, a blocked dispenser, excess suds, and a damaged door seal as possible sources of a small puddle, while its inlet-hose guidance says to check hoses for wear, cuts, bulges, kinks, and leaks. Inspect only accessible areas after the machine is safe and disconnected as appropriate. Do not pull the washer out, open the cabinet, or run another cycle if the leak is active, reaches electrical parts, or comes from underneath with no clear external source; arrange qualified service.
Before you begin
Safety first
- A Fisher & Paykel trained or authorized technician can inspect hoses, valves, dispenser, door seal, pump, tub, and controls safely. Do not open the cabinet, move the washer to inspect underneath, or run repeated cycles to reproduce the leak.
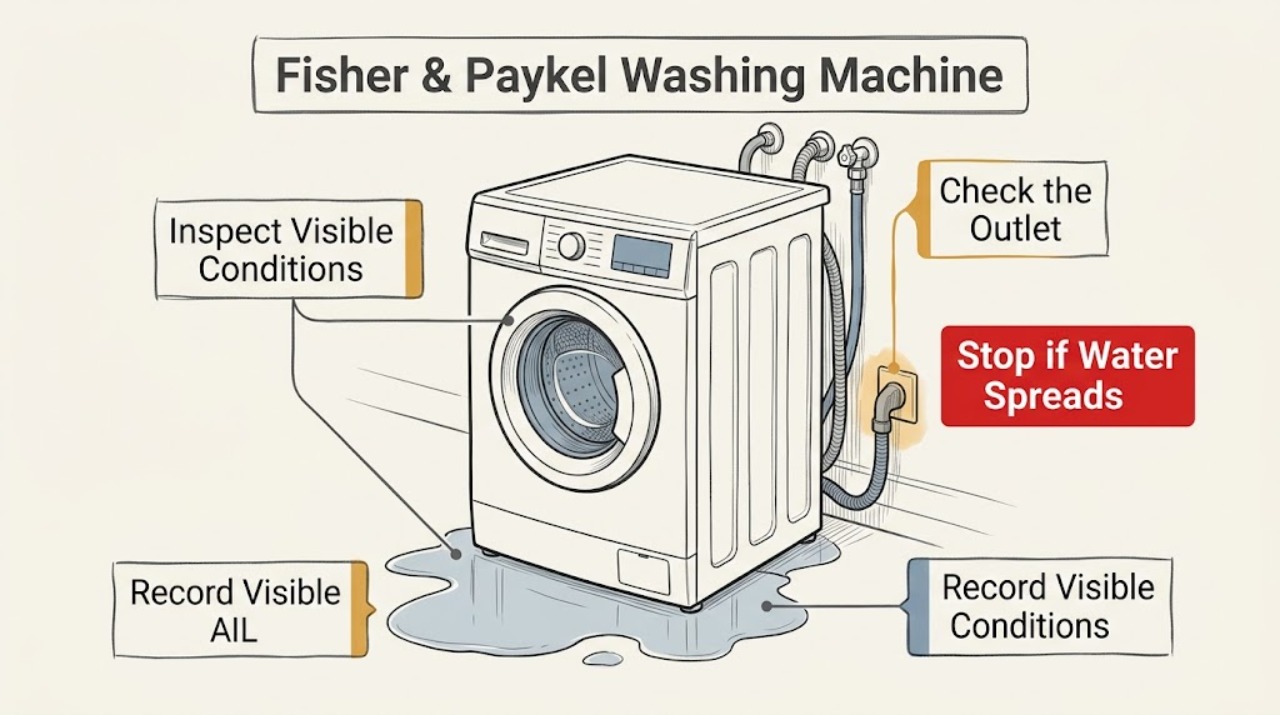
Work through in order
Diagnostic checks
Use only checks that match the exact appliance or system and its official guide.
-
Check 1
Stop the washer, close the inlet taps, and check from a dry position for standing water, an active spray, a wet plug or outlet, a burning smell, or water reaching the controls. If electrical parts are wet, stay clear and arrange safe isolation by a qualified person.
Expected result: The leak is active or near electrical parts, or the machine is dry enough for a low-risk external inspection.
Next step: For any electrical or uncontrolled-water hazard, stop and call qualified service. Otherwise note where the puddle begins and when it appears in the cycle.
Stop if: Wet electrical parts, an active spray, burning odor, damaged cord, or rapidly spreading water ends user testing.
Why this matters
Why: Flooding and electrical contact take priority over locating a component. A stable, dry area permits only accessible checks.
-
Check 2
Without moving the washer, trace the dry edge of the puddle and record whether water first appears during filling, washing, draining, or spin. Look only at the front, sides, and visible hose ends for a source.
Expected result: The timing points to the inlet or dispenser, door area, drain path, or underside; alternatively, the source cannot be seen externally.
Next step: Use the matching inlet, dispenser, door, or drain check below. If the source is hidden, stop rather than pulling the appliance out or opening its cabinet.
Stop if: Do not run repeated cycles to reproduce an active leak and do not move the machine to inspect its underside.
Why this matters
Why: Cycle timing narrows the inspection path. Water that starts underneath or has no visible source is more likely to need internal diagnosis.
-
Check 3
With the taps closed and power safely off as required by the model guide, inspect the visible inlet hoses and their connections. Look for cuts, bulges, kinks, worn areas, a displaced seal, or water residue; do not loosen a fitting that is under pressure.
Expected result: An inlet hose or connection shows damage, a kink, or residue, or the inlet path appears dry and intact.
Next step: Keep the taps closed and arrange a hose or connection repair when damage is found. If the hose looks sound, continue with the front and drain observations rather than replacing it by guesswork.
Stop if: Stop at any cracked hose, persistent connection leak, seized fitting, or need to move the washer for access.
Why this matters
Why: A damaged or kinked inlet hose can leak during filling. A dry inlet path moves attention to the dispenser, door seal, drain path, or an internal component.
-
Check 4
Inspect the door seal and detergent dispenser from the front. Look for clothing or debris caught in the seal, a visible tear, a drawer that is not fully closed, a blocked dispenser, or a heavy layer of suds; do not remove a damaged seal or open the cabinet.
Expected result: The seal is damaged or obstructed, the dispenser is blocked or not closed, excess suds are present, or these areas look normal.
Next step: Remove only an obvious loose obstruction and clean an accessible dispenser according to the model guide. If the seal is torn, the drawer remains blocked, or suds recur, stop using the washer and call service.
Stop if: Do not force the drawer, stretch the seal, use sharp tools, or continue a cycle when water escapes from the door area.
Why this matters
Why: Fisher & Paykel identifies door-seal damage, dispenser blockage, and excess suds as possible contributors to water appearing under or around the washer. A normal front area points back to hoses, drain components, or the tub.
-
Check 5
Inspect the visible drain hose and floor area after the water has been shut off. Note a loose or damaged hose, a drain connection that backs up, a leak that appears only during drain or spin, or water that continues from underneath after the washer is idle.
Expected result: The drain hose or connection is visibly loose or damaged, the drain backs up, or the leak remains unexplained and comes from underneath.
Next step: Stop use and provide the timing and location to an authorized technician. Do not remove the pump filter or panels unless the exact model guide explicitly supports a safe procedure and the water is cool and controlled.
Stop if: Water from inside the cabinet, a persistent underside leak, or any need to access the pump or tub ends user troubleshooting.
Why this matters
Why: A drain-path issue can release water during discharge, while an unexplained underside leak can involve the pump, tub, or an internal seal that requires service.
-
Check 6
Prepare the service record instead of running another cycle: photograph the puddle location if safe, record the model and serial details, selected program, stage when water appeared, hose and seal observations, dispenser condition, suds, and whether water reached electrical parts.
Expected result: The leak stopped after an accessible obstruction was corrected, or it recurs, has no clear external source, or caused an electrical or flooring hazard.
Next step: Keep the washer out of service when the leak recurs or its source is internal, and use Fisher & Paykel's official service path with the recorded evidence.
Stop if: Do not resume normal washing solely because the floor dried or the leak was not visible during one idle check.
Why this matters
Why: A one-time accessible obstruction may be resolved, but a recurring or hidden leak needs a trained technician to inspect the appliance and plumbing safely.
Use your observations
Decision map
Find the observation that best matches what you see, then follow the next safe action.
-
PATH 01Next step
What you see
Water reaches electrical parts, spreads rapidly, or the cord or outlet is wet or damaged
Do this next
Stay clear, stop use, and arrange safe electrical and appliance service before restoring power or water.
-
PATH 02Next step
What you see
The leak begins during filling and a hose or connection shows damage or residue
Do this next
Keep the inlet taps closed and arrange qualified hose or plumbing service; do not loosen a pressurized fitting or move the washer for access.
-
PATH 03Next step
What you see
Water appears at the front and the door seal or dispenser is visibly obstructed or damaged
Do this next
Remove only a loose obstruction or clean an accessible dispenser as the model guide permits. Replace a damaged seal through service and stop if water returns.
-
PATH 04Next step
What you see
The leak begins during drain or spin and the visible drain hose is loose, blocked, or damaged
Do this next
Keep the washer off, protect the floor, and arrange a drain-path inspection. Do not open the pump or cabinet as an ordinary-user test.
-
PATH 05Next step
What you see
Water comes from underneath, the source is hidden, or the leak returns after an external check
Do this next
Stop using the washer and contact a Fisher & Paykel trained or authorized technician with the model, cycle stage, and leak observations.
Helpful context
Understand the symptom
Stop the water before tracing the leak
Cancel or pause the washer if it can be done without contacting wet electrical parts. Close the inlet taps and keep the floor clear. If water is near the plug, outlet, or controls, do not touch those parts; have the area made safe by a qualified person. A small puddle can spread well beyond its source, so dry the floor only after the appliance is safe to approach.
The timing and location matter
Water appearing as the machine fills points toward the inlet path or dispenser. Water appearing during drain or spin points toward the drain hose, pump area, or an internal seal. A front-edge leak can involve the door seal or dispenser, while water that begins underneath without a visible external fitting needs service. Note the program stage rather than repeatedly running the washer to reproduce it.
Make only accessible checks
With the taps closed and the washer safely disconnected where the model instructions require it, inspect the visible hose connections, door seal, dispenser drawer, and drain hose. Look for a kink, cut, bulge, loose connection, trapped debris, or excessive suds residue. Do not pull the washer forward, remove panels, or reach into the pump or valve area as a first check.
Escalate an internal or repeating leak
If an accessible hose or dispenser issue is corrected, make at most one controlled observation with the floor protected and the water shutoff within reach. A recurring leak, water from underneath, a damaged seal, or any electrical symptom requires an authorized Fisher & Paykel technician. Keep the model and serial details ready for the service request.
Only after diagnosis
Potential parts
- inlet hose and seal
Consider this category only if a qualified inspection finds a cut, bulge, kink, worn hose, or failed seal at the water inlet connection.
Confirm the complete model and connection configuration before ordering; close the water taps and use qualified help if access is difficult. - door seal
Consider this category only if water escapes at the door and the seal is visibly torn or no longer seals after an obstruction is removed.
Match the exact model and have a qualified technician handle seal installation when the front assembly must be opened. - detergent dispenser or drawer component
Consider this category only if the dispenser remains blocked or damaged after accessible cleaning and water is confirmed to escape from that area.
Verify model fit and avoid replacing a dispenser when the leak source has not been confirmed. - drain pump or drain hose
Consider this category only when a technician confirms a drain-stage leak or pump-area fault after the visible drain hose and connections are checked.
Drain and pump access can expose residual water and electrical parts; use model-specific qualified service.
When checks do not resolve it
Need a professional?
Arrange service immediately for water near electrical parts, an active or spreading leak, a recurring leak, water from underneath, a torn door seal, a damaged hose, or a source that cannot be found externally.
Safety scope: A Fisher & Paykel trained or authorized technician can inspect hoses, valves, dispenser, door seal, pump, tub, and controls safely. Do not open the cabinet, move the washer to inspect underneath, or run repeated cycles to reproduce the leak.
Have this ready
- Provide the model and serial details, program and cycle stage, leak location, whether it occurs during filling or draining, hose and seal observations, dispenser and suds condition, and any electrical or flooring damage.
Common questions
FAQ
Why is my Fisher & Paykel washing machine leaking from underneath?
A small puddle can come from an inlet or drain hose, blocked dispenser, excess suds, or door-seal damage. If the source is underneath and not visible externally, stop using the washer and arrange qualified service rather than removing panels.
What should I check first when my Fisher & Paykel washer leaks?
Stop the cycle, close the inlet taps, keep away from wet electrical parts, and note whether water appears during filling, washing, draining, or spin. Then inspect only visible hoses, the door seal, and dispenser.
Can a Fisher & Paykel inlet hose cause a leak?
Yes. Fisher & Paykel advises checking inlet hoses for wear, cuts, bulges, kinks, and leaks. Keep the taps closed and arrange replacement or connection service when damage is found.
Why does water leak from the front door or detergent drawer?
A damaged or obstructed door seal, a blocked dispenser, an incompletely closed drawer, or excess suds can contribute to a front or under-machine puddle. Remove only an obvious loose obstruction; have a damaged seal or persistent dispenser leak serviced.
Should I run another cycle to find where my Fisher & Paykel washer leaks?
Not when the leak is active, recurring, near electrical parts, or coming from underneath. Record the cycle stage and location instead, and give those details to a Fisher & Paykel trained or authorized technician.
Read the exact guide
Official sources
- Washing Machine Inlet HoseFisher & Paykel · Fisher & Paykel inlet-hose care and leak-prevention guidance; confirm the exact model and hose configuration before replacement.
- Front Loading Clothes Washer User GuideFisher & Paykel · Model-family operating and troubleshooting guidance for front-loading washers; verify the user's exact model before applying model-specific procedures.
- Help & Support | Book A Service | Repair | TechnicianFisher & Paykel · Official troubleshooting, manuals, parts, and trained-service path for Fisher & Paykel appliances.
Community feedback
Share a repair observation
Share a plain-text repair observation. Accepted observations are published automatically; this page may take a moment to update.