
On this page
Start here
Quick answer
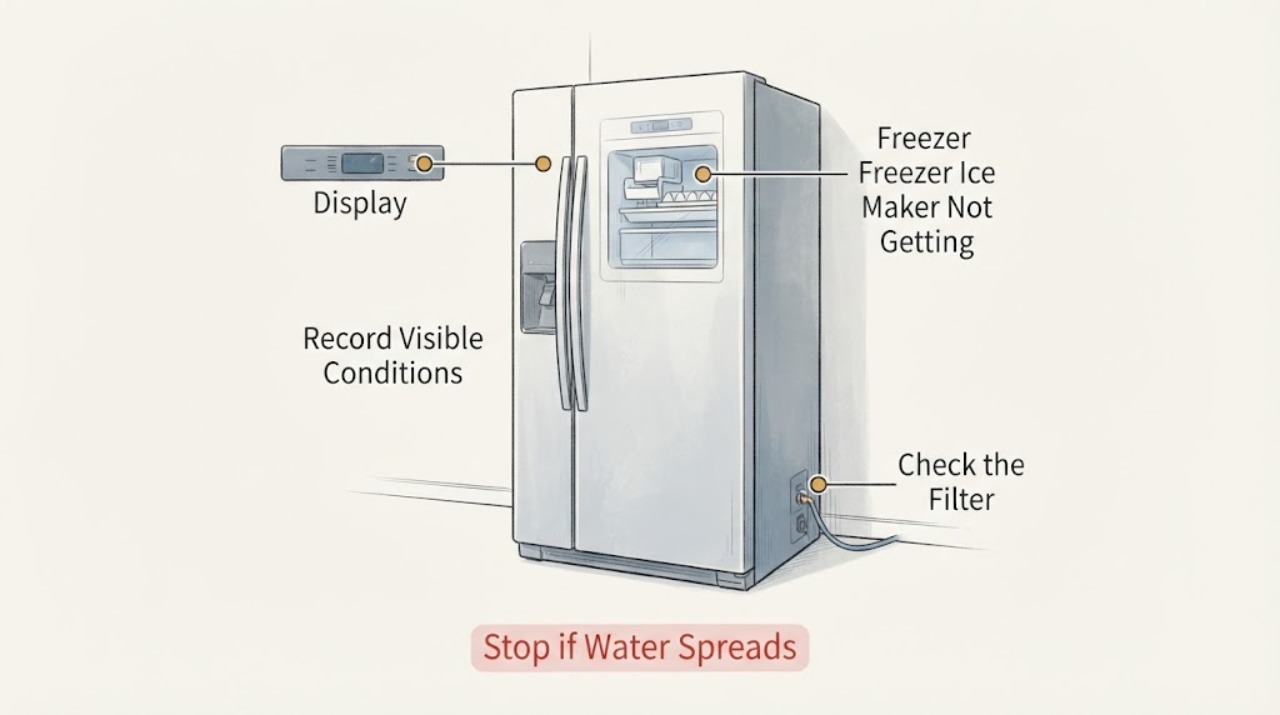
Stop the ice maker, close the accessible water shutoff, and disconnect freezer power only if the plug or breaker can be reached from a dry, safe position. Do not keep cycling the ice maker or assume the inlet valve is bad. Once isolated, document whether the leak is at the household line, a rear connection, the fill-tube extension, filter, or drain area; check only the accessible water supply, ice-maker switch or feeler arm, temperature, and filter conditions allowed by the exact model. A frozen or inaccessible fill tube, water near electrical parts, or a leak that returns after isolation needs qualified appliance or plumbing service.
Work through in order
Diagnostic checks
Use only checks that match the exact appliance or system and its official guide.
-
Check 1
From a dry, safe position, turn the ice maker off and close the nearest accessible water shutoff. If water is near a receptacle, cord, controls, or wiring, do not touch the wet area; disconnect power only if the plug or breaker is reachable without contact with water. Do not press a test button or repeatedly cycle the ice maker.
Expected result: The leak stops when the water is closed, water continues despite the shutoff, or water has reached electrical parts or an inaccessible cabinet area.
Next step: Keep water and power off, protect the floor and nearby food from further water, and arrange qualified appliance or plumbing service for a shutoff that does not isolate, continuing flow, or any electrical exposure.
Why this matters
Why: Stopping with the supply valve points to a pressurized water path; continued flow or water near electrical parts is an isolation/service issue, not proof of a failed valve.
-
Check 2
With the appliance isolated, record the exact model and inspect only visible areas: the household supply connection, rear tubing, filter housing, fill-tube extension, and any accessible drain area. Note whether the leak is at a fitting, tube, valve area, cabinet seam, or drain, and whether the ice-maker mold is empty.
Expected result: A rear connection or tube is cracked, kinked, displaced, or wet; the fill-tube extension is wet; water is at the drain or case exterior; or no visible source can be identified.
Next step: Photograph the dry-isolated leak location and use the exact model manual for any owner-accessible connection check. Do not tighten, pull, pierce, or remove a fitting by guesswork.
Why this matters
Why: The location narrows the service path but does not identify a specific valve, filter, tube, or internal component. GE lists these areas separately for refrigerator ice-maker leaks.
-
Check 3
Check the non-invasive ice-maker conditions listed by the exact manual: the ice maker is on, the feeler arm or paddle moves freely, the freezer is at its documented operating temperature, the water supply line is on and not kinked, and the water filter is correctly seated and not visibly damaged. Do not remove the ice maker to inspect its tube.
Expected result: The ice maker is off or blocked, the freezer is too warm, the line or filter is restricted or damaged, the dispenser works while the ice maker does not fill, or all visible conditions are normal.
Next step: Correct only an obvious setting or model-approved filter/line condition with the water off. For a frozen or inaccessible tube, keep the ice maker off and arrange service; do not heat, pierce, or pull the tube.
Why this matters
Why: GE identifies switch/feeler-arm position, freezer temperature, water supply, filter condition, and a frozen fill tube as different no-fill possibilities. A working dispenser with no ice-maker fill can occur when the ice-maker fill tube is frozen, but GE says verification requires technician removal.
-
Check 4
After the area has been dry and the model manual permits a check, compare whether the water dispenser also has restricted flow or leaks, whether the symptom began after filter, door, or water-line work, and whether the rear leak returns without a fill cycle. Do not restore water merely to reproduce an active leak.
Expected result: The dispenser and ice maker both lack water, only the ice maker lacks water, the event followed a filter or line change, or the rear leak returns while the ice maker is off.
Next step: Keep the water off and provide the exact model, leak location, water-off result, dispenser behavior, filter/line history, and photographs to qualified service. Have a plumber address house-side supply or drain work.
Why this matters
Why: Shared symptoms keep the household supply, filter, and common water-line path in scope; an ice-maker-only no-fill pattern keeps the fill tube, ice-maker control, and model-specific supply branch in scope. A leak with the ice maker off points toward a continuously pressurized connection or other supply-side issue, not a confirmed ice-maker part.
Use your observations
Decision map
Find the observation that best matches what you see, then follow the next safe action.
-
PATH 01Next step
What you see
Water reaches an outlet, cord, controls, wiring, or an inaccessible cabinet area, or the supply cannot be shut off safely.
Do this next
Do not touch the wet area or restore power. Keep people away and obtain qualified appliance service or plumbing help; use emergency assistance for an immediate flooding or electrical danger.
Why this path and its safety boundary
Why it matters: The combined water and electrical hazard is beyond an owner visual check.
-
PATH 02Next step
What you see
The water stops at the shutoff and a visible rear tube, fitting, filter connection, or fill-tube extension is wet, cracked, kinked, or displaced.
Do this next
Leave the water off, document the location, and follow only the exact model's connection procedure or arrange qualified service; do not force a fitting.
Why this path and its safety boundary
Why it matters: The accessible supply or fill path is implicated, but the failed component is not proven by the symptom.
-
PATH 03Next step
What you see
The dispenser works, the ice-maker mold stays empty, and the visible supply and filter checks are normal.
Do this next
Keep the ice maker off and arrange model-specific service. Do not thaw with a heat source, pierce the tube, or remove the ice maker on an unknown model.
Why this path and its safety boundary
Why it matters: GE says a frozen ice-maker fill tube is one possibility in this pattern, but verifying it requires removing the ice maker and should be done by a service technician.
-
PATH 04Next step
What you see
The appliance is actually a stand-alone ice maker rather than a refrigerator/freezer ice maker.
Do this next
Use the stand-alone unit's exact installation manual and keep water off until the supply/drain path is inspected. Arrange service if the leak persists.
Why this path and its safety boundary
Why it matters: The drain cap, drain alignment, level, supply hose, and drain-pump connections can follow a different architecture; GE explicitly separates this from automatic refrigerator ice makers.
Helpful context
Understand the symptom
Control water and electrical risk first
A freezer ice maker that is not filling while water appears at the back has two linked but different symptoms: the fill path may not be delivering water to the mold, while a supply connection, fill-tube extension, valve area, filter, or drain may be leaking elsewhere. Isolate the water and power before inspecting. Do not reach behind a wet refrigerator, touch wet wiring, or run a fill test to reproduce the leak.
Confirm the appliance architecture
The task describes a freezer, but manufacturer guidance distinguishes an automatic ice maker inside a refrigerator or freezer from a stand-alone ice maker. GE explicitly says its stand-alone ice-maker leak article does not describe an automatic refrigerator ice maker. Use the exact model manual before treating a rear drain, supply hose, filter, or fill-tube instruction as applicable.
When checks do not resolve it
Need a professional?
Obtain qualified appliance or plumbing service for water near electrical parts, a leak that continues or returns with the ice maker off, an inaccessible or frozen fill tube, a damaged rear line or fitting, a shutoff that will not isolate, or no-fill after the model-approved external checks.
Have this ready
- Provide the exact model and serial, refrigerator/freezer versus stand-alone architecture, water-off result, rear leak location, dispenser behavior, ice-maker status, filter and water-line history, freezer temperature, and photos taken with water and power isolated.
Common questions
FAQ
Why can the ice maker be empty while water leaks at the back?
The no-fill symptom and the rear leak can involve different parts of the water path. Official guidance keeps the household line, fittings, filter, valve area, fill-tube extension, drain, temperature, and ice-maker controls in scope. The location must be documented with water and power isolated before a part is identified.
Can I remove the ice maker to check whether the fill tube is frozen?
Do not do that on an unknown model. GE says verifying a frozen fill tube requires ice-maker removal and should be checked by a service technician. Do not pierce, heat, or pull the tube.
Should I keep the ice maker running to see where the leak starts?
No. Close the water supply and disconnect power only if safe. Repeated fill cycles can spread water toward electrical parts and cannot distinguish a line, filter, fill tube, valve, or drain problem.
Read the exact guide
Official sources
- Refrigerator and Freezer Troubleshooting and SupportGE Appliances · Official GE refrigerator/freezer family guidance; exact model access and component layout remain model-specific.
- Water leaks in a Samsung refrigeratorSamsung · Official Samsung refrigerator troubleshooting; model-specific water-line and filter access remains controlling.
- Refrigerator - Icemaker Doesn't Fill With WaterGE Appliances · Applies to GE refrigerator ice makers; exact fill-tube access and controls vary by model.
- Ice Maker - LeakingGE Appliances · Applies only to stand-alone ice makers; GE explicitly says it is not an article about automatic refrigerator ice makers.
- Connect and install the water line to your Samsung refrigeratorSamsung · Official Samsung refrigerator water-line guidance used for general supply isolation; exact tubing and connector layout varies by model.
Community feedback
Share a repair observation
Share a plain-text repair observation. Accepted observations are published automatically; this page may take a moment to update.