
On this page
Start here
Quick answer
First confirm that this is the ice maker's fill problem, not a dispenser-flow problem: the ice mold is empty after a harvest or fill attempt, while the refrigerator may still dispense water. Verify the exact model's ice-maker On/Off state, water supply valve, and unobstructed supply line. If a filter is fitted, make sure it is seated, not cracked or frozen, and recently changed filters have been primed as the model instructions require. A newly installed refrigerator can have air in the plumbing and may produce a few empty ice cycles. Check that the freezer is cold enough for the model and allow its documented stabilization time. If water reaches the ice-maker area but the mold does not fill, or a valve, fill tube, wiring, or ice-maker module needs access, stop and arrange service; do not force a valve, pierce ice, or perform live tests. Frigidaire ice-maker layouts differ across French-door, side-by-side, and top-freezer families, so do not apply a signal-arm or control-panel procedure to a model that does not have it.
Before you begin
Safety first
- This article covers external water and filter checks, exact-model enable and startup observations, freezer-condition checks, priming, and one supervised cycle. Inlet valves, fill tubes, ice-maker modules, sensors, wiring, controls, and cabinet access require qualified service.
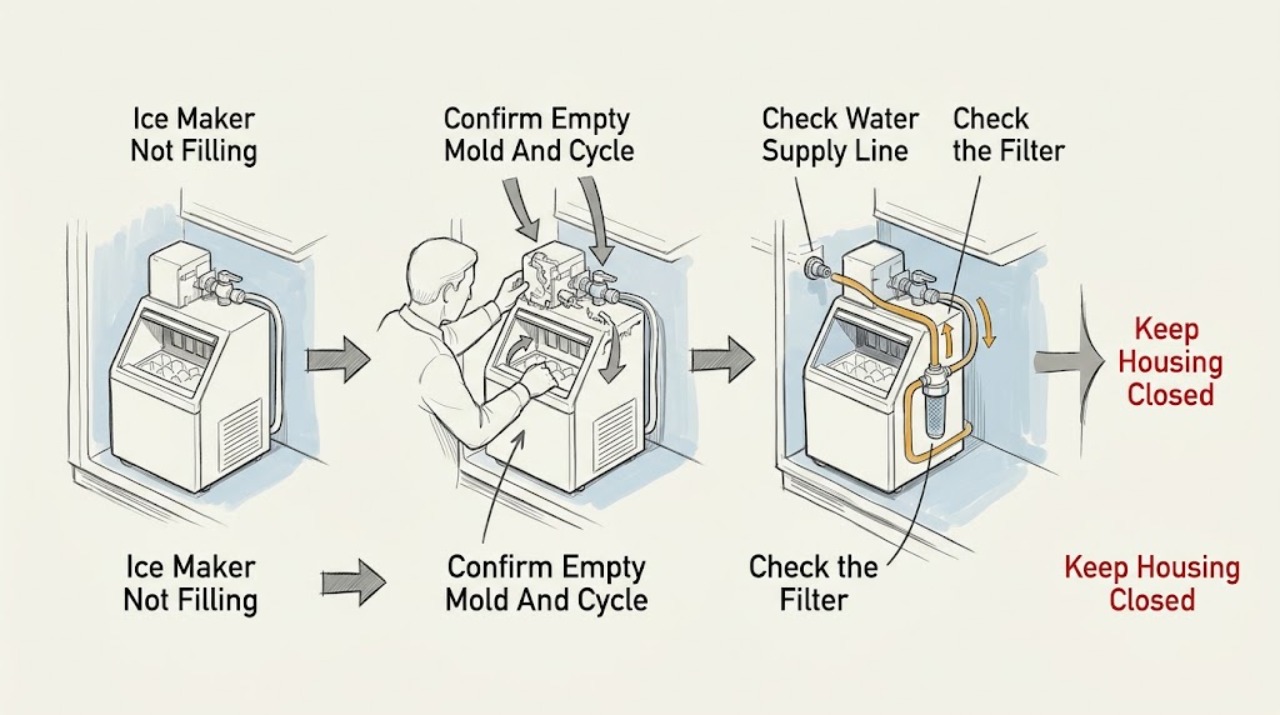
Work through in order
Diagnostic checks
Use only checks that match the exact appliance or system and its official guide.
-
Check 1
Inspect the ice-maker mold or tray and bin without removing the ice maker. Note whether the mold is empty, contains a partial fill, is frozen with old cubes, or is producing ice that never reaches the bin. Check the exact model's display or ice-maker control for an On/Off state.
Expected result: The mold is empty after a normal cycle; the ice maker is disabled; the mold contains a partial or frozen fill; ice is present but not transferring; or the model has no visible user control.
Next step: Enable the ice maker only with the exact model procedure, clear only a visibly full bin, and continue to the water-supply checks. Do not infer a signal-arm procedure for a different architecture.
Stop if: Do not force the mold, ejector, signal arm, or ice-maker housing, and do not reach near moving parts during a cycle.
Why this matters
Why: An empty mold after a fill attempt points to the water path or fill control. A disabled ice maker or full/jammed bin can prevent a fill cycle, while ice that never reaches the bin is an ejector or bin-path issue rather than a water-fill issue.
-
Check 2
Confirm the refrigerator's accessible water shutoff is open and inspect the visible supply line for a kink, pinch, or damage. Do not pull a built-in refrigerator forward or loosen a pressurized connection just to inspect hidden tubing.
Expected result: The shutoff was closed; the line is kinked or pinched; the line is damaged or wet; the refrigerator was recently installed; or the accessible water path appears open and dry.
Next step: Correct only a safely accessible valve position or visible routing issue. For a new installation, follow the exact priming procedure and allow the model's normal startup time before judging the first cycles.
Stop if: Shut off water and stop if a connection leaks, tubing is split, water reaches electrical parts, or access requires moving the appliance.
Why this matters
Why: No water reaching the refrigerator prevents an ice-maker fill. A new installation can also have air in the lines, while a wet or damaged connection is a leak and safety issue rather than a simple no-fill setting.
-
Check 3
If the refrigerator uses a water filter, verify from the exact manual that it is the correct type and is fully seated. Inspect the accessible filter for a crack, freezing, or recent replacement; prime and purge the water system only as the model instructions describe.
Expected result: The filter is loose, cracked, frozen, clogged, overdue, or was just replaced; the dispenser flow is also slow; or the filter and water flow are normal.
Next step: Reseat or replace the filter only with exact-model confirmation, then prime the line if required. Do not remove a filter and run an unapproved bypass or assume a look-alike filter is compatible.
Stop if: Stop for a cracked housing, leaking filter, water near controls, or a filter that cannot seat without force.
Why this matters
Why: A shared filtered water path can reduce or stop ice-maker filling when the filter is not seated or water flow is restricted. A normal dispenser does not rule out an ice-maker valve or fill-path fault, but it makes a whole-house supply failure less likely.
-
Check 4
Verify the freezer is closing and cooling normally, with no heavy frost blocking the ice-maker area. Use only the temperature and fast-freeze controls provided for the exact model; do not change a sealed-system setting or remove panels.
Expected result: The freezer is too warm, the door has been left open, heavy frost is present, the refrigerator was recently powered on, or the freezer is otherwise stable and cold.
Next step: Close the freezer, restore the model's normal temperature setting, and allow the documented stabilization period. If the freezer is not cooling or frost returns, address that issue before blaming the fill valve.
Stop if: Do not scrape evaporator frost with sharp tools, use forced heat near wiring, or dismantle the ice-maker compartment.
Why this matters
Why: The ice maker may not complete its harvest/fill sequence until the freezer reaches the model's operating condition. A recent installation or temperature change can delay production; heavy frost or a cooling fault requires a different service diagnosis.
-
Check 5
After the ice maker is enabled and the water path is available, observe one normal cycle from outside the appliance. Listen only for normal valve activity and check the mold afterward; do not hold a door switch, force a harvest, or put hands into the ice-maker mechanism.
Expected result: The mold fills normally; the ice maker cycles but no water enters; a brief fill occurs and stops; the valve chatters; or no cycle occurs after the model's documented wait.
Next step: Turn the ice maker off and arrange service for a fill-timed failure, persistent chatter, frozen internal path, or absent cycle after the external checks. Do not test a valve electrically.
Stop if: Stop for uncontrolled water, repeated chattering, a burning smell, sparking, a damaged line, or any need to bypass a door or ice-maker switch.
Why this matters
Why: A normal cycle with no fill narrows the issue to supply restriction, filter, valve, frozen fill path, or ice-maker control. Chattering without a connected supply is a stop condition; no cycle at all shifts attention to enable state, temperature, control, or module.
-
Check 6
If ice is present but the user reports no filling, check whether the bin is full, cubes are bridging or stuck, or the complaint is actually that the dispenser does not deliver ice. Use only the removable-bin and chute procedure in the exact manual; keep the water-fill diagnosis separate.
Expected result: The bin is full; cubes are fused or blocking the chute; the dispenser is locked or has slow water flow; the mold is empty; or the bin and dispenser are clear.
Next step: Clear only removable ice as the model guide permits, verify the bin is seated, and retest the ice maker without mixing in dispenser-specific repairs. Escalate for an internal auger, dispenser, or ice-maker mechanism.
Stop if: Do not chip ice with a sharp tool, force the auger, or disassemble the dispenser or ice maker.
Why this matters
Why: A full or jammed bin can stop further ice production, and a dispenser problem can be mistaken for a fill problem. An empty mold after a confirmed cycle remains a water-path or ice-maker control question.
-
Check 7
After an exact-model control, supply, filter, priming, or temperature correction, perform one supervised ice-making check with all covers and the bin correctly fitted. Stop at the first leak, abnormal sound, or electrical warning.
Expected result: The mold fills; it remains empty after a normal cycle; water leaks; the ice maker chatters; the freezer is not cold; or a control/error condition returns.
Next step: Turn off the ice maker and water supply if needed, preserve the model and timing observations, and arrange Frigidaire or qualified refrigerator service.
Stop if: Do not cycle the valve repeatedly, perform live tests, remove panels, or keep water connected to an uncontrolled fill path.
Why this matters
Why: Recovery after an external correction supports a supply, filter, startup, enable, or temperature cause. Persistent no-fill or a fill-timed leak points to an inlet valve, fill tube, ice-maker module, sensor, wiring, or refrigerator control that cannot be identified safely by an owner test.
Use your observations
Decision map
Find the observation that best matches what you see, then follow the next safe action.
-
PATH 01Safety boundary
What you see
The refrigerator is newly installed, the water supply is connected, and the first one or two ice cycles are empty.
Do this next
Prime the water system as the exact model guide directs, confirm the ice maker is enabled, and allow its documented startup time before escalating.
Why this path and its safety boundary
Why it matters: Air in new plumbing and startup stabilization are more likely than an immediately failed valve.
Safety stop: Do not leave the ice maker enabled against an unconnected water supply or continue if a connection leaks.
-
PATH 02Safety boundary
What you see
The dispenser is also slow or dry, the filter is loose/overdue/cracked/frozen, or the visible supply line is kinked or the valve is closed.
Do this next
Restore only the accessible supply, correct exact filter seating or replacement, and prime the system if required. Call service for leaks or hidden tubing.
Why this path and its safety boundary
Why it matters: A shared supply or filtered-water restriction is more likely than an isolated ice-maker mold failure.
Safety stop: Shut off water for any active leak or water near electrical parts.
-
PATH 03Safety boundary
What you see
The ice maker is Off, its bin is full, the signal arm/control is in a stop state, or cubes are blocking transfer.
Do this next
Use the exact model control or signal-arm procedure, ensure the removable bin is correctly seated, and observe a normal cycle.
Why this path and its safety boundary
Why it matters: The unit may be intentionally prevented from requesting a fill; this is not evidence of a failed inlet valve.
Safety stop: Do not force the control, signal arm, ejector, or auger.
-
PATH 04Safety boundary
What you see
The freezer is warm, frost-blocked, recently powered on, or has had a door-open or cooling interruption.
Do this next
Restore normal freezer operation and allow the model's stabilization period. If cooling or frost remains abnormal, arrange refrigerator service.
Why this path and its safety boundary
Why it matters: The ice maker may not yet reach its normal cycle condition, so a no-fill conclusion is premature.
Safety stop: Do not scrape hidden frost or alter sealed-system components.
-
PATH 05Safety boundary
What you see
The ice maker is enabled, the freezer is stable, water is available, and the mold remains empty after a normal cycle, or water enters uncontrolled.
Do this next
Turn off the ice maker and water supply, isolate power safely if water is near electrical parts, and call qualified service with the exact model and fill timing.
Why this path and its safety boundary
Why it matters: An inlet valve, fill tube, ice-maker module, sensor, wiring, or internal control fault is more likely; the symptom does not identify a compatible part.
Safety stop: Do not open panels, bypass a switch, energize a valve, or keep cycling a leaking fill path.
Helpful context
Understand the symptom
An empty mold is not the same as a dry dispenser
A dispenser can have slow flow while an ice maker is still waiting for a fill, and some refrigerators have no dispenser at all. Check the ice mold or tray and the ice-maker's own cycle state. The supply, filter, and control layout varies among Frigidaire refrigerator families; record the model before using a signal-arm, display, or fill-tube instruction.
New plumbing can delay the first fill
Frigidaire says air trapped in new water lines can produce two or three empty ice-maker cycles. Priming is normally performed through the refrigerator's water dispenser when the model has one, using the exact installation or Owner's Manual procedure. Do not run an ice maker with an unconnected supply merely to see whether the valve operates.
Filling is a sequence, not just a valve
The ice maker must be enabled, the freezer must be within the model's operating conditions, the water path must be available, and the ice maker must reach its fill phase. A clear mold with no fill after a normal cycle narrows the issue toward supply, filter, valve, fill tube, or ice-maker control; it does not identify which internal part failed.
Safety boundary
Stop conditions
- Turn off the ice maker and refrigerator water supply for an active leak, uncontrolled fill, chattering valve, damaged line, or water near electrical parts; isolate power only from a safe, dry location.
- Do not move the refrigerator to reach hidden plumbing, remove panels, bypass a door or ice-maker switch, perform live electrical tests, or alter a sealed refrigeration system.
- Do not chip ice with sharp tools, force a signal arm, ejector, auger, bin, filter, or fill tube, or use a filter or part without exact-model confirmation.
- A persistent empty mold after supply, filter, enable, temperature, and startup checks, or a fill-timed leak, requires Frigidaire or qualified refrigerator service.
When checks do not resolve it
Need a professional?
Arrange Frigidaire or qualified refrigerator service when the ice maker remains empty after the accessible water supply, exact filter, enable state, freezer condition, priming, and startup checks, when water enters without stopping or leaks internally, or when diagnosis requires the inlet valve, fill tube, ice-maker module, sensor, wiring, dispenser, or control access.
Safety scope: This article covers external water and filter checks, exact-model enable and startup observations, freezer-condition checks, priming, and one supervised cycle. Inlet valves, fill tubes, ice-maker modules, sensors, wiring, controls, and cabinet access require qualified service.
Common questions
FAQ
Why is my Frigidaire ice maker not filling with water?
Start with the ice-maker On/Off state, the accessible refrigerator water supply, filter seating, and visible line routing. Then confirm the freezer is in normal operating condition and observe one normal cycle. An empty mold after those checks needs exact-model service for the fill valve, fill tube, control, or ice-maker module rather than a guessed part.
Can a new Frigidaire refrigerator have empty ice-maker cycles?
Yes. Frigidaire says air trapped in newly installed plumbing can cause two or three empty ice-maker cycles. Prime the water system using the exact model procedure and allow normal startup time before diagnosing an internal failure.
Can a water filter stop the ice maker from filling?
On applicable filtered-water models, an incorrectly seated, frozen, cracked, clogged, or overdue filter can restrict the water path used for ice. Check the exact filter and manual; do not use a look-alike filter or unapproved bypass.
Does a working water dispenser prove the ice-maker fill valve is good?
No. A working dispenser makes a whole-refrigerator supply problem less likely, but the ice maker can still have its own enable state, fill timing, valve, fill tube, sensor, module, or wiring issue. Keep the two symptoms separate.
When should I stop checking the ice maker?
Stop for water near electrical parts, an active or uncontrolled leak, a chattering valve, a damaged supply line, abnormal heat or smell, or any repair that requires an internal valve, fill tube, ice-maker module, wiring, panel, or live test. Turn off the ice maker and water supply and arrange qualified service.
Read the exact guide
Official sources
- Refrigerators - What does it mean to “Prime the Water Supply System” and why is it important for my refrigerator?Frigidaire · Official Frigidaire article for French-door, side-by-side, and top-freezer refrigerators connected to a water supply; priming controls and ice-maker timing remain model-specific.
- What should I do if the dispenser on my refrigerator is not dispensing water?Frigidaire · Official Frigidaire article for French-door, side-by-side, and top-freezer dispenser systems; it is used here only to separate shared filter/flow symptoms from an ice-maker-only no-fill symptom.
- Refrigerator Water LeaksFrigidaire · Official Frigidaire owner-support article for refrigerators; exact water valve, fill path, and ice-maker construction varies by model.
- Refrigerators - No WaterFrigidaire · Official Frigidaire owner-support article for refrigerator models with water and/or ice systems; exact ice-maker architecture is model-specific.
- Refrigerator Error Code DI SP or DISP - Ice JamFrigidaire · Official Frigidaire article for refrigerator models with the described dispenser and ice-bin architecture; it is not a universal fill-valve procedure.
Community feedback
Share a repair observation
Share a plain-text repair observation. Accepted observations are published automatically; this page may take a moment to update.