
On this page
Start here
Quick answer
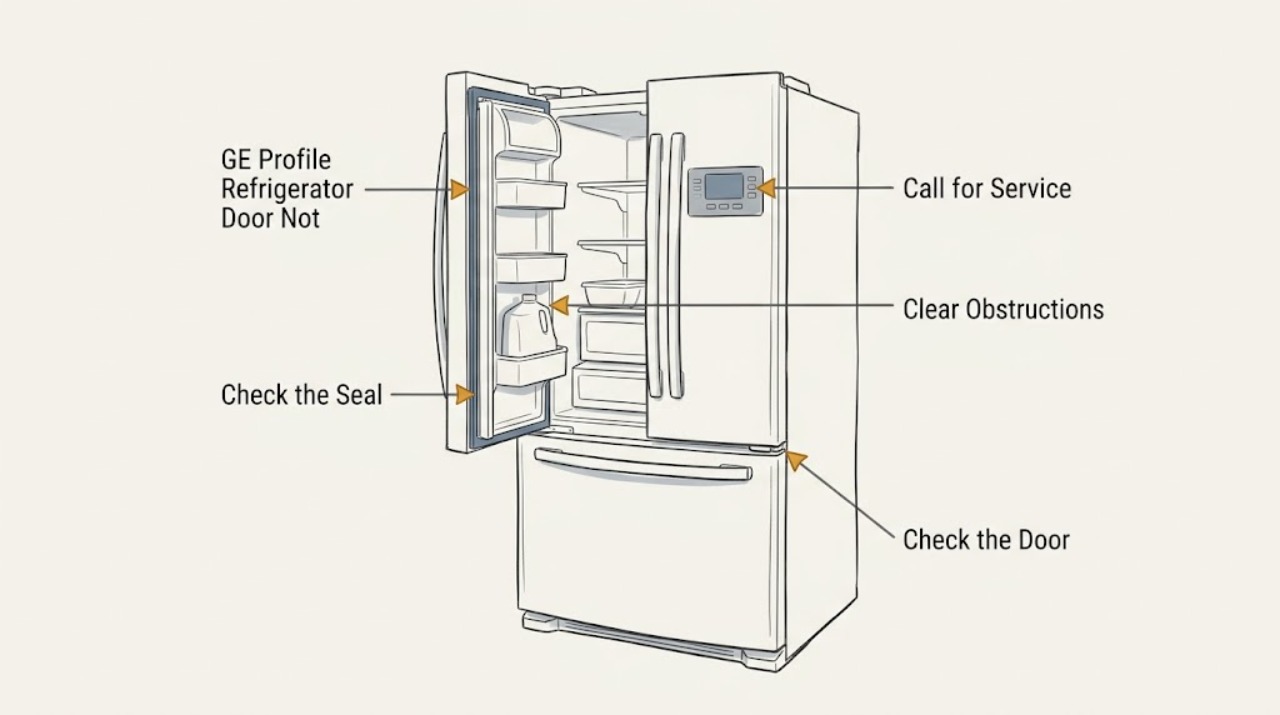
Start with the accessible closure path: remove a projecting tray, pizza box, tall container, open bin, heavy door item, or ice behind the ice bin, and make sure every drawer and bin is fully closed. GE Appliances says improper leveling can prevent a refrigerator door from shutting on its own and that a broken hinge requires service. Inspect the gasket around the entire door for dirt, folding, twisting, a loose section, tears, or a corner that does not contact the cabinet; clean only as the exact Owner's Manual directs. GE's gasket guidance says some modern gaskets seat into a retaining groove, but gasket removal, adjustment, and replacement instructions depend on door style, so do not pull the seal out just to experiment. If the door appears closed but the interior light stays on, GE notes that on most models the light should go out as the door nearly closes and that misalignment can affect cooling. A French-door Profile model may require model-specific door alignment; GE's alignment instructions are limited to specified French-door/bottom-freezer models labeled Assembled in the USA, so do not copy that procedure to another Profile model. Keep the door closed as much as possible and protect food if temperature is rising. Arrange qualified service for a sagging or unstable door, bent hinge, persistent gasket gap, damaged cabinet or glass, light staying on, moisture/frost, or any work requiring door removal, hinge loading, trim/panel access, or a built-in adjustment. Do not force the door, modify hinge hardware, bypass the light/door switch, or order a generic gasket or hinge without exact model confirmation.
Before you begin
Safety first
- The user may remove accessible obstructions, close bins, clean an intact gasket according to the manual, observe closure/light behavior, and identify the model. Qualified personnel or the installer must handle door removal, hinge/stop alignment, hidden installation hardware, switches, wiring, cabinet damage, and electrical or structural repair.
Work through in order
Diagnostic checks
Use only checks that match the exact appliance or system and its official guide.
-
Check 1
Support the door or freezer drawer by its safe outer handle while inspecting it, keep fingers away from hinge and closing gaps, and minimize the time the refrigerator remains open. If the door is unstable, glass or cabinet is cracked, or food has warmed, stop the inspection and arrange safe food storage/service.
Expected result: The door is stable and closes without force; it drops or swings unexpectedly; the glass/cabinet is damaged; or the compartment temperature is rising.
Next step: Continue only with a stable, undamaged door. Call service for structural damage or temperature loss and follow food-safety guidance when cooling is not controlled.
Stop if: Do not lift the door, hold a loaded drawer by its hinge, or put fingers into the closing gap.
Why this matters
Why: A stable undamaged door can receive accessible obstruction and gasket checks. Sag, instability, or damage can overload hinges and compromise the seal; rising temperature makes the issue more than cosmetic.
-
Check 2
Inspect the door edge, shelves, drawers, door bins, ice-bin area, and cabinet front for projecting packages, trays, pizza boxes, open bins, heavy items falling forward, or a loose ice cube. Close each bin and rearrange or remove only the accessible obstruction.
Expected result: The door closes after an item is removed; a bin remains out of position; an ice cube is behind or beside the ice bin; or no item touches the door.
Next step: Close the door gently after clearing the path and inspect gasket contact. If the path cannot be cleared without force or a drawer/ice component is damaged, call service.
Stop if: Do not chip ice with a sharp tool, overpack the door, or force a drawer past its track.
Why this matters
Why: A repeatable obstruction explains a door that stops at one point and does not establish a hinge or gasket failure. A clear path shifts attention to seal, level, alignment, or hinge condition.
-
Check 3
With the door open, inspect the complete gasket for dirt, a folded or twisted section, a loose edge, tears, hardening, or a corner that rolls inward. Wipe accessible dirt using the exact model's care instructions, then close the door gently and look for continuous contact around the cabinet.
Expected result: The gasket is dirty but intact; it is folded or loose; there is a visible gap; it is torn or hardened; or it contacts evenly.
Next step: Clean an intact gasket and recheck contact. Use the exact style-specific GE instructions for any adjustment and arrange service for a damaged seal or persistent gap.
Stop if: Do not heat, stretch, glue, cut, or pull the gasket from its groove unless the exact model procedure explicitly directs a safe user adjustment.
Why this matters
Why: A dirty, folded, or unseated seal can restrict closure or leak air. Tears, hardening, and persistent gaps indicate a sealing or alignment issue; an even seal with a door that still reopens shifts concern to level or hinge.
-
Check 4
From outside the appliance, open the door partway and observe whether it closes smoothly on its own. Look for a cabinet that rocks, a door that sits low, an uneven top gap, or a gap that changes when the door is lifted; consult the exact Owner's Manual before touching leveling legs, rollers, or alignment screws.
Expected result: The door self-closes smoothly; it remains open from a partial opening; the cabinet is visibly out of level; or the door sags/changes position when lifted.
Next step: Use a model-specific leveling or alignment procedure only when the exact manual permits it. Call service or the installer for a sagging door, built-in alignment, cabinet movement, or uncertain architecture.
Stop if: Do not lift/remove the door, loosen hinge bolts, remove trim, or adjust a loaded hinge.
Why this matters
Why: GE identifies leveling as a self-closing factor. Sag or movement makes hinge/alignment hardware more concerning, but generic adjustments do not apply to every Profile model or installation.
-
Check 5
After a gentle closure, slowly reduce the door opening and observe from outside whether the interior light goes out as expected for the model. Check the temperature display, visible condensation/frost, and whether the door gap remains; do not defeat the door switch or leave the door open for a long test.
Expected result: The light goes out and temperature is normal; the light stays on; condensation/frost or warmth is present; or the door appears closed but the gasket gap remains.
Next step: Correct only an identified obstruction or gasket issue. If the light stays on, the gap remains, or temperature does not recover, arrange service and keep openings brief.
Stop if: Do not tape down or bypass the door/light switch, remove the light assembly, or access its wiring.
Why this matters
Why: GE notes that on most models the light should go out near closure and that a misaligned door can leave it on and affect cooling. Incomplete closure also admits warm/humid air.
-
Check 6
Observe the lower hinge and door-stop area only from the outside. If the door opens unusually far, hits a wall/cabinet, or the stop appears bent, compare with the exact model documentation; do not bend, remove, or relocate the stop.
Expected result: The door stop behaves normally; the door opens into surrounding cabinetry; the lower hinge/stop is visibly damaged; or the stop is being considered as a closure adjustment.
Next step: Protect surrounding cabinetry and arrange service for a damaged or abnormal stop/hinge. If the stop is normal, return to obstruction, gasket, level, and closure checks.
Stop if: Do not remove hinge covers, load the hinge, bend the stop, or modify the door swing.
Why this matters
Why: The door-stop design and hinge system differ by model. A damaged stop or hinge is structural service work, not a user adjustment to make the door close.
-
Check 7
Record the complete GE Profile model/serial, door style, installation type, point where closure stops, obstruction/gasket/level observations, light behavior, temperature/moisture symptoms, and any prior installation or repair. Use GE's model support page and exact Owner's Manual before requesting parts or an adjustment.
Expected result: The door closes after clearing an obstruction; the gasket remains open; the door sags or hinge is damaged; the light stays on; or cooling/moisture symptoms persist.
Next step: Arrange GE Appliances/GE Profile or qualified refrigerator service for persistent gaps, damage, light/cooling effects, or any internal adjustment. Provide the record rather than ordering a generic part.
Stop if: Do not remove the door, hinge, gasket, switch, trim, or wiring, and do not buy a part without exact model fit confirmation.
Why this matters
Why: A resolved obstruction is different from a failed seal, hinge, switch, or alignment. The model and architecture determine whether a gasket, leveling, hinge, or control procedure is appropriate.
Use your observations
Decision map
Find the observation that best matches what you see, then follow the next safe action.
-
PATH 01Safety boundary
What you see
The door stops at a repeatable point and a package, tray, open bin, heavy door item, or ice cube touches or projects into the closure path.
Do this next
Remove or rearrange the item, close bins, and check gasket contact. If closure remains poor, continue to the seal/level branch.
Why this path and its safety boundary
Why it matters: The accessible obstruction is the direct explanation and does not establish a hinge or gasket failure.
Safety stop: Do not force the door, chip ice with a sharp tool, or overload door bins.
-
PATH 02Safety boundary
What you see
The gasket is dirty, folded, twisted, loose, torn, hardened, or leaves a visible gap after closure.
Do this next
Clean an intact seal and follow only the exact Profile style instructions for seating/adjustment. Arrange service for damage or a persistent gap.
Why this path and its safety boundary
Why it matters: The seal can prevent closure or admit warm/humid air. A damaged or unseated seal may need model-specific adjustment or service.
Safety stop: Do not heat, glue, stretch, cut, or pull out the gasket as an experiment.
-
PATH 03Safety boundary
What you see
The path is clear and gasket is intact, but the door stays open from a partial opening, sits low, has an uneven gap, or changes position when lifted.
Do this next
Check the exact model's installation instructions. Use a permitted user adjustment only when the model qualifies; otherwise call the installer or qualified service.
Why this path and its safety boundary
Why it matters: Leveling can affect self-closing, while sag or movement makes hinge/alignment hardware more concerning.
Safety stop: Do not loosen hinges or lift/remove a loaded Profile door.
-
PATH 04Safety boundary
What you see
The door appears closed but the interior light remains on, condensation/frost increases, or the cabinet temperature rises.
Do this next
Keep openings brief, correct only visible closure causes, and call service if the light remains on or temperatures do not recover.
Why this path and its safety boundary
Why it matters: A misaligned door or incomplete gasket contact can leave the light on and admit warm/humid air. This is a cooling and food-preservation concern.
Safety stop: Do not tape or bypass the door switch or leave the door open to repeat the test.
-
PATH 05Safety boundary
What you see
The hinge is bent/broken, the door is unstable, the lower hinge/stop is damaged, the cabinet/glass is cracked, or the door hits surrounding cabinetry.
Do this next
Stop using the door more than necessary and arrange qualified service or installer assistance with model and photos.
Why this path and its safety boundary
Why it matters: GE states a broken hinge requires service. Structural or alignment work can injure the user and further damage the cabinet.
Safety stop: Do not bend the stop, remove hinge hardware, prop a damaged door, or load it with heavy items.
-
PATH 06Safety boundary
What you see
The Profile refrigerator is built-in/counter-depth with hidden or unusual hinges, or its model and door architecture cannot be confirmed.
Do this next
Record the model/serial and contact GE Appliances/GE Profile support or the installer. Continue only with clearing obvious accessible obstructions and cleaning an intact gasket.
Why this path and its safety boundary
Why it matters: Generic leveling, hinge, gasket, and French-door alignment instructions may not apply to this installation.
Safety stop: Do not pull out the appliance, remove trim, or copy an alignment procedure from another Profile model.
Helpful context
Understand the symptom
Clear the door path before touching alignment
GE's closure guidance starts with projecting food, open bins, heavy door items, and ice. A door that stops at the same point because of a package is not evidence of a failed hinge. Remove only accessible obstructions, close drawers and bins, and close the door gently before judging the gasket or cabinet level.
Gasket work is style- and model-dependent
GE says many modern refrigerator gaskets seat in a groove and must be smooth and flat against the case. It publishes separate French-door, side-by-side, and top-freezer instructions. A GE Profile French-door procedure or alignment video should not be applied to a different Profile architecture without the exact Owner's Manual.
A closure gap can become a cooling and moisture issue
GE links incomplete closure with warm or humid air entering the cabinet. It also says a misaligned door can leave the interior light on and affect temperature. If the door will not seal, minimize openings and check temperatures; persistent warmth, frost, or moisture warrants service rather than a forced closure.
Safety boundary
Stop conditions
- Stop for cracked glass/cabinet, an unstable or sagging door, bent/broken hinge, damaged stop, sharp hardware, water near electrical parts, smoke, or a hot/damaged cord; arrange qualified service.
- Do not lift or remove a refrigerator door, loosen hinge hardware, remove trim/panels, bypass the door/light switch, or modify a door stop.
- Do not force a door against packages, bins, drawers, ice, or a gasket, and do not chip ice with a knife or sharp tool.
- Do not heat, glue, stretch, cut, or pull out a gasket unless the exact model procedure explicitly permits a safe user adjustment.
- Do not order a Profile hinge, gasket, switch, roller, or alignment part without confirming the exact model and door architecture.
When checks do not resolve it
Need a professional?
Safety scope: The user may remove accessible obstructions, close bins, clean an intact gasket according to the manual, observe closure/light behavior, and identify the model. Qualified personnel or the installer must handle door removal, hinge/stop alignment, hidden installation hardware, switches, wiring, cabinet damage, and electrical or structural repair.
Common questions
FAQ
What should I check first when my GE Profile refrigerator door will not close?
Look for a projecting package, open bin, heavy door item, tray, drawer, or ice cube in the closure path. GE Appliances lists these before leveling or hinge service. Clear only accessible obstructions and close the door gently.
Can an unlevel GE Profile refrigerator keep the door from closing?
Yes. GE says improper leveling can prevent a refrigerator door from shutting on its own. Because Profile installations and door architectures vary, use only the exact model's leveling instructions and call the installer or service for a built-in or sagging-door alignment.
What if my GE Profile refrigerator door looks closed but the light stays on?
GE notes that on most models the interior light should go out as the door nearly closes, and a misaligned door can leave it on and affect cooling. Check for a gap, gasket problem, or obstruction without bypassing the switch; arrange service if it remains on or the cabinet warms.
Can I adjust the gasket or French doors on a GE Profile refrigerator?
Only when the exact model and door style are covered by GE's instructions. GE publishes separate gasket and French-door alignment guidance and limits one alignment procedure to specified labeled models. Do not copy it to another Profile architecture or remove the door without the model manual.
When does a GE Profile refrigerator door problem need service?
Call for a broken or sagging hinge, unstable or cracked door/cabinet, persistent gasket gap after accessible cleaning and clearance checks, a light that stays on, rising temperature or moisture, or any adjustment requiring door removal, hinge loading, wiring access, or built-in installation work.
Read the exact guide
Official sources
- Refrigerator and Freezer Troubleshooting and SupportGE Appliances · Applies to GE and GE Profile refrigerator support and reinforces using model-specific support for a door issue.
- Refrigerator - Interior MoistureGE Appliances · Applies to GE refrigerator moisture symptoms and supports the relationship between incomplete closure, warm/humid air, and leveling.
- Refrigerator - Not Cooling EnoughGE Appliances · Applies to GE refrigerator cooling symptoms and supports door closure, gasket, interior-light, airflow, and service checks relevant when a door will not seal.
- Refrigerator - Door Will Not CloseGE Appliances · Applies to GE refrigerator door-closure symptoms and identifies obstructions, leveling, and hinge service; exact Profile architecture remains model-specific.
- User Manual & Care for PFCS1NFWSSGE Appliances · Used to verify the GE Profile product identity and the need for model-specific documentation; PFCS1NFWSS procedures are not universal to every Profile refrigerator.
- Bottom Freezer Refrigerator - How to Align French DoorsGE Appliances · Only use for French-door bottom-freezer refrigerators labeled ‘Assembled in the USA’ and confirmed by the exact model instructions; it is not a universal GE Profile adjustment.
- French-Door Refrigerator - Adjusting or Replacing the Door GasketsGE Appliances · Applies to French-door refrigerator gaskets; use only when the GE Profile model has this architecture and the exact manual agrees.
- Refrigerator - Easy to Remove GasketGE Appliances · Applies to modern GE refrigerator gaskets that use a retaining groove; exact Profile gasket construction and replacement instructions must be confirmed by model.
- Refrigerator - Door Stop / Door SwingGE Appliances · Applies to GE refrigerator door-stop information; exact Profile model and stop design must be confirmed before any service discussion.
Community feedback
Share a repair observation
Share a plain-text repair observation. Accepted observations are published automatically; this page may take a moment to update.