
On this page
Start here
Quick answer
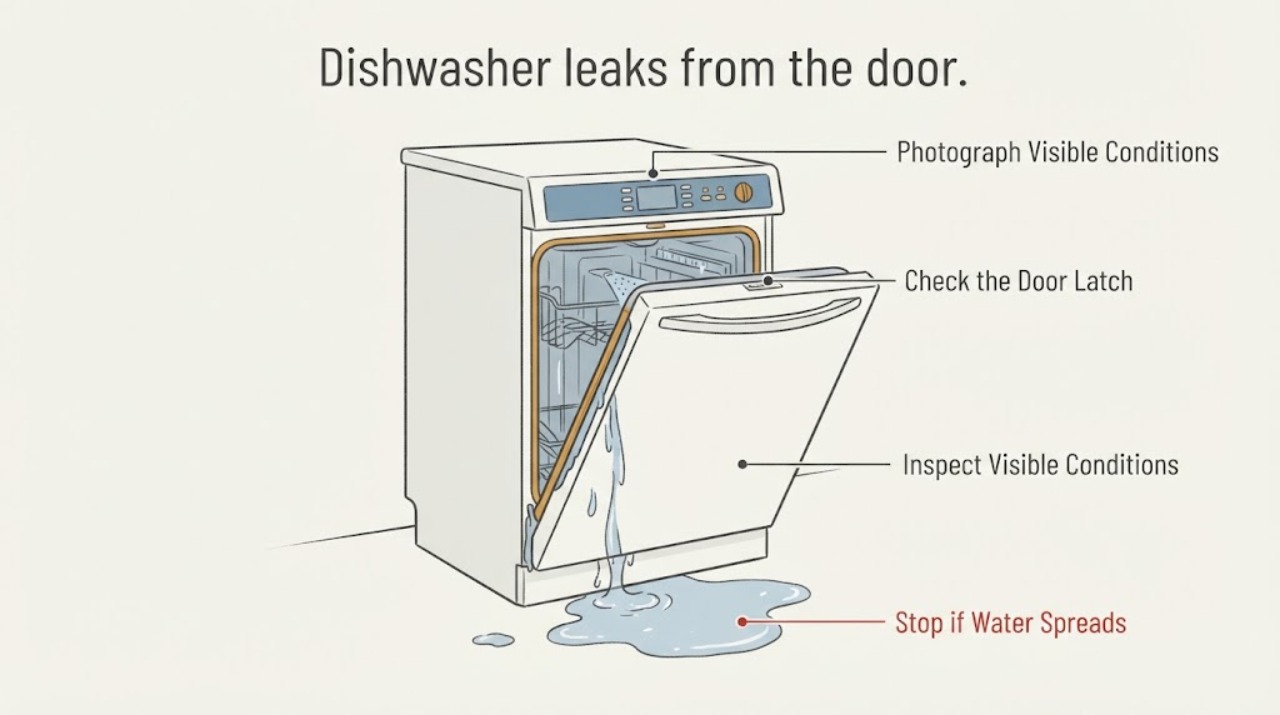
Stop the GE Profile PDP715SYV1FS if water is actively escaping from the door, reaching the floor, or appearing near electrical parts; do not run more cycles just to see whether a new gasket settles. GE says a new dishwasher door gasket may need several complete cycles to seat, but its leak guidance still requires checking whether the control panel or adjacent cabinet prevents a tight seal, whether the gasket is torn or displaced, whether a rack or tall item redirects spray, and whether suds from the wrong detergent or spilled rinse aid are pushing water out. After the appliance is off and dry, record where the first water appears, the cycle phase, detergent used, and whether the door closes without contact. Inspect only visible gasket, rack, spray-arm openings, floor, and accessible cabinet-side connections; do not pull the dishwasher out, remove panels, bend the door or latch, or keep operating through a leak. If the leak continues, appears underneath, or remains unexplained after these checks, leave water and power isolated only from a safe location and arrange qualified GE service, an installer, plumber, or electrician according to the boundary.
Work through in order
Diagnostic checks
Use only checks that match the exact appliance or system and its official guide.
-
Check 1
Stop the dishwasher as soon as water is actively escaping and record the full model PDP715SYV1FS, cycle and phase, detergent and rinse aid used, the first place water appeared, and whether water reached the floor, cabinet, or electrical area. Photograph the dry external area only when it is safe; do not run another cycle to reproduce the leak.
Expected result: Water is still flowing, has reached the floor or an electrical area, appears underneath the appliance, or was only a small front-edge trace with no ongoing flow after the appliance stopped.
Next step: For active flow, floor water, an underneath leak, or water near electricity, keep the dishwasher off, close its water supply if safely reachable, isolate power only from a dry safe location, and arrange qualified service. Otherwise continue only with the appliance off and dry.
Stop if: Do not touch wet wiring, pull the dishwasher out, remove panels, or restart the appliance to locate the first drop.
Why this matters
Why: Location separates an immediate water or electrical stop-use condition from a front-seal clue that can be inspected while the appliance is off. New-unit timing does not make ongoing leakage normal or safe.
-
Check 2
With the dishwasher off and the door open, inspect the visible door or tub gasket for a cut, tear, flattened section, foreign material, or a part that is out of its groove. Check the top and side door edges for contact with the counter, adjacent cabinet, or a rack or dish that prevents the door from closing evenly. Do not bend the metal, remove the gasket, or alter the latch.
Expected result: The gasket is visibly damaged or displaced, the door contacts the cabinet or counter, a rack or dish obstructs closure, the seal appears intact and the door closes evenly, or the leak was not at the door edge.
Next step: Remove only an obvious dish or rack obstruction that can be moved without force. For a damaged seal, cabinet contact, misalignment, or continuing front leak, leave the unit off and use the installer or GE service route; do not run cycles to seat or test the seal.
Stop if: Do not force the door, press the control panel to compensate for cabinet contact, reshape the gasket, or operate with water reaching the floor.
Why this matters
Why: A new gasket may still be stiff, but a tear, displacement, obstruction, or cabinet contact can defeat the seal. An intact, evenly closing door makes a spray, suds, plumbing, drain, or underneath branch more important.
-
Check 3
Inspect the visible lower and upper spray-arm openings and the rack loading while the dishwasher is off. Look for plainly accessible food, detergent, or mineral residue, a cracked or split arm, or a tall item that could direct spray at the door. Remove only loose accessible residue without sharp tools; do not remove the arm or reach into the sump.
Expected result: An opening is blocked, an arm is cracked or split, a rack or dish can direct spray toward the door, or the visible spray path is clear.
Next step: Correct only plainly accessible residue or loading that can be changed without force. If an arm is damaged or the leak returns, keep the dishwasher off and arrange service rather than operating for confirmation.
Stop if: Do not use a sharp object in spray holes, run with a cracked arm, or continue any cycle with active water on the floor.
Why this matters
Why: GE says blocked openings or splits can deflect water out the front. A clear spray path with a continuing leak makes the seal, alignment, suds, plumbing, drain, or internal leak more likely; it does not identify a spray-arm replacement.
-
Check 4
Check the detergent history and the visible tub for foam only after the appliance has stopped. Note any hand dish soap on pre-washed dishes, excess automatic-dishwasher detergent, or rinse aid spilled on the door. Do not add a different chemical, detergent, or cleaner and do not run a cycle while foam remains.
Expected result: Foam is visible or the leak followed a detergent or rinse-aid change, or there is no foam and the leak occurred with the usual automatic-dishwasher detergent.
Next step: If foam is present, leave the dishwasher off and follow only the exact GE model's safe pump-out or service guidance; use automatic-dishwasher detergent only afterward. If water or foam returns, stop use and arrange service.
Stop if: Do not mix products, pour chemicals into the tub, reach into standing water near electrical parts, or restart to clear foam.
Why this matters
Why: GE says wrong or excessive detergent, dish soap residue, and spilled rinse aid can create suds that push water out. No suds or a leak that persists after they dissipate leaves door, spray, plumbing, drain, or internal causes in scope.
-
Check 5
From normal cabinet access, inspect only the visible inlet and drain hose connections, shutoff area, sink drain or air gap, and tub water level. Do not loosen a clamp, reach behind the dishwasher, or pull it from its opening. Record whether water first appeared at a hose, air gap, cabinet, underneath, or the door.
Expected result: A hose or shutoff connection is wet, the sink or air gap backs up, water remains in the tub, all visible external connections are dry, or the source is underneath or behind the machine.
Next step: Use a plumber for an external sink, air-gap, shutoff, or cabinet plumbing problem. For water underneath, persistent standing water, or an unclear source, keep the dishwasher off and arrange qualified appliance service or installer assessment.
Stop if: Do not dismantle the drain or inlet path, access wet connections, tip the appliance, or remove installation hardware.
Why this matters
Why: GE separates plumbing and drain concerns from door leakage. A backed-up sink or air gap may expel water outside the dishwasher; dry external connections with water underneath leave an internal leak or installation issue that cannot be confirmed from the front.
-
Check 6
After the visible checks, preserve the model label, installation date, receipt or warranty record, leak location, photos, cycle phase, detergent history, door-contact result, and whether the leak stopped with the water supply closed. Do not make a replacement-part decision from the timing after three cycles alone.
Expected result: A new-installation contact or loading issue is visible, the gasket is damaged, suds or plumbing explain the water, or no visible cause explains the recurring door leak.
Next step: Use the installer or GE warranty/service route for a new unit, a damaged seal, or a leak that returns. Provide the exact PDP715SYV1FS identity and evidence; do not open panels, bypass protection, or run further cycles for diagnosis.
Stop if: Stop immediately for active flow, floor water, water near electricity, smoke, burning odor, a tripping breaker, or an appliance that cannot be safely isolated.
Why this matters
Why: The three-cycle timing can support an installer or gasket-seating question, but a recurring or unexplained leak requires model-specific assessment. An intact-looking seal does not rule out a hidden alignment, spray, hose, drain, or internal issue.
Use your observations
Decision map
Find the observation that best matches what you see, then follow the next safe action.
-
PATH 01Next step
What you see
The leak began on a new PDP715SYV1FS after a few uses, the control panel or door edge contacts the counter or adjacent cabinet, or a rack or dish prevents even closure.
Do this next
Leave the dishwasher off and have the installer correct the visible installation or loading obstruction. Do not run additional cycles to seat the gasket or force the door shut.
Why this path and its safety boundary
Why it matters: GE identifies new-gasket seating and installation contact as distinct front-seal conditions; a door can latch without forming a watertight seal.
-
PATH 02Next step
What you see
The gasket has a cut, tear, wear, or displacement, or the front leak remains with a properly closing door.
Do this next
Keep the dishwasher off and request model-specific GE service or installer support. Do not order or install a gasket without confirming the exact model and diagnosis.
Why this path and its safety boundary
Why it matters: A seal problem is plausible, but GE's gasket guidance does not make every bottom gap a defect and a persistent leak can have another cause.
-
PATH 03Next step
What you see
Foam is visible or the leak followed hand dish soap, excess detergent, or spilled rinse aid.
Do this next
Leave the unit off, do not mix chemicals or restart it, and use the exact model service or pump-out guidance. Arrange service if the leak or foam persists.
Why this path and its safety boundary
Why it matters: Excess suds can push wash water out of the door and mimic a gasket failure.
-
PATH 04Next step
What you see
The spray-arm openings are blocked or split, a tall item redirects spray at the door, or the sink or air gap backs up.
Do this next
Correct only accessible residue or loading without force; use a plumber for an external sink or air-gap blockage. Keep the dishwasher off if water remains or the leak returns.
Why this path and its safety boundary
Why it matters: Water may be misdirected by the spray path or expelled by an external drain boundary rather than leaking through the door seal.
-
PATH 05Next step
What you see
Water appears underneath or behind the dishwasher, reaches electrical areas, continues after the appliance stops, or the source remains unknown.
Do this next
Close the water supply if safely reachable, isolate power only from a dry safe location, keep the dishwasher off, and arrange qualified appliance service; use an electrician for recurring breaker or wiring concerns and a plumber for an external plumbing source.
Why this path and its safety boundary
Why it matters: An internal leak, installation problem, or electrical hazard is more likely than a front gasket-seating issue and cannot be identified safely from outside.
Helpful context
Understand the symptom
Three cycles changes the first question, not the safety rule
GE's new-dishwasher guidance says the door gasket may need several complete wash cycles to seat, and a new gasket can remain stiff. That timing can make a small front seep after the first few uses an installation or seal-seating clue, but it is not permission to keep running an actively leaking appliance. A door can latch while still contacting the underside of a counter or an adjacent cabinet, preventing a tight seal. With the dishwasher off, dry the area only if safe, record the first point of water, and inspect the door edge and surrounding cabinetry without changing the installation.
Separate door leakage from water that is only seen at the front
A true door-edge leak is different from water appearing at an air gap, drain connection, cabinet hose, or underneath the tub. GE lists over-sudsing, plumbing, gasket or door issues, and water deflected by spray-arm openings as separate leak mechanisms. The first visible drop and the cycle phase matter more than the fact that the appliance is new. Do not wipe up and restart repeatedly to locate the source; preserve a photo and the timing for the installer or service technician.
Do not order a gasket from the symptom alone
GE's gasket guidance says to inspect for cuts, tears, wear, and correct seating; it also notes that some light-gray gasket designs intentionally leave a gap at the bottom. A new PDP715SYV1FS should remain tied to its exact model record, installation instructions, and warranty or installer route. A persistent leak with an intact-looking seal may instead be caused by cabinet contact, loading, spray direction, suds, drainage, or an internal condition. The visible evidence cannot select a gasket, baffle, spray arm, pump, or valve by itself.
When checks do not resolve it
Need a professional?
Call the installer or qualified GE appliance service for a new-unit leak that returns, a damaged or displaced gasket, door or cabinet contact, water underneath, unexplained leakage, or any leak that remains after the safe visible checks. Use a plumber for a sink, air-gap, shutoff, or cabinet plumbing source and a licensed electrician for repeated breaker trips or supply concerns. Treat active flow, floor water, water near electricity, smoke, burning odor, or a leak that cannot be safely isolated as immediate stop-use conditions.
Have this ready
- Provide model PDP715SYV1FS, serial number, installation and delivery date, receipt or warranty record, cycle and phase, first water location, detergent and rinse-aid history, photos of the door edge and visible connections, whether the door contacted the cabinet, and whether closing the accessible water valve stopped the leak.
Common questions
FAQ
Can a GE PDP715SYV1FS door leak be normal after three cycles?
GE says a new dishwasher gasket may need several complete cycles to seat, but active leakage is not a reason to keep running the appliance. Stop it, check the visible gasket and whether the door or control panel contacts the counter or cabinet, and use the installer or service route if water returns.
What should I check before blaming the door gasket?
Record where the first water appears, then with the appliance off inspect the visible gasket, cabinet or counter contact, rack loading, spray-arm openings, foam, and accessible hose or sink connections. GE lists all of these as distinct leak paths. Do not order a gasket from the symptom alone.
Is a gap in the dishwasher gasket automatically a defect?
Not always. GE says some light-gray gasket designs intentionally leave a gap of about three inches at the bottom. Inspect for cuts, tears, wear, or displacement and relate the observation to the exact model; a recurring leak still needs service rather than a guessed replacement.
What if water is under the dishwasher instead of at the door?
Keep it off. Water underneath, water near electrical parts, or an unexplained source is outside a safe door-seal check. Close the water supply if safely reachable, isolate power from a dry safe location, and arrange appliance service; use a plumber or electrician when the source is clearly outside the dishwasher or the circuit is abnormal.
Read the exact guide
Official sources
- Dishwasher - Door Will Not LatchGE Appliances · Official GE dishwasher guidance that applies to models beginning with PDT/PDP and other listed prefixes, including the PDP family; exact model installation instructions remain controlling.
- Dishwasher - Checking and Replacing Door GasketGE Appliances · Official GE gasket guidance; gasket appearance and replacement remain model-specific and must be confirmed against PDP715SYV1FS documentation.
- Model Search | PDP715SYV1FSGE Appliances Parts & Accessories · Official GE Appliances parts site entry for the exact PDP715SYV1FS dishwasher; it identifies the product as a GE Profile top-control stainless-interior dishwasher and links the exact manual and installation instructions.
- Dishwasher - Leaking From DoorGE Appliances · Official GE dishwasher symptom guidance; it directly covers new-dishwasher gasket seating, cabinet contact, gasket/baffle checks, door vent, alignment, and service.
- Dishwasher - Preventing LeakingGE Appliances · Official GE dishwasher leak guidance used for visible symptom boundaries; it does not authorize appliance removal or internal repair.
Community feedback
Share a repair observation
Share a plain-text repair observation. Accepted observations are published automatically; this page may take a moment to update.