
On this page
Start here
Quick answer
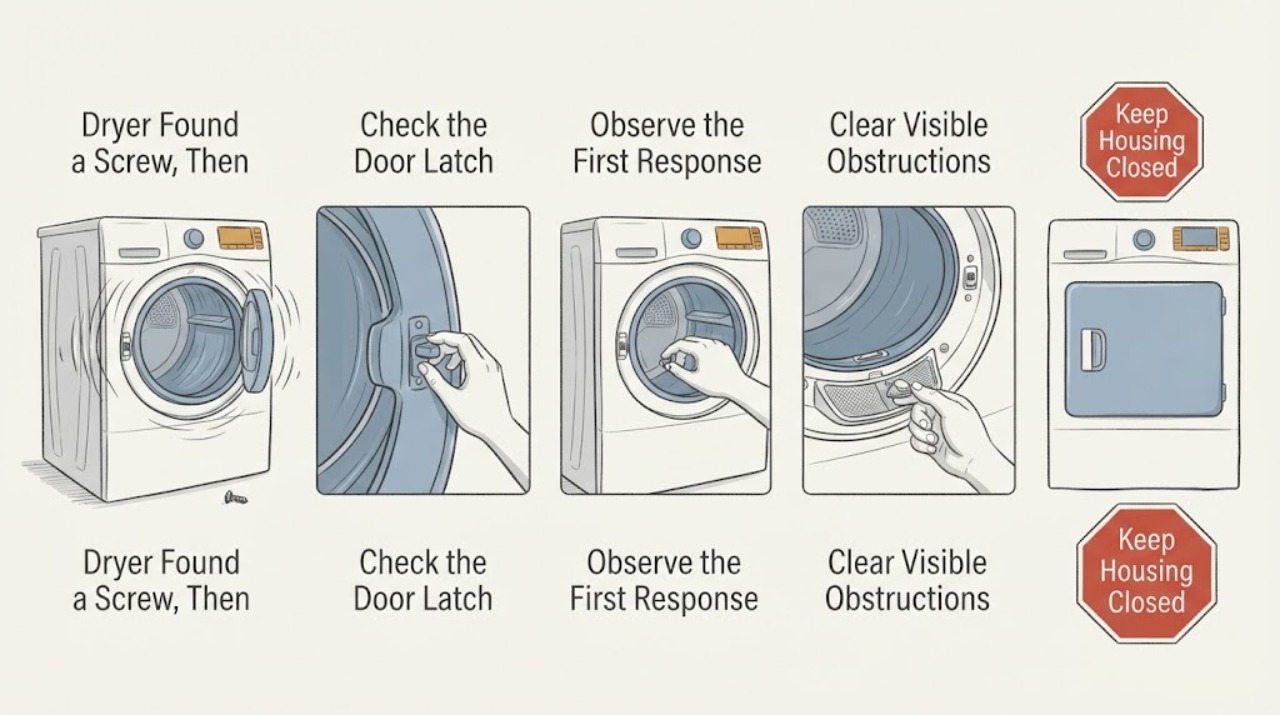
Do not run the GE GTD42EASJ2WW again for now. This is an electric dryer, and a loose screw followed by a new noise, a door that may be out of alignment, and a shutdown after about one minute is not a normal explanation for a low-heat setting. Unplug it or switch off its dryer circuit only if that can be done safely, keep the screw and photographs, and do not bend the door, reach behind the lint opening, remove panels, bypass the door switch, or keep testing it. From the outside, record whether the door catches, whether the cord or outlet is hot or damaged, whether the vent is kinked or blocked, and whether the cabinet is unusually hot. Arrange qualified appliance service to inspect the door/latch, drum and loose-object path, airflow, and electrical start or protection circuit as one event rather than ordering a part from the symptom alone.
Before you begin
Safety first
- Do not continue test cycles, reach behind the lint opening, rotate a damaged-looking drum, remove the cabinet, open the terminal area, bypass the door switch, reset a breaker repeatedly, or choose a replacement part from the symptoms alone. The dryer is electric; isolate power only when safe.
Work through in order
Diagnostic checks
Use only checks that match the exact appliance or system and its official guide.
-
Check 1
Leave the dryer stopped, unplugged or isolated at the dryer circuit only when safe, and let it cool. Put the loose screw in a labeled bag; photograph the screw, the drum, the door gap and hinges, the latch/strike area, and any mark where the screw was found. Write down the cycle, Low temperature selection, load, first noise, and the approximate one-minute shutdown.
Expected result: The screw can be matched to a visible external location, it was found in the drum or lint area, or its origin is unknown; the door catches normally, needs force, sits unevenly, or leaves a visible gap; the stop was immediate or followed a noise.
Next step: Keep the unit out of service and give the screw, photos, full model and serial number, and timeline to the appliance technician. Do not throw away the screw or try to reinstall it in an unverified hole.
Stop if: Stop immediately and seek urgent electrical or appliance help for smoke, sparks, a burning smell, melted plastic, shock, a hot cord or outlet, or a breaker that trips again.
Why this matters
Why: The evidence preserves the relationship between a possible missing fastener, door alignment, noise, and shutdown without assuming that the screw belongs to a particular assembly. GE's model page confirms the exact electric-dryer identity, and its manual says not to operate a damaged or malfunctioning appliance.
-
Check 2
With power isolated and the dryer cool, look at the closed door from the front and side without forcing it: check whether the hinges appear loose, the latch/strike meet squarely, the door rubs the opening, or the seal is visibly displaced. Inspect only the visible switch area for scorching or obvious damage; do not remove the door, bend the strike, tighten unknown fasteners, or bypass the switch.
Expected result: The door will not close evenly, must be lifted or pushed, rubs, has a displaced seal, or the visible switch is scorched/pushed in; or the door and visible switch look normal.
Next step: Do not keep trying the Start control. Photograph the gap and latch position and arrange service for the door/latch and related wiring, especially because the noise and loose screw preceded the stop.
Stop if: Do not tape, wedge, or hold the door switch closed, and do not continue if the door or hinge is bent, sharp, loose, or likely to fall.
Why this matters
Why: A new alignment problem can keep the door interlock from making reliable contact and can also allow rubbing or a loose part. GE lists a tightly closed door and a scorched or pushed-in door switch among no-start checks, but a normal-looking door does not clear a hidden hinge, latch, or wiring fault.
-
Check 3
Without operating the dryer, remove only the load and look with a light at the accessible drum surface, front seal, lint-filter screen and opening. Look for a loose object, a fresh scrape, metal dust, a hanging seal, or a visible obstruction; do not put a hand or tool past the opening, reach behind the seal, or try to rotate a damaged-looking drum.
Expected result: A screw or other object is visible, the drum/seal has a scrape or metal dust, the opening is clear but the noise was rotation-linked, or no mechanical mark is visible.
Next step: Remove only an obviously loose object that is fully accessible without force; otherwise leave the dryer disconnected and tell the technician where the sound occurred. Do not open the cabinet or run an empty-drum test.
Stop if: Stop handling the area if the seal, drum edge, or opening is sharp, loose, bent, or contaminated with metal fragments.
Why this matters
Why: GE says foreign objects in the drum can rattle or scrape, while objects at the front seal or worn or loose drum slides can make metal scraping as the drum rotates; a frayed or damaged belt can thump. Those observations distinguish a service-level mechanical path from a harmless brief startup sound, but they do not identify a replacement part.
-
Check 4
Inspect the lint filter, the visible exhaust transition and the outside wall hood from safe positions. Look for a packed filter, a crushed or kinked hose, a disconnected duct, lint or nesting at the hood, weak-looking flap movement, or a cabinet that became unusually hot before the shutdown. Do not pull the dryer out, disconnect a duct for a test, insert a tool into the duct, or operate it with the vent disconnected.
Expected result: The filter or vent path is visibly restricted, crushed, disconnected, or obstructed; the cabinet was unusually hot; or the external airflow path appears open and the cabinet temperature was normal.
Next step: Clean only the accessible lint filter and arrange safe duct service for a restriction. Keep the dryer off even if the vent looks clear, because the combined mechanical and door symptoms still require appliance inspection.
Stop if: Do not use plastic ducting, a temporary indoor exhaust, a booster fan, or any powered test to see whether airflow improves; stop for lint fire evidence, smoke, or excessive heat.
Why this matters
Why: GE states that restricted exhaust can trap heat and humidity, lengthen drying time, collect lint, and create a potential safety issue. An airflow fault may explain poor drying or a protective stop, but it does not explain away a newly loose screw, a changed door, or a mechanical noise.
-
Check 5
From outside the cabinet, record the control response before service: blank display versus normal indicators, whether the dedicated breaker is open, whether the plug or outlet shows heat/discoloration, and whether the cord is damaged. Do not reset repeatedly, remove the terminal cover, reconnect a loose conductor, use a meter on the appliance, or start the dryer to reproduce the one-minute stop.
Expected result: The breaker trips or will not stay set, the cord/outlet is hot or damaged, the controls are blank, the controls remain on but the motor stops after about a minute, or all visible power signs are normal.
Next step: Leave the dryer off. Use an electrician for a hot, damaged, or repeatedly tripping household supply and qualified appliance service for a dryer-side fault; provide the technician the exact stop timing and preserved screw.
Stop if: Do not touch exposed conductors or panels, bypass a fuse or switch, or continue after a breaker trip, burning odor, arcing, shock, or heat damage.
Why this matters
Why: GE lists the dedicated circuit, plug, door, and start control among no-start checks and warns that electric models can have a burned, broken, or loose power-cord or terminal-block connection. A normal display does not rule out a protection, motor, wiring, or door-interlock fault after a mechanical event.
Use your observations
Decision map
Find the observation that best matches what you see, then follow the next safe action.
-
PATH 01Next step
What you see
The door is visibly out of square, needs force to latch, rubs, or has a loose hinge/strike after the screw was found.
Do this next
Keep the GE dryer disconnected and have qualified service inspect the door, strike, interlock and nearby structure; do not bend or rehang the door as a home test.
Why this path and its safety boundary
Why it matters: The combined timing makes door hardware, latch alignment, and possible missing-fastener damage more important than the selected Low temperature. A door switch may stop or prevent operation, but the exact failed part is not established.
-
PATH 02Next step
What you see
The screw or metal debris is visible in the drum/lint area, or the drum shows a fresh scrape, catches, wobble, or a repeated noise path.
Do this next
Do not run an empty test or open the cabinet. Preserve the debris and arrange appliance service for the drum, seal, supports and belt path.
Why this path and its safety boundary
Why it matters: GE associates drum objects, front-seal or slide problems, and damaged belts with rattling, scraping, or thumping. A mechanical fault can also cause secondary door or motor-protection symptoms; continued running could add wear.
-
PATH 03Next step
What you see
The filter or external duct is restricted, the cabinet became hot, and clothes were not drying, but there is no visible door or mechanical damage.
Do this next
Keep the dryer off, clean the accessible filter, and arrange qualified duct service or appliance service as appropriate. Do not disconnect the vent and run the dryer to compare results.
Why this path and its safety boundary
Why it matters: Airflow is a plausible contributor to poor drying and heat retention. It is not a sufficient explanation for a newly found screw and new noise, so the mechanical sequence still needs service review.
-
PATH 04Next step
What you see
The breaker trips, the cord or outlet is hot/damaged, there is smoke or a burning smell, or the dryer-side controls went blank after the noise.
Do this next
Do not reset repeatedly or touch the dryer wiring. If safe, isolate power; use an electrician for the household supply and qualified appliance service for the dryer, and report the screw and noise sequence.
Why this path and its safety boundary
Why it matters: This is an electrical stop condition, not a Low-temperature setting issue. GE's manual requires power to be disconnected before service and says not to operate a damaged or malfunctioning appliance.
-
PATH 05Next step
What you see
The vent, door and visible power conditions look normal, but the dryer still stopped about a minute after the new noise or the exact cause cannot be seen.
Do this next
Leave the unit out of service and arrange qualified GE or appliance service with the full model, serial, preserved screw, photos, selected Low temperature, noise description, and one-minute timing. Do not order a belt, switch, motor, heater, or board from these symptoms alone.
Why this path and its safety boundary
Why it matters: A normal external inspection does not clear hidden drum hardware, motor, thermal protection, door-interlock wiring, or control damage. The stop remains unresolved and is not safe to diagnose by repeated runs.
Helpful context
Understand the symptom
The sequence matters more than the low-heat label. A screw appearing before a new sound and a possibly shifted door creates a credible mechanical-damage or loose-hardware concern. The one-minute stop may also involve the door switch, a protective control, airflow, or the electrical supply, but it cannot identify one component by itself. Keep the dryer out of service while preserving the screw, the door position, and the exact timing of the stop.
GE's exact model listing identifies the GTD42EASJ2WW as an electric dryer. Its manual says not to operate an appliance that is damaged, malfunctioning, partially disassembled, or missing or broken parts, and GE's noise article says to discontinue use when unusual noise is not resolved. The checks below are external observations only; they do not authorize cabinet disassembly, live electrical testing, door-switch bypassing, or another run.
When checks do not resolve it
Need a professional?
Arrange qualified appliance service for the combined screw/noise/door/shutdown event. Use an electrician for a hot or damaged outlet, cord, breaker or household circuit. Treat smoke, sparks, burning odor, shock or melted material as an urgent stop condition.
Safety scope: Do not continue test cycles, reach behind the lint opening, rotate a damaged-looking drum, remove the cabinet, open the terminal area, bypass the door switch, reset a breaker repeatedly, or choose a replacement part from the symptoms alone. The dryer is electric; isolate power only when safe.
Have this ready
- Provide model GTD42EASJ2WW, serial number, purchase age, the labeled screw, photos of the door and any marks, the load and Low temperature setting, exact noise type and timing, the one-minute stop, display/breaker behavior, and external vent and cord observations.
Common questions
FAQ
Could the Low temperature setting make this GE dryer stop after a minute?
Low is a documented temperature option for suitable fabrics, but it does not account for a newly found screw, a new abnormal noise or possible door misalignment. Keep the dryer off and investigate the combined event through service.
Should I run it empty to find where the noise comes from?
No. GE advises discontinuing use when unusual noise is not resolved, and the manual says not to operate a damaged or malfunctioning appliance. Preserve the screw and have service inspect it.
Can I simply put the screw back in the door or cabinet?
Not unless a qualified person confirms its original location and the correct fastener. An unknown screw may have come from a moving or electrical area, and reinstalling it blindly can worsen damage or create a hazard.
What should I tell the repair technician?
Give the exact GTD42EASJ2WW model and serial, keep the screw, and report the order of events: screw found, noise began, door appeared misaligned, Low-temperature cycle, and shutdown after about one minute. Include photos, breaker/cord observations, and whether the vent or cabinet showed heat or obstruction.
Read the exact guide
Official sources
- Dryer - Taking Too Long To Dry Clothes or Not Drying at AllGE Appliances · GE drying-performance guidance for venting, lint, load, power and temperature-setting context
- Dryer - NoisesGE Appliances · GE noise classification, external loose-object checks and service boundary for GTD42EASJ2WW
- Dryer - Will Not Run or StartGE Appliances · GE external no-start checks for door closure, door switch, dedicated circuit and electric cord/terminal warning
- Owner’s ManualGE Appliances · Exact-model owner manual linked from the GTD42EASJ2WW GE model page; safety, low-temperature operation, door behavior, venting and troubleshooting
- Dryer - Things To Check For A Venting IssueGE Appliances · GE external airflow and vent-safety guidance for the exact electric dryer
- Model Search | GTD42EASJ2WWGE Appliances · Exact model identity and electric-dryer classification for GTD42EASJ2WW
Community feedback
Share a repair observation
Share a plain-text repair observation. Accepted observations are published automatically; this page may take a moment to update.