
On this page
Start here
Quick answer
Stop using the GE electric dryer if air is not leaving the exhaust, the cabinet becomes unusually hot, or you smell burning or lint. With power safely off, clean the lint screen, inspect the accessible metal transition duct for a kink or collapse, and check the outside wall cap for a blocked or stuck damper. Do not keep running the dryer with the duct disconnected, do not use plastic or screened ducting, and do not guess a maximum duct length without the exact model's installation instructions. A new or recently moved scratch-and-dent unit can have a crushed transition hose or an installation-specific restriction, so have the vent route and appliance checked if external checks do not restore airflow.
Before you begin
Safety first
- Do not operate with the exhaust disconnected, bypass a thermal or airflow control, open the dryer cabinet, alter wiring, install an unapproved booster fan, or continue cycling through a blocked vent. Have a qualified person inspect concealed ducting and internal lint accumulation.
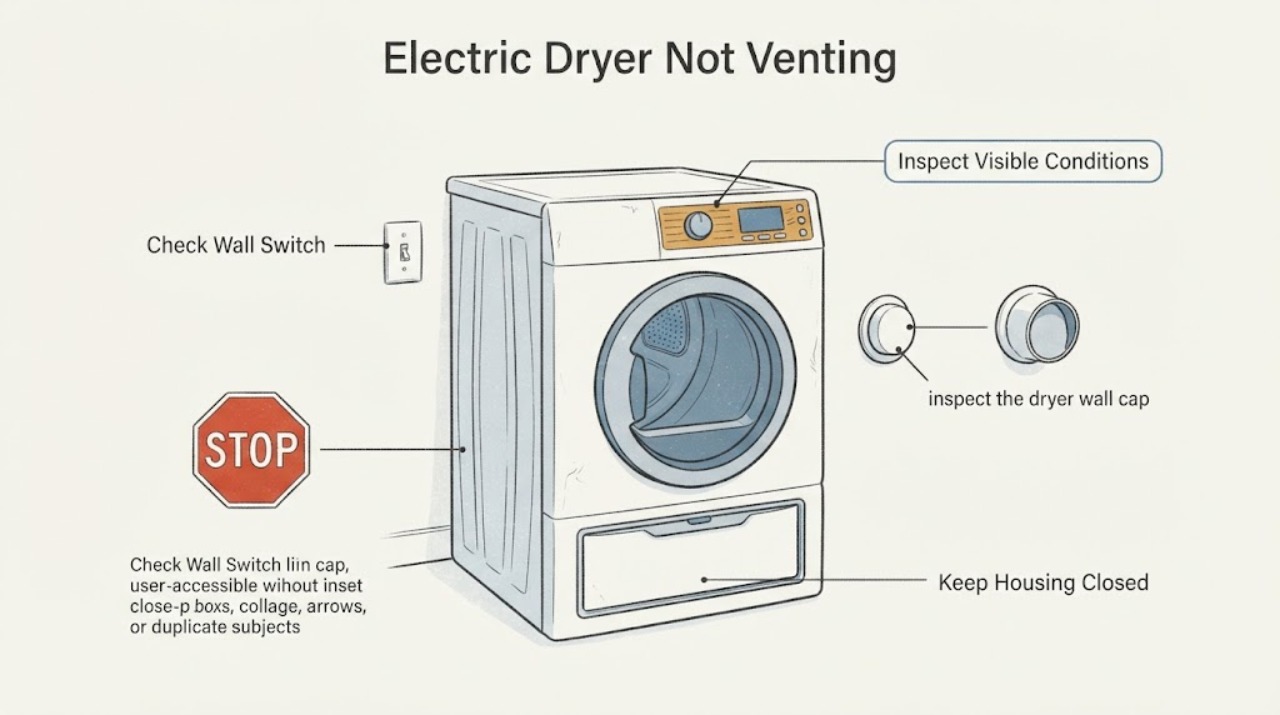
Work through in order
Diagnostic checks
Use only checks that match the exact appliance or system and its official guide.
-
Check 1
Stop the dryer and let it cool. If there is smoke, a burning or hot-lint smell, scorching, a very hot cabinet, or lint collecting around the appliance, switch it off, disconnect power only if the plug or breaker is safely accessible, and do not run another load.
Expected result: A fire or overheating warning sign is present, or the dryer is only mildly slow without heat, odor, or visible lint hazard.
Next step: For any warning sign, keep the dryer out of service and arrange qualified appliance/vent service. For slow drying without a warning sign, continue only with the power-off external checks below.
Why this matters
Why: Smoke, scorching, unusual heat, and burning odor are safety signals rather than routine vent symptoms; slow drying alone can still fit restricted exhaust airflow.
-
Check 2
With the dryer unplugged or otherwise safely isolated, remove lint from the lint screen and inspect the short transition duct behind the dryer without moving the appliance beyond what the installation allows. Look for a kink, collapse, crushing, a loose joint, plastic material, or lint packed at the connection.
Expected result: The screen is blocked, the transition duct is kinked/crushed/loose, or the duct is plastic or otherwise not the metal type specified by GE.
Next step: Clean the screen and have the transition duct corrected or replaced with the exact model-approved metal configuration. Do not run the dryer while the duct is disconnected or the connection is unsafe.
Why this matters
Why: A blocked screen or restricted transition duct can reduce airflow; GE says plastic flexible duct can collapse and collect lint, and its installation guidance calls for UL-listed metal ducting and a 4-inch round duct.
-
Check 3
From outside, inspect the dryer wall cap or hood for lint, nesting material, snow, ice, or another obstruction, and confirm that the damper can move freely when the appliance is not operating. Do not insert tools into the duct or dismantle a concealed route.
Expected result: The cap is blocked, the damper cannot move, there is no clear outlet, or airflow is weak when a qualified person later verifies operation with the complete duct connected.
Next step: Have the building or appliance vent route cleaned or corrected by a qualified vent professional. Keep the dryer unused until the complete exhaust path is reconnected and clear.
Why this matters
Why: A blocked or poorly terminating wall duct can prevent hot, moist air from leaving and can cause lint accumulation; the outside observation does not prove a failed dryer motor or heater.
-
Check 4
Find the full GE model number on the rating label and compare the installed exhaust material, route, elbows, length, clearances, and outlet direction with that model's GE installation instructions. Pay special attention if the scratch-and-dent unit was recently delivered, repositioned, or converted to a side or bottom outlet.
Expected result: The exact model instructions are unavailable, the route exceeds their limits, the hose is pinched after positioning, or the outlet/clearance differs from the documented installation.
Next step: Stop treating this as an internal part diagnosis. Have the installer or qualified vent technician correct the route using the exact instructions, then verify safe airflow with the duct fully connected.
Why this matters
Why: GE states that allowable duct length, elbows, clearances, and exhaust location are model-specific; the condition can be installation-related even when the dryer itself is new to the home.
Use your observations
Decision map
Find the observation that best matches what you see, then follow the next safe action.
-
PATH 01Next step
What you see
Smoke, burning odor, scorching, unusual cabinet heat, or heavy lint appears around the GE electric dryer.
Do this next
Keep the dryer off, isolate power only if safe, clear people from immediate danger, and arrange qualified appliance/vent service or emergency help if there is active smoke or fire.
Why this path and its safety boundary
Why it matters: The restricted-airflow situation has a potential overheating or fire boundary; continued cycling is not a diagnostic test.
-
PATH 02Next step
What you see
The lint screen or accessible transition duct is blocked, kinked, crushed, loose, plastic, or disconnected after a recent move.
Do this next
Correct the complete metal transition connection to the exact model instructions, reconnect the exhaust fully, and do not operate while it is disconnected or compromised.
Why this path and its safety boundary
Why it matters: The evidence points to a local installation or maintenance restriction rather than proving an internal dryer failure.
-
PATH 03Next step
What you see
The transition duct looks sound but the outside cap is blocked, the damper is stuck, the route is concealed, or the model-specific length/elbow limits cannot be confirmed.
Do this next
Keep the dryer out of service and have a qualified vent professional inspect and clear the complete route; do not guess a replacement internal component or add a booster fan.
Why this path and its safety boundary
Why it matters: The restriction may be in the wall or roof duct, and the assigned topic lacks a full model number for safe length or part claims.
Helpful context
Understand the symptom
“Not venting” describes an airflow problem, not a confirmed failed internal component. On a newly installed or moved electric dryer, the first decision is whether the restriction is at the lint screen, the short transition duct, the wall duct, or the outside cap. Because the exact GE model is not supplied, use the model's installation instructions for the permitted route and length.
The checks below stay external and are performed with the dryer safely stopped. They do not authorize opening the cabinet, bypassing a thermal control, or operating the dryer with its exhaust disconnected.
When checks do not resolve it
Need a professional?
Arrange qualified appliance or dryer-vent service when airflow remains poor after the power-off external checks, the route is concealed or inaccessible, the unit overheats, or installation limits cannot be verified from the exact GE model instructions.
Safety scope: Do not operate with the exhaust disconnected, bypass a thermal or airflow control, open the dryer cabinet, alter wiring, install an unapproved booster fan, or continue cycling through a blocked vent. Have a qualified person inspect concealed ducting and internal lint accumulation.
Have this ready
- Provide the full GE model number, delivery/installation date, whether the unit was moved or side/bottom vented, drying-time change, any Check Vent alert, outside-cap observation, and any heat, odor, smoke, or lint finding.
Common questions
FAQ
Can I run the GE electric dryer with the vent hose disconnected to test it?
Do not use a disconnected exhaust as a continuing operating setup. GE describes a disconnected-vent test for electric models, but CPSC and GE also require the duct to be reconnected before use; for this safety-focused article, keep the complete exhaust connected and have airflow checked by a qualified person if the external checks do not resolve the issue.
Does a new scratch-and-dent dryer prove the dryer itself is defective?
No. A recently delivered or repositioned dryer can have a pinched transition hose, an incorrect outlet configuration, or a wall-duct restriction. GE says the permitted vent route and length are model-specific, so confirm the full model and installation before diagnosing an internal part.
What does weak or absent airflow at the outside cap mean?
It usually points to an obstruction or restriction in the exhaust path, but it does not identify which section is blocked. Keep the dryer off and have the complete route inspected and cleaned; do not add a booster fan or leave the duct disconnected.
Read the exact guide
Official sources
- Dryer - Installation Information for Exhaust DuctingGE Appliances · General GE dryer installation guidance; exact length, elbow count, clearances, and outlet direction must be taken from the assigned appliance's installation instructions, which are not supplied in the task.
- Dryer - Check Vent Sensor AlertGE Appliances · Used for general GE dryer airflow and maintenance boundaries; not treated as proof that this unmodeled dryer has a Check Vent sensor.
- CPSC Publication 5022 - Overheated Clothes Dryers Safety AlertU.S. Consumer Product Safety Commission · General clothes-dryer fire-safety guidance supporting the stop-use boundary and reconnection requirement; it does not diagnose the GE appliance.
- Dryer - Things To Check For A Venting IssueGE Appliances · Applies to GE dryer venting symptoms at general model scope; it does not supply a missing model's maximum duct length.
Community feedback
Share a repair observation
Share a plain-text repair observation. Accepted observations are published automatically; this page may take a moment to update.