
On this page
Start here
Quick answer
First determine whether this is a GE icemaker installed in a refrigerator or a GE standalone ice maker; GE's standalone guidance explicitly says it does not apply to refrigerator icemakers. For a refrigerator icemaker, use the exact manual to identify the control-panel setting, toggle or slide switch, or wire feeler arm, then check that it is ON and that a full bin or clumped ice is not holding the paddle or arm in the stop position. For a standalone unit, check its ON/OFF button, water indication, and household circuit. A new refrigerator icemaker may not start until the mold is cold enough, so GE recommends allowing at least 24 hours after installation. Do not remove an icemaker, thaw a fill tube with heat, probe a valve, reach into a moving mechanism, or perform live electrical tests. Stop for leaking water near electrical parts, smoke, burning odor, sparks, hot wiring, or repeated breaker trips.
Before you begin
Safety first
- Do not remove an icemaker, open the standalone cabinet, reach into a rake or heater, apply heat to a fill tube, disconnect water tubing, probe a valve or connector, bypass controls, or perform live electrical tests. Stop immediately for water near electrical parts, smoke, burning/electrical odor, sparks, abnormal heat, damaged wiring, a hot or damaged cord/outlet, or repeated breaker trips.
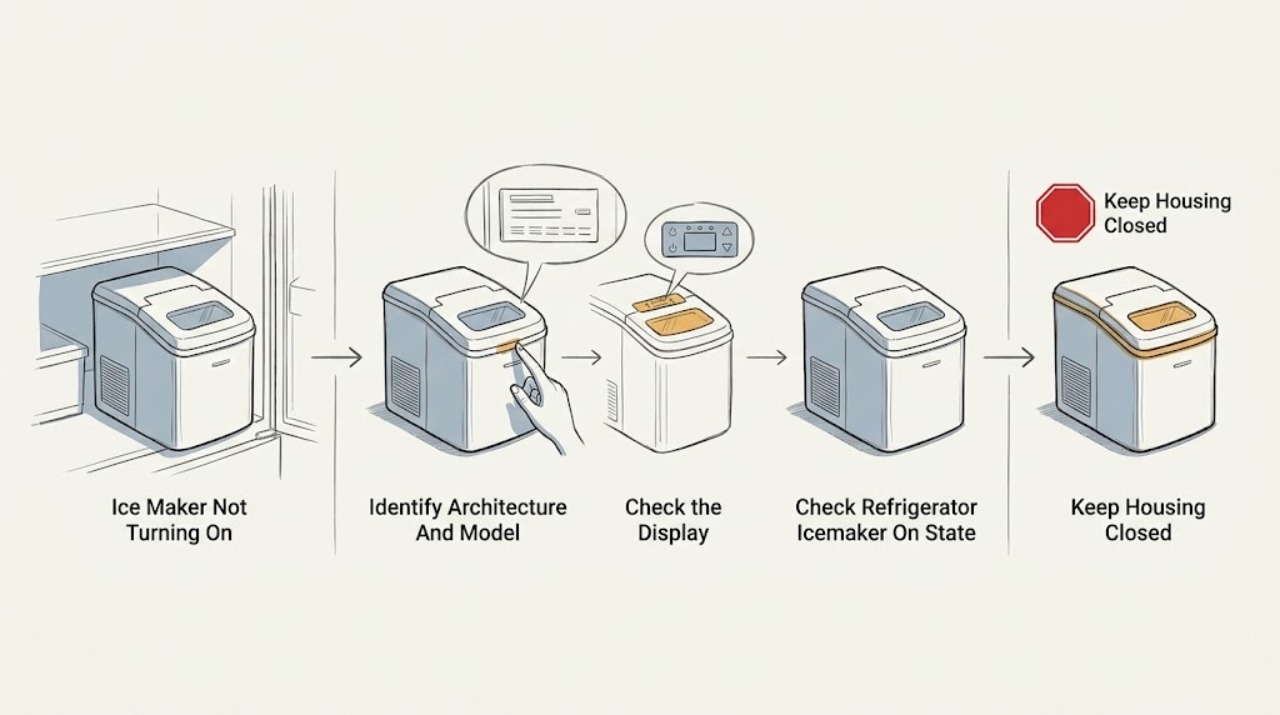
Work through in order
Diagnostic checks
Use only checks that match the exact appliance or system and its official guide.
-
Check 1
Identify whether the GE ice maker is a module inside a refrigerator or a separate standalone ice maker. Read the exact model and serial information from the appliance label or manual, and note whether the complaint is no display or power, a refrigerator icemaker with no cycle, or a standalone unit with a dark control or water warning.
Expected result: The unit is refrigerator-integrated, standalone, an optional refrigerator icemaker, or the architecture/model cannot be confirmed safely.
Next step: Use only the branch for the confirmed architecture and exact manual. If the model label is inaccessible because the appliance is wet, damaged, or built into a hazard, stop and arrange service.
Why this matters
Why: GE publishes different troubleshooting paths for refrigerator icemakers and standalone ice makers. An unknown architecture makes the control and water instructions uncertain, so a generic switch position or part claim would be unsafe.
-
Check 2
For a confirmed GE standalone ice maker, from a dry position check that the appliance plug is seated and the household circuit is available, then press or select its documented ON/OFF control once. Do not open the cabinet, use a damaged cord, or repeatedly reset a breaker.
Expected result: The ON/OFF control is OFF, the unit has a Check Water light or equivalent warning, the display remains dark despite safe power, or lights are flashing after an auger or overload condition.
Next step: Correct only an accidentally OFF control or restore water according to the standalone manual. If the unit remains unresponsive or the overload indication returns, leave it off and arrange qualified service.
Stop if: Stop immediately for smoke, burning/electrical odor, sparks, abnormal heat, a hot or damaged cord/outlet, liquid near electrical parts, or repeated breaker trips.
Why this matters
Why: GE's standalone guidance treats power state, household circuit, low water, and auger overload as distinct conditions. A dark unit after a safe power check or a recurring overload indication needs model-specific service; refrigerator icemaker rules do not apply.
-
Check 3
For a refrigerator-integrated GE icemaker, use the exact model manual to locate its control-panel Ice Maker setting, I/O toggle, labeled slide switch, or wire feeler arm. Check the visible state without forcing a switch, paddle, arm, bin, or rake; do not assume two icemakers or a green light exists on every refrigerator.
Expected result: The panel says Ice Off, the toggle is at O/OFF, the slide paddle is tucked under the icemaker, the wire arm is raised, the green light is off or blinking, or the model uses a different documented control.
Next step: Set the control to ON only as the exact manual shows and clear only loose, visible ice that prevents the bin or paddle from moving. If the arm, paddle, or indicator behaves abnormally, stop before removing the icemaker and arrange service.
Why this matters
Why: GE says refrigerator icemakers use several designs. OFF, a raised arm, a tucked slide paddle, or a full bin can pause production; an indicator that is blinking may mean stuck ice, while an absent light may simply reflect a different model or an OFF state.
-
Check 4
With the refrigerator door or drawer open and the appliance otherwise safe, inspect the accessible ice bin, clumped cubes, wire feeler arm, or horizontal paddle. Remove only loose cubes that visibly hold the arm or keep the bin seated; do not force the mechanism, touch a heater, or reach into the mold.
Expected result: The bin is full, clumped ice holds the arm or paddle up, loose ice blocks the rake, the arm cannot move freely with no ice present, or no visible obstruction exists.
Next step: Restore only the documented bin and arm position after clearing loose ice. If cubes are stuck in the mold, the mold may be hot; do not pry, chip, or heat it. Arrange service for an inaccessible or persistent obstruction.
Stop if: Stop if water is leaking near electrical parts or if clearing the visible ice would require touching a heater, motor, wiring, or moving mechanism.
Why this matters
Why: GE says a full bin or obstructing ice can prevent the feeler mechanism from completing its motion and pause production. A stuck rake can prevent a cycle from completing. An arm that remains abnormal without an obstruction points toward model-specific service.
-
Check 5
For a refrigerator icemaker, check the exact model's temperature display or setting and consider whether the refrigerator or icemaker was just installed, moved, unplugged, or loaded with warm food. Do not repeatedly lower the setting or open the freezer to force a cycle.
Expected result: The installation is new, less than the documented recovery period has passed, the freezer is warmer than the model target, or the refrigerator has otherwise reached stable temperature but the icemaker remains inactive.
Next step: Use the exact manual's setting and allow the documented recovery time. If the freezer is stable and the icemaker still does not start, continue only to external water and filter checks; do not open the icemaker.
Why this matters
Why: GE says the mold must reach approximately 15–16°F before a refrigerator icemaker cycle begins and recommends at least 24 hours after a new installation; its general guidance also identifies 0°F freezer and 37°F fresh-food settings for optimal production. A warm or recovering freezer does not prove a failed icemaker.
-
Check 6
For a refrigerator model that has a water connection, check only the accessible external shutoff, visible supply line, and model-approved filter or bypass procedure. If the refrigerator has a dispenser, note whether its flow is normal, slow, or absent; do not pull the refrigerator out over a wet floor or disconnect tubing.
Expected result: The shutoff is closed, the line is visibly kinked, the filter is due or restricted, dispenser flow is slow or absent, or dispenser flow is normal while the icemaker mold remains dry.
Next step: Restore only an accidentally closed shutoff or follow the exact manual's filter procedure. Do not remove the icemaker, apply heat, probe a valve, or test wiring; arrange service when the mold remains dry after safe external checks.
Why this matters
Why: GE says a closed supply, restricted filter, or slow timed fill can prevent an icemaker from filling. Normal dispenser flow with a dry mold does not rule out an icemaker fill-tube or valve issue; GE says checking a frozen fill tube requires icemaker removal by a technician.
-
Check 7
Record the architecture, exact model, control state, indicator behavior, bin or arm position, freezer condition, installation age, water-flow result, and whether any ice cycle or fill occurred. Give this sequence to qualified GE appliance service; do not order a valve, icemaker, motor, control, or sensor from the symptom alone.
Expected result: The correct ON state and temperature are present but there is no cycle, the mold stays dry, an indicator repeats a fault, the standalone unit stays dead, or a leak or electrical warning appears.
Next step: Leave the appliance off for a hazard and arrange qualified appliance or electrical service. Provide the model and symptom sequence rather than attempting internal tests or repeated resets.
Stop if: Do not remove an icemaker, open a cabinet, thaw tubing with heat, probe connectors, reach into a heater or rake, or perform live electrical measurements.
Why this matters
Why: An internal icemaker, control, valve, fill path, sensor, auger, or electrical diagnosis may be needed. The GE articles support the external decision points but do not establish one universal architecture or part fit.
Use your observations
Decision map
Find the observation that best matches what you see, then follow the next safe action.
-
PATH 01Next step
What you see
It is not clear whether the GE ice maker is a standalone appliance or a module inside a refrigerator, or the model-specific controls cannot be identified.
Do this next
Identify the exact appliance and manual before changing a setting or ordering a part. If identification requires touching a hazard, stop and arrange service.
Why this path and its safety boundary
Why it matters: The applicable power, water, temperature, and control logic is uncertain; GE explicitly separates standalone and refrigerator icemaker troubleshooting.
-
PATH 02Next step
What you see
A refrigerator icemaker is in an OFF state, its feeler arm is raised, its slide paddle is tucked under the module, or a full/clumped bin holds the mechanism in the stop position.
Do this next
Use the exact manual to enable the icemaker and clear only loose visible ice. Arrange service if the mechanism cannot move freely without force or the condition returns without an obstruction.
Why this path and its safety boundary
Why it matters: A documented OFF or full-bin condition is more likely than an internal failure. GE says the control design varies by refrigerator and icemaker style.
-
PATH 03Next step
What you see
The refrigerator or icemaker was newly installed or interrupted, the freezer has not stabilized, or the model's required mold temperature has not been reached.
Do this next
Use the exact temperature guidance, limit door openings, and allow the documented recovery period. If the freezer is stable and there is still no cycle, move to external water checks.
Why this path and its safety boundary
Why it matters: Normal startup or temperature delay is more likely than a failed control. GE says a new refrigerator icemaker may need at least 24 hours before a cycle starts.
-
PATH 04Next step
What you see
A refrigerator icemaker has a closed supply, restricted filter, slow/absent dispenser flow, or dry mold; or a standalone unit shows its documented low-water indication.
Do this next
Correct only an accessible shutoff or exact model-approved filter condition. For a standalone unit, follow its water-fill instruction. Do not remove an icemaker, thaw tubing with heat, disconnect lines, or probe a valve.
Why this path and its safety boundary
Why it matters: The external supply, filter, or standalone water state is more likely than a simple ON/OFF error. A refrigerator fill tube or valve can still require service even when an external dispenser works.
-
PATH 05Safety boundary
What you see
The confirmed appliance is ON, correctly assembled or configured, at operating temperature with the external water path normal, but remains inactive; or it has a recurring fault indicator, water near electrical parts, smoke, odor, sparks, abnormal heat, damaged wiring, or repeated breaker trips.
Do this next
Stop using the appliance for a hazard and obtain qualified appliance or electrical service. For a non-hazardous persistent no-start, arrange model-specific service and provide the recorded controls, temperature, water, and indicator results.
Why this path and its safety boundary
Why it matters: An internal control, icemaker motor, sensor, valve, fill path, auger, or electrical fault may be involved. The public GE guidance does not support a universal part diagnosis or safe internal test.
Safety stop: Do not remove the icemaker, open panels, bypass a control, probe live wiring, apply heat to tubing, or repeatedly reset a tripping breaker.
Helpful context
Understand the symptom
Identify the ice-maker architecture first
“Not turning on” can describe a refrigerator icemaker with a switch or feeler arm, an icemaker controlled from a refrigerator display, or a separate countertop/standalone ice maker with its own ON/OFF button and water indicator. GE separates these products in its support guidance. Do not apply standalone water-light behavior to a refrigerator module or copy a refrigerator arm position to a standalone appliance. The exact model manual controls when a control label or mechanism is not obvious.
“On” does not mean ice should start immediately
For a refrigerator icemaker, the ON state only enables a cycle; the freezer and mold still have to reach the model's operating temperature, and the bin or feeler mechanism must allow production. GE says a new installation may need at least 24 hours. A standalone unit has a different control and water-check path. Record whether the appliance is making any sound, showing a light, or producing an exact model-specific indication, but do not infer a hidden code from an unknown LED pattern.
Stop before water, heater, or electrical access
Limit owner checks to visible controls, the accessible bin or paddle, documented temperature settings, an external water shutoff, and the exact model's filter procedure. Do not remove the icemaker, expose a fill tube, apply heat to frozen tubing, probe a water valve or connector, reach into a rake or heater, or test wiring while energized. Stop for water near electrical parts, a leak into the cabinet, smoke, burning or electrical odor, sparks, abnormal heat, damaged wiring, or repeated breaker trips; leave the appliance off and obtain qualified appliance or electrical service.
When checks do not resolve it
Need a professional?
Call qualified service for a refrigerator icemaker that remains inactive after the exact ON setting, stable temperature, visible bin/arm check, and external water checks, or for a standalone unit that remains dead or repeats a water/overload fault. Stop immediately for water near electrical parts, smoke, burning or electrical odor, sparks, abnormal heat, damaged wiring, a hot or damaged cord/outlet, or repeated breaker trips.
Safety scope: Do not remove an icemaker, open the standalone cabinet, reach into a rake or heater, apply heat to a fill tube, disconnect water tubing, probe a valve or connector, bypass controls, or perform live electrical tests. Stop immediately for water near electrical parts, smoke, burning/electrical odor, sparks, abnormal heat, damaged wiring, a hot or damaged cord/outlet, or repeated breaker trips.
Have this ready
- Exact appliance architecture and model, control type and state, indicator or display behavior, bin and feeler-arm/paddle position, freezer temperature or recovery timing, water shutoff/filter/dispenser result, installation age, and whether any cycle, fill, or ice ejection occurred.
Common questions
FAQ
How do I turn on a GE refrigerator icemaker?
GE uses several designs: a control-panel Ice Maker setting, an I/O toggle, a labeled slide switch, or a wire feeler arm. Use the exact refrigerator manual. Do not assume a slide-paddle position, green light, or dual-icemaker control applies to your model.
Does GE's standalone ice-maker advice apply to an icemaker in my refrigerator?
No. GE's standalone Ice Maker - No Ice Production article expressly separates standalone units from refrigerator icemakers. Use the refrigerator-specific ON/OFF, temperature, bin, and water guidance for an icemaker installed in a refrigerator.
Why is my GE refrigerator icemaker on but not starting?
Check whether the freezer is at its model operating temperature, whether the refrigerator was newly installed, and whether a full bin, clumped ice, or a raised feeler arm is holding production off. GE says a new icemaker may need at least 24 hours and that the mold must become cold enough before a cycle begins.
What does a GE icemaker's blinking green light mean?
GE says the green light is on when many refrigerator icemakers are on, and a blinking light may indicate ice cubes are stuck. Light behavior is model-specific, so use the exact manual and do not remove the icemaker or pry at the mechanism to investigate.
Can I thaw a frozen GE icemaker fill tube myself?
Do not use heat or open the icemaker to test it. GE says verifying a frozen refrigerator icemaker fill tube requires removing the icemaker and should be checked by a service technician. Check only the accessible shutoff and model-approved filter path first.
Read the exact guide
Official sources
- Refrigerator - Icemaker Power Light Not Lit or BlinkingGE Appliances · Only refrigerator icemaker models equipped with the described green indicator
- Refrigerator - On/Off Switch on the IcemakerGE Appliances · Refrigerator-integrated GE icemakers; exact design depends on the refrigerator model
- Ice Maker - No Ice ProductionGE Appliances · Standalone GE ice makers only; GE explicitly excludes refrigerator-integrated icemakers from this article
- Refrigerator - Icemaker Does Not Fill With WaterGE Appliances · Refrigerator-integrated GE icemakers; fill connections and controls vary by model
- Icemaker - New Installation Tips & TroubleshootingGE Appliances · Newly installed refrigerator icemakers; exact refrigerator model controls remain authoritative
- GE Appliance - Owner's Manuals and Installation InstructionsGE Appliances · GE appliances generally; use the exact model manual for icemaker controls and procedures
- Refrigerator - Icemaker Not Producing IceGE Appliances · GE refrigerator icemakers; exact controls and features remain model-specific
- Service Scheduling for Other GE ProductsGE Appliances · GE small appliances; the exact service path depends on product and model
Community feedback
Share a repair observation
Share a plain-text repair observation. Accepted observations are published automatically; this page may take a moment to update.